

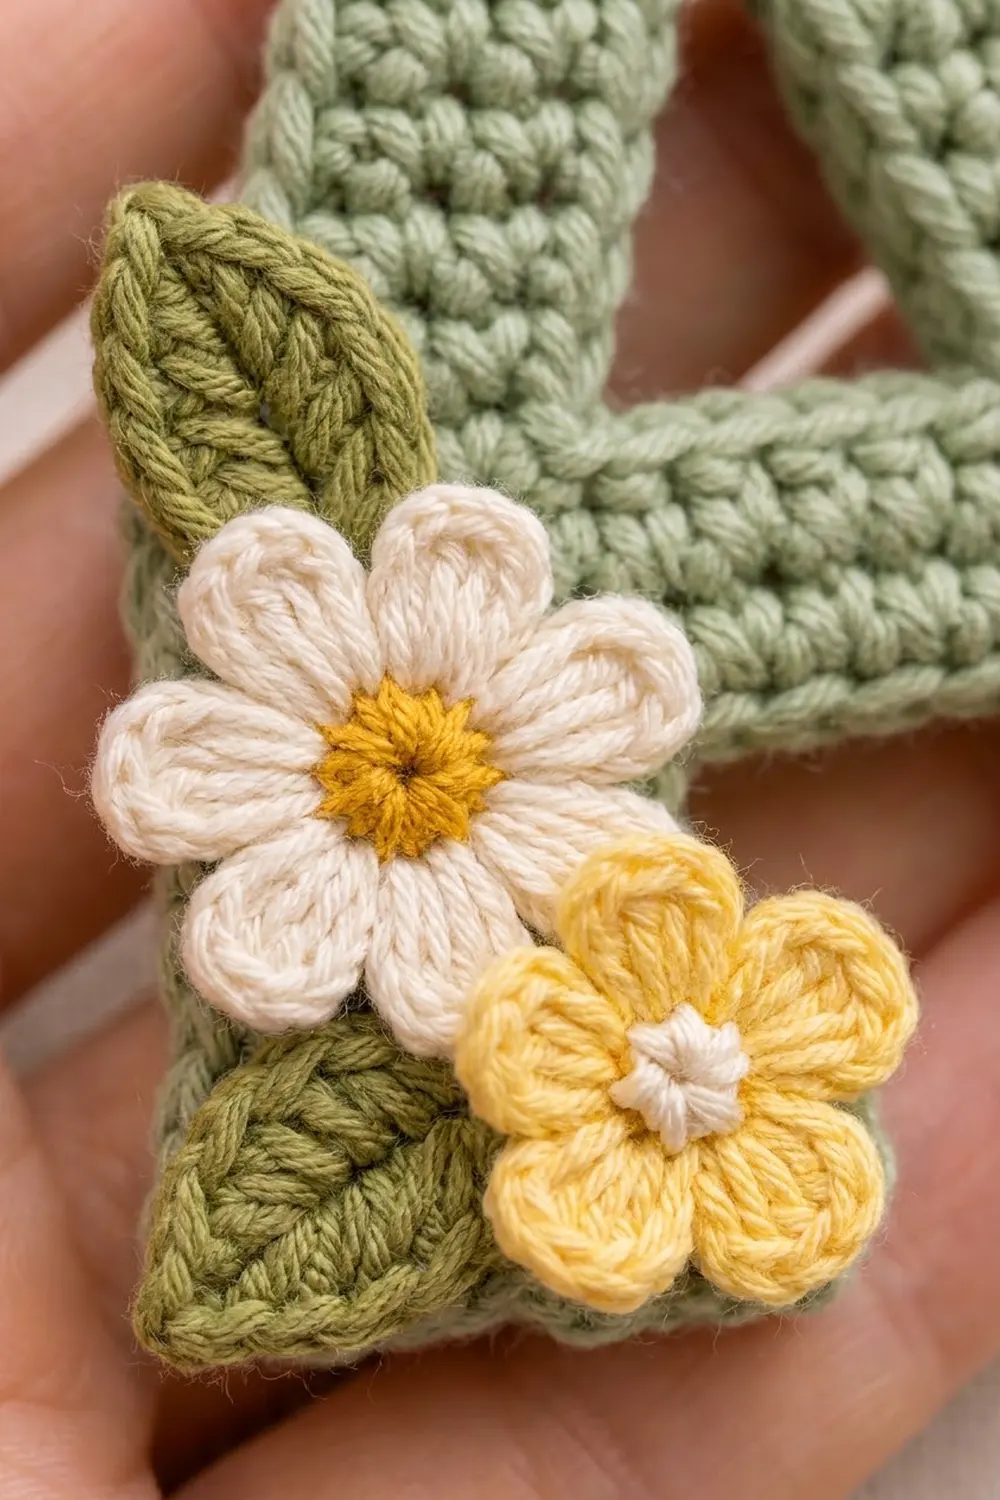
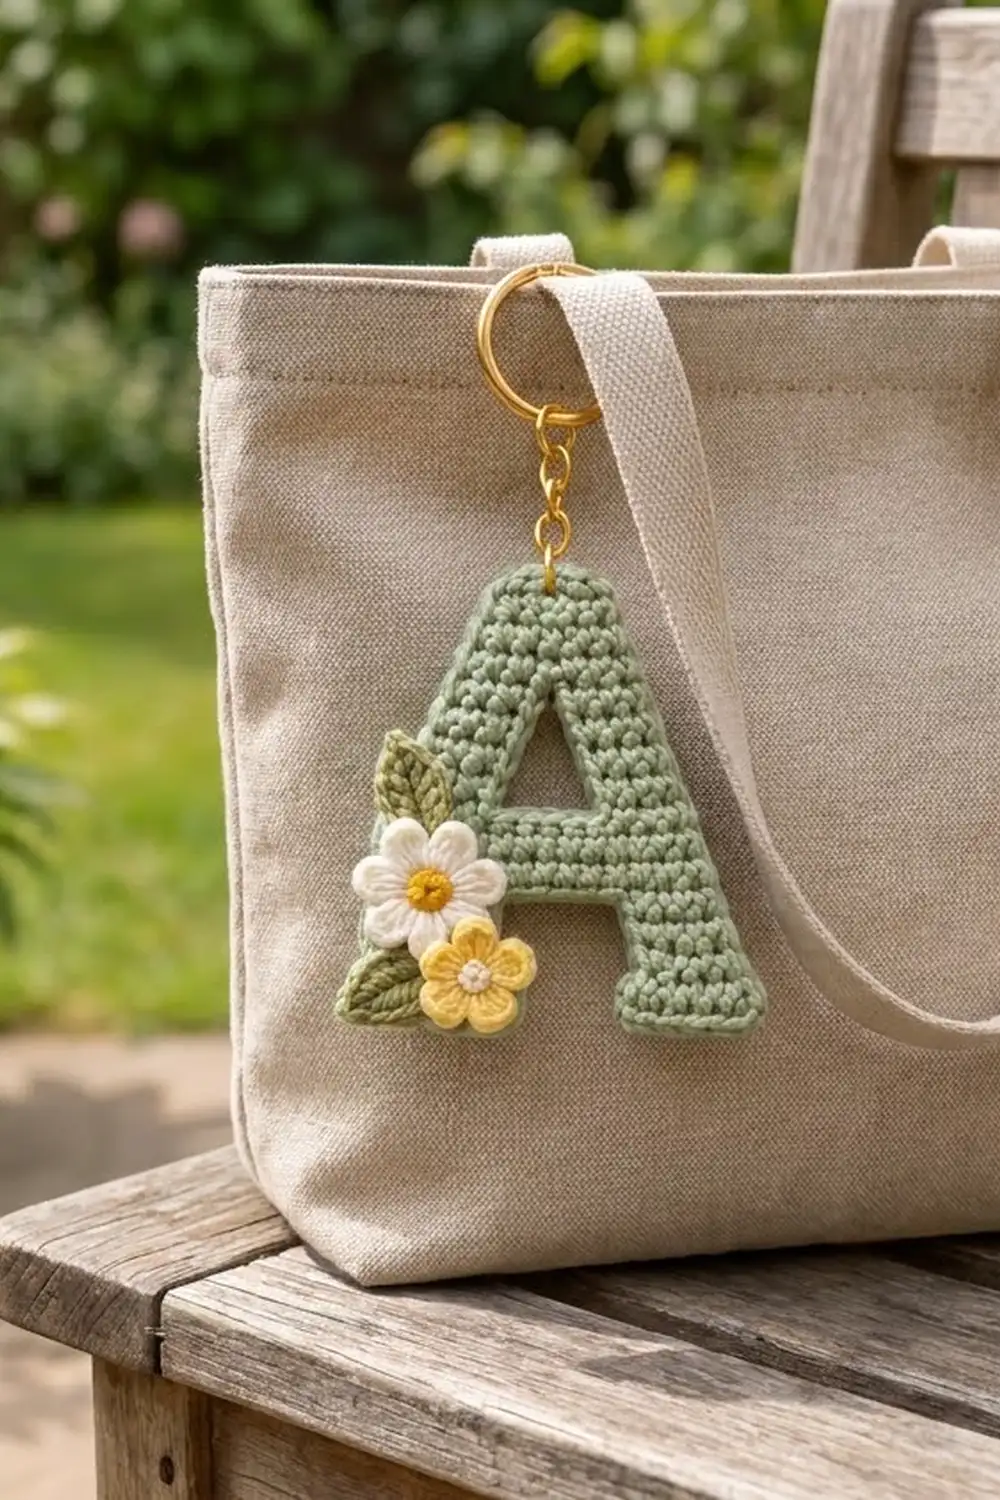
This little keychain is a sage green capital “A” with a small cluster of wildflowers at its lower left corner. A cream daisy with a golden center and a smaller butter-yellow blossom sit on top of two olive-green leaves. A gold key ring finishes it off.
The style is soft, cottage-inspired and practical. The letter is worked in tight single crochet, so it stays firm on your keys or bag. This pattern uses US crochet terms throughout.
The finished letter measures 3.3 in (8.4 cm) wide by 3.8 in (9.7 cm) tall, not counting the hardware.
Construction overview: You make two identical legs, then join them with a chain bridge to form the crossbar. Next you split the work to form the counter (the hole), close it with a second chain bridge, and work up to a flat top. A single edging round goes around the outline, and a separate small round finishes the counter. Last, you crochet the flowers and leaves, sew them on in layers, and add the key ring.
Finished Size and Construction
- Finished size: 3.3 in (8.4 cm) wide x 3.8 in (9.7 cm) tall
- Skill level: Easy
- Terminology: US
- Yarn weight: DK (light worsted, #3), cotton
- Hook: 3.0 mm
- Number of pieces: 1 letter body, plus 4 small appliqués (2 leaves, 2 flowers)
- Layout: single letter, appliqué cluster at lower left
- Size before edging: 3 in (7.6 cm) wide x 3.5 in (8.9 cm) tall (15 stitches x 21 rows)
- Edging depth: about 0.15 in (0.4 cm) per edge, which adds 0.3 in (0.8 cm) to each dimension
Materials
Use a smooth, mercerized DK cotton. Cotton holds its shape on a keychain and shows stitch texture clearly. Avoid fuzzy or very stretchy yarns.
- Sage green (letter): 6 g, about 13 m (14 yd)
- Olive green (leaves): 1 g, about 2 m (2 yd)
- Cream (large flower petals, small flower center): 1 g, about 2 m (2 yd)
- Golden yellow (large flower center): 1 g, about 2 m (2 yd)
- Butter yellow (small flower petals): 1 g, about 2 m (2 yd)
All quantities include a safety margin of roughly 20%.
Tools:
- 3.0 mm crochet hook
- Tapestry needle
- 2 stitch markers
- Gold split key ring, 1 in (2.5 cm)
- Gold jump ring, 6 mm, and a short gold chain (3 links)
- 2 pairs of flat-nose pliers
- Blocking mat, rustproof pins and a spray bottle
- Optional: light fabric stiffener
Abbreviations (US Terms)
- ch: chain
- sl st: slip stitch
- sc: single crochet
- hdc: half double crochet
- dc: double crochet
- sc2tog: single crochet 2 together. Insert hook in next st, yarn over, pull up a loop; insert hook in following st, yarn over, pull up a loop; yarn over, pull through all 3 loops.
- st(s): stitch(es)
- MR: magic ring
- rep: repeat
Special stitch – standing sc: Start with a slipknot on your hook, insert the hook into the stitch, and complete a sc as usual. Use it when joining new yarn.
Gauge and Checkpoints
Gauge: 20 sc x 24 rows = 4 in (10.2 cm) in sc, worked flat with a 3.0 mm hook. That is 5 stitches and 6 rows per inch.
Make one leg first and use it as your test piece. It is quicker than a full swatch, and you will use it in the letter.
Checkpoints:
- After Leg Row 8: each leg is 1 in (2.5 cm) wide and 1.3 in (3.3 cm) tall.
- After Row 9: the crossbar row is 2.2 in (5.6 cm) across.
- After Row 14: the letter is 2.3 in (5.8 cm) tall.
- After Row 21: the body is 3 in (7.6 cm) at the base, 3.5 in (8.9 cm) tall, and the top is 1.4 in (3.6 cm) wide.
- After edging: the letter is 3.3 in (8.4 cm) x 3.8 in (9.7 cm).
A tolerance of 0.1 in (0.3 cm) either way is fine.
If the piece is too big, go down 0.25 mm in hook size. If it is too small, go up 0.25 mm. Recheck your gauge on a new leg before continuing.
Letter Body
The fabric looks almost the same on both sides. You will flip one leg over to mirror it.
Legs (make 2)
With sage green, ch 6.
Row 1: Sc in 2nd ch from hook and in each ch across. Turn. (5 sc) The end where you started this row is the outer edge. Mark it with a stitch marker.
Rows 2–4: Ch 1, sc in each st across. Turn. (5 sc)
Row 5 (starts at the outer edge): Ch 1, sc2tog, sc in next 2 sts, 2 sc in last st. Turn. (5 sc) This row moves the whole leg inward by 1 stitch, which makes the slant of the A.
Rows 6–8: Ch 1, sc in each st across. Turn. (5 sc) Row 8 ends at the outer edge.
First leg: fasten off and weave in the ends.
Second leg: do not fasten off. This is the right leg.
Arrange the legs: Flip the first leg over and lay it to the left of the right leg. Both outer markers should face outward, both Row 8 edges should be at the top, and the inner edges should face each other.
Crossbar
Row 9: Continue with the right leg. Ch 1, sc2tog, sc in next 3 sts, ch 3. Starting at the inner edge of the left leg, sc in next 3 sts, then sc2tog over the last 2 sts. Turn. (8 sc + 3 ch = 11 sts)
Row 10: Ch 1, sc in next 4 sts, sc in each of the 3 ch, sc in next 4 sts. Turn. (11 sc)
The span between the legs is now 13 stitches wide at Rows 5–8. It narrows to 11 stitches at Rows 9–11.
Counter Sides
The two sides are worked separately so they leave a hole 3 stitches wide.
Right side, Row 11: Ch 1, sc in next 4 sts. Turn, leaving the rest unworked. (4 sc)
Right side, Row 12: Ch 1, sc in next 2 sts, sc2tog. Turn. (3 sc) The decrease is at the outer edge.
Right side, Rows 13–14: Ch 1, sc in each st across. Turn. (3 sc)
Row 14 ends at the outer edge. Pull up a long loop, slip it onto a stitch marker, and set it aside.
Left side, Row 11: Skip the 3 center stitches of Row 10. Starting at the left outer edge of Row 10, join sage green with a standing sc in the first st. Sc in next 3 sts. Turn. (4 sc)
Left side, Rows 12–14: Work the same as the right side, Rows 12–14. (3 sc) Fasten off.
Top
Row 15: Put the held loop back on your hook. Ch 1, sc in next 3 sts, ch 3. Starting at the inner edge of the left side, sc in next 3 sts. Turn. (6 sc + 3 ch = 9 sts)
The counter is now closed. It is 0.6 in (1.5 cm) wide and about 0.7 in (1.8 cm) tall.
Row 16: Ch 1, sc2tog, sc in next 5 sts (including the 3 ch), sc2tog. Turn. (7 sc)
Rows 17–21: Ch 1, sc in each st across. Turn. (7 sc)
Do not fasten off. Check the body against the Row 21 checkpoint.
Width summary:
| Rows | Stitches across |
|---|---|
| 1–4 | 15 |
| 5–8 | 13 |
| 9–11 | 11 |
| 12–15 | 9 |
| 16–21 | 7 |
Edging
Edging gauge: One sc goes into each stitch along the top and the leg bases, and into each row end along the sides. Each corner gets 3 sc in one stitch. In the counts below, the corner groups belong to the top and base segments only. The side counts never repeat them.
Outer Edging Round
Work this round with the sage green still on your hook.
- Top: Ch 1, 3 sc in first st, sc in next 5 sts, 3 sc in last st. (11 sc)
- Left outer side: sc in each row end of Rows 20 down to 2. (19 sc)
- Left leg base: working in the bottom of the foundation ch, 3 sc in first st, sc in next 3, 3 sc in last st. (9 sc)
- Left leg inner side: sc in each row end of Rows 2–8. (7 sc)
- Crossbar underside: sc in the bottom of each of the 3 ch from Row 9. (3 sc)
- Right leg inner side: sc in each row end of Rows 8 down to 2. (7 sc)
- Right leg base: 3 sc in first st, sc in next 3, 3 sc in last st. (9 sc)
- Right outer side: sc in each row end of Rows 2–20. (19 sc)
Join with sl st to the first sc. Total: 84 sc (11 + 19 + 9 + 7 + 3 + 7 + 9 + 19). Fasten off.
Counter Edging Round
Join sage green with a standing sc in the first unworked stitch of Row 10.
- Bottom: sc in next 2 unworked sts of Row 10. (3 sc in total, including the standing sc)
- Side: sc in each row end of Rows 11–14. (4 sc)
- Top: sc in the bottom of each of the 3 ch from Row 15. (3 sc)
- Other side: sc in each row end of Rows 14–11. (4 sc)
Join with sl st. Total: 14 sc. Fasten off.
Why the Math Works
Single crochet rows are nearly square, so one sc per row end matches the edge length without stretching or ruffling. The 3-sc corner groups add the extra length the outside of each corner needs. The small decrease and increase steps get smoothed over by the edging.
The edging adds one stitch height to every edge, about 0.15 in (0.4 cm) per edge. So the body grows from 3 in (7.6 cm) to 3.3 in (8.4 cm) wide, and from 3.5 in (8.9 cm) to 3.8 in (9.7 cm) tall.
Appliqués
Leaves (make 2)
With olive green, ch 6.
Rnd 1: Sl st in 2nd ch from hook, sc in next ch, hdc in next ch, dc in next ch, sc in last ch. Rotate the leaf. Working in the bottom loops of the chain: sc in same ch, dc in next ch, hdc in next ch, sc in next ch, sl st in last ch. (10 sts)
Tip: Ch 2, sl st in 2nd ch from hook, sl st in the tip. Fasten off and leave a 6 in (15.2 cm) tail.
Each leaf is about 1 in (2.5 cm) long and 0.5 in (1.3 cm) wide.
Large Flower (make 1)
Rnd 1: With golden yellow, make a MR. Work 5 sc into the ring, pull it closed, and sl st to the first sc. (5 sc) Fasten off.
Rnd 2: Join cream in any sc. In each st around: (sl st, ch 2, 3 dc, ch 2, sl st). (5 petals) Fasten off and leave a 6 in (15.2 cm) tail.
The large flower is about 1 in (2.5 cm) across.
Small Flower (make 1)
Rnd 1: With cream, make a MR. Work 5 sc into the ring, pull it closed, and sl st to the first sc. (5 sc) Fasten off.
Rnd 2: Join butter yellow in any sc. In each st around: (sl st, ch 1, 2 hdc, ch 1, sl st). (5 petals) Fasten off and leave a tail.
The small flower is about 0.8 in (2.0 cm) across.
Layering and Sewing
Sew from the bottom layer up, using the yarn tails and small running stitches. Keep your stitches hidden under the petals.
- Place one leaf on the outer edge of the left leg, just below the crossbar, pointing up and out.
- Place the second leaf near the left leg base, pointing down and out.
- Center the large flower over the bases of both leaves so that only the leaf tips show. It should sit level with the bottom of the crossbar and overlap the outer edge slightly.
- Overlap the small flower on the lower right of the large flower, toward the inner edge of the left leg.
Final Blocking
- Pin the letter flat on the mat, stretching it to 3.3 in (8.4 cm) x 3.8 in (9.7 cm).
- Pin each outer corner and the top corners. Keep the slanted sides straight.
- Mist the letter until it is damp, but not soaked. Avoid the flowers, or mist them only lightly.
- Let it dry completely, which takes about 6–8 hours.
- Optional: brush a thin coat of fabric stiffener onto the back of the letter and let it dry again.
- Open the jump ring sideways with pliers. Thread it through the center sc of the top edging (the 6th of the 11 top stitches) and through the end link of the chain, then close it.
- Attach the other end of the chain to the split key ring.
Final Quality-Control Checklist
- The letter measures 3.3 in (8.4 cm) x 3.8 in (9.7 cm), within 0.1 in (0.3 cm).
- The outer edging has 84 sc and the counter edging has 14 sc.
- Both legs are the same width and slant evenly.
- The counter is open and 3 stitches wide.
- The leaves are tucked under the large flower and the small flower overlaps it.
- All ends are woven in on the back.
- The jump ring is fully closed with no gap.
Troubleshooting
- The legs slant the wrong way: The first leg wasn’t flipped. Check that both outer markers point outward before working Row 9.
- The edging ruffles: Your edging tension is looser than your body tension. Redo it with a firmer hand, or use a hook 0.25 mm smaller for the edging only.
- The edging cups or pulls: Make sure every corner has 3 sc. If it still pulls, use a hook 0.25 mm larger for the edging.
- The counter closes up: You worked into the 3 center stitches of Row 10 by mistake. Count 4 stitches for each side.
- The letter is floppy: Your gauge is loose. Go down a hook size or use stiffener.
- The flower petals curl: Pin them flat while the letter blocks.
Care
Spot clean with mild soap and cool water, then lay the keychain flat to dry. Don’t put it in the machine, because that can tarnish the hardware and bend the petals.
Final Notes
Here is the measurement chain in short:
- Gauge is 20 sc x 24 rows = 4 in (10.2 cm).
- Each leg is 5 stitches = 1 in (2.5 cm).
- Row 9 is 11 stitches = 2.2 in (5.6 cm).
- The body is 15 stitches x 21 rows = 3 in (7.6 cm) x 3.5 in (8.9 cm).
- The 84-stitch edging brings it to 3.3 in (8.4 cm) x 3.8 in (9.7 cm).
If you hit each checkpoint, the letter, appliqués and hardware will come out in proportion. You can use the same leg-and-bridge method for other initials.
Happy crocheting!