

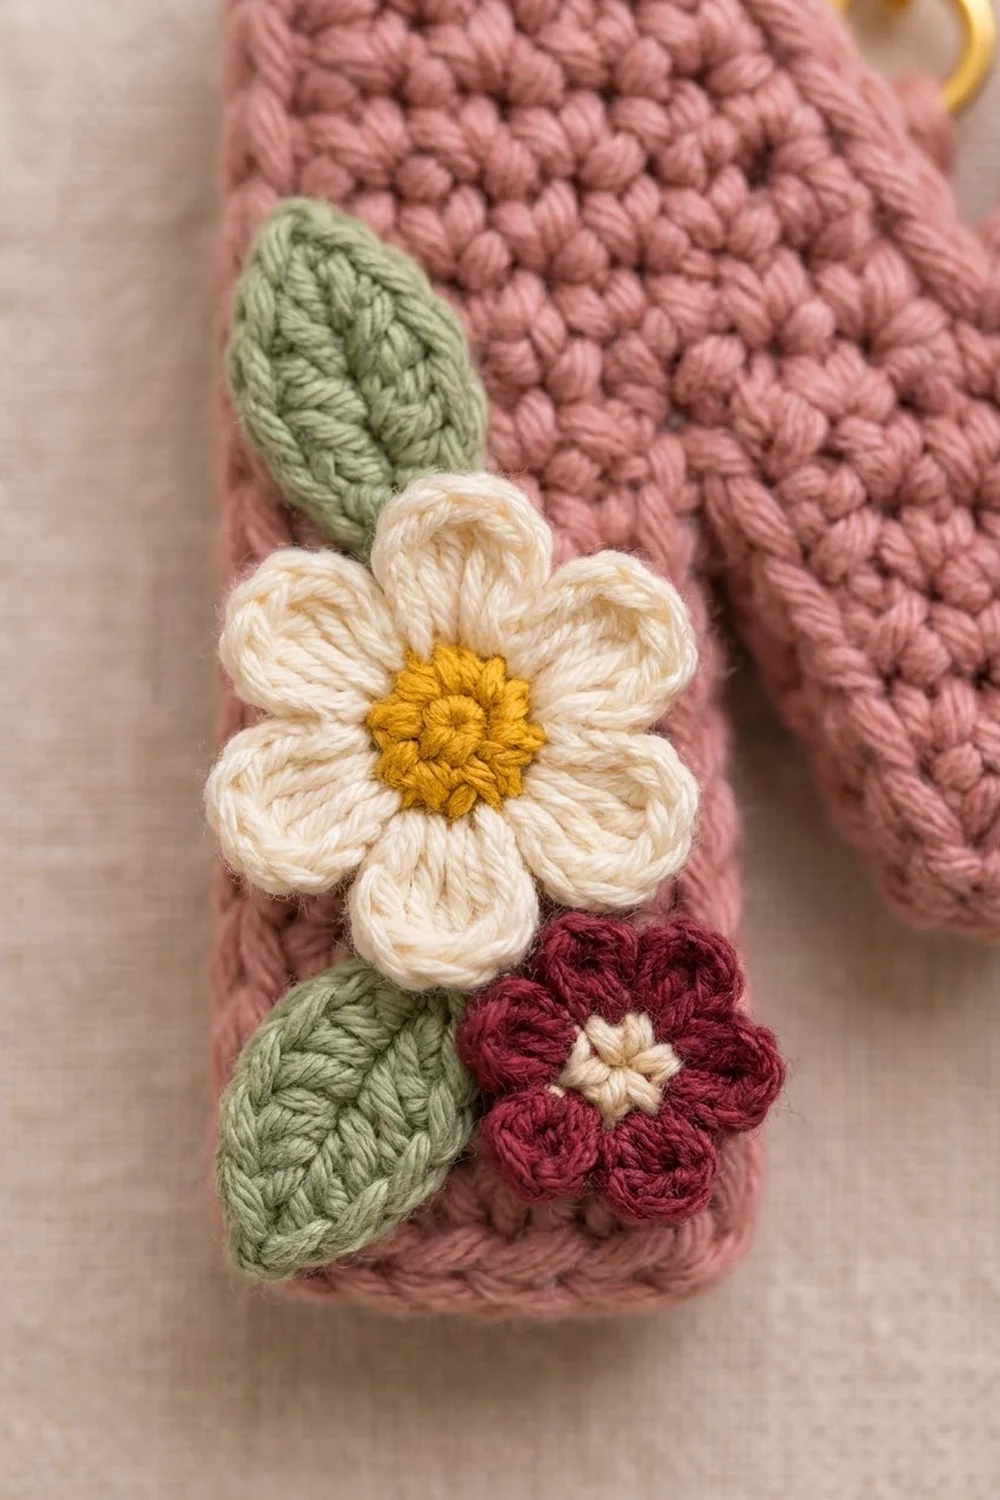
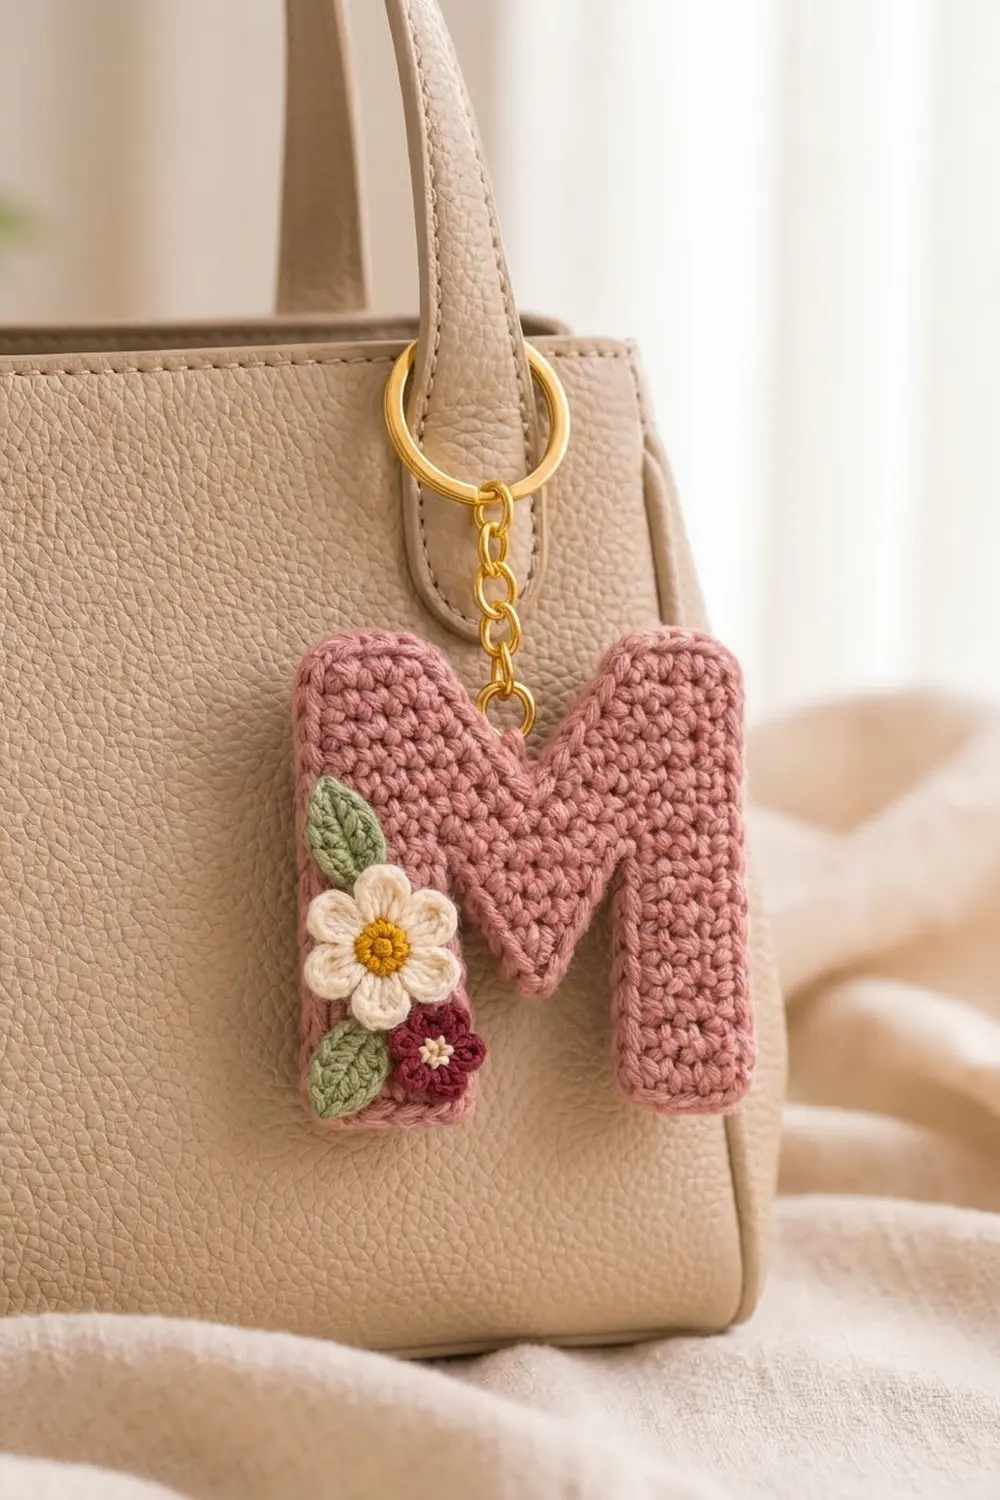
This little letter M is a quick, satisfying make. It is worked in dense dusty-rose single crochet, so it holds a crisp shape. A slip-stitch rim gives the outline a neat raised finish, and a small floral cluster brightens the lower left corner.
The palette is soft and vintage: dusty rose for the letter, a cream daisy with a mustard-yellow center, a tiny burgundy blossom with a cream center, and two sage-green leaves. A gold keyring and chain finish it off, which makes it a nice personalized bag charm or gift.
The pattern uses US crochet terms. The finished letter measures about 3.25 in (8.3 cm) wide by 3.4 in (8.6 cm) tall, not counting the hardware.
Here is how it’s built. You crochet the two lower legs separately, join them into a solid middle band, and split again at the top to form the V notch. A two-round border smooths the outline. Then you make the flowers and leaves, layer them, and sew them on.
Finished Size and Construction
- Finished size: 3.25 in (8.3 cm) wide × 3.4 in (8.6 cm) tall
- Skill level: Easy–Intermediate (simple shaping, small appliqués)
- Terminology: US crochet terms
- Yarn weight: DK (#3), cotton or cotton blend
- Hook: 3.0 mm
- Number of pieces: 1 letter piece + 4 appliqués (2 flowers, 2 leaves)
- Layout: single letter, appliqué cluster on the lower left leg
- Letter size before border: 3.0 in (7.6 cm) wide × 3.1 in (7.9 cm) tall
- Border depth: about 1/8 in (0.3 cm) on every edge
Materials
Choose a smooth, mercerized or matte cotton in DK weight. Cotton shows clean stitch definition and doesn’t stretch out on a keychain. Don’t use fuzzy or very soft acrylic, because it pills where the keychain rubs against a bag.
- Dusty rose (MC): 8 g / 20 m (22 yd)
- Cream (A): 2 g / 5 m (5.5 yd)
- Mustard yellow (B): 1 g / 2 m (2.2 yd)
- Burgundy (C): 1 g / 2 m (2.2 yd)
- Sage green (D): 2 g / 4 m (4.4 yd)
Tools:
– 3.0 mm crochet hook
– Tapestry needle
– Sewing needle and cream or rose sewing thread (optional, for a firmer appliqué hold)
– Gold split keyring, 1 in (2.5 cm)
– Gold chain, about 1.25 in (3.2 cm), with 2 jump rings
– 2 pairs of flat-nose pliers
– Stitch markers
– Blocking mat and rust-proof pins
All quantities include a margin of about 25% for swatching and weaving in ends.
Abbreviations (US Terms)
- ch – chain
- sl st – slip stitch
- sc – single crochet
- hdc – half double crochet
- dc – double crochet
- sc2tog – single crochet 2 together: (insert hook in next st, yarn over, pull up a loop) twice, yarn over, pull through all 3 loops
- BLO – back loop only
- MR – magic ring
- st(s) – stitch(es)
- RS / WS – right side / wrong side
Special technique: inner edge. In the leg and top sections, “inner edge” means the edge that faces the center of the M. All increases and decreases happen on the inner edge only, so the outer edges stay perfectly straight.
Gauge and Checkpoints
Gauge: 12 sc and 13 rows = 2 in (5.1 cm) in sc rows, worked firmly.
Because the letter is a single piece, your first leg works as a test piece. Work Rows 1–4 of the left leg and measure before you go further.
- After Rows 1–4 of a leg: 5 sts wide, about 0.85 in (2.2 cm).
- After Row 8 (each leg): 9 sts wide, about 1.5 in (3.8 cm) at the top edge. The leg is about 1.25 in (3.2 cm) tall.
- After Row 12: 18 sts, 3.0 in (7.6 cm) wide, about 1.85 in (4.7 cm) tall.
- After Row 20: 3.0 in (7.6 cm) wide × 3.1 in (7.9 cm) tall.
- After the border: 3.25 in (8.3 cm) × 3.4 in (8.6 cm).
If your piece is too big, go down 0.25 mm in hook size. If it is too small, go up 0.25 mm. The fabric should be firm enough that the stitches don’t gap when you hold it up to light.
Letter M
Work flat in rows. Begin every row with ch 1 and turn; the ch 1 does not count as a stitch. Mark the RS of each leg with a stitch marker so both legs face the same way when you join them.
Left Leg
With MC, ch 6.
Row 1 (RS): Sc in 2nd ch from hook and in each ch across. (5 sts)
This row ends at the outer (left) edge. Odd rows begin at the inner edge; even rows end at the inner edge.
Rows 2–4: Ch 1, turn, sc in each st across. (5 sts)
Row 5: Ch 1, turn, 2 sc in first st (inner edge), sc in each st across. (6 sts)
Row 6: Ch 1, turn, sc in each st to last st, 2 sc in last st. (7 sts)
Row 7: Ch 1, turn, 2 sc in first st, sc in each st across. (8 sts)
Row 8: Ch 1, turn, sc in each st to last st, 2 sc in last st. (9 sts)
Fasten off and set aside with RS facing you.
Right Leg
With MC, ch 6.
Row 1 (RS): Sc in 2nd ch from hook and in each ch across. (5 sts)
For this leg, odd rows end at the inner edge and even rows begin at the inner edge.
Rows 2–4: Ch 1, turn, sc in each st across. (5 sts)
Row 5: Ch 1, turn, sc in each st to last st, 2 sc in last st. (6 sts)
Row 6: Ch 1, turn, 2 sc in first st, sc in each st across. (7 sts)
Row 7: Ch 1, turn, sc in each st to last st, 2 sc in last st. (8 sts)
Row 8: Ch 1, turn, 2 sc in first st, sc in each st across. (9 sts)
Don’t fasten off.
Checkpoint: Lay both legs RS up with their inner edges together. The inner edges should slant toward each other and touch only at the top of Row 8, forming a pointed arch over a gap 8 sts wide at the bottom, about 1.35 in (3.4 cm).
Middle Band
Row 9 (RS): Ch 1, turn, sc in each of the 9 sts of the right leg. Then continue straight into the top of Row 8 of the left leg and sc in each of its 9 sts. (18 sts)
Rows 10–12: Ch 1, turn, sc in each st across. (18 sts)
Row 12 ends at the right outer edge. Place a marker in st 9 and st 10 of Row 12 (the two center sts).
Top Right Half
Row 13 (RS): Ch 1, turn, sc in next 7 sts, sc2tog over sts 8 and 9. Leave the remaining 9 sts unworked. (8 sts)
Row 14: Ch 1, turn, sc2tog, sc in each st across. (7 sts)
Row 15: Ch 1, turn, sc in each st to last 2 sts, sc2tog. (6 sts)
Row 16: Ch 1, turn, sc2tog, sc in each st across. (5 sts)
Rows 17–20: Ch 1, turn, sc in each st across. (5 sts)
Fasten off.
Top Left Half
Row 13 (RS): With RS facing, join MC in st 10 of Row 12 (the first unworked st next to center). Ch 1, sc2tog over sts 10 and 11, sc in the remaining 7 sts. (8 sts)
Row 14: Ch 1, turn, sc in each st to last 2 sts, sc2tog. (7 sts)
Row 15: Ch 1, turn, sc2tog, sc in each st across. (6 sts)
Row 16: Ch 1, turn, sc in each st to last 2 sts, sc2tog. (5 sts)
Rows 17–20: Ch 1, turn, sc in each st across. (5 sts)
Fasten off and weave in all ends on the WS.
Checkpoint: The two top halves leave a V notch. Its point sits between the two Row 13s, and it opens to 8 sts wide at Row 16, matching the bottom gap. The piece measures 3.0 in (7.6 cm) × 3.1 in (7.9 cm).
Border
Border gauge: One sc per stitch along top and bottom edges, and one sc per row-end along side and inner edges. Each row is roughly one stitch tall at this gauge (6 sts vs. 6.5 rows per inch), so the edges lie flat without ruffling or cupping.
Round 1 (RS): Join MC with a sl st in the first st of Row 20 on the left leg (the top-left outer corner). Ch 1, then work around clockwise:
- Top of left leg: 3 sc in the corner st, sc in the next 3 sts, 3 sc in the last st. (9 sts)
- Top notch: 7 sc down the inner row-ends, sc2tog over the last row-end of the left half and the first row-end of the right half, 7 sc up the inner row-ends of the right half. (15 sts)
- Top of right leg: 3 sc in the corner st, sc in the next 3 sts, 3 sc in the last st. (9 sts)
- Right outer edge: 1 sc in each of the 20 row-ends. (20 sts)
- Bottom of right leg: working into the foundation ch: 3 sc in the corner, sc in the next 3, 3 sc in the last. (9 sts)
- Bottom gap: 7 sc up the inner row-ends of the right leg, sc2tog at the apex over the two Row 8 row-ends, 7 sc down the left leg. (15 sts)
- Bottom of left leg: 3 sc in the corner, sc in the next 3, 3 sc in the last. (9 sts)
- Left outer edge: 1 sc in each of the 20 row-ends. (20 sts)
Sl st to the first sc. Total: 106 sts.
Why the math works: Each 5-stitch top or bottom edge becomes 3 + 3 + 3 = 9, because each of its two end sts takes 3 sc and the middle 3 sts take 1 each. The four leg ends give 4 × 9 = 36. The inner edges each have 8 row-ends per side, 16 in total. The sc2tog joins 2 of those row-ends into 1 stitch, so each of them gives 7 + 1 + 7 = 15, or 30 for both. The outer edges add 20 + 20 = 40. Total: 36 + 30 + 40 = 106. The corner groups are counted only once, inside the 9-stitch edges.
Round 2: Ch 1, sl st loosely in the BLO of each st around. (106 sl sts) Join to the first sl st and fasten off.
Working through back loops leaves the front loops showing as a smooth raised rim. Work this round loosely; if your rim pulls the letter in, go up to a 3.5 mm hook for this round only. The border adds about 1/8 in (0.3 cm) per edge, which brings the letter to 3.25 in (8.3 cm) × 3.4 in (8.6 cm).
Appliqués
Large Daisy (make 1)
Round 1: With B, MR, 5 sc in ring. Pull the ring closed and sl st with A to the first sc, changing color. Fasten off B. (5 sts)
Round 2: With A, in each sc around: (ch 2, 3 dc, ch 2, sl st) all in the same st. (5 petals)
Fasten off and leave a 10 in (25.4 cm) tail. The flower measures about 1.1 in (2.8 cm) across.
Small Blossom (make 1)
With C, MR. Work (ch 2, dc, ch 2, sl st) 5 times into the ring. Pull it closed tightly. (5 petals)
Fasten off and leave an 8 in (20.3 cm) tail. With A, work one French knot in the center. The blossom measures about 0.6 in (1.5 cm).
Leaf (make 2)
With D, ch 7. Starting in the 2nd ch from hook: sl st, sc, hdc, dc, hdc, then (sc, ch 2, sc) in the last ch for the tip. Working along the other side of the chain: hdc, dc, hdc, sc, sl st. Join to the first sl st. (12 sts + ch-2 tip)
Fasten off and leave a tail. Each leaf is about 0.9 in (2.3 cm) long.
Assembly
- Position the large daisy on the left leg so its center sits about 1.25 in (3.2 cm) above the bottom edge. Let it overlap the left outer rim slightly.
- Tuck one leaf under the upper left of the daisy, angled up and outward. Tuck the second leaf under the lower left, angled down.
- Tack each leaf down at its base and tip with its tail.
- Sew the daisy over the leaf bases. Stitch around the yellow center and tack each petal tip once.
- Overlap the small blossom onto the lower right edge of the daisy and sew it through its center.
- Weave all tails into the WS of the letter, staying inside the sc fabric so nothing shows on the front.
Hardware
Open a jump ring with two pliers. Pass it through the center sc of the top edge of the left leg and through the rim, then through the end link of the chain. Close it fully. Attach the keyring to the other end of the chain with the second jump ring.
Final Blocking
- Lightly mist the letter with water. Don’t soak it, because the appliqués are already attached.
- Lay it RS up on the blocking mat.
- Pin the eight outer corners first, aiming for 3.25 in (8.3 cm) across the bottom.
- Pin the bottom gap apex and the top notch point so both V shapes are sharp and centered.
- Check the height is 3.4 in (8.6 cm) and both legs are parallel.
- Shape the petals and leaves with your fingertips. Don’t pin through them.
- Let it dry completely, at least 4 hours, before you remove the pins.
Final Quality-Control Checklist
- Letter body: 18 sts wide at Rows 9–12, legs 5 sts wide at Rows 1–4 and 17–20.
- Border Round 1: exactly 106 sts.
- Both V shapes come to a single clean point.
- Outer edges are straight, with no ruffling.
- Appliqués are secure: tug each petal and leaf gently.
- No tails visible on the front.
- Jump rings fully closed with no gap for yarn to slip through.
- Final size: 3.25 in (8.3 cm) × 3.4 in (8.6 cm).
Troubleshooting
The legs don’t meet at a point. Check that every increase in Rows 5–8 is on the inner edge. Each leg must reach 9 sts at Row 8.
The bottom gap or top notch looks lopsided. One leg or one top half probably has an extra or missing stitch. Count every row against the pattern.
The border ruffles. Skip 1 row-end evenly on each long outer edge (that’s 18 sts per edge), and do the same on both edges to keep the shape symmetrical.
The border cups or pulls in. Use a bigger hook for Round 2, or sl st more loosely.
The letter is floppy. Go down a hook size and remake it; this piece needs firm fabric.
The daisy petals curl. Steam them lightly and press them flat with your fingers while they’re still warm.
Care
Spot clean with mild soap and cool water, then reshape and dry flat. Don’t put it in the machine, because the agitation can loosen the appliqués and the metal hardware.
Final Notes
Here is the measurement chain to keep in mind. Your gauge of 12 sc × 13 rows = 2 in (5.1 cm) gives 5-stitch legs about 0.85 in (2.2 cm) wide. Those legs grow to 9 sts each by Row 8 and join into an 18-stitch band 3.0 in (7.6 cm) wide. The top halves split back down to 5 sts by Row 16, so the body measures 3.0 in (7.6 cm) × 3.1 in (7.9 cm) after Row 20. The 106-stitch border then brings the letter to 3.25 in (8.3 cm) × 3.4 in (8.6 cm). If you check each stage as you go, your letter will come out crisp and evenly shaped. Add the flowers, clip it to your favorite bag, and enjoy.
Happy crocheting!