

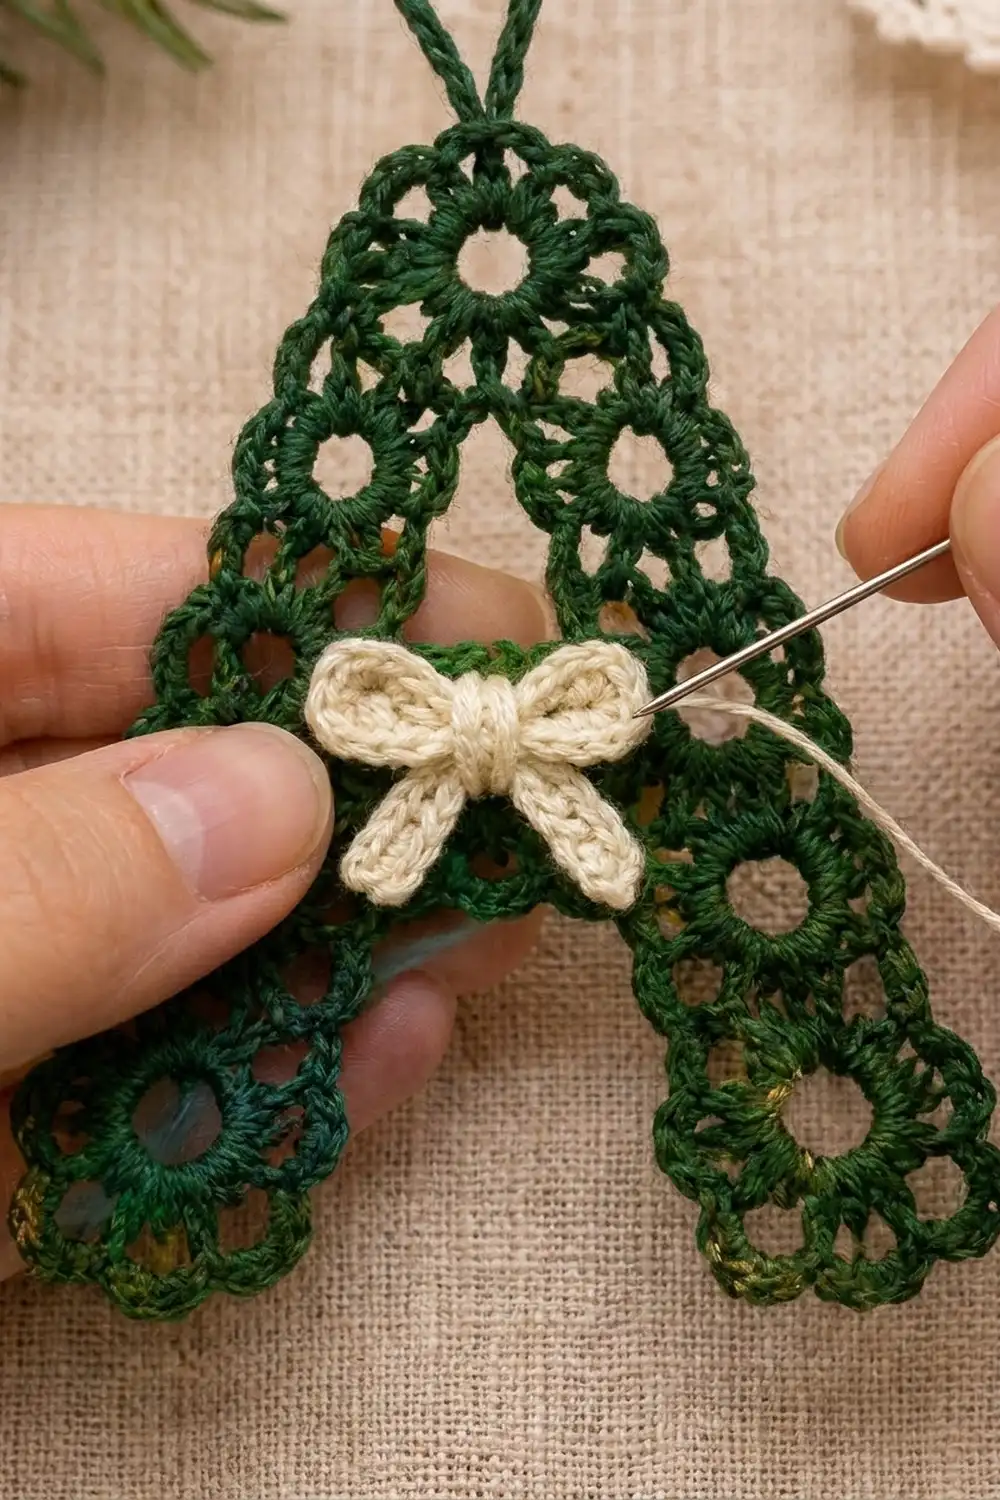
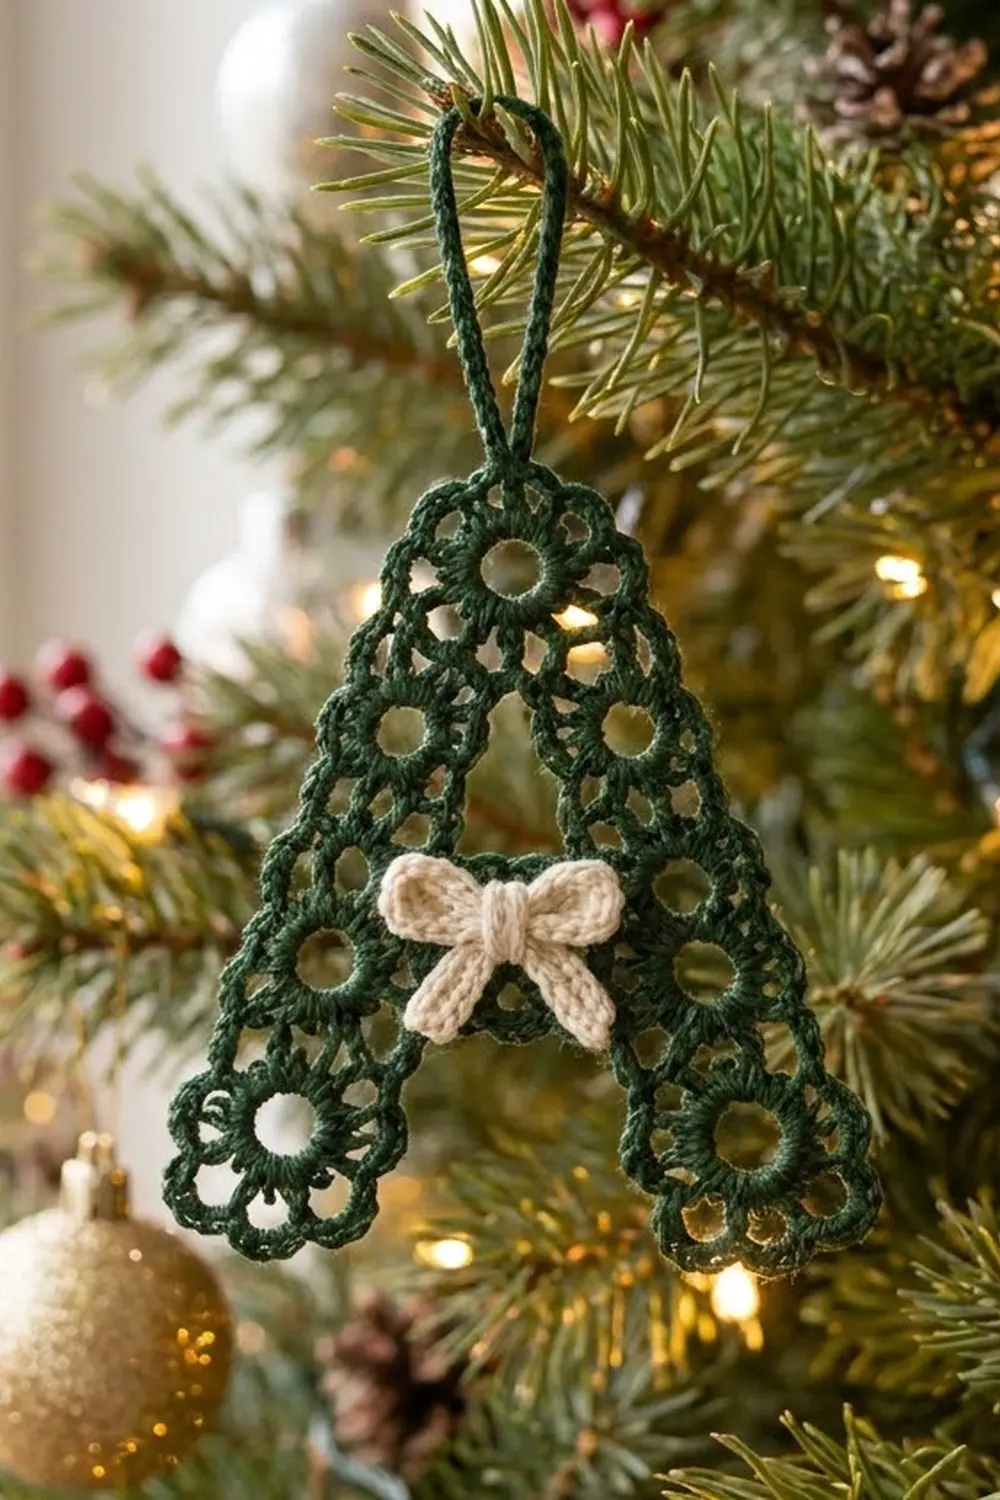
This little ornament is a capital letter “A” made from tiny lace rings. Each ring has an open center, a firm band of single crochet and a soft scalloped edge. Twelve of these rings are joined at their petal tips to form the letter, and a cream bow sits on the crossbar.
The palette is deep forest green and warm cream, a classic holiday pairing that looks good on a tree, on a gift package or tied to a stocking. Thread gives the lace crisp definition and helps the ornament hold its shape after blocking.
The pattern uses US crochet terms. The finished A measures about 3.2 inches (8.1 cm) wide and 4.5 inches (11.4 cm) tall. With the hanging loop, the full length is about 6 inches (15.2 cm).
Construction is simple. You make one motif in full, then join each new motif to the earlier ones in its final round with a petal-join stitch, so there is no sewing. The scalloped motif edges form the outline. To finish, you add a hanging loop, block the piece, make the bow and stitch it on.
Finished Size and Construction
- Finished size: 3.2 in (8.1 cm) wide x 4.5 in (11.4 cm) tall; 6 in (15.2 cm) tall with the loop
- Skill level: Intermediate (join-as-you-go)
- Terminology: US
- Yarn weight: Size 3 crochet thread (Lace / 0)
- Hook: 2.0 mm steel hook
- Number of pieces: 12 green motifs, 1 cream bow band, 1 cream tail strip
- Layout: 1 apex motif, 5 motifs per leg, 1 crossbar motif
- Piece size: each motif is 0.8 in (2.0 cm) across, from petal tip to petal tip
- Size before border: 3.2 in x 4.5 in (8.1 x 11.4 cm), with all motifs joined
- Border depth: 0 in (0 cm). The scalloped edge is built into Round 3; no extra border round is added.
Materials
Use a mercerized cotton thread in size 3. It has good stitch definition and blocks well. Avoid fuzzy or very soft acrylics, because the lace will not hold its shape.
- Color A, forest green: 20 g (56 m)
- Color B, cream: 5 g (14 m)
These quantities include a generous margin for gauge swatches and tails.
Tools:
– 2.0 mm steel crochet hook
– Tapestry needle
– 2 locking stitch markers
– Rustproof pins and a foam blocking board
– Spray bottle or light spray starch
– Small sharp scissors
Abbreviations (US Terms)
- ch: chain
- sl st: slip stitch
- sc: single crochet
- hdc: half double crochet
- dc: double crochet
- sk: skip
- sp: space
- st(s): stitch(es)
- rnd: round
Special stitch: Petal Join (PJ). This stitch replaces the tip dc of a petal.
1. Yarn over and insert the hook into the current ch-2 sp.
2. Yarn over and draw up a loop.
3. Yarn over and draw through 2 loops. You now have 2 loops on the hook.
4. Insert the hook from front to back under both top loops of the tip dc on the matching petal of the neighboring motif.
5. Yarn over and draw through that dc and both loops on the hook.
The PJ counts as 1 dc, so the petal’s stitch count does not change.
Clock positions: Each motif has 12 petals. With the motif lying right side up in the layout, number its petals like the hours on a clock: 12 o’clock points up and 6 o’clock points down.
Gauge and Checkpoints
Gauge is one complete motif, 0.8 in (2.0 cm) across from petal tip to petal tip. Make one test motif first and check it at each stage:
- After Rnd 1: 0.5 in (1.3 cm) across
- After Rnd 2: 0.6 in (1.5 cm) across
- After Rnd 3: 0.8 in (2.0 cm) across
If your motif is 0.9 in (2.3 cm) or larger, change to a 1.75 mm hook. If it is 0.75 in (1.9 cm) or smaller, change to a 2.25 mm hook. Every motif must match, because the joins rely on petal tips meeting without stretching. Lightly steam the test motif before you measure it, since unblocked thread lace curls.
The Motif
Make 12 motifs in Color A. Work Motif 1 exactly as written. Work every other motif the same way, but replace the tip dc of each joining petal with a PJ, following the joining table below.
Ring: Ch 8 and sl st to the first ch to form a ring.
Rnd 1: Ch 1. Work 24 sc into the ring and sl st to the first sc. (24 sc)
Pack the stitches snugly so the center hole stays round and open, about 0.25 in (0.6 cm) across.
Rnd 2: Ch 1, sc in the same st, ch 2, sk 1 st. Sc in the next st, ch 2, sk 1 st. Repeat from * 10 more times. Sl st to the first sc. (12 sc, 12 ch-2 sps)
Rnd 3 (petals): Sl st into the first ch-2 sp, then ch 1. Work (sc, hdc, dc, hdc, sc) in the same sp and in each ch-2 sp around. Sl st to the first sc. (12 petals, 60 sts)
The dc at the center of each petal is its tip. Fasten off, leaving a 4 in (10.2 cm) tail.
Each motif therefore has 24 sts in Rnd 1, 24 sts in Rnd 2 (12 sc + 12 chains) and 60 sts in Rnd 3. A join swaps one dc for one PJ, so joined motifs also finish with 60 sts.
Make All Pieces
Color A (green): 12 motifs, joined as you go in the order below.
Color B (cream): 1 bow band and 1 tail strip. Instructions are in the bow section.
Layout grid (as seen from the right side):
              A1
          L1      R1
      L2              R2
      L3      C       R3
  L4                      R4
  L5                      R5
Leg motifs step down in two ways:
– Diagonal step (about 30° from vertical): from A1 to L1, L1 to L2, and L3 to L4.
– Straight-down step: from L2 to L3 and L4 to L5.
The right leg mirrors the left. Motif C sits level with L3 and R3. The open space framed by L1, R1, L2, R2 and C is the gap inside the A.
Joining
Work each new motif through Rnd 2, then work Rnd 3 with PJs where shown. Always make the first join on the first petal of Rnd 3. That petal becomes the “new petal” clock position listed in the table.
The table assumes right-handed crochet, where Rnd 3 travels counterclockwise. If you crochet left-handed, the first-petal joins stay the same, but R1’s second join moves to petal 11 (C’s stays on petal 7).
| Order | Motif | Join (new motif’s petal ↔ existing motif’s petal) |
|---|---|---|
| 1 | A1 | no joins |
| 2 | L1 | petal 1 (1 o’clock) ↔ A1 at 7 o’clock |
| 3 | R1 | petal 1 (11 o’clock) ↔ A1 at 5 o’clock; petal 3 (9 o’clock) ↔ L1 at 3 o’clock |
| 4 | L2 | petal 1 (1 o’clock) ↔ L1 at 7 o’clock |
| 5 | L3 | petal 1 (12 o’clock) ↔ L2 at 6 o’clock |
| 6 | L4 | petal 1 (1 o’clock) ↔ L3 at 7 o’clock |
| 7 | L5 | petal 1 (12 o’clock) ↔ L4 at 6 o’clock |
| 8 | R2 | petal 1 (11 o’clock) ↔ R1 at 5 o’clock |
| 9 | R3 | petal 1 (12 o’clock) ↔ R2 at 6 o’clock |
| 10 | C | petal 1 (9 o’clock) ↔ L3 at 3 o’clock; petal 7 (3 o’clock) ↔ R3 at 9 o’clock |
| 11 | R4 | petal 1 (11 o’clock) ↔ R3 at 5 o’clock |
| 12 | R5 | petal 1 (12 o’clock) ↔ R4 at 6 o’clock |
How the stitches line up: each join links exactly one tip dc to one tip dc. Before every PJ, lay the piece flat and right side up, find the existing motif’s petal by its clock position, and mark that tip dc with a stitch marker.
Tension: work the PJ at the same height as a normal dc. If you pull it tight, the motifs overlap and the A pinches. If you leave it loose, a visible gap opens between the tips. The two motifs should just touch, with their centers 0.8 in (2.0 cm) apart.
Size checkpoints:
– After A1, L1 and R1: a small triangle 1.6 in (4.1 cm) wide x 1.5 in (3.8 cm) tall.
– After the left leg (L5): the piece is 4.5 in (11.4 cm) tall.
– After all 12 motifs: 3.2 in (8.1 cm) wide across the feet x 4.5 in (11.4 cm) tall.
Border: Built-In Scallop Edge and Hanging Loop
No separate border round is worked. A round of sc around such an irregular outline would bunch at the inner corners and hide the scallops seen in the finished piece. The petals of Rnd 3 form the border instead.
Border gauge: each petal takes up about 0.2 in (0.5 cm) of the motif’s outline, because 12 petals sit around a circle about 2.5 in (6.4 cm) in circumference.
Petal math: 12 motifs x 12 petals = 144 petals. There are 13 joins, and each one uses 2 petals, so 26 petals are joined. That leaves 118 free petals forming the outside edge and the edge of the inner opening. No stitches are added at any join, so every motif keeps exactly 60 sts.
Hanging loop (Color A):
1. With the right side facing, join Color A with a sl st in the tip dc of A1’s 12 o’clock petal.
2. Ch 30 and sl st in the same tip dc to form the loop.
3. Ch 1. Work 36 sc over the chain loop, working into the loop and enclosing the chain.
4. Sl st to the first sc and fasten off.
The 30 chains make a loop 3 in (7.6 cm) around, which folds to 1.5 in (3.8 cm) tall. Covering it with 36 sc (1.2 sc per chain) keeps it smooth and firm without ruffling.
Final Blocking
- Weave in all green tails along the back of Rnd 1, splitting the plies so they cannot work loose.
- Mist the A until it is damp, or dip it in water and press out the excess in a towel.
- Pin it right side up on the blocking board. Put one pin through the center hole of each motif, then pin the outer foot petals of L5 and R5.
- Check the measurements: 3.2 in (8.1 cm) across the feet and 4.5 in (11.4 cm) from A1’s top petal to the bottom of the feet.
- Shape the inner opening so it forms a clean triangle above C.
- Spray lightly with starch if you want a stiffer ornament.
- Let it dry completely, then remove the pins.
Bow (Color B)
Bow band:
1. Ch 30 and sl st to the first ch to form a ring, taking care not to twist the chain.
2. Rnd 1: Ch 1, sc in each ch around, sl st to the first sc. (30 sc)
3. Rnd 2: Ch 1, sc in each sc around, sl st to the first sc. (30 sc)
4. Fasten off, leaving an 8 in (20.3 cm) tail.
Flatten the band into an oval with the seam at the center back. It measures 1.2 in (3.0 cm) wide.
Tail strip:
1. Ch 11.
2. Sc in the 2nd ch from the hook and in each ch across. (10 sc)
3. Fasten off.
The strip is about 0.8 in (2.0 cm) long.
Assembly:
1. Fold the tail strip into a V and place it behind the center of the bow band.
2. Pinch both pieces together at the center.
3. Wrap the long tail tightly 5 times around the pinch to form the knot.
4. Use the same tail to sew the bow over motif C. Stitch through the bow’s center and through C’s Rnd 1 so nothing shows on the front.
The bow loops overlap the edges of L3 and R3 slightly, and each tail hangs about 0.4 in (1.0 cm) below the knot.
Final Quality-Control Checklist
- All 12 motifs measure 0.8 in (2.0 cm) and have 60 sts in Rnd 3.
- There are 13 joins, each linking one petal tip to one petal tip.
- The piece measures 3.2 in (8.1 cm) wide x 4.5 in (11.4 cm) tall.
- The inner triangular opening is open and symmetrical.
- The hanging loop is centered on A1’s 12 o’clock petal and is 1.5 in (3.8 cm) tall.
- The bow is centered on C, and the knot sits level.
- No tails show on the front.
Troubleshooting
The legs flare outward or lean inward. A join was made on the wrong clock position. Check the table, undo the motif back to Rnd 2 and rework Rnd 3.
Motifs overlap at a join. The PJ was pulled too tight. Rework it with a taller, looser final pull-through.
The center holes close up. Rnd 1 is too crowded. Use a slightly larger chain ring or loosen your sc.
The piece curls after drying. Re-dampen it, pin every outer petal and starch lightly.
The bow twists. Wrap the knot again with firmer tension and sew through both bow layers.
Care
Spot clean with cool water and mild soap. Reshape and pin flat to dry, and store flat in tissue paper between seasons.
Final Notes
The measurements build on each other:
1. One motif is 0.8 in (2.0 cm) across, with 24, 24 and 60 sts in its three rounds.
2. Twelve motifs joined with 13 single-petal joins make a 3.2 x 4.5 in (8.1 x 11.4 cm) letter A with no added stitches.
3. The 36-sc loop adds 1.5 in (3.8 cm), for a hanging length of 6 in (15.2 cm).
If each motif matches gauge, every later stage will measure correctly. Make one for every initial on your tree.
Happy crocheting!