

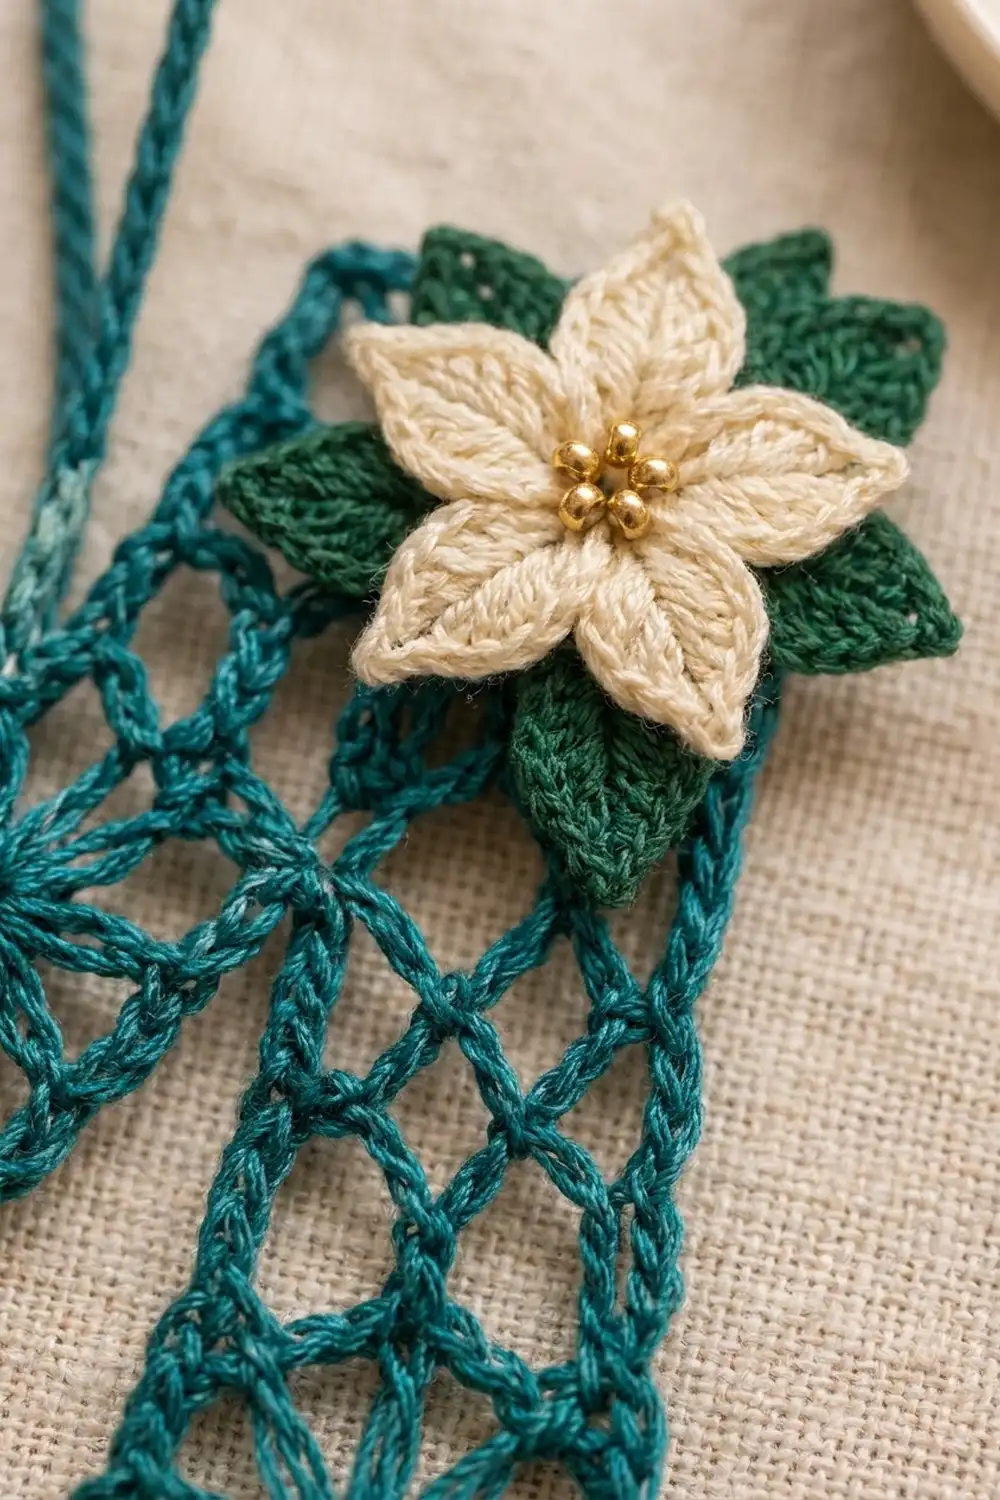
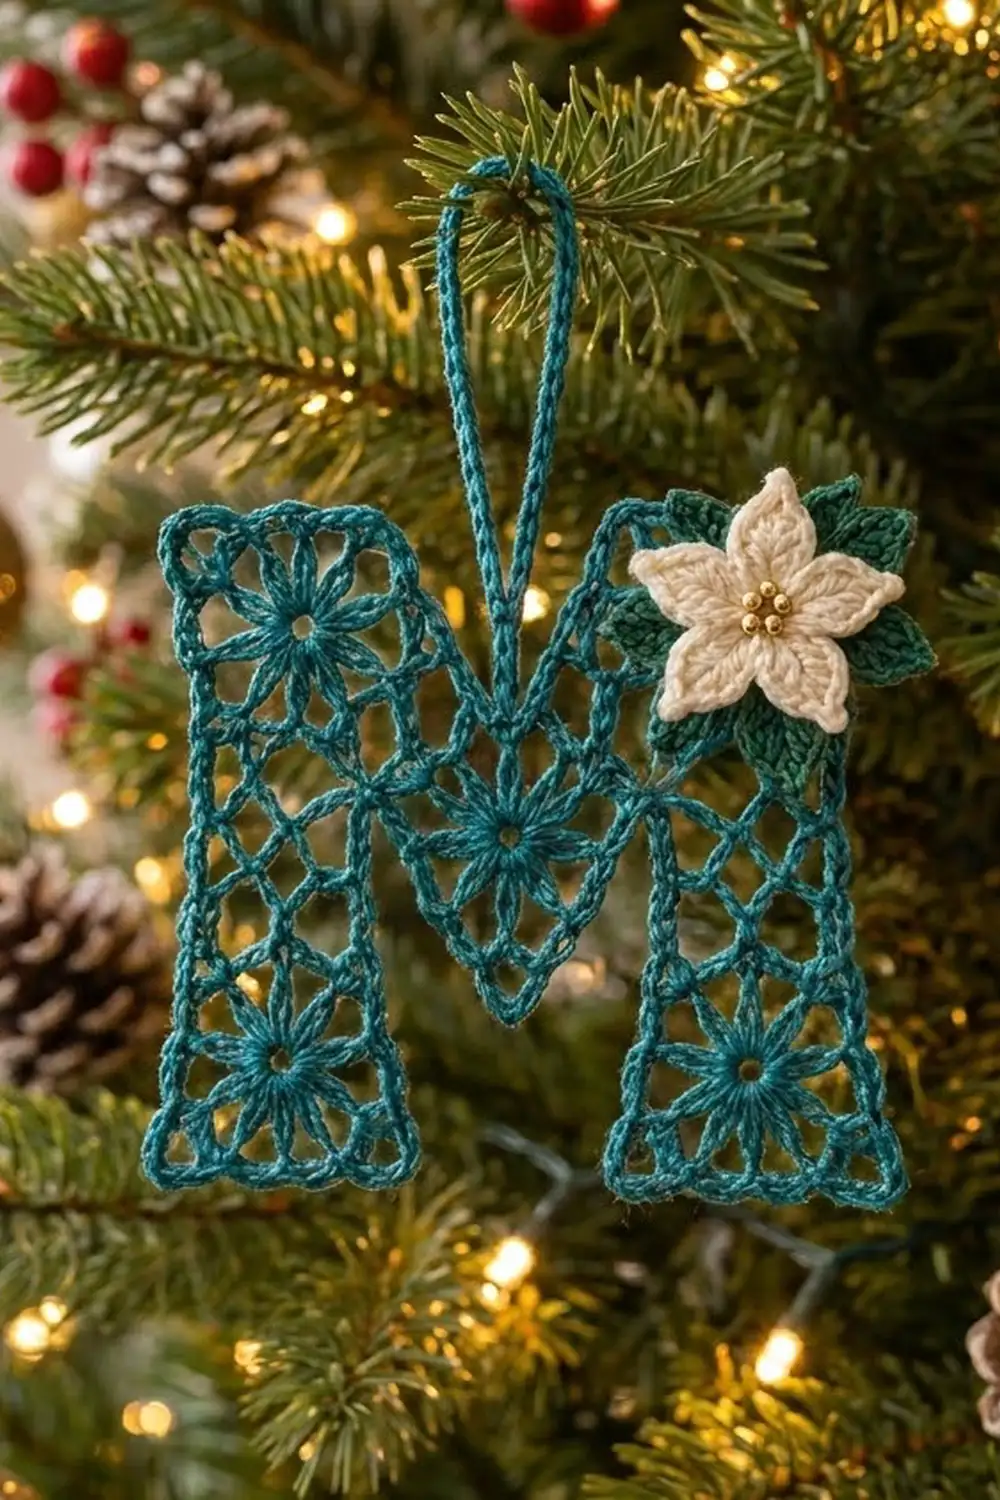
This openwork letter M ornament is worked in deep teal thread. Lacy star medallions sit at the top and bottom of each leg and in the center V, open net sections link them, and a cream flower with three gold bead centers rests on a cluster of green leaves at the top right corner. A chained hanging loop rises from the notch in the middle of the M.
The palette is teal, cream, dark green, and gold, so it looks festive without being red. The texture is crisp and airy, like vintage thread lace, and it shows up well against tree lights.
This pattern uses US crochet terms. The finished ornament measures 5 in (12.7 cm) wide by 5 in (12.7 cm) tall, not counting the 2 in (5.1 cm) hanging loop.
You make seven small motifs (four star squares, two net squares, and one star triangle) and seam them into the M shape. Then you add a two-round corded border, the hanging loop, and the layered flower appliqué. The result is one single ornament.
Finished Size and Construction
- Finished size: 5 in x 5 in (12.7 cm x 12.7 cm), plus a 2 in (5.1 cm) loop
- Skill level: Intermediate
- Terminology: US crochet terms
- Yarn weight: Size 3 cotton crochet thread (fine, Lace category 0)
- Hook: 2.0 mm
- Number of pieces: 7 lace motifs, plus 1 flower and 3 leaves
- Layout: two legs of 3 squares each, with 1 triangle hanging point-down between the top squares
- Piece size: squares are 1.5 in (3.8 cm) per side; the triangle is 1.5 in (3.8 cm) per side and 1.3 in (3.3 cm) tall
- Size before border: 4.5 in x 4.5 in (11.4 cm x 11.4 cm)
- Border depth: 0.25 in (0.6 cm) on each edge
Materials
Use a mercerized cotton crochet thread in size 3. It has crisp stitch definition, holds its shape after blocking, and won’t fuzz on the tree. Choose a smooth, slightly shiny thread so the star spokes stay sharp.
- Teal (main color): 16 g, about 24 m
- Cream (flower): 3 g, about 4.5 m
- Dark green (leaves): 3 g, about 4.5 m
The quantities include a margin of roughly 20 percent for your gauge swatch, seams, and weaving in ends.
Tools:
- 2.0 mm crochet hook
- 3 gold seed beads, size 6/0 or 8/0
- Fine sewing needle and matching cream sewing thread
- Tapestry needle
- Rust-proof pins and a foam blocking board
- Spray bottle with clean water
- Optional: spray starch
- Scissors and a ruler
Abbreviations (US Terms)
- ch = chain
- sl st = slip stitch
- sc = single crochet
- hdc = half double crochet
- dc = double crochet
- sp = space
- sk = skip
- st(s) = stitch(es)
- rnd = round
- rev sc = reverse single crochet (crab stitch)
- BLO = back loop only
Reverse single crochet (rev sc): Work from left to right (right-handed). Insert the hook into the next stitch to the right, yarn over, pull up a loop, yarn over, and draw through both loops on the hook. This makes the twisted, corded edge.
Gauge and Checkpoints
Gauge: 13 sc = 1.5 in (3.8 cm) along the edge of a finished motif.
Make one star square first and measure it before you go on. Checkpoints:
- Star square, after Rnd 1: about 0.6 in (1.5 cm) across
- Star square, after Rnd 2: about 1.2 in (3.0 cm) across, loop tip to loop tip
- Square, after Rnd 4: 1.5 in (3.8 cm) per side
- Triangle, after Rnd 4: 1.5 in (3.8 cm) per side
- Leg strip, after joining: 1.5 in x 4.5 in (3.8 cm x 11.4 cm)
If your square measures more than 1.5 in (3.8 cm), go down 0.25 mm in hook size. If it’s smaller, go up 0.25 mm. Every motif uses the same count of 13 sc per side, so getting one square right sets the gauge for the whole ornament.
Star Square (Make 4, Teal)
Rnd 1: Make a magic ring. Ch 3 (counts as dc), work 15 dc into the ring, then sl st to the top of the beginning ch-3. (16 dc) Pull the ring tight.
Rnd 2 (star points): Ch 1, sc in the same st, ch 6, sk 1 st. Sc in the next st, ch 6, sk 1 st. Repeat from * 6 more times, then sl st to the first sc. (8 sc, 8 ch-6 loops)
Rnd 3 (squaring): Sl st in each of the next 3 ch, which brings you to the center of the first loop. Ch 3 (counts as dc). In the same loop work (2 dc, ch 3, 3 dc) for the corner. Ch 2, sc in the next loop, ch 2. In the next loop work (3 dc, ch 3, 3 dc), ch 2, sc in the next loop, ch 2. Repeat from * 2 more times. Sl st to the top of the beginning ch-3. (24 dc, 4 sc, 8 ch-2 sps, 4 ch-3 corner sps)
Rnd 4 (frame): Ch 1. Sc in the same st and in the next 2 dc. In the corner sp work (sc, ch 2, sc). Sc in the next 3 dc, 2 sc in the ch-2 sp, sc in the sc, 2 sc in the next ch-2 sp, sc in the next 3 dc. Repeat from * around, leaving out the final 3 dc on the last repeat because you worked them at the start. Sl st to the first sc. Fasten off and leave a 12 in (30.5 cm) tail.
Each side has 1 corner sc + 3 + 2 + 1 + 2 + 3 + 1 corner sc = 13 sc. The total is 52 sc and 4 ch-2 corner sps.
Net Square (Make 2, Teal)
Rnd 1: Ch 4 and sl st to the first ch to form a ring. Ch 1, then work 8 sc into the ring. Sl st to the first sc. (8 sc)
Rnd 2 (net loops): Ch 1, sc in the same st, ch 6. Sc in the next st, ch 6. Repeat from * 6 more times, then sl st to the first sc. (8 sc, 8 ch-6 loops)
Rnds 3–4: Work exactly as Rnds 3 and 4 of the star square. (52 sc, 4 ch-2 corner sps, 13 sc per side)
The small sc center leaves open loops that look like the plain netting between the stars.
Star Triangle (Make 1, Teal)
Rnd 1: Make a magic ring. Ch 3 (counts as dc), work 11 dc into the ring, then sl st to the top of the ch-3. (12 dc)
Rnd 2: Ch 1, sc in the same st, ch 6, sk 1. Sc in the next st, ch 6, sk 1. Repeat from * 4 more times, then sl st to the first sc. (6 sc, 6 ch-6 loops)
Rnd 3: Sl st to the center of the first loop. Ch 3, then (2 dc, ch 3, 3 dc) in the same loop. Ch 2, sc in the next loop, ch 2. In the next loop work (3 dc, ch 3, 3 dc), ch 2, sc in the next loop, ch 2. Repeat from * once more, then sl st to the top of the ch-3. (18 dc, 3 sc, 6 ch-2 sps, 3 ch-3 corner sps)
Rnd 4: Work as Rnd 4 of the square, with 3 corners. (39 sc, 3 ch-2 corner sps, 13 sc per side)
Because each side holds 13 sc, the triangle’s top edge exactly fills the 1.5 in (3.8 cm) gap between the legs.
Make All Pieces
- Teal: 4 star squares, 2 net squares, 1 star triangle
- Cream: 1 flower
- Dark green: 3 leaves
Lay the motifs out right side up, like this:
[Star]          [Star]
[Net ]  \Tri/   [Net ]
[Star]          [Star]
The triangle points down. Its two top corners touch the bottom inner corners of the top star squares, which are also the top inner corners of the net squares. Its top edge forms the floor of the notch, 1.5 in (3.8 cm) below the leg tops.
Joining
Legs: Put the bottom star square and the net square right sides together. With teal and working through the BLO of both pieces, sl st from corner ch-2 sp to corner ch-2 sp: 1 sl st in the matched corner sps, 1 sl st in each of the 13 pairs of sc, and 1 sl st in the matched corner sps. That is 15 sl st, with 13 sc matched stitch to stitch. Join the top star square to the net square the same way. Repeat for the second leg.
Triangle: Lay both legs flat with a 1.5 in (3.8 cm) gap between them. Using a tail, sew the triangle’s top-left corner ch-2 sp to the left leg’s seam corner (the two joined corner sps on the inner side). Take 3 firm stitches, then 1 stitch into the sc on each side. Repeat on the right.
Tension: Keep the seam sl sts as loose as the sc under them. If they’re too tight, the leg will cup.
Checkpoint: The assembled body measures 4.5 in x 4.5 in (11.4 cm x 11.4 cm). The V point sits 2.8 in (7.1 cm) below the leg tops.
Border
Border gauge: 1 border sc per edge sc. At each convex corner (one that points outward), work ch 2 and add no sc. At each concave corner (one that turns inward), go straight from the last sc of one edge to the first sc of the next. Never work into ch-2 sps that are joined at a seam.
The outline has 19 motif edges of 13 sc, 9 convex corners, and 4 concave corners.
Rnd 1: Join teal in the first sc of the left leg’s outer side, just above the bottom-left corner. Work 1 sc in each sc and ch 2 at each convex corner, as follows:
- Left outer side: 3 squares x 13 = 39 sc
- Left top: 13 sc
- Down the inner side of the top-left square: 13 sc
- Triangle top edge (notch floor, concave at both ends): 13 sc
- Up the inner side of the top-right square: 13 sc
- Right top: 13 sc
- Right outer side: 39 sc
- Right bottom: 13 sc
- Up the right inner side (2 squares): 26 sc
- Triangle right slant: 13 sc, then ch 2 at the V point
- Triangle left slant: 13 sc
- Down the left inner side: 26 sc
- Left bottom: 13 sc
Sl st to the first sc. (247 sc, 9 ch-2 corner sps) As a check, 19 x 13 = 247.
Rnd 2: Ch 1. Rev sc in each sc and 2 rev sc in each convex ch-2 sp. Sl st to the first st. (247 + 18 = 265 rev sc) Fasten off.
Why the math works: Each edge has exactly as many border sts as motif sts, so the edges stay flat. The ch-2 corners give each outward point room to turn without flaring. The concave corners take no extra sts, so the notch and the inner angles stay tight and sharp.
Hanging loop: Join teal in the 7th (center) sc of the triangle’s top edge. Ch 36, sl st in the same st, then sl st in each ch back along the loop to the base. Fasten off. The loop stands about 2 in (5.1 cm) tall.
Flower and Leaves
Flower (cream): Make a magic ring and work 5 sc into it. Sl st to the first sc. For each petal: ch 6. Working down the chain, starting in the 2nd ch from the hook, work sl st, sc, hdc, dc, dc. Sl st in the next sc of the ring. Repeat 5 times. (5 pointed petals) The flower measures about 1.25 in (3.2 cm) across. Sew 3 gold beads in a cluster at the center.
Leaf (make 3, green): Ch 8. Starting in the 2nd ch from the hook, work sl st, sc, hdc, dc, hdc, sc. In the last ch work (sc, ch 2, sc) for the tip. Working along the other side of the chain, work sc, hdc, dc, hdc, sc, sl st. (14 sts plus a ch-2 tip) Each leaf is about 1 in (2.5 cm) long.
Layering: Fan the 3 leaves out from the top-right outer corner of the M, with the tips extending about 0.25 in (0.6 cm) past the border. Sew them down. Then sew the flower on top so it covers the leaf bases.
Final Blocking
- Weave in all ends. If your thread might shrink, wait until after blocking to sew on the flower and leaves.
- Mist the ornament until it is evenly damp.
- Pin it right side up to 5 in x 5 in (12.7 cm x 12.7 cm). Place a pin at each of the 9 convex corners and 4 concave corners.
- Open each star point and net loop with a pin tip.
- Pin the loop straight up.
- Spray lightly with starch if you want, then let it dry completely.
- Unpin, and sew on the flower and leaves if you haven’t already.
Final Quality-Control Checklist
- Each square has 13 sc per side, and the triangle has 13 per side.
- Seams lie flat, with no puckers.
- Border Rnd 1 has 247 sc, and Rnd 2 has 265 rev sc.
- The notch floor sits 1.5 in (3.8 cm) below the leg tops.
- The finished ornament measures 5 in x 5 in (12.7 cm x 12.7 cm).
- The loop is centered over the notch.
- The flower and leaves are secure, and the beads don’t wobble.
Troubleshooting
- Square cups: Rnd 3 chains are too tight. Loosen them, or add 1 ch to each ch-2.
- Square ruffles: Your tension is loose. Go down a hook size.
- Border flares at corners: Change the corner to ch 1.
- Notch closes up: You added sts at a concave corner. Rework it with none.
- Triangle droops: Add a second tack through the corner seam.
- Loop twists: Pin it straight while blocking.
Care
Hand wash in cool water with mild soap, press out the water in a towel, and reshape it flat to dry. Store it flat, away from sunlight.
Final Notes
Here is the measurement chain: one 1.5 in (3.8 cm) motif with 13 sc per side, legs of 3 squares measuring 4.5 in (11.4 cm), a triangle that fills the 1.5 in (3.8 cm) gap, 247 border sc that match the 19 edges, and a 0.25 in (0.6 cm) border that brings the ornament to 5 in x 5 in (12.7 cm x 12.7 cm). If your first square measures correctly, everything after it will fit.
Happy crocheting!