

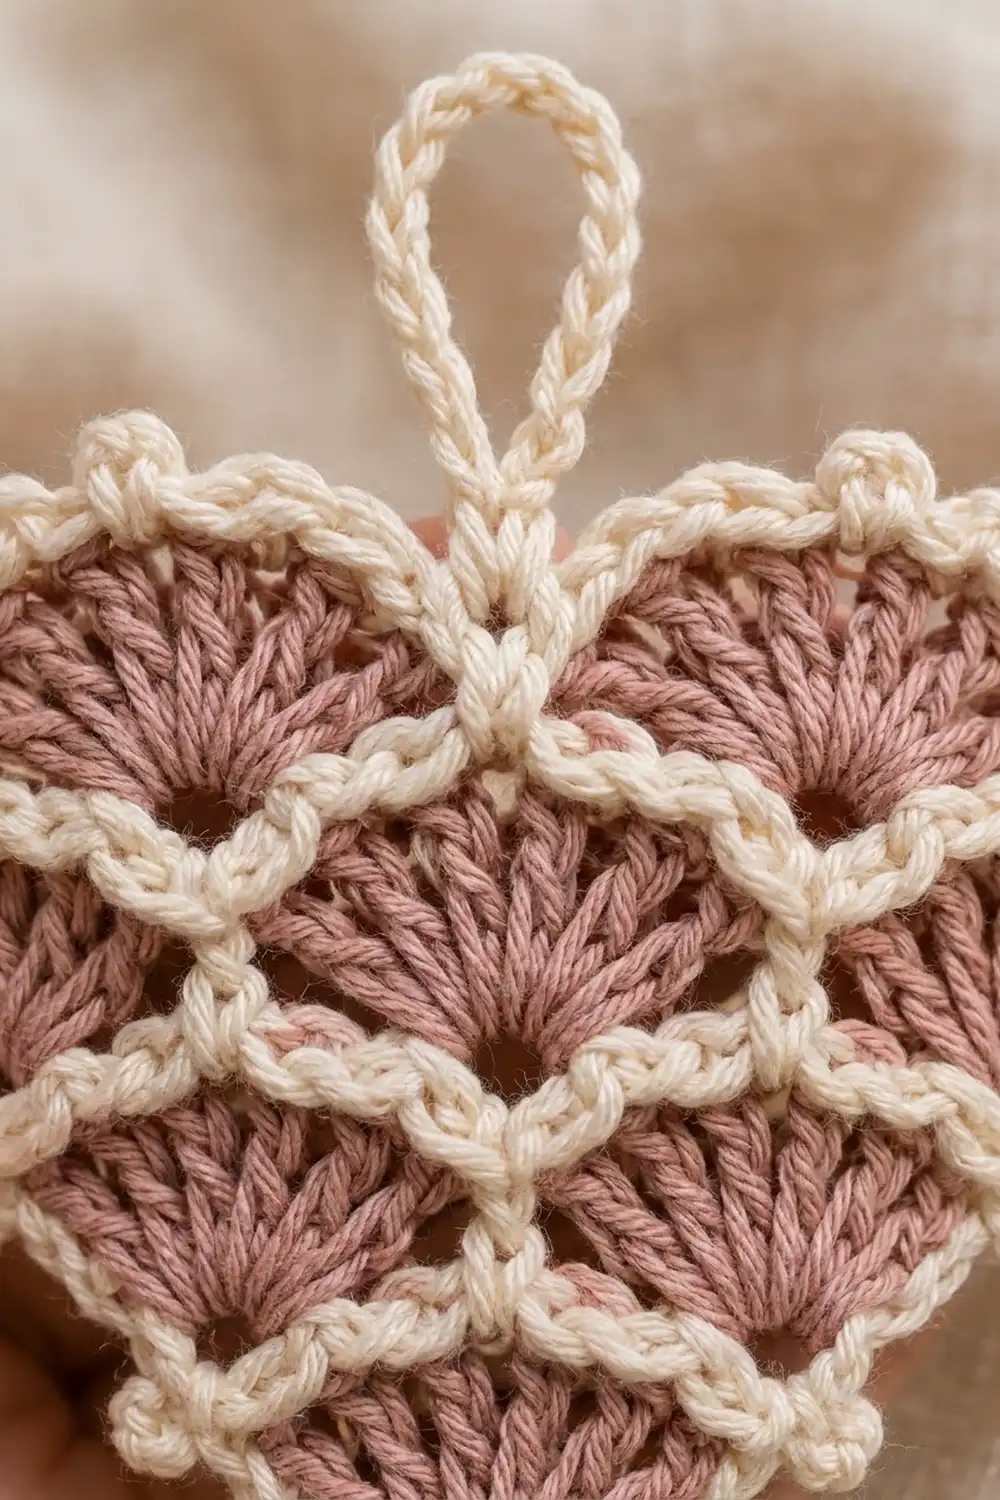
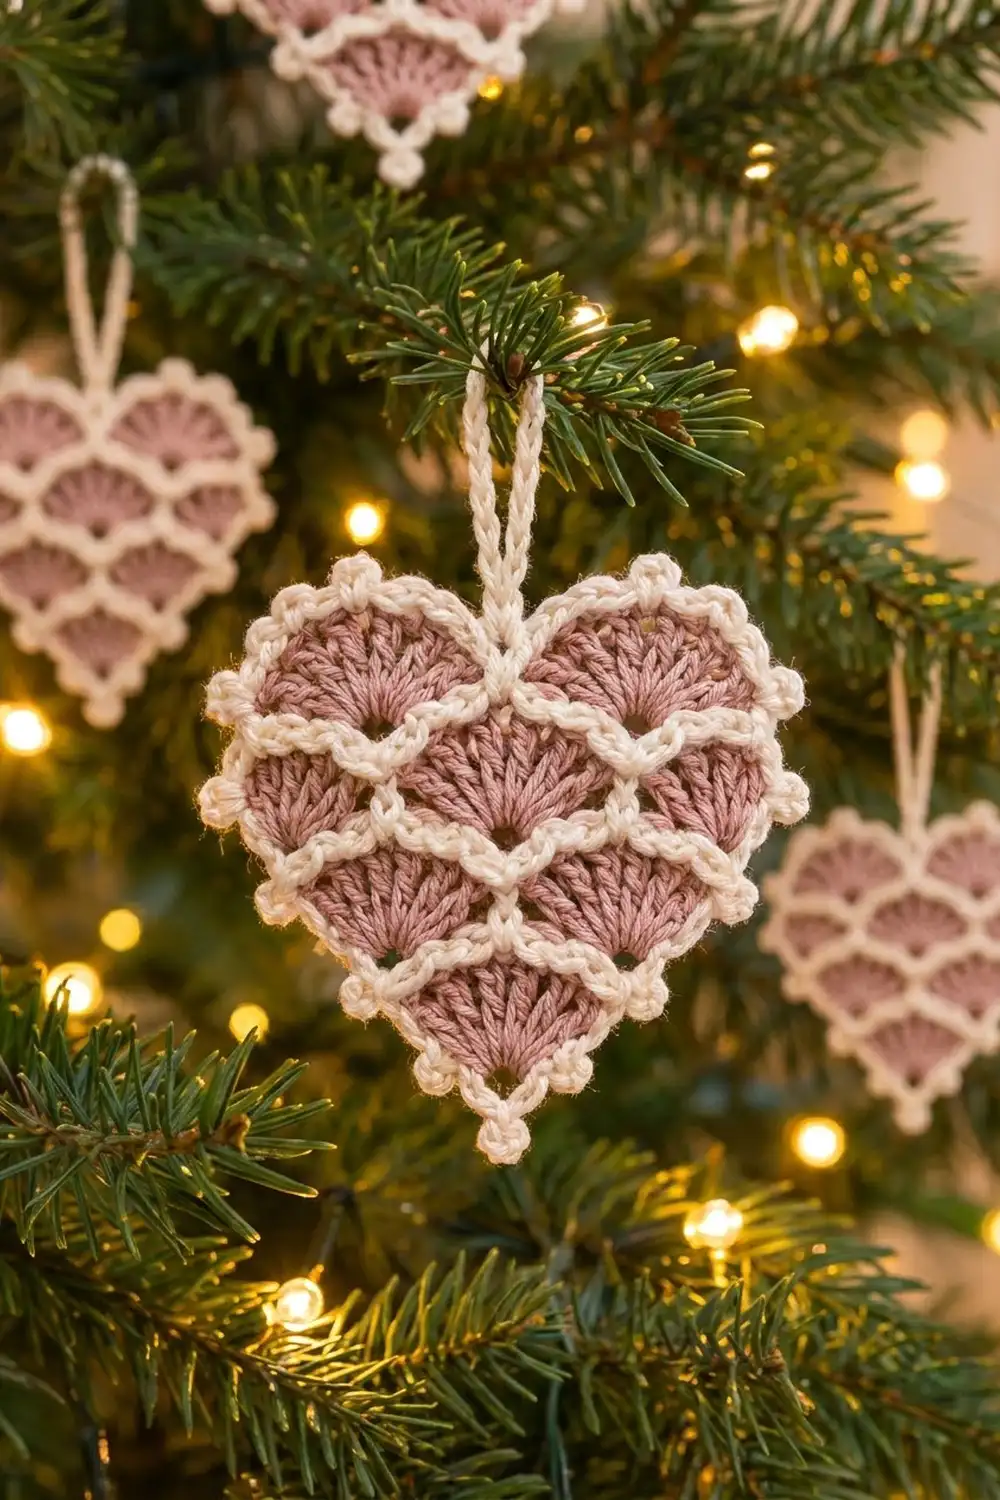
The Rosy Scales Heart is a small, lacy ornament. Dusty rose fans are stacked like fish scales, and each fan is framed with a corded cream outline. A row of tiny picots edges the heart, and a sturdy cream loop at the top dip lets it hang straight on a tree branch, a door handle, or a gift.
The two colors give it a soft, vintage look: muted rose against warm cream. The fans have a gentle sunburst texture, and the cream frames make the scale pattern easy to see from across the room.
This pattern uses US crochet terms. The finished heart measures 3.5 in (8.9 cm) wide and 3.25 in (8.3 cm) tall, not counting the 1.25 in (3.2 cm) hanging loop.
You make the heart in one piece from the bottom point up, in rows. Rose fan rows alternate with two-row cream frame tiers. A cream picot border goes around the whole heart, and the hanging loop is worked last.
Finished Size and Construction
- Finished size: 3.5 in (8.9 cm) wide × 3.25 in (8.3 cm) tall
- Hanging loop: 1.25 in (3.2 cm) long
- Skill level: Intermediate (simple stitches with careful placement)
- Terminology: US
- Yarn weight: Sport (#2) cotton
- Hook: 2.75 mm (C-2)
- Number of pieces: 1
- Layout: fan tiers of 1, 2 and 3 fans, then 2 lobe fans at the top
- Size before border: 3 in (7.6 cm) wide × 2.75 in (7.0 cm) tall
- Border depth: 0.25 in (0.6 cm) on every edge
Materials
Use a smooth, mercerized sport-weight cotton. It shows the stitches clearly and holds its shape after blocking. Avoid fuzzy or very splitty yarn, because the fan stitches all go into the same stitch and need to stay distinct.
- Color A, Dusty Rose: 5 g, about 16 m
- Color B, Cream: 7 g, about 22 m
These amounts include a safety margin for tails and a test swatch.
Tools
– 2.75 mm (C-2) crochet hook
– Tapestry needle
– Scissors
– Rust-proof pins and a blocking mat
– Spray bottle with water
– Ruler or tape measure
– 2 stitch markers
Abbreviations (US Terms)
- ch – chain
- sl st – slip stitch
- sc – single crochet
- dc – double crochet
- sk – skip
- sp – space
- st(s) – stitch(es)
- RS / WS – right side / wrong side
Special stitches
– Fan: 7 dc worked into the same stitch.
– Lobe fan: 11 dc worked into the same stitch.
– Picot: ch 3, sl st in the 3rd ch from the hook.
Gauge and Checkpoints
This is a small piece, so work Rows 1–3 first and measure them before continuing. That first tier is your gauge.
Gauge: After Row 3, the piece measures 1 in (2.5 cm) wide × 0.75 in (1.9 cm) tall.
Checkpoints
– After Row 3: 1 in (2.5 cm) wide × 0.75 in (1.9 cm) tall
– After Row 6: 1.75 in (4.4 cm) wide × 1.5 in (3.8 cm) tall
– After Row 9: 2.5 in (6.4 cm) wide × 2.25 in (5.7 cm) tall
– After Row 12: 3 in (7.6 cm) wide × 2.75 in (7.0 cm) tall
– After the border: 3.5 in (8.9 cm) wide × 3.25 in (8.3 cm) tall
If your piece is too big, go down to a 2.5 mm hook. If it’s too small, go up to a 3 mm hook. Most size problems come from loose dc fans, so also check that each fan’s stitches lie flat and don’t ruffle.
Pattern
Notes on Color Changes
The rose yarn is carried up the side and stays attached the whole time. After each fan row, drop it and pick it up again for the next fan row. The cream yarn is fastened off at the end of each two-row frame tier and rejoined for the next one. Crochet over the cream tails as you go to cut down on weaving later.
The fan rows alternate between RS and WS. Double crochet looks almost the same on both sides, so this doesn’t change the finished look.
Tier 1: Bottom Point
Row 1 (RS, Color A): Make a magic ring. Ch 3 (counts as dc), work 6 dc into the ring, and pull the ring closed. (7 dc, 1 fan) Don’t turn. Drop Color A without cutting it.
Row 2 (WS, Color B): Join Color B in the last dc of Row 1 (the top of the 7th dc). Ch 1, sc in the same dc, ch 3, sk 2 dc, sc in the next dc (the center, 4th dc), ch 3, sk 2 dc, sc in the last dc (the top of the beginning ch-3). Turn. (3 sc + 2 ch-3 sps)
Row 3 (RS, Color B): Ch 1, sc in the first sc, 4 sc in the ch-3 sp, sc in the next sc, 4 sc in the ch-3 sp, sc in the last sc. (11 sc) Fasten off Color B.
The sc that sit on top of Row 2’s sc are your anchor stitches: sc 1 (edge), sc 6 (center), and sc 11 (edge). Mark sc 1 and sc 11.
Checkpoint: 1 in (2.5 cm) wide × 0.75 in (1.9 cm) tall.
Tier 2: Two Fans
Row 4 (WS, Color A): Pick up Color A, which is waiting at the sc 11 end. Ch 3 (counts as dc), 6 dc in sc 11, sk 4 sc, sc in sc 6, sk 4 sc, 7 dc in sc 1. Turn. (2 fans + 1 sc = 15 sts)
The two edge fans open outward and upward. This is what widens the heart. The single rose sc in the middle pins the “V” between the fans.
Row 5 (RS, Color B): Join Color B in the last dc made. For each fan: [sc in dc 1, ch 3, sk 2 dc, sc in dc 4, ch 3, sk 2 dc, sc in dc 7]. Skip the rose sc between the fans, so the two fans’ end sc sit side by side. Turn. (6 sc + 4 ch-3 sps)
Row 6 (WS, Color B): Ch 1, sc in each sc and 4 sc in each ch-3 sp across. (22 sc, 11 per fan frame) Fasten off Color B.
Each frame now has anchors at its sc 1, sc 6, and sc 11. Where the two frames meet, frame A’s sc 11 sits right next to frame B’s sc 1. This pair is the junction.
Checkpoint: 1.75 in (4.4 cm) wide × 1.5 in (3.8 cm) tall.
Tier 3: Three Fans
Row 7 (RS, Color A): Pick up Color A. Ch 3 (counts as dc), 6 dc in sc 1 of frame A (the edge), sc in sc 6 of frame A, 7 dc in the space between the two junction sc, sc in sc 6 of frame B, 7 dc in sc 11 of frame B (the edge). Turn. (3 fans + 2 sc = 23 sts)
Row 8 (WS, Color B): Join Color B in the last dc made. Repeat the Row 5 frame over each fan, skipping the rose sc. (9 sc + 6 ch-3 sps)
Row 9 (RS, Color B): Ch 1, sc in each sc and 4 sc in each ch-3 sp. (33 sc: frames A, B and C, 11 each) Fasten off Color B.
Checkpoint: 2.5 in (6.4 cm) wide × 2.25 in (5.7 cm) tall.
Tier 4: Top Lobes
Row 10 (WS, Color A): Pick up Color A. Sl st in sc 1 of frame A, sk 4 sc, 11 dc in sc 6 of frame A (lobe fan), sk 10 sc (sc 7–11 of A and sc 1–5 of B), sc in sc 6 of frame B, sk 10 sc (sc 7–11 of B and sc 1–5 of C), 11 dc in sc 6 of frame C (lobe fan), sk 4 sc, sl st in sc 11 of frame C. Turn. (22 dc + 1 sc + 2 sl st = 25 sts)
Check that every stitch of Row 9 is accounted for: 1 + 4 + 1 + 10 + 1 + 10 + 1 + 4 + 1 = 33. The sc in the center of frame B forms the heart’s top dip. The two large fans sweep outward to round off the shoulders.
Row 11 (RS, Color B): Join Color B in the last dc made. For each lobe fan: [sc in dc 1, ch 3, sk 2 dc, sc in dc 4, ch 3, sk 3 dc, sc in dc 8, ch 3, sk 2 dc, sc in dc 11]. Skip the center rose sc and both end sl sts. Turn. (8 sc + 6 ch-3 sps)
Row 12 (WS, Color B): Ch 1, sc in each sc and 4 sc in each ch-3 sp. (32 sc, 16 per lobe) Fasten off Color B. Fasten off Color A at the side edge.
Checkpoint: 3 in (7.6 cm) wide × 2.75 in (7.0 cm) tall. Weave in all the rose ends now.
Border
Border gauge: 7 sc = 1 in (2.5 cm) along the edge.
Rnd 1 (Color B): With RS facing, join Color B in the center sc of the top dip (the first sc of Lobe 1, next to the center). Ch 1. Then:
- Lobe 1 top: sc in each of the 16 sc. (16)
- Side 1, working down the row ends: 1 sc in each end of Rows 12, 11, 10, 9 and 8; 3 sc around the end dc of Row 7; 1 sc in each end of Rows 6 and 5; 3 sc around the end dc of Row 4; 1 sc in each end of Rows 3 and 2; 3 sc around the end dc of Row 1. (18)
- Bottom tip: 3 sc into the base of the magic ring. (3)
- Side 2, working up: repeat the Side 1 placement in reverse order. (18)
- Lobe 2 top: sc in each of the 16 sc. (16)
Sl st to the first sc. (71 sc)
Numbered around the heart, the stitches fall like this: Lobe 1 is sts 1–16, Side 1 is 17–34, the tip is 35–37 (with st 36 as the exact point), Side 2 is 38–55, and Lobe 2 is 56–71.
Rnd 2: Ch 1, sc in the first 5 sc, [sc in the next sc, picot, sc in the next 4 sc] 13 times, sc in the last sc. Sl st to the first sc. (71 sc + 13 picots)
Why the math works: The picots land on sts 6, 11, 16 … 66, every 5th stitch. That places one exactly on the tip (st 36), one on each outer lobe corner (sts 16 and 56), and a matching pair on each side. The heart is mirror-symmetric because 6 and 66 are each 6th from their end of a 71-stitch round. No picot lands in the top dip, so the hanging loop has a clean spot. The edge before the border measures about 10 in (25.4 cm), and 10 × 7 = 70, so 71 sc lies flat without cupping or ruffling.
Hanging loop: Don’t fasten off. Ch 22, then sl st in the same first sc to form the loop. Work 30 sc into the ch-22 loop to make it thick and corded, then sl st in the first sc of Rnd 2. Fasten off. The loop measures 1.25 in (3.2 cm).
Final Blocking
- Weave in all remaining cream ends through the cream frames so they stay hidden.
- Lightly mist the heart until it’s damp but not soaked.
- Lay it RS up on the blocking mat and gently shape the two lobes into even curves.
- Pin the bottom tip, the two lobe corners, and each side picot, as shown on the mat.
- Check the measurements: 3.5 in (8.9 cm) wide and 3.25 in (8.3 cm) tall.
- Open each fan so its stitches radiate evenly, and straighten the cream junction lines.
- Pull the hanging loop straight up from the dip and pin it flat.
- Leave it to dry completely, at least 4 hours, before unpinning.
Final Quality-Control Checklist
- Fan count is 1, 2, 3, then 2 lobe fans.
- Every fan has 7 dc (11 dc for the lobes).
- Frame rows totals are 11, 22, 33 and 32 sc.
- Border Rnd 1 has 71 sc, and Rnd 2 has 13 picots.
- There’s a picot on the bottom tip and one on each lobe corner.
- The heart measures 3.5 in (8.9 cm) × 3.25 in (8.3 cm).
- The loop is centered in the dip and 1.25 in (3.2 cm) long.
- No ends are visible on the RS.
Troubleshooting
Fans ruffle or curl: Your dc are too tall or loose. Go down a hook size, or keep your yarn-overs shorter.
Gaps between frame and fan: Tighten the sc into the ch-3 spaces, and make sure you work exactly 4 sc per space.
Heart leans to one side: Count the anchors again. Each edge fan has to go into the outermost sc 1 or sc 11, not the stitch next to it.
Lobes look flat: Check that each lobe fan has 11 dc all in the single center sc. Then re-block with pins pulling the lobe curves outward.
Border cups: You probably added extra sc along the sides. Each side should have exactly 18.
Border ruffles: Too few stitches can pull the edge, while extra picot chain length makes it ruffle. Check that each picot is exactly ch 3.
Care
Hand wash in cool water with mild soap, press out the water in a towel, and re-pin to dry flat. Store it flat or hanging so the lobes keep their shape.
Final Notes
The measurement chain is simple. The 1 in (2.5 cm) first tier grows to 1.75 in (4.4 cm), then 2.5 in (6.4 cm), then 3 in (7.6 cm) across the lobes. The 0.25 in (0.6 cm) border on every edge brings the finished heart to 3.5 in (8.9 cm) × 3.25 in (8.3 cm). If you match the first checkpoint, the rest will follow. Make one for every branch, or tie one onto a special gift.
Happy crocheting!