

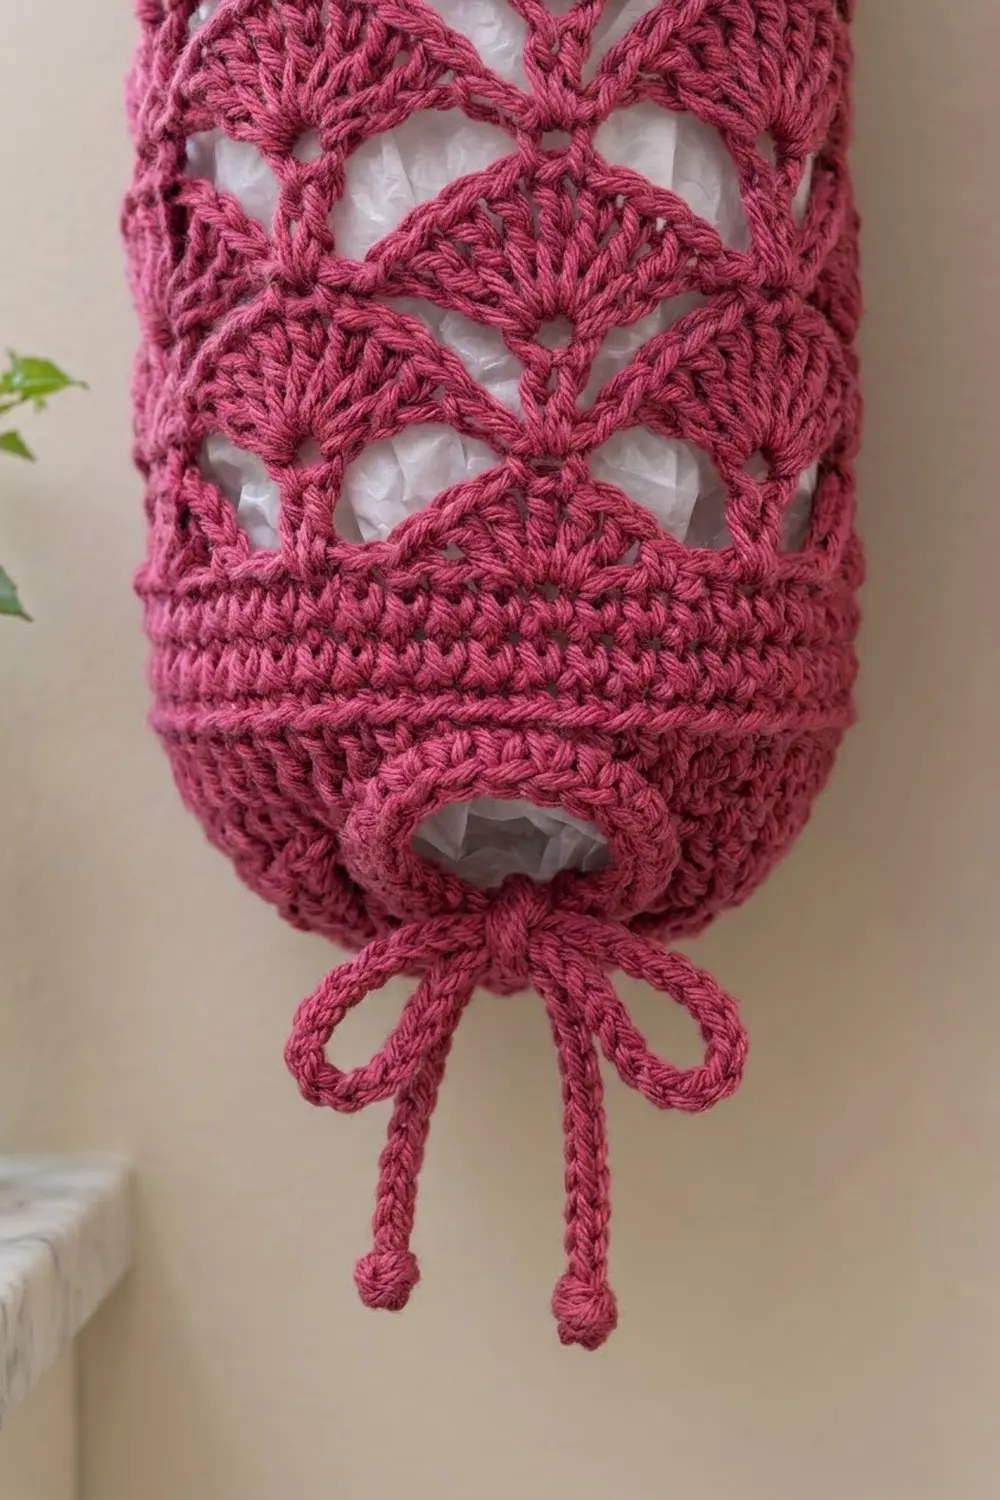
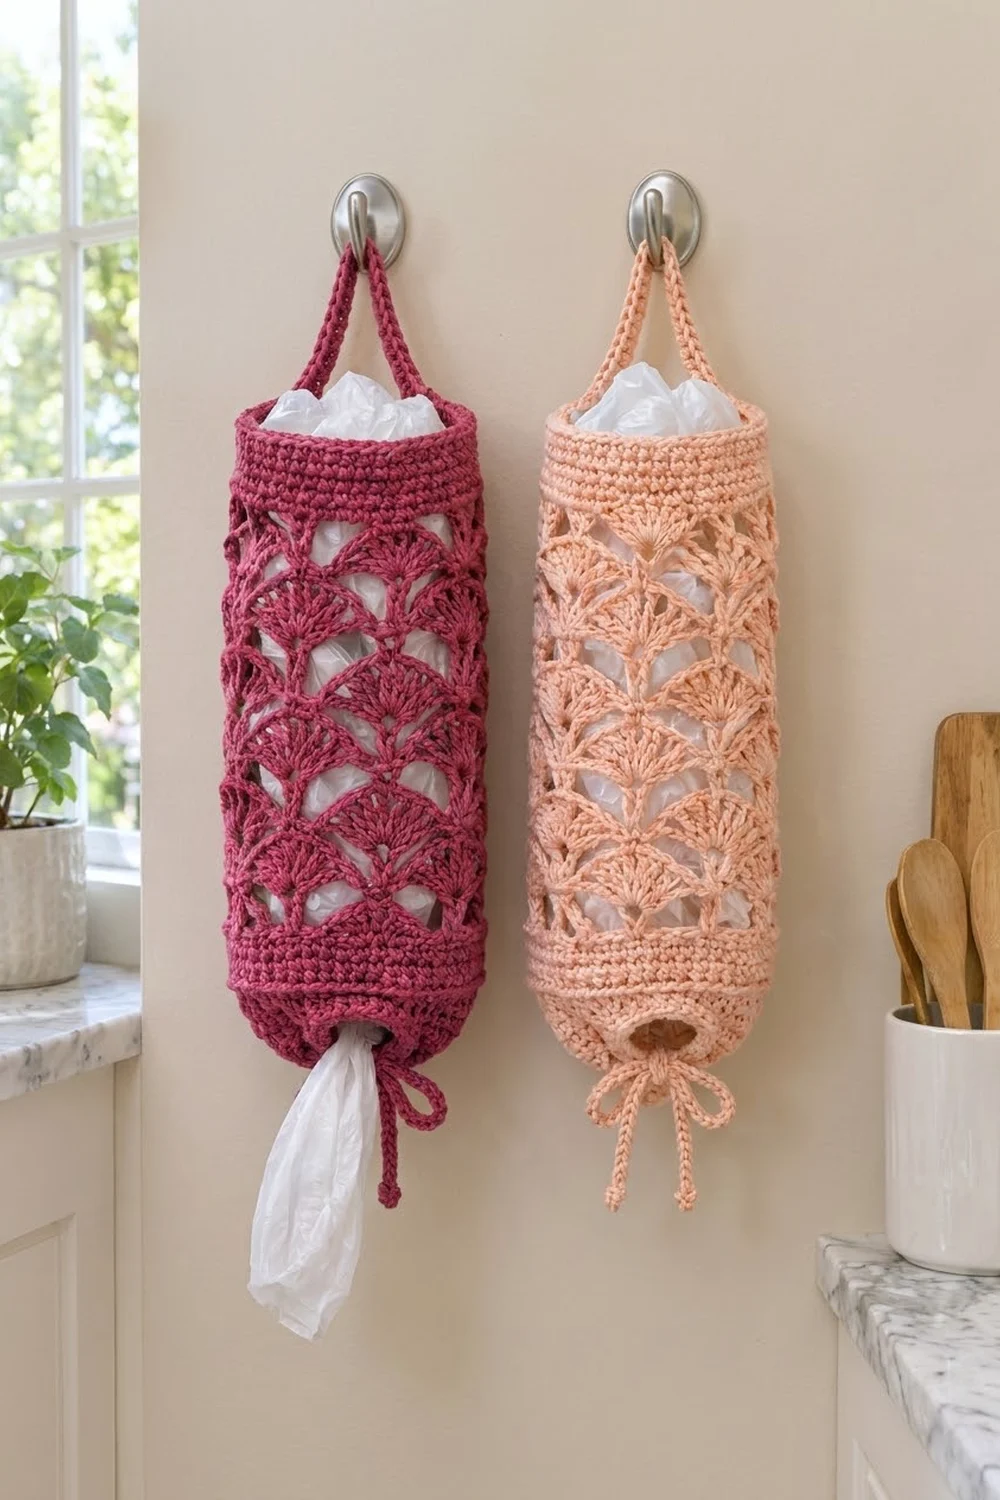
This plastic bag holder turns a messy drawer of grocery bags into a tidy kitchen accessory. The tall tube is covered in stacked scallop fans that open up like a lattice. You can see the bags inside and know at a glance when it is time to restock.
The sample colors are a deep raspberry pink and a soft peach, but any sturdy cotton works. Solid bands at the top and bottom keep the shape crisp. A narrow strap hangs the holder from a hook, and a chain drawstring closes the bottom opening so you can pull out one bag at a time.
This pattern uses US crochet terms. The finished holder measures 8 in (20.3 cm) wide when laid flat, 16 in (40.6 cm) around, and 15.75 in (40.0 cm) tall, not counting the strap.
The holder is worked in one piece with no seams. You start at the bottom opening with a chain ring, then work an eyelet round, two increase rounds, a solid band, and 12 rounds of scallop lace. A shaping round levels the tops of the fans, and a solid top band finishes the rim. The strap is worked straight up from the rim and sewn to the opposite side.
Finished Size and Construction
- Finished size: 8 in (20.3 cm) wide flat x 15.75 in (40.0 cm) tall; circumference 16 in (40.6 cm)
- Skill level: Easy-intermediate
- Terminology: US crochet terms
- Yarn weight: Worsted (#4), cotton or cotton blend
- Hook: US H-8 (5 mm)
- Number of pieces: 1 (tube with the strap worked on; the drawstring is a separate chain cord)
- Layout: Single vertical tube, worked bottom to top in joined rounds
- Piece size before top band: 12.5 in (31.8 cm) tall
- Top band (border) depth: 3.25 in (8.3 cm)
- Strap: 1.25 in (3.2 cm) wide x 14 in (35.6 cm) long, forming a loop about 6 in (15.2 cm) high
Materials
Choose a smooth worsted-weight cotton. Cotton holds its shape under the weight of the bags and shows the fan stitches clearly. Acrylic also works, but it will stretch more over time.
Medium and darker shades hide kitchen marks well. Pale shades like the peach sample show the white bags behind the lace more strongly, which shows off the fans.
- Main color (Raspberry or Peach): 120 g / about 210 m (230 yd) for one holder, including the drawstring
- To make the matching second holder in the other colorway, buy another 120 g / 210 m of that color.
These quantities include a margin of about 15 percent for your gauge swatch and differences in tension.
Tools:
- US H-8 (5 mm) crochet hook
- Stitch marker
- Tapestry needle
- Scissors
- Measuring tape
- Spray bottle and a rolled towel for blocking
Abbreviations (US Terms)
- ch – chain
- sl st – slip stitch
- sc – single crochet
- hdc – half double crochet
- dc – double crochet
- tr – treble crochet
- sk – skip
- sp – space
- st(s) – stitch(es)
Special stitch – Fan: In the same stitch, work (dc, ch 1) 4 times, then 1 more dc. Each Fan has 5 dc and 4 ch-1 spaces. The 3rd dc is the center dc.
Gauge and Checkpoints
Gauge:
- 16 sc and 18 rounds = 4 in (10.2 cm)
- 16 hdc and 10 rounds = 4 in (10.2 cm)
- Lace: 1 pattern repeat (8 sts) = 2 in (5.1 cm) wide; 4 lace rounds = 3 in (7.6 cm) tall
Start with a small hdc swatch about 5 in (12.7 cm) square and measure across the center, away from the edges. Then treat the first 10 rounds of the holder as your real test piece. A tube’s width is easy to check at that point, and you can rip back only a few rounds if needed.
Width matters more than height here. A holder that is too narrow holds fewer bags. One that is too wide sags on the hook.
Checkpoints:
- After Rnd 5, the tube has 64 sts and measures 8 in (20.3 cm) wide when flattened.
- After Rnd 10, the bottom band measures 3.5 in (8.9 cm) tall.
- After Lace Rnd 12, the lace section measures 9 in (22.9 cm) and the piece is 12.5 in (31.8 cm) tall.
- After Top Rnd 8, the holder measures 15.75 in (40.0 cm) tall.
If your piece is too big, go down to a G-6 (4 mm) hook. If it is too small, go up to an I-9 (5.5 mm) hook. Get the gauge right at Checkpoint 1, and the lace will follow.
Pattern
Work in joined rounds with the right side facing you at all times. The beginning ch 1 does not count as a stitch. Beginning chains of 3 or more count as a stitch where noted. Place a marker in the first stitch of each round.
Bottom Opening and Base
Foundation: Ch 32, then sl st to the first ch to form a ring. Do not twist the chain.
Rnd 1: Ch 1, sc in each ch around, sl st to first sc. (32 sc)
Rnd 2 (eyelet round): Ch 4 (counts as dc + ch 1), sk next st, dc in next st, ch 1, sk next st 15 times, sl st to 3rd ch of beginning ch-4. (16 dc + 16 ch-1 sps = 32 sts)
Rnd 3: Ch 1, sc in each dc and each ch-1 sp around, sl st to first sc. (32 sc)
Rnd 4: Ch 1, sc in next st, 2 sc in next st 16 times, sl st to first sc. (48 sc: 32 worked + 16 added)
Rnd 5: Ch 1, sc in next 2 sts, 2 sc in next st 16 times, sl st to first sc. (64 sc: 48 worked + 16 added)
These two increase rounds create the gentle taper at the bottom of the holder.
Bottom Band
Rnds 6–10: Ch 1, hdc in each st around, sl st to first hdc. (64 hdc each round)
Check: the bottom band measures 3.5 in (8.9 cm) from the foundation.
Scallop Lace Body
Lace Rnd 1: Ch 1, sc in first st, ch 2, sk 3 sts, Fan in next st, ch 2, sk 3 sts, sc in next st 8 times, leaving out the last sc on the final repeat; sl st to first sc. (8 Fans, 8 sc, 16 ch-2 sps)
Each repeat uses exactly 8 sts: 1 sc + 3 skipped + 1 Fan stitch + 3 skipped. Eight repeats use all 64 sts.
Lace Rnd 2: Sl st in next ch-2 sp, then sl st in each dc and ch-1 sp across to the center dc of the first Fan (6 sl sts total). Ch 1, sc in same center dc, ch 2, Fan in next sc, ch 2, sc in center dc of next Fan 8 times, leaving out the last sc on the final repeat; sl st to first sc. (8 Fans, 8 sc, 16 ch-2 sps)
Lace Rnds 3–12: Repeat Lace Rnd 2. (8 Fans each round)
Each new tier of Fans grows from the sc between the Fans below it, and each sc is anchored in the center of a Fan. That offset creates the stacked scallop lattice. Keep the ch-2 spaces relaxed so the lace can open up during blocking.
Check: the lace section measures 9 in (22.9 cm), and the piece is 12.5 in (31.8 cm) tall.
Top Band (Border)
Work the Top Rounds now, following the Border section below. Then come back here for the strap.
Strap
With the right side facing, flatten the tube so the beginning of the round is at one side fold. Join the yarn in st 1 of Top Rnd 8.
Row 1: Ch 1, sc in sts 1–5, turn. (5 sc)
Row 2 and following: Ch 1, sc in each st across, turn. (5 sc)
Repeat Row 2 until the strap measures 14 in (35.6 cm), about 63 rows. Fasten off, leaving a 12 in (30.5 cm) tail.
Without twisting the strap, sew the last row to sts 33–37 of Top Rnd 8. These sts sit exactly opposite sts 1–5 because 64 ÷ 2 = 32. The strap forms a loop about 6 in (15.2 cm) high. If you need a longer loop to reach your hook, add rows in pairs. The strap has about 4.5 rows per inch.
Drawstring
Ch about 96 sts, until the chain measures 24 in (61.0 cm). Fasten off. Tie an overhand knot at each end and trim the tails to 0.5 in (1.3 cm).
Weave the cord in and out of the 16 ch-1 spaces of Rnd 2, starting and ending at the front. Pull to close the opening to about 1.5 in (3.8 cm) across and tie a bow.
Border
The solid top band acts as the border. It turns the uneven tops of the Fans back into a level 64-stitch edge, then adds firm rounds that hold the rim open.
Border gauge: 16 hdc and 10 rounds = 4 in (10.2 cm), the same as the bottom band. When the tube is flattened, it has 32 sts on the front and 32 on the back.
Top Rnd 1 (leveling round): Sl st to first sc. Ch 4 (counts as tr), dc in next ch-2 sp, hdc in next dc, sk ch-1 sp, sc in next 3 dc (skipping the ch-1 sps between them), sk ch-1 sp, hdc in next dc, dc in next ch-2 sp, tr in next sc, dc in next ch-2 sp, hdc in next dc, sk ch-1 sp, sc in next 3 dc (skipping the ch-1 sps between them), sk ch-1 sp, hdc in next dc, dc in next ch-2 sp 7 times, sl st to top of beginning ch-4. (64 sts: 8 sts per repeat x 8 repeats; 32 per side)
The tall tr fills the low point above each sc. The short sc stitches sit on the high tops of the Fans, so the edge comes out level.
Top Rnds 2–7: Ch 1, hdc in each st around, sl st to first hdc. (64 hdc each round; 32 per side)
Top Rnd 8: Ch 1, sc in each st around, sl st to first sc. (64 sc; 32 per side) Fasten off and weave in the end.
Why the math works: The lace uses 8 repeats of 8 sts, and the leveling round puts back exactly 8 sts per repeat, for 64 total. That matches the bottom band, so the rim and base are the same width at 8 in (20.3 cm) flat. A tube has no corners, so no stitches are added at the side folds. The band depth is 0.6 in (1.5 cm) + 2.4 in (6.1 cm) + 0.25 in (0.6 cm) = 3.25 in (8.3 cm).
Final Blocking
- Weave in all ends. Leave the drawstring knots as they are.
- Roll a bath towel into a tube about 5 in (12.7 cm) across and slide it inside the holder.
- Spray the holder until it is damp but not dripping.
- Gently stretch the lace section lengthwise so the Fans open and each tier sits evenly over the one below.
- Pat the top and bottom bands smooth. Check that both are 8 in (20.3 cm) wide flat.
- Let it dry fully on the towel, standing upright.
- Spray the strap lightly and lay it flat to dry so it hangs straight.
Final Quality-Control Checklist
- The tube measures 8 in (20.3 cm) flat at both the bottom band and the top band.
- Total height is 15.75 in (40.0 cm), not counting the strap.
- Every lace round has 8 Fans, and each Fan sits centered over an sc.
- Top Rnd 1 has exactly 64 sts, and the rim is level.
- The strap is 5 sts wide, untwisted, and sewn to sts 33–37.
- The drawstring passes through all 16 eyelets and ties in a neat bow.
- All ends are woven in securely.
Troubleshooting
The bottom flares into a ruffle. Your increase rounds are too loose. Work Rnds 4–5 with a hook one size smaller.
The Fans look crowded or cupped. In Lace Rnd 1, make sure you skip exactly 3 sts on each side of every Fan. Skipping fewer crowds the Fans, and skipping more stretches them flat.
The Fans don’t line up in columns. Make sure every sc goes into the center (3rd) dc of a Fan, not the 2nd or 4th.
The round ends in the wrong place. Count your slip stitches at the start of Lace Rnd 2. There should be exactly 6.
The rim is wavy after Top Rnd 1. Count the round. It must have 64 sts. A missing tr leaves a dip, and extra sc make ripples.
The strap stretches too much. Use a smaller hook for the strap only, or work it with tighter tension.
Bags fall out of the bottom. Pull the drawstring tighter and double-knot the bow.
Care
Hand wash in cool water with mild soap, gently press out the water, and dry flat or over the rolled towel. Do not wring or tumble dry, because this can stretch the lace.
Final Notes
The whole holder follows one measurement chain. Gauge sets the 64-stitch tube at 8 in (20.3 cm) flat. The bottom band reaches 3.5 in (8.9 cm). The 12 lace rounds add 9 in (22.9 cm), for a 12.5 in (31.8 cm) piece. The 3.25 in (8.3 cm) top band brings the total to 15.75 in (40.0 cm). Check each step along the way, and the finished holder will hang straight and hold plenty of bags.
Happy crocheting!