

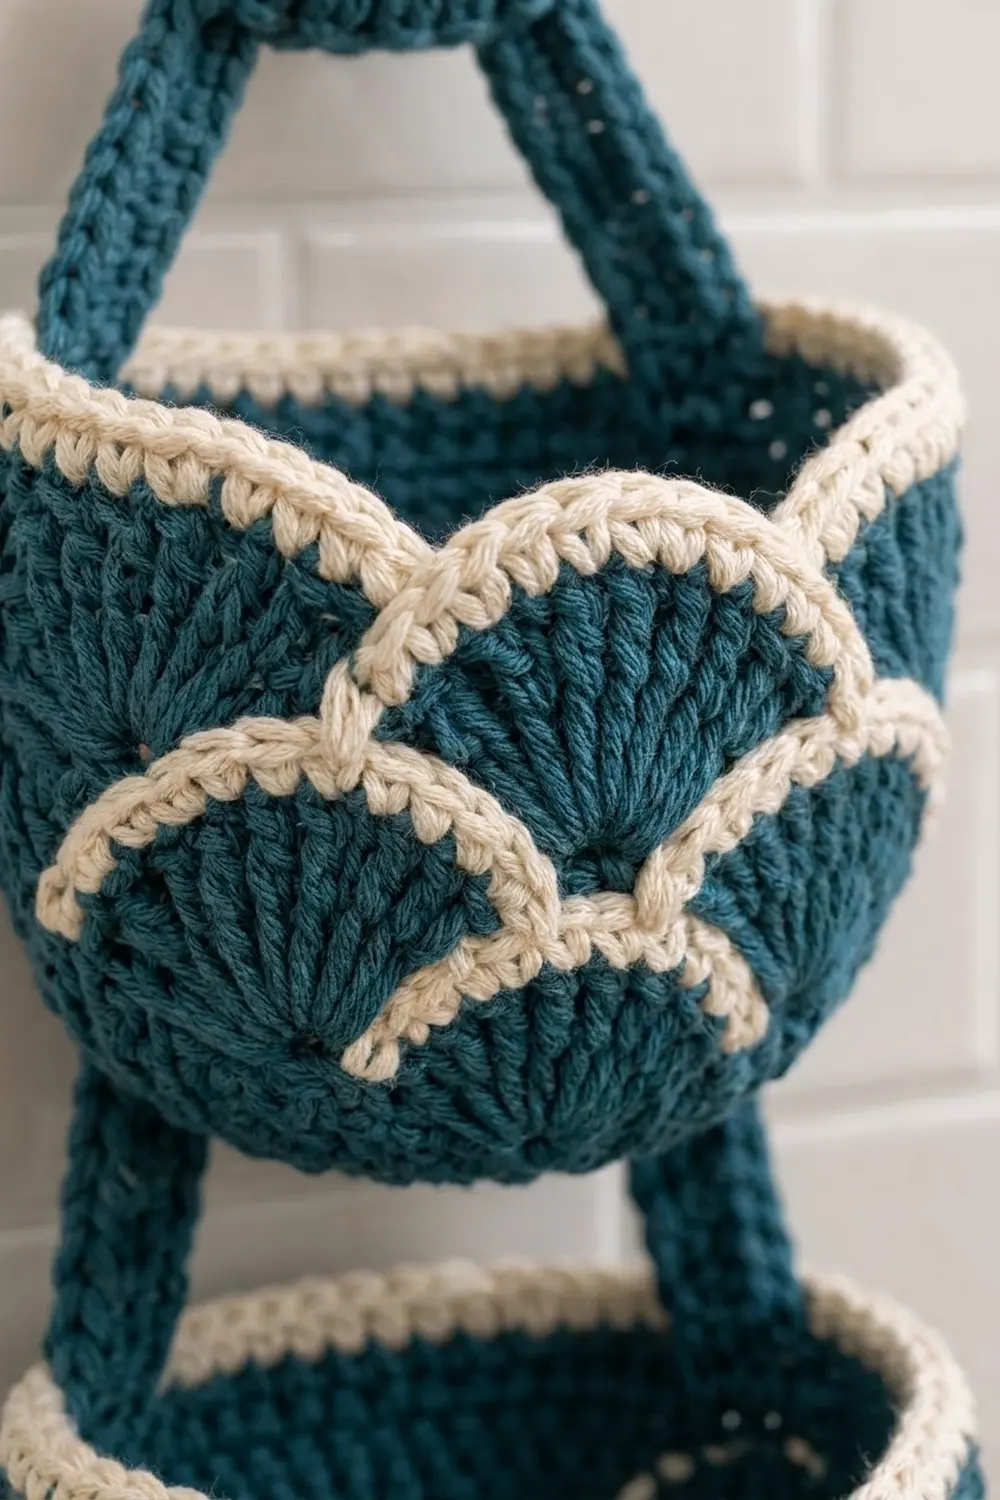
The Tidewater Scales holder is a three-tier hanging basket set that keeps three spare rolls on the wall. Each round basket has deep teal fans with crisp cream outlines, so the sides look like fish scales or rolling waves.
There are just two colors: deep teal for the body, straps and ring tab, and cream for the scale outlines and rims. A natural wooden ring at the top hangs on a towel hook or knob. The look is coastal and modern.
This pattern uses US crochet terms. The assembled holder is about 24.5 in (62.2 cm) long from the top of the ring to the bottom of the lowest basket. Each basket is about 6 in (15.2 cm) across at the rim and 4 in (10.2 cm) deep.
Construction is simple. You crochet three identical baskets from the bottom up in joined rounds, plus two long flat straps and one small tab. The tab wraps around the ring, and the straps run down both sides of the stack, sewn to each basket wall.
Finished Size and Construction
- Finished size: about 24.5 in (62.2 cm) long, 6 in (15.2 cm) wide
- Skill level: Intermediate (color changes, fan stitches, seaming)
- Terminology: US crochet terms
- Yarn weight: #4 medium (worsted/aran) cotton or cotton blend
- Hook: 5 mm (H-8)
- Number of pieces: 6 (3 baskets, 2 side straps, 1 ring tab), plus a wooden ring
- Layout: 3 baskets stacked in 1 vertical column
- Piece size: each basket 6 in (15.2 cm) across at the rim, 4 in (10.2 cm) deep
- Size before border: 3.6 in (9.1 cm) deep after Rnd 21
- Border depth: 2 rim rounds, about 0.4 in (1.0 cm)
Materials
Pick a firm cotton or cotton blend. It holds the bowl shape well, stands up to bathroom humidity and shows the fans clearly. Avoid splitty yarn, because you will work into the tops of the fans many times.
- Teal (Color A): 150 g / 255 m (based on 100 g = 170 m)
- Cream (Color B): 50 g / 85 m
These amounts include about 15 percent extra for your gauge test and seaming.
Tools:
- 5 mm (H-8) crochet hook
- Wooden ring, 3 in (7.6 cm) outer diameter
- Tapestry needle
- 8 locking stitch markers
- Scissors
- Measuring tape
- Rustproof pins and a blocking mat
Abbreviations (US Terms)
- ch – chain
- sl st – slip stitch
- sc – single crochet
- hdc – half double crochet
- dc – double crochet
- tr – treble crochet
- sc2tog – single crochet 2 together
- BLO – back loop only
- rev sc – reverse single crochet (crab stitch)
- sk – skip
- st(s) – stitch(es)
- Rnd(s) – round(s)
Fan: 7 dc worked into the same stitch.
Reverse sc (rev sc): Work from left to right. Insert the hook into the next stitch to the right, yarn over, pull up a loop, yarn over, then pull through both loops.
Gauge and Checkpoints
Gauge: 15 sc and 16 rnds = 4 in (10.2 cm) in sc worked in the round.
Make one full basket before you start the others. It is your real gauge test, and it shows you whether a roll fits.
Checkpoints:
- After Rnd 8: the base measures 4 in (10.2 cm) across.
- After Rnd 10: the base measures 5 in (12.7 cm) across.
- After Rnd 18: the wall is about 3 in (7.6 cm) tall from the Rnd 11 ridge.
- After Rnd 21: the wall is about 3.6 in (9.1 cm) tall, and the rim circumference is about 18.7 in (47.5 cm).
- After the border: the wall is about 4 in (10.2 cm) tall, and the rim is about 6 in (15.2 cm) across.
If your base is too big: go down to a 4.5 mm hook. If it is too small: go up to a 5.5 mm hook. A base under 4.5 in (11.4 cm) after Rnd 10 may not hold a standard roll.
Basket (Make 3)
Work in joined rounds without turning. Join each round with a sl st to the first st. Start each sc round with ch 1, which does not count as a st.
Base
With teal, make a magic ring.
Rnd 1: 6 sc in ring. (6)
Rnd 2: 2 sc in each st around. (12)
Rnd 3: (sc 1, 2 sc in next) 6 times. (18)
Rnd 4: (sc 2, 2 sc in next) 6 times. (24)
Rnd 5: (sc 3, 2 sc in next) 6 times. (30)
Rnd 6: (sc 4, 2 sc in next) 6 times. (36)
Rnd 7: (sc 5, 2 sc in next) 6 times. (42)
Rnd 8: (sc 6, 2 sc in next) 6 times. (48)
Rnd 9: (sc 7, 2 sc in next) 6 times. (54)
Rnd 10: (sc 8, 2 sc in next) 6 times. (60)
Checkpoint: the base is flat and 5 in (12.7 cm) across.
Wall Start
Rnd 11: Sc in BLO of each st around. (60) This makes a ridge where the wall turns up.
Rnd 12: Sc in each st around. (60) Fasten off teal.
Scale Tiers
The scales are three tiers of teal fans. A cream round outlines the top of each tier. Each new tier sits in the valleys of the tier below, which gives the overlapping scale look. Fasten off at the end of each round and weave the ends in on the inside.
Rnd 13 (teal): Join teal in any st. Ch 1, sc in the same st, sk 2, 7 dc in next st, sk 2, sc in next st; repeat from * 8 more times, then sk 2, 7 dc in next st, sk 2, sl st to first sc. (10 fans of 7 dc + 10 sc = 80)
Each repeat uses 6 sts of Rnd 12, so 60 ÷ 6 = 10 fans. The fans flare outward, which starts the bowl shape.
Rnd 14 (cream): Join cream with a sl st in any valley sc of Rnd 13. Sc in each of next 7 dc, sl st in next valley sc; repeat from * around, ending with sc in the last 7 dc and a sl st to the joining sl st. (70 sc + 10 sl st = 80)
Rnd 15 (teal): Join teal with a sl st in any valley sl st of Rnd 14. Ch 3 (counts as dc), 6 dc in the same st, sk 3, sc in next sc (center of the arch below), sk 3, 7 dc in next sl st, sk 3, sc in next sc, sk 3; repeat from * 8 more times, sl st to top of ch-3. (10 fans of 7 dc + 10 sc = 80)
Each repeat uses 8 sts of Rnd 14 (1 sl st + 7 sc), so the count stays at 80.
Rnd 16 (cream): Join cream with a sl st in any valley sc of Rnd 15. Work as Rnd 14. (70 sc + 10 sl st = 80)
Rnd 17 (teal): Work as Rnd 15. (80)
Rnd 18 (cream): Work as Rnd 16. (80)
Checkpoint: you should have three cream arch lines with 10 arches in each. The wall is about 3 in (7.6 cm) tall from the Rnd 11 ridge.
Leveling and Top
Rnd 19 (teal): Join teal with a sl st in any valley sl st of Rnd 18. Ch 4 (counts as tr), dc in next sc, hdc in next sc, sc in next 3 sc, hdc in next sc, dc in next sc, tr in next sl st; repeat from * around, leaving out the last tr, sl st to top of ch-4. (10 tr + 70 shaped sts = 80)
The tall stitches fill the valleys, so the top edge is level again.
Rnd 20 (teal): Ch 1, (sc 6, sc2tog) 10 times. (70)
Rnd 21 (teal): Ch 1, sc in each st around. (70) Fasten off.
Checkpoint: the wall is about 3.6 in (9.1 cm) tall. The decrease pulls the rim in slightly so it hugs the roll.
Side Straps (Make 2)
With teal, ch 73.
Row 1: Sc in 2nd ch from hook and in each ch across. (72)
Rows 2–4: Ch 1, turn, sc in each st across. (72)
Fasten off, leaving a long tail. Each strap is 19.2 in (48.8 cm) long and 1 in (2.5 cm) wide.
Starting from the top end, mark each strap along Row 4:
- Sts 1–15: top slant, 4 in (10.2 cm)
- Sts 16–30: Basket 1 wall, 4 in (10.2 cm)
- Sts 31–36: gap, 1.6 in (4.1 cm)
- Sts 37–51: Basket 2 wall, 4 in (10.2 cm)
- Sts 52–57: gap, 1.6 in (4.1 cm)
- Sts 58–72: Basket 3 wall, 4 in (10.2 cm)
Check: 15 + 15 + 6 + 15 + 6 + 15 = 72 sts.
Ring Tab (Make 1)
With teal, ch 9.
Row 1: Sc in 2nd ch from hook and in each ch across. (8)
Rows 2–20: Ch 1, turn, sc in each st across. (8)
Fasten off, leaving a long tail. The tab is about 2.1 in (5.3 cm) wide and 5 in (12.7 cm) long.
Make All Pieces
- Baskets: 3. Each uses teal (Rnds 1–13, 15, 17, 19–21) and cream (Rnds 14, 16, 18 and the border).
- Side straps: 2, teal only.
- Ring tab: 1, teal only.
Work the cream border (see Border) on each basket before joining, because the strap seams run all the way up to the top of the rim.
Layout, top to bottom:
      [ wooden ring ]
        [ ring tab ]
       /            \
   strap            strap
     |  [Basket 1]   |
     |     gap       |
     |  [Basket 2]   |
     |     gap       |
     |  [Basket 3]   |
Joining
Method: Whipstitch with teal through both loops.
Ring tab: Fold the tab around the wooden ring so Row 1 meets Row 20. Whipstitch the 8 sts of Row 1 to the 8 sts of Row 20, one to one, to close the ring inside.
Strap tops: Lay the two straps side by side with their top ends up. Together they are 2 in (5.1 cm) wide, which fits under the tab’s 2.1 in (5.3 cm) width. Sew the 4 row ends of each strap to the seamed lower edge of the tab, so 8 row ends meet the tab’s 8 sts.
Baskets: On each basket, place markers in rim sts 1 and 36. These sit exactly opposite each other, with 35 sts on each half. Turn the basket so the markers are at the sides.
Pin each strap’s 15-st basket segment straight up the wall, centered on a marker. The top of the segment meets the top of the rim, and the bottom meets the Rnd 11 ridge. Pin both ends first, then the middle, so the 15 strap sts spread evenly over the 4 in (10.2 cm) wall. Whipstitch along both long edges of the strap.
Join Basket 1 at strap sts 16–30, Basket 2 at sts 37–51, and Basket 3 at sts 58–72.
Tension: Pull each stitch snug but not tight. The strap should lie flat against the wall without puckering. If it ripples, take out the seam and re-pin, starting with the middle point.
Size checkpoint: The distance from one rim to the next measures 5.6 in (14.2 cm), which is one 4 in (10.2 cm) basket segment plus one 1.6 in (4.1 cm) gap.
Border
The border is the cream rim on each basket.
Border gauge: The same as the body, 15 sts = 4 in (10.2 cm).
Rnd 22 (cream): Join cream in any st of Rnd 21. Ch 1, sc in each st around, sl st to first sc. (70: 35 on the front half, 35 on the back half)
Rnd 23 (cream): Ch 1, rev sc in each st around, sl st to first st. (70: 35 front, 35 back) Fasten off and weave in the ends.
Why the math works: At 15 sts per 4 in (10.2 cm), 70 sts give a circumference of about 18.7 in (47.5 cm), which is an opening about 6 in (15.2 cm) across. The border works one stitch into each stitch, so the count stays the same and the rim neither ruffles nor pulls in. The scale rounds have 80 sts, and Rnd 20 brings that down to 70, which gives the bowl its cupped top. The 35/35 split also lines up with the strap markers at sts 1 and 36.
Final Blocking
- Weave in all ends on the inside of each basket.
- Mist the assembled holder lightly with water until it is damp.
- Put a toilet paper roll in each basket to set the round shape.
- Lay the holder flat on a blocking mat with the baskets facing up.
- Pin the straps straight. Check the 1.6 in (4.1 cm) gaps and the 5.6 in (14.2 cm) rim-to-rim distance.
- Gently shape the cream arches so each one curves smoothly.
- Let it dry completely, at least 24 hours, before you remove the rolls.
Final Quality-Control Checklist
- Each basket has 10 fans per tier and 3 cream arch lines.
- Rims are level, with 70 sts and a neat crab-stitch edge.
- All three baskets match within 0.25 in (0.6 cm) in height and width.
- Straps measure 19.2 in (48.8 cm) and lie flat.
- The gaps between baskets are an even 1.6 in (4.1 cm).
- The ring tab is sewn securely and the ring cannot slip out.
- No loose ends show on the outside.
- A standard roll fits easily in each basket.
Troubleshooting
The base cups before Rnd 10. Your tension is tight. Go up one hook size for the base only.
The base ruffles. Your tension is loose, or you added extra increases. Recount each round.
The fans don’t line up in Rnd 15. Make sure each fan goes into a cream sl st, and each sc goes into the 4th (center) sc of a cream arch.
The rim is wavy. Check that Rnd 19 has 80 sts and Rnd 20 has 70 sts.
The holder tilts forward. Move both strap seams slightly toward the back, keeping sts 1 and 36 opposite each other.
Care
Hand wash in cool water with mild soap. Lay flat to dry, reshaping each basket around a roll, and do not tumble dry.
Final Notes
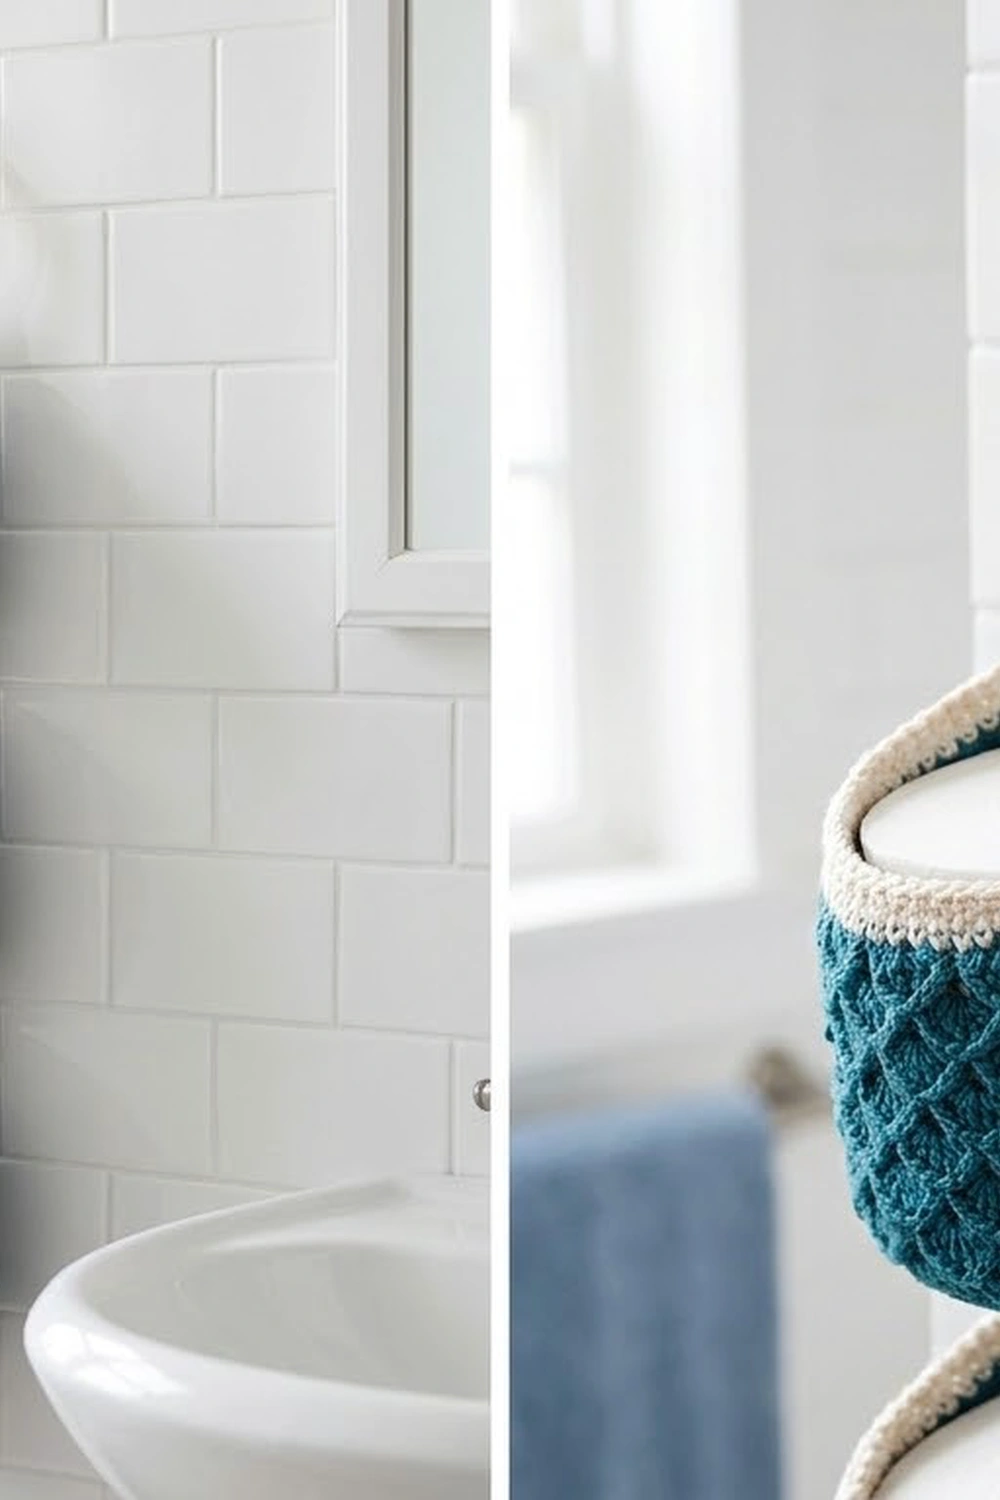
The measurement chain is simple. A 5 in (12.7 cm) base grows to 80 sts in the scale tiers, then settles into a 70-st rim about 6 in (15.2 cm) across and 4 in (10.2 cm) deep. Two 72-st straps hold the three baskets 5.6 in (14.2 cm) apart from rim to rim, for a finished holder about 24.5 in (62.2 cm) long. Check each stage as you go and the finished holder will come together cleanly.
Happy crocheting!