

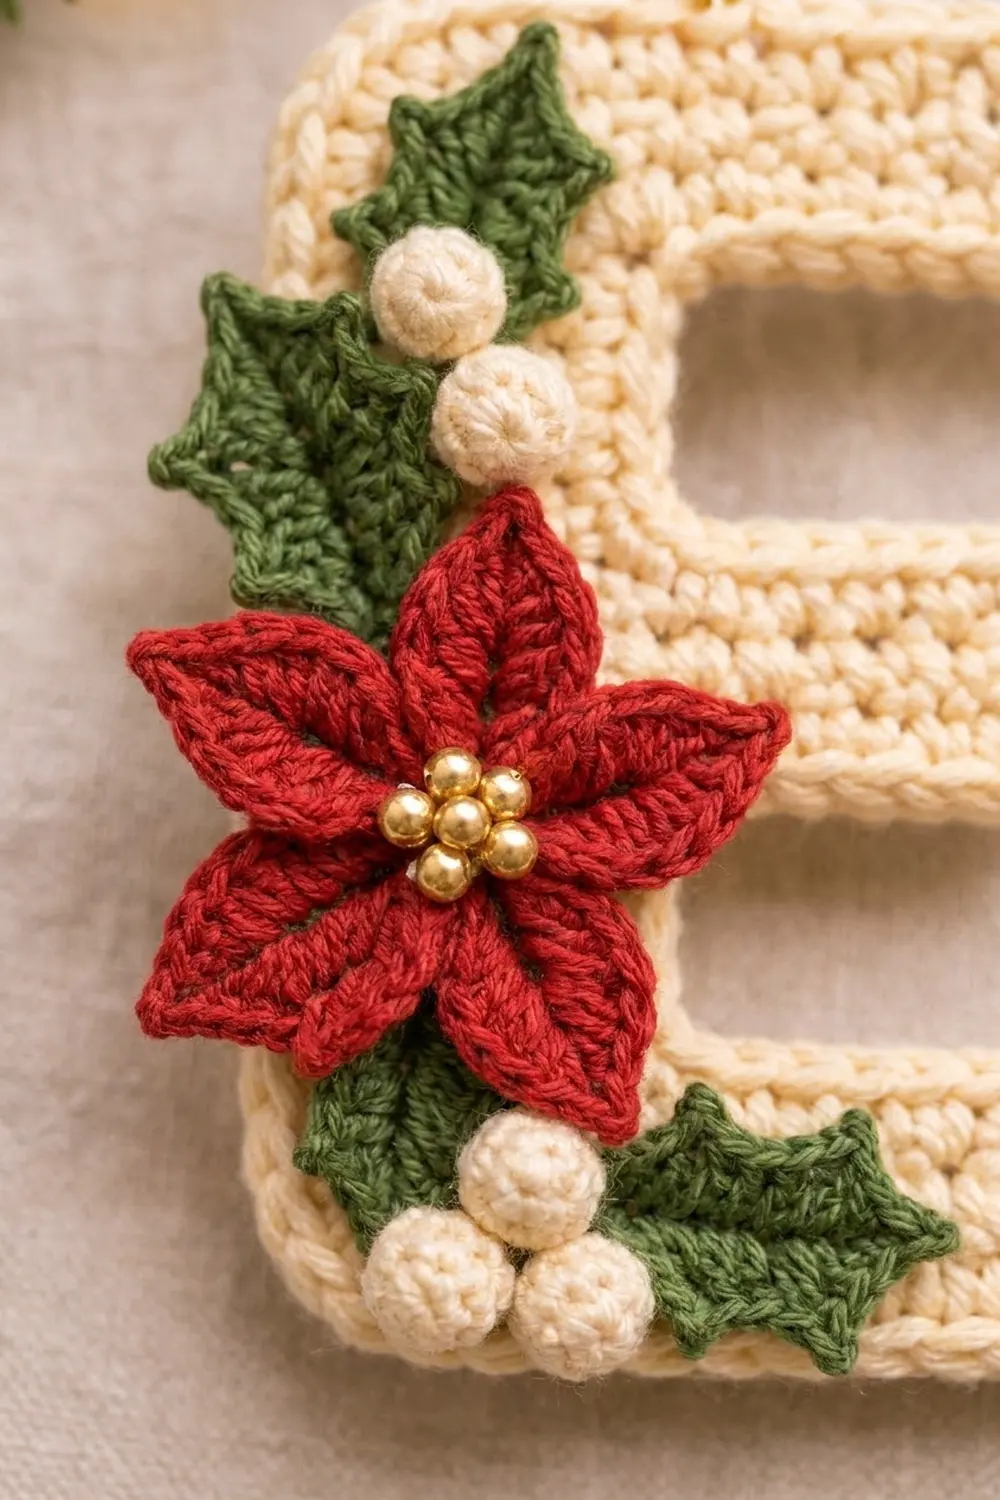
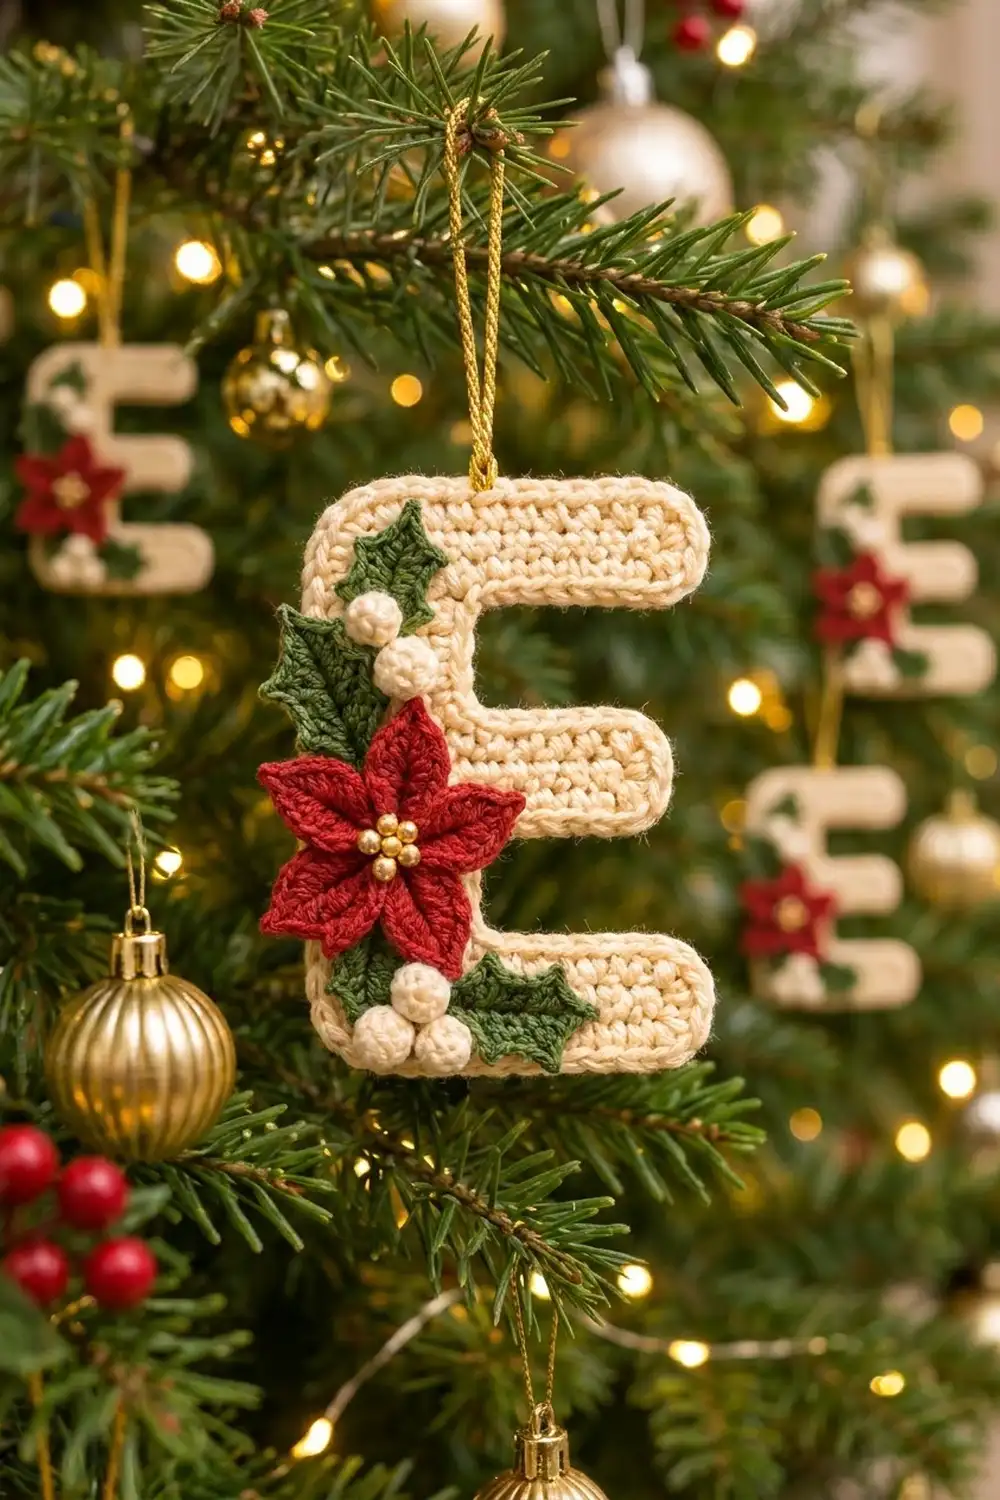
This Poinsettia Letter E Ornament is a solid crocheted capital “E” in soft cream. A raised, rope-like edge outlines the letter, and a small layered bouquet decorates it: a red five-petal poinsettia with a gold bead center, three green holly leaves, and five round cream berries. A gold twisted cord lets you hang it on the tree or tie it to a gift.
The colors are classic Christmas: warm cream, deep red, forest green, and gold. Dense single crochet gives the letter a firm, slightly padded feel, and the rounded outer corners keep the edges soft.
This pattern uses US crochet terms. The finished ornament measures 3.4 in wide x 4.4 in tall (8.6 cm x 11.2 cm), not counting the hanging loop.
You crochet the vertical spine of the “E” in rows, then work the three arms straight off the spine’s inner edge. Two border rounds outline the letter. The appliqués are made separately and sewn on after blocking.
Finished Size and Construction
- Finished size: 3.4 in x 4.4 in (8.6 cm x 11.2 cm)
- Skill level: Easy-intermediate
- Terminology: US crochet terms
- Yarn weight: DK (#3), cotton or cotton blend
- Hook: 3.25 mm (US D/3)
- Number of pieces: 1 letter base, plus 1 poinsettia, 3 holly leaves, and 5 berries sewn on top
- Layout: Single ornament; no joining
- Size before border: 3 in x 4 in (7.6 cm x 10.2 cm)
- Spine: 1 in x 4 in (2.5 cm x 10.2 cm)
- Top and bottom arms: 0.8 in (2.0 cm) tall, reaching 3 in (7.6 cm) from the left edge
- Middle arm: 0.8 in (2.0 cm) tall, reaching 2.4 in (6.1 cm) from the left edge
- Border depth: 0.2 in (0.5 cm) on every edge
Materials
Choose a smooth DK cotton. Cotton holds crisp edges and shows the slip-stitch outline clearly. Acrylic also works, but it needs gentle steam to lie flat. One 50 g ball of each color makes many ornaments, so this is a good way to use up scraps.
- Cream: 12 g / 25 m (letter, border, berries)
- Red: 4 g / 8 m (poinsettia)
- Green: 3 g / 6 m (holly leaves)
These amounts include a margin for swatching and sewing tails.
Tools:
- 3.25 mm (US D/3) hook, plus a 3.5 mm hook in case you need to adjust tension
- Tapestry needle and 2 stitch markers
- 7 gold seed beads or 4 mm beads, a sewing needle, and thread
- 6 in (15.2 cm) of gold twisted cord
- A pinch of fiberfill
- Blocking board, rustproof pins, and a spray bottle or steamer
- Ruler
Abbreviations (US Terms)
- ch – chain
- sl st – slip stitch
- sc – single crochet
- hdc – half double crochet
- dc – double crochet
- sc2tog – single crochet 2 together
- BLO – back loop only
- st(s) – stitch(es)
- RS – right side
Special stitches:
- Picot: ch 3, sl st in 3rd ch from hook.
- Outer corner: 3 sc in the same stitch or row-end. That stitch is already part of the edge count, so the corner adds 2 stitches.
- Inner corner: sc2tog over the last stitch of one edge and the first stitch of the next. This removes 1 stitch.
Gauge and Checkpoints
Gauge: 20 sc and 20 rows = 4 in (10.2 cm), worked firmly. Each stitch and each row equals 0.2 in (0.5 cm).
The gauge needs to be square because the arm length is set by the number of rows and the arm height by the number of stitches. Use the spine as your test piece. Single crochet rows often come out a little shorter than the stitches are wide. If that happens to you, your 20 spine stitches will measure 4 in (10.2 cm), but the 5 rows will measure less than 1 in (2.5 cm).
Checkpoints:
- After the spine: 1 in x 4 in (2.5 cm x 10.2 cm).
- After the top arm: total width 3 in (7.6 cm).
- After the middle arm: total width 2.4 in (6.1 cm).
- Before the border: 3 in x 4 in (7.6 cm x 10.2 cm).
- After the border: 3.4 in x 4.4 in (8.6 cm x 11.2 cm).
If the spine is too long (over 4 in / 10.2 cm), switch to a 3 mm hook. If it’s too short, switch to a 3.5 mm hook. If your stitches match but your rows are shorter (for example, 22 rows per 4 in), add 1 row to the top and bottom arms.
Pattern: Letter Base
Spine
With cream, ch 21. The slip-knot end of the chain becomes the top of the letter.
Row 1: Sc in 2nd ch from hook and in each ch across, turn. (20 sc)
Rows 2–5: Ch 1 (does not count as a st), sc in each st across, turn. (20 sc)
Row 5 ends at the top of the letter. Number the Row 5 stitches 1 to 20 from the bottom up. The foundation chain is the left edge, and the tops of Row 5 form the inner edge where the arms grow. Mark st 12 and st 4 now; you will rejoin the yarn there for the middle and bottom arms. Do not fasten off.
Top Arm
Row 6: Ch 1, turn, sc in sts 20, 19, 18, and 17, turn, leaving the rest unworked. (4 sc)
Rows 7–15: Ch 1, sc in each st across, turn. (4 sc)
That makes 10 arm rows. Fasten off. Checkpoint: width 3 in (7.6 cm).
Middle Arm
Leave sts 13–16 unworked; they form the upper gap.
Row 6: Join cream with a sc in st 12, sc in sts 11, 10, and 9, turn. (4 sc)
Rows 7–12: Ch 1, sc in each st across, turn. (4 sc)
That makes 7 arm rows. Fasten off.
Bottom Arm
Leave sts 5–8 unworked; they form the lower gap.
Row 6: Join cream with a sc in st 4, sc in sts 3, 2, and 1, turn. (4 sc)
Rows 7–15: Ch 1, sc in each st across, turn. (4 sc)
Fasten off and weave in all ends. Checkpoint: 3 in x 4 in (7.6 cm x 10.2 cm).
Pattern: Appliqués
Poinsettia (make 1, red)
The flower is about 1.6 in (4.1 cm) across, with five pointed petals.
Rnd 1: Magic ring, ch 1, 10 sc in ring, sl st to first sc. (10 sc)
Rnd 2: Ch 8; working in the back bumps of the chain: sl st in 2nd ch from hook, sc, hdc, dc in each of next 2 ch, hdc, sc (7 sts along the chain); sl st in each of the next 2 sc of Rnd 1. Repeat from * to * 4 more times. (5 petals)
Fasten off, leaving a 12 in (30.5 cm) tail. The sl st at each tip makes the point, and the pair of dc widens the middle of the petal.
Center: Sew 7 gold beads in a tight cluster over the ring: 1 in the middle and 6 around it.
Holly Leaves (make 3, green)
Each leaf is about 1.5 in (3.8 cm) long, with three picot points on each side.
Ch 9. Number the chains 1–9, starting from the hook.
Side 1: Sc in ch 2, hdc in ch 3, (dc, picot) in ch 4, dc in ch 5, (dc, picot) in ch 6, dc in ch 7, (hdc, picot) in ch 8, 3 sc in ch 9.
Side 2 (opposite side of chain): Hdc in ch 8, picot, dc in ch 7, (dc, picot) in ch 6, dc in ch 5, (dc, picot) in ch 4, hdc in ch 3, sc in ch 2.
Tip: Picot, sl st in ch 1 and in the first sc of Side 1.
Count: 7 sts on each side, 3 sc at the base, and 7 picots in total. Fasten off, leaving a tail.
Berries (make 5, cream)
Each berry is about 0.4 in (1.0 cm) across.
Rnd 1: Magic ring, 6 sc in ring. (6 sc)
Rnd 2: Sc in each st. (6 sc)
Rnd 3: Stuff lightly. Sc2tog 3 times. (3 sts)
Fasten off, pull the last 3 sts closed, and keep the tail for sewing.
Border
The border has two rounds. The sc round rounds off the corners, and the BLO slip-stitch round sits up like a fine cord.
Border gauge: Work 1 sc in each stitch or row-end. Because the gauge is square, a row-end is the same length as a stitch, so every edge stays flat. Work into the outer loop of each row-end, not the thin strand at the very edge.
Round 1: With RS facing, join cream with a sc in the Row 1 row-end at the top of the letter. Work clockwise:
| Edge | Base | How to work | Sts made |
|---|---|---|---|
| Top edge | 15 row-ends | sc in 14 (incl. join), 3 sc in 15th | 17 |
| Top arm end | 4 sts | sc in 3, 3 sc in 4th | 6 |
| Under top arm | 10 row-ends | sc in 9, sc2tog (10th + spine st 16) | 10 |
| Upper gap | 4 sts | st 16 used; sc in 15 and 14, sc2tog (st 13 + middle arm Row 6) | 3 |
| Top of middle arm | 7 row-ends | Row 6 used; sc in 5, 3 sc in Row 12 | 8 |
| Middle arm end | 4 sts | sc in 3, 3 sc in 4th | 6 |
| Under middle arm | 7 row-ends | sc in 6, sc2tog (Row 6 + spine st 8) | 7 |
| Lower gap | 4 sts | st 8 used; sc in 7 and 6, sc2tog (st 5 + bottom arm Row 6) | 3 |
| Top of bottom arm | 10 row-ends | Row 6 used; sc in 8, 3 sc in Row 15 | 11 |
| Bottom arm end | 4 sts | sc in 3, 3 sc in 4th | 6 |
| Bottom edge | 15 row-ends | sc in 14, 3 sc in Row 1 | 17 |
| Left edge | 20 ch | sc in 19, 3 sc in last ch | 22 |
Sl st to first sc. (116 sc)
Why the math works: The base perimeter is 104 stitches and row-ends (20 + 15 + 4 + 10 + 4 + 7 + 4 + 7 + 4 + 10 + 4 + 15). The 8 outer corners add 2 each (+16), and the 4 inner corners remove 1 each (−4). 104 + 16 − 4 = 116.
Round 2: Ch 1, sl st in BLO of each st around, keeping the loops relaxed. Join. (116 sl st)
Fasten off and weave in the ends. Checkpoint: 3.4 in x 4.4 in (8.6 cm x 11.2 cm).
Final Blocking
- Mist the letter lightly, or hold a steamer over it without touching the fabric.
- Lay it RS up on the board.
- Pin the outer corners: 3.4 in (8.6 cm) across the top arm and 4.4 in (11.2 cm) down the left edge.
- Pin the arm ends straight. The middle arm should reach 2.8 in (7.1 cm) from the left edge.
- Pin the inner corners so the gaps stay square.
- Let it dry completely (at least 2 hours), then unpin.
- Steam the poinsettia and leaves flat, then shape the tips with your fingers.
- Sew on the appliqués, starting with the back layer. Use small stitches that don’t show through to the back:
- Upper holly leaf: on the spine just below the top arm, with the tip pointing up and slightly left.
- Two berries: stacked diagonally below the upper leaf.
- Small holly leaf: on the lower spine, placed so it will peek out from under the poinsettia.
- Poinsettia: on the lower half of the spine, overhanging the left edge by about 0.4 in (1.0 cm).
- Lower holly leaf: on the bottom arm, with the tip pointing right.
- Three berries: in a triangle cluster at the bottom-left corner.
- Fold the gold cord in half, knot the ends, and stitch the knot to the back of the top-left corner. The loop should stand about 2 in (5.1 cm) tall.
Final Quality-Control Checklist
- The letter measures 3.4 in x 4.4 in (8.6 cm x 11.2 cm).
- Round 1 has 116 sc and Round 2 has 116 sl st.
- All 8 outer corners are evenly rounded, and all 4 inner corners are crisp, not puckered.
- The top and bottom arms are the same length.
- The poinsettia has 5 even petals, and the beads are secure.
- Each leaf has 3 points per side plus a tip.
- All 5 berries are firm and round.
- The ornament hangs upright, and no ends show on the front.
Troubleshooting
Edges ripple: There are too many stitches. Recount each edge against the table.
Edges cup: The border is too tight. Work Round 1 more loosely or with a 3.5 mm hook.
Outline puckers: Rework Round 2 with longer loops or with a 3.5 mm hook.
Holes at inner corners: Make sure each sc2tog catches both the row-end and the spine stitch.
Arms too short: Your rows are shorter than your stitches. Add 1 row to the top and bottom arms.
Berries lose shape: Add a little more fiberfill before closing Rnd 3.
Beads wobble: Pass the thread through each bead twice and knot it on the back of the flower.
Petals curl: Pin the tips while the steamed flower dries.
Ornament tilts: Move the cord slightly toward the center of the top arm.
Care
Spot clean with cool water and mild soap, press in a towel, and dry flat. Do not machine wash.
Final Notes
Every measurement in this ornament builds on the one before it. A gauge of 5 sts and 5 rows per inch makes the spine 1 in x 4 in (2.5 cm x 10.2 cm). The arms bring the letter to 3 in x 4 in (7.6 cm x 10.2 cm). The 116-stitch border adds 0.2 in (0.5 cm) to each edge, for a final size of 3.4 in x 4.4 in (8.6 cm x 11.2 cm). Check each stage before moving on, and the letter will block square and hang straight.
Once you’re comfortable with the “E,” the same spine-and-arms method works for F, L, and other straight-sided letters, so you can spell out names for the tree.
Happy crocheting!