

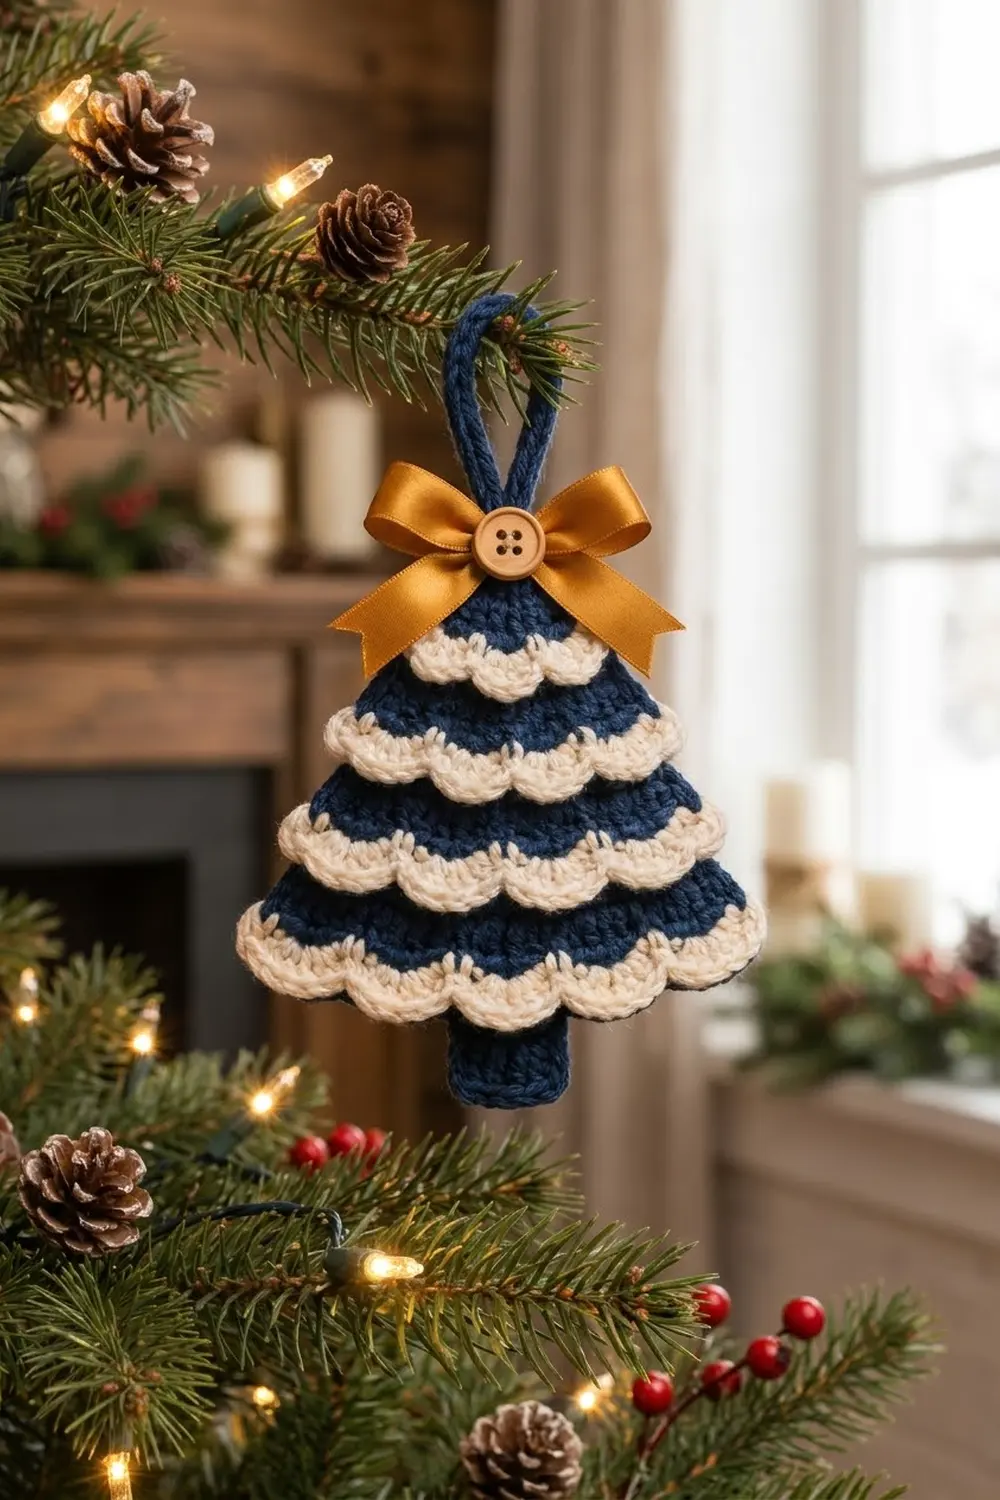
Midnight Frost is a small, flat Christmas tree ornament with a classic winter look. Rich navy and soft cream alternate in neat bands. The cream tiers are scalloped ruffles that sit on top of the tree and overlap the navy below, so the ornament looks layered and full instead of flat-striped.
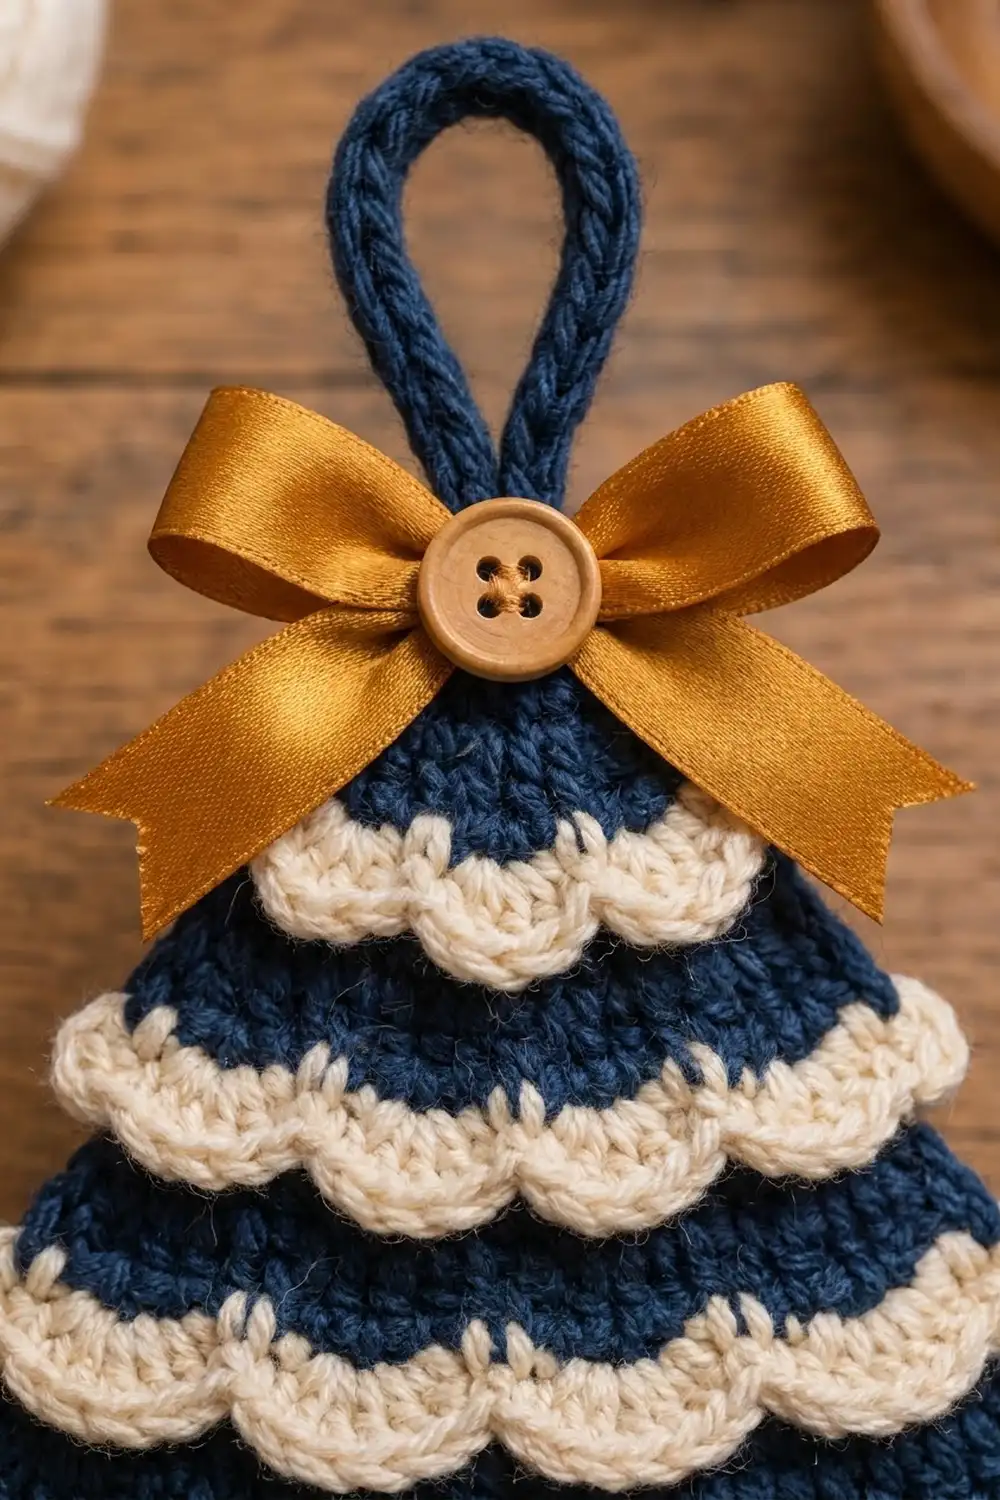
The finishing details make it gift-ready: a thick crocheted hanging loop, a gold satin bow, and a wooden button at the tip. Make one for a tag or a whole set for your tree.
The pattern is written in US crochet terms. The finished ornament is about 5 in (12.7 cm) wide across the bottom scallops and 5 in (12.7 cm) tall from tip to trunk. With the hanging loop, it is about 6.5 in (16.5 cm) tall.
Construction is simple. You work the navy tree in rows from the tip down, increasing on every other row. Three rows are worked in back loops only, which leaves free front loops for the cream scallop tiers. A cream scallop edge finishes the bottom, the trunk is worked into the remaining back loops, and the loop and bow are added last.
Finished Size and Construction
- Finished size: 5 in (12.7 cm) wide x 5 in (12.7 cm) tall, plus a 1.5 in (3.8 cm) loop
- Skill level: Advanced beginner
- Terminology: US crochet terms
- Yarn weight: Worsted (#4), cotton or cotton blend
- Hook: 4.0 mm (G-6)
- Number of pieces: 1 (single piece, no joining)
- Layout: One flat tree with 4 cream tiers (3 surface tiers + 1 bottom edge)
- Piece size before border: 4.7 in (11.9 cm) wide x 3.8 in (9.7 cm) tall (navy body, Rows 1–19)
- Border depth: 0.4 in (1.0 cm) bottom scallop edge
- Trunk: 1.1 in (2.8 cm) wide x 1.2 in (3.0 cm) long, about 0.8 in (2.0 cm) visible below the scallops
Materials
Yarn: Use a smooth worsted-weight cotton or cotton blend. Cotton gives the scallops clean, crisp edges and holds its shape well on a tree. Avoid fuzzy or very stretchy yarn, because it blurs the shell definition.
- Color A – Navy: 12 g / about 20 m (22 yd), for the body, trunk, and hanging loop
- Color B – Cream: 6 g / about 10 m (11 yd), for the scallop tiers and bottom edge
These quantities include a margin of about 20% for your gauge swatch and weaving in ends.
Tools and notions:
– 4.0 mm (G-6) crochet hook
– Tapestry needle
– 2 locking stitch markers
– 12 in (30.5 cm) of gold satin ribbon, 5/8 in (1.6 cm) wide
– 1 wooden four-hole button, 3/4 in (1.9 cm)
– Sewing needle and gold or matching thread
– Blocking mat, rustproof pins, and a spray bottle or steamer
– Optional: light fabric stiffener
Abbreviations (US Terms)
- ch – chain
- sl st – slip stitch
- sc – single crochet
- hdc – half double crochet
- dc – double crochet
- sk – skip
- st(s) – stitch(es)
- BLO – back loop only
- FLO – front loop only
- RS / WS – right side / wrong side
- inc – 2 sc in the same stitch
Special stitch – Scallop: (hdc, 3 dc, hdc) all in the same loop. One scallop uses 5 stitches.
Scallop repeat: sl st in a loop, sk 1 loop, Scallop in the next loop, sk 1 loop, sl st in the next loop. Each repeat uses 4 loops, plus 1 loop for the first sl st. A scallop row therefore needs a stitch count of a multiple of 4, plus 1.
Gauge and Checkpoints
Gauge: 18 sc and 20 rows = 4 in (10.2 cm) in sc with a 4.0 mm hook. That is 4.5 sts and 5 rows per inch.
Test the pattern before making a full set. Work Rows 1–7 as a test cone and measure it against the first checkpoint below. A small triangle shows your gauge far more accurately than a square swatch, because the edge increases affect its width.
Checkpoints (measure flat, without stretching):
- After Row 7 (9 sts): 2.0 in (5.1 cm) wide, 1.4 in (3.6 cm) tall
- After Row 11 (13 sts): 2.9 in (7.4 cm) wide, 2.2 in (5.6 cm) tall
- After Row 15 (17 sts): 3.8 in (9.7 cm) wide, 3.0 in (7.6 cm) tall
- After Row 19 (21 sts): 4.7 in (11.9 cm) wide, 3.8 in (9.7 cm) tall
If your piece is too big, use a 3.75 mm (F-5) hook. If it is too small, use a 4.5 mm (7) hook. A tree within 0.2 in (0.5 cm) of the checkpoints will block to size. Since this is an ornament, small differences are fine as long as the stitch counts stay correct, because the scallop math depends on the counts.
Tree Body (Color A – Navy)
The body is worked from the tip down. Odd rows are RS rows and even rows are WS rows. The ch 1 at the start of each row does not count as a stitch. Increases happen only on WS rows, one at each edge.
Row 1 (RS): Ch 2. Work 3 sc in the 2nd ch from hook. Turn. (3 sts)
Row 2 (WS): Ch 1. Inc in first st, sc in next st, inc in last st. Turn. (5 sts)
Row 3: Ch 1, sc in each st across. Turn. (5 sts)
Row 4: Ch 1. Inc in first st, sc in each st to last st, inc in last st. Turn. (7 sts)
Row 5: Ch 1, sc in each st across. Turn. (7 sts)
Row 6: Ch 1. Inc in first st, sc to last st, inc in last st. Turn. (9 sts)
Row 7 (RS, Tier 1 row): Ch 1, sc BLO in each st across. Turn. (9 sts)
The 9 free front loops of Row 6 now form a ridge on the RS. Tier 1 is worked into this ridge later. Place a marker in the ridge so you can find it easily.
Row 8: Ch 1. Inc in first st, sc to last st, inc in last st. Turn. (11 sts)
Row 9: Ch 1, sc across. Turn. (11 sts)
Row 10: Ch 1. Inc in first st, sc to last st, inc in last st. Turn. (13 sts)
Row 11 (RS, Tier 2 row): Ch 1, sc BLO in each st across. Turn. (13 sts) This leaves 13 free front loops of Row 10.
Row 12: Ch 1. Inc in first st, sc to last st, inc in last st. Turn. (15 sts)
Row 13: Ch 1, sc across. Turn. (15 sts)
Row 14: Ch 1. Inc in first st, sc to last st, inc in last st. Turn. (17 sts)
Row 15 (RS, Tier 3 row): Ch 1, sc BLO in each st across. Turn. (17 sts) This leaves 17 free front loops of Row 14.
Row 16: Ch 1. Inc in first st, sc to last st, inc in last st. Turn. (19 sts)
Row 17: Ch 1, sc across. Turn. (19 sts)
Row 18: Ch 1. Inc in first st, sc to last st, inc in last st. Turn. (21 sts)
Row 19 (RS): Ch 1, sc in each st across through both loops. (21 sts) Fasten off and leave a short tail.
Check the size: 4.7 in (11.9 cm) wide x 3.8 in (9.7 cm) tall. The tip should be a neat point with straight, evenly stepped sides.
Cream Scallop Tiers (Color B)
Each surface tier is worked into its free front-loop ridge with the RS facing you and the tip of the tree pointing up. Work from right to left (left to right if you crochet left-handed).
The ridge counts are 9, 13, and 17. Each one is a multiple of 4 plus 1, so every tier starts and ends with a sl st at the side edges.
Tier 1 (Row 6 ridge, 9 loops): Join B with a sl st in the first free front loop. Sk 1, Scallop in next loop, sk 1, sl st in next loop. Repeat from * once more. Fasten off.
(2 scallops: 10 sts in the scallops + 3 sl sts = 13 sts)
Tier 2 (Row 10 ridge, 13 loops): Join B with a sl st in the first free front loop. Repeat from * to * 3 times. Fasten off.
(3 scallops: 15 + 4 sl sts = 19 sts)
Tier 3 (Row 14 ridge, 17 loops): Join B with a sl st in the first free front loop. Repeat from * to * 4 times. Fasten off.
(4 scallops: 20 + 5 sl sts = 25 sts)
After each tier, smooth the scallops downward with your fingers so they overlap the navy band below. Each scallop is about 0.4 in (1.0 cm) deep. Each navy band is 4 rows, or 0.8 in (2.0 cm). That leaves about 0.4 in (1.0 cm) of navy showing between tiers, so the cream and navy bands look evenly matched.
The first and last scallop of each tier sit right at the side edge and flare slightly past it. This is what makes the stepped tree silhouette.
Weave in the cream tails on the WS, or tuck them under the scallops on the RS.
Border: Bottom Scallop Edge
On this ornament, the border is the fourth cream tier, worked along the bottom edge. The two side edges are left without a border, so the tier scallops define the outline.
Border gauge: One scallop repeat covers 4 sts of Row 19. At 4.5 sts per inch, that is about 0.9 in (2.3 cm) per scallop. The scallops are 0.4 in (1.0 cm) deep.
Bottom edge (Row 19, 21 sts, FLO): With the RS facing, turn the tree upside down so the bottom edge is on top. Join B with a sl st in the FLO of the first st of Row 19. Sk 1, Scallop in FLO of next st, sk 1, sl st in FLO of next st. Repeat from * 4 more times, for 5 repeats in total. Fasten off.
(5 scallops: 25 sts + 6 sl sts = 31 sts)
Count per side:
– Bottom: 21 sts used, 5 scallops
– Left and right sides: 0 sts added (19 row-ends each, left plain)
Why the math works: Each repeat uses 4 sts, and the edge needs 1 more st for the opening sl st: 5 × 4 + 1 = 21. That exactly matches the Row 19 count, so the scallops start and end at the corners with no squeezing or gaps.
The same rule explains the tiers: 2 × 4 + 1 = 9, 3 × 4 + 1 = 13, and 4 × 4 + 1 = 17. The body increases by 2 sts on every other row, so every fourth row lands on the next multiple of 4 plus 1. That is why the tiers fall on Rows 6, 10, 14, and 19.
With the border, the tree measures about 5 in (12.7 cm) across the scallops and 4.2 in (10.7 cm) from tip to scallop bottom.
Trunk (Color A – Navy)
The trunk is worked into the back loops of Row 19 that are still free behind the bottom scallops. This way it sits neatly behind the cream edge.
With the RS facing and the bottom edge on top, count to the center 5 sts of Row 19. These are sts 9–13 of 21, with 8 sts on each side.
Trunk Row 1: Join A with a sl st in the free back loop of st 9. Ch 1, sc BLO in sts 9–13. Turn. (5 sts)
Trunk Rows 2–6: Ch 1, sc in each st across. Turn. (5 sts)
Fasten off after Row 6. The trunk measures 1.1 in (2.8 cm) wide x 1.2 in (3.0 cm) long. About 0.4 in (1.0 cm) hides behind the scallops, so about 0.8 in (2.0 cm) shows.
Hanging Loop (Color A – Navy)
Join A with a sl st at the tip, into the base of the Row 1 stitches. Ch 18, then sl st into the same tip stitch to form a ring.
Work 27 sc over the chain ring. Covering the chain this way makes the thick, rounded cord seen on the finished ornament. Sl st into the tip again and fasten off. Weave the tail down through the top few rows of the tree to anchor it.
The loop stands about 1.5 in (3.8 cm) above the tip. If it twists, block it flat with the tree.
Bow and Button
- Tie the 12 in (30.5 cm) gold ribbon into a bow with loops about 1.25 in (3.2 cm) wide on each side. Trim the tails diagonally to about 1.5 in (3.8 cm).
- Place the bow at the tip so it covers the base of the hanging loop and the top of the navy cone.
- Sew the button to the center knot of the bow, stitching through the bow and the tree so both are held firmly.
- Add a few hidden stitches under each bow loop so the bow lies flat.
Sew on the bow after blocking, so the ribbon does not get wet or water-marked.
Final Blocking
- Weave in all remaining ends before blocking.
- Lightly mist the ornament with water. If you prefer, hover a steamer above it, but never press the iron onto the stitches.
- Pin the tree RS up on the mat. Put one pin at the tip and one at each bottom corner, at 4.7 in (11.9 cm) apart.
- Pin each tier so its end scallops flare slightly past the side edges. Push all scallops downward so they overlap the navy below.
- Pin the trunk straight and centered, and pin the loop flat in a neat teardrop shape.
- Let it dry completely. For a firmer ornament, brush a light fabric stiffener onto the WS before drying.
- Unpin it, then add the bow and button.
Final Quality-Control Checklist
- Body stitch counts: 3, 5, 5, 7, 7, 9, 9, 11, 11, 13, 13, 15, 15, 17, 17, 19, 19, 21, 21
- Tiers have 2, 3, and 4 scallops, and the bottom edge has 5
- Every tier starts and ends with a sl st at the side edges
- Scallops lie downward with about 0.4 in (1.0 cm) of navy showing between tiers
- Trunk is centered on sts 9–13 and is 5 sts wide
- Body measures 4.7 in (11.9 cm) x 3.8 in (9.7 cm) before the border
- Finished tree is about 5 in (12.7 cm) wide and 5 in (12.7 cm) tall
- Loop is firmly anchored and about 1.5 in (3.8 cm) tall
- Bow and button are secure, with no ends showing
Troubleshooting
Scallops won’t fit the ridge. Recount the row. Each tier needs exactly 9, 13, 17, or 21 loops. If you are off by one, an increase was missed or doubled.
Tiers stand straight up. Steam them downward and pin while drying. Tight hdc and dc stitches also stand stiffly, so loosen your tension on scallops.
Sides are wavy. Work the increases firmly into the first and last stitches. Don’t add an extra stitch in the turning chain.
Front-loop ridge is hard to find. Use stitch markers on Rows 7, 11, and 15 as you work them.
Trunk is off-center. Count 8 sts in from each corner before joining.
Loop flops over. Pack the 27 sc tightly. You can add a light coat of stiffener to the loop.
Care
Hand wash in cool water and lay flat to dry, reshaping the scallops. Remove the bow first, or spot-clean around it to protect the satin.
Final Notes
The whole ornament depends on one measurement chain. Gauge is 4.5 sts and 5 rows per inch. The body grows by 2 sts every other row, which places a multiple of 4 plus 1 on Rows 6, 10, 14, and 19. Those counts give tiers of 2, 3, 4, and 5 scallops. The body measures 4.7 in (11.9 cm) x 3.8 in (9.7 cm) before the border, and the finished ornament is 5 in (12.7 cm) x 5 in (12.7 cm) plus a 1.5 in (3.8 cm) loop. Check your counts at each tier and the tree will come out the right shape.
Happy crocheting!