

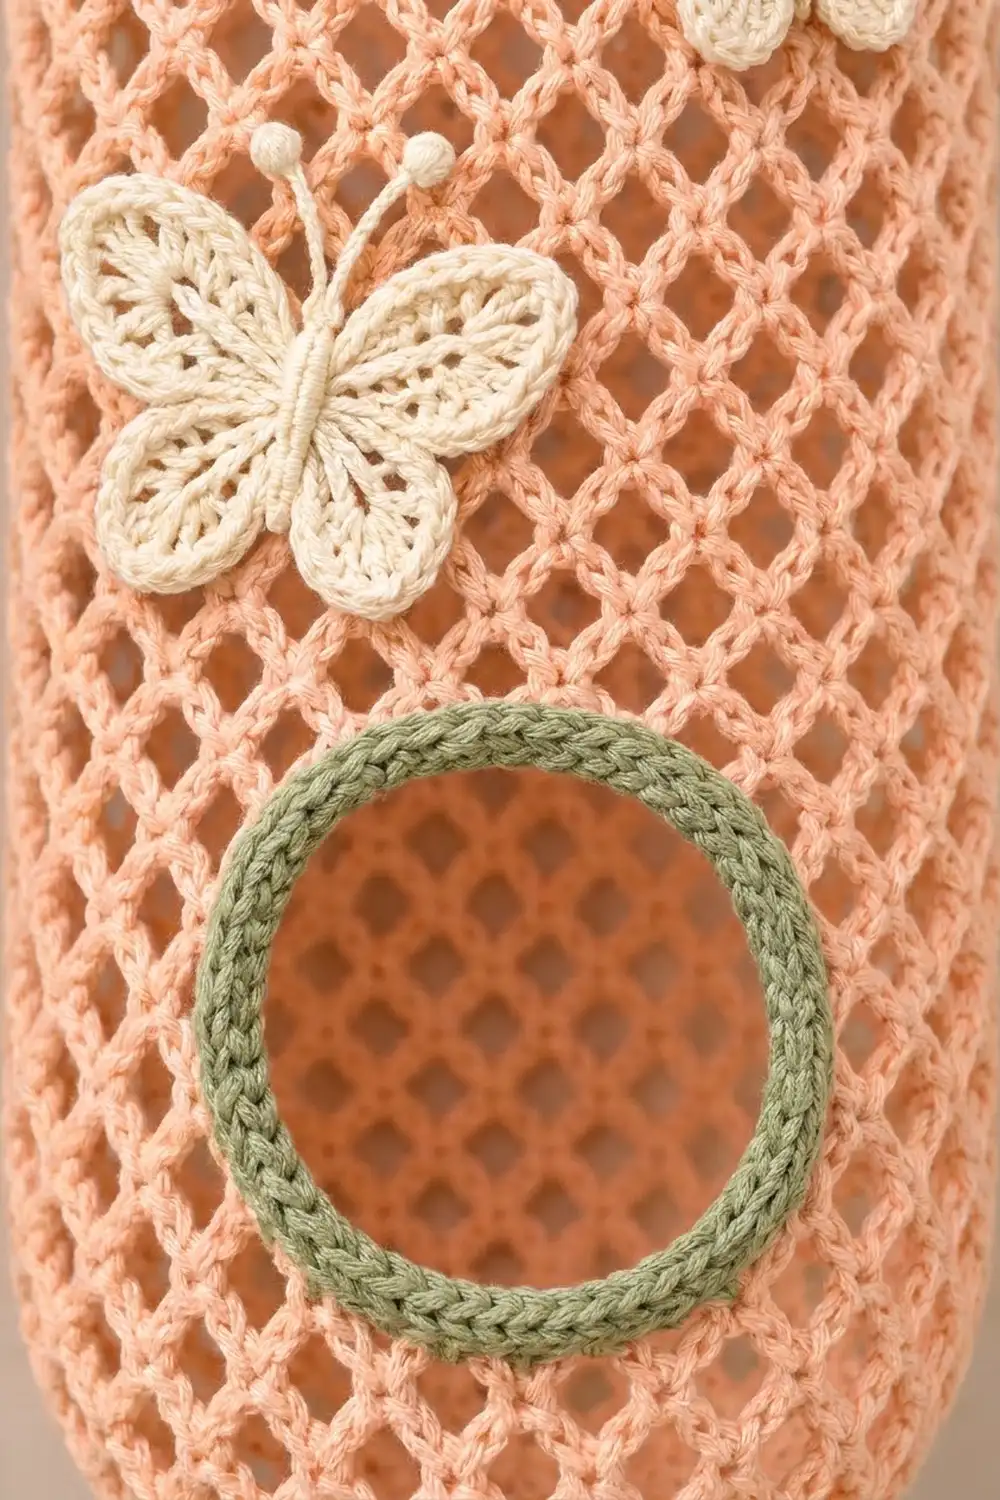
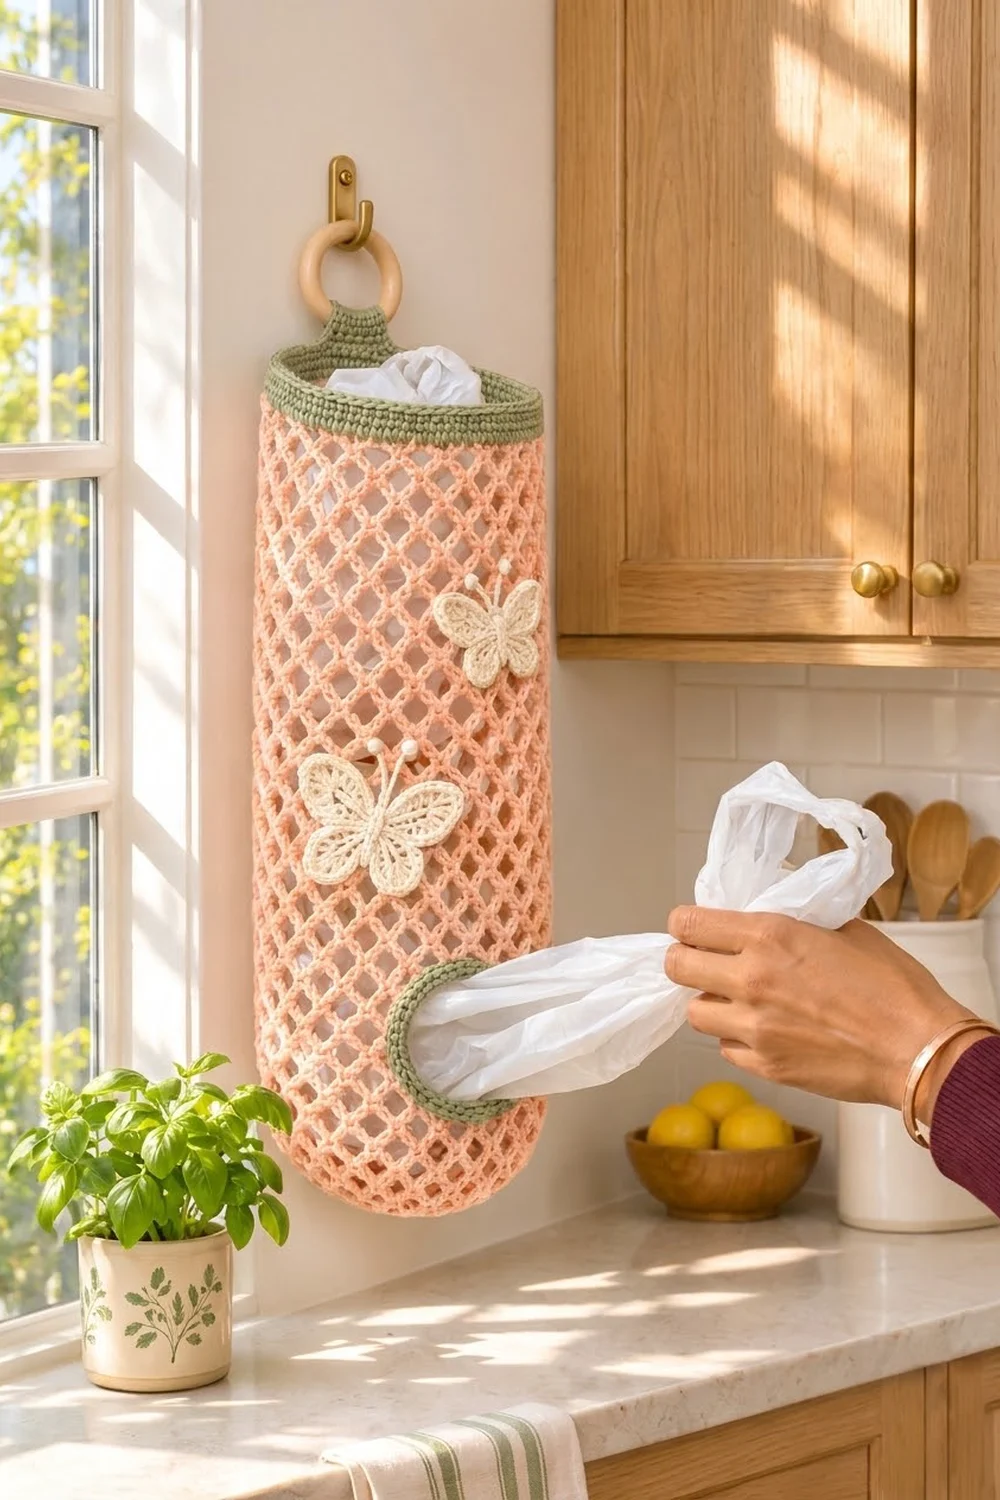
This bag holder turns the pile of plastic grocery bags under the sink into something you won’t mind seeing on the wall. It is a long peach mesh tube with a rounded bottom, a sage-green rim, and a sage-trimmed hole near the bottom for pulling bags out one at a time.
Two cream butterflies on the front add a light spring touch. The colors are soft and warm: peach mesh, sage trim, and creamy appliqués. It fits a farmhouse or cottage kitchen and hangs from a wooden ring on any hook.
The pattern uses US crochet terms. The finished holder measures 6.75 in (17.1 cm) wide when laid flat and 18 in (45.7 cm) tall. Including the hanging loop, it is about 19.75 in (50.2 cm) tall.
You work the body as one piece from the bottom up. It starts as a domed mesh base. A few turned rows leave the dispensing hole open, and the tube then continues in joined rounds. You finish it with a solid sage band and a hanging tab. The hole gets a sage edging, and the two butterflies are made separately and sewn on.
Finished Size and Construction
- Finished size: 6.75 in (17.1 cm) wide flat × 18 in (45.7 cm) tall; about 19.75 in (50.2 cm) including the loop
- Skill level: Intermediate
- Terminology: US
- Yarn weight: Worsted (#4) cotton
- Hooks: 5.0 mm (H-8) for the body; 4.0 mm (G-6) for the butterflies
- Number of pieces: 1 body plus 2 butterfly appliqués
- Layout: A single tube. The hole is at the center front, the tab is at the center back, and the butterflies sit above the hole.
- Piece size: The tube is 13.5 in (34.3 cm) around.
- Size before border: 6.75 × 17 in (17.1 × 43.2 cm)
- Border depth: The top band is 1 in (2.5 cm) deep. The hole edging is about 0.4 in (1.0 cm) deep.
Materials
Use a 100% cotton or cotton-blend worsted yarn. Cotton holds the mesh open, doesn’t stretch much under the weight of bags, and washes well. These amounts assume about 92 m per 50 g.
- Peach (A): 75 g, about 138 m
- Sage green (B): 20 g, about 37 m
- Cream (C): 15 g, about 28 m
All of these amounts include a margin of about 15–20%.
Tools
- 5.0 mm (H-8) and 4.0 mm (G-6) crochet hooks
- One wooden ring, 2.5 in (6.4 cm) across
- 4 stitch markers
- Tapestry needle
- Scissors and a measuring tape
- Rust-proof pins and a rolled towel for blocking
Abbreviations (US Terms)
- ch: chain
- sl st: slip stitch
- sc: single crochet
- hdc: half double crochet
- dc: double crochet
- tr: treble crochet
- sc2tog: single crochet 2 together
- sp(s): space(s)
- st(s): stitch(es)
- RS / WS: right side / wrong side
Special technique: hdc join. At the end of a mesh round, ch 1, then hdc in the first sc of the round. The ch-1 and the hdc together take the place of the last ch-3 space. They also leave your hook sitting in the middle of that space, ready for the next round. In the instructions, “the first sp” always means this hdc-closed space.
Picot: Ch 3, then sl st in the first of those 3 ch.
Gauge and Checkpoints
- Mesh gauge (5.0 mm hook): 4 ch-3 sps = 2.25 in (5.7 cm) wide, and 4 mesh rounds = 2 in (5.1 cm) tall.
- Sc gauge (5.0 mm hook): 16 sc and 18 rounds = 3 in (7.6 cm).
Use the base as your gauge test. Work Rounds 1–5, then flatten the piece gently. It should be about 4 in (10.2 cm) across, with the edge starting to cup.
Checkpoints
- After Round 8: 3.5 in (8.9 cm) from the bottom tip
- After Row 13: 6 in (15.2 cm)
- After Round 24: 11.5 in (29.2 cm)
- After Round 35: 17 in (43.2 cm) tall and 6.75 in (17.1 cm) wide flat
- After Round 41: 18 in (45.7 cm)
If your piece is too big, go down a hook size, or tighten the ch-3s so each one is just long enough to arch. If it is too small, go up a hook size. Don’t add mesh spaces to fix the size. The band math depends on 24 spaces.
Body
The body starts at the bottom with Color A and the 5.0 mm hook. Rounds are joined, not worked in a spiral, and you don’t turn except in Rows 9–13.
Round 1: Make a magic ring. Ch 1, then work 8 sc in the ring. Sl st to the first sc and pull the ring closed. (8 sc)
Round 2: Ch 1, sc in the first sc, (ch 3, sc in next sc) 7 times, then ch 1 and hdc in the first sc. (8 ch-3 sps)
Round 3 (increase): Ch 1, then (sc, ch 3, sc) in the first sp. Ch 3, (sc, ch 3, sc) in next sp. Repeat from * 6 more times. Ch 1, hdc in the first sc. (16 sps)*
Round 4: Ch 1, sc in the first sp, (ch 3, sc in next sp) 15 times, then ch 1 and hdc in the first sc. (16 sps)
Round 5 (increase): Ch 1, (sc, ch 3, sc) in the first sp, then ch 3 and sc in the next sp. Ch 3, (sc, ch 3, sc) in next sp, ch 3, sc in next sp. Repeat from * 6 more times. Ch 1, hdc in the first sc. (24 sps)*
Rounds 6–8: Ch 1, sc in the first sp, (ch 3, sc in next sp) 23 times, then ch 1 and hdc in the first sc. (24 sps in each round)
Place a marker in the space your hook is in. This marks the center front of the holder.
Dispensing Hole (Rows 9–13)
In these rows you work back and forth over 20 of the spaces. The 4 spaces you skip become the bottom of the hole.
Row 9 (RS): Ch 1, sc in the first sp, (ch 3, sc in next sp) 19 times. Turn. (20 sc and 19 ch-3 sps; 4 sps of Round 8 stay unworked)
Row 10 (WS): Ch 5 (this counts as dc + ch 2). Sc in the first ch-3 sp, (ch 3, sc in next ch-3 sp) 18 times, then ch 2 and dc in the last sc. Turn. (19 sc, 18 ch-3 sps, and 2 ch-2 half-spaces)
Row 11 (RS): Ch 1, sc in the dc, (ch 3, sc in next ch-3 sp) 18 times, then ch 3 and sc in the 3rd ch of the turning ch-5. Turn. (20 sc and 19 ch-3 sps)
Row 12: Repeat Row 10.
Row 13: Repeat Row 11, but do not turn at the end.
Round 14 (closing round): Ch 15 loosely, then sc in the first sc of Row 13. This bridge chain closes the hole. Next, (ch 3, sc in next ch-3 sp) 19 times. Ch 3, skip the edge sc, and sc in the 3rd ch of the bridge. (Ch 3, skip 2 ch, sc in next ch) 3 times. Finish with ch 1 and hdc in the first sc. (19 + 1 + 3 + 1 = 24 sps)
The hole is about 2.8 in (7.1 cm) wide, which is 5 space widths, and 2.5 in (6.4 cm) tall.
Upper Tube
Rounds 15–35: Ch 1, sc in the first sp, (ch 3, sc in next sp) 23 times, then ch 1 and hdc in the first sc. (24 sps in each round)
On the last yarn-over of the final hdc in Round 35, change to Color B. Fasten off Color A.
Border
The border is made up of three parts: the top band, the hanging tab, and the hole edging. It is worked in Color B with the 5.0 mm hook.
Border gauge: 16 sc = 3 in (7.6 cm), which is about 5.33 sc per inch. Six rounds of sc = 1 in (2.5 cm).
Top Band
Round 36 (conversion): Ch 1, then work 2 sc in the first sp. Sc in next sc, 2 sc in next ch-3 sp. Repeat from * 22 more times. Sc in the last sc, then sl st to the first sc. (24 sc worked 1 per existing sc + 48 sc added in the spaces = 72 sc)*
Rounds 37–41: Ch 1, sc in each sc around, then sl st to the first sc. (72 sc in each round) Fasten off.
Why the math works: The tube is 13.5 in (34.3 cm) around. At 5.33 sc per inch, 13.5 × 5.33 = 72 sc. That means 3 sc per mesh space (24 × 3 = 72), so the band lies flat without flaring or pulling in.
Hanging Tab
Lay the tube flat with the hole centered on the front. Mark the center back stitch of Round 41, then count 4 sts back from the marker.
Row 1: Join B with a sc in that st, then sc in the next 7 sts. (8 sc)
Rows 2–24: Ch 1, turn, sc in each sc. (8 sc in each row)
The tab is 1.5 in (3.8 cm) wide and 4 in (10.2 cm) long. Fasten off, leaving a 12 in (30.5 cm) tail.
Thread the tab through the ring and fold it toward the inside. Whipstitch Row 24 to the inside of Round 37. The loop stands about 1.75 in (4.4 cm) above the rim.
Hole Edging
Round 1: Join B at the bottom edge of the hole and work sc evenly around it:
- 12 sc along the bottom (3 sc in each of the 4 unworked sps)
- 14 sc up the first side, along the row ends
- 15 sc across the bridge (1 sc in each ch)
- 14 sc down the second side
Sl st to the first sc. (12 + 14 + 15 + 14 = 55 sc)
Round 2: Ch 1, then (sc in next 3 sts, sc2tog) 11 times. Sl st to the first sc. (44 sc) Fasten off.
The decreases ease the rectangular gap into a round opening. The finished opening is about 2.5 in (6.4 cm) across.
Butterfly Appliqués (Make 1 Large, 1 Small)
Work the butterflies in Color C with the 4.0 mm hook.
Round 1: Make a magic ring. Ch 1, then work 12 sc in the ring. Sl st to the first sc. (12 sc)
Round 2 (wing loops): Ch 6, skip 2 sc, sl st in next sc. Repeat once more. Then ch 4, skip 2 sc, sl st in next sc. Repeat once more; the last sl st lands in the first sc. (4 loops: two ch-6 loops for the upper wings and two ch-4 loops for the lower wings)
Round 3 (wings):
- Each ch-6 loop: (2 dc, ch 1, 2 tr, ch 2, 2 tr, ch 1, 2 dc), then sl st in the next sl st.
- Each ch-4 loop: (2 hdc, ch 1, 3 dc, ch 1, 2 hdc), then sl st in the next sl st.
(8 sts per upper wing and 7 sts per lower wing = 30 sts, plus 4 sl sts)
The small butterfly stops here. Fasten off. It measures 2.25 in (5.7 cm) across the wings and 1.75 in (4.4 cm) tall.
Round 4 (large butterfly only):
- Each upper wing: Sc in the 2 dc, 2 sc in the ch-1 sp, sc in the 2 tr, (2 sc, picot, 2 sc) in the ch-2 sp, sc in the 2 tr, 2 sc in the ch-1 sp, sc in the 2 dc. (16 sc and 1 picot)
- Each lower wing: Sc in the 2 hdc, 2 sc in the ch-1 sp, sc in the 3 dc, 2 sc in the ch-1 sp, sc in the 2 hdc. (11 sc)
- Sl st in each sl st between the wings.
(54 sc, 2 picots) The large butterfly measures 3.25 in (8.3 cm) across the wings and 2.5 in (6.4 cm) tall.
Body and antennae: Use Color C. Wrap 5 stacked straight stitches down the center, from between the upper wings to between the lower wings. This makes a raised body about 1 in (2.5 cm) long on the large butterfly and 0.75 in (1.9 cm) on the small one.
Embroider 2 angled straight stitches for antennae. Make them 0.75 in (1.9 cm) long on the large butterfly and 0.5 in (1.3 cm) on the small one, with a French knot at each tip.
Placement:
- Large butterfly: Center it 1.5 in (3.8 cm) above the top of the hole edging, shifted 1 in (2.5 cm) left of center front.
- Small butterfly: Center it 4 in (10.2 cm) above the center of the large butterfly, shifted 1 in (2.5 cm) right of center front.
Whipstitch around the body and wing tips through the mesh sc’s. Sew only through the front layer.
Final Blocking
- Weave in all ends except the tab tail, which you’ve already used.
- Soak the holder in cool water for 10 minutes, then press the water out in a towel without wringing.
- Slide a rolled towel inside the tube so it measures 6.75 in (17.1 cm) wide flat.
- Gently pull the length to 18 in (45.7 cm) and straighten the diamond rows.
- Shape the hole into a circle and pin the butterfly wings flat.
- Let it dry completely, then remove the towel.
Final Quality-Control Checklist
- Every mesh round has 24 spaces.
- The band has 72 sc in every round and lies flat.
- The tube is 6.75 in (17.1 cm) wide flat and 18 in (45.7 cm) tall.
- The hole edging has 44 sc in its last round, and the opening is round.
- The tab sits at the center back and is sewn securely.
- The butterflies are sewn through the front layer only.
- There are no loose ends inside, where they could snag bags.
Troubleshooting
- The mesh is twisting: You probably skipped or doubled a space. Count to 24 every few rounds.
- The base is ruffling: Your chains are too loose. Tighten the ch-3s or drop a hook size.
- The band flares: Your tension is loose. Rework Round 36 with a smaller hook.
- The hole is too oval: Make sure each side of the edging has exactly 14 sc, then block the hole over a jar lid.
- The tab is pulling the rim: Sew the tab to two band rounds, not just one.
Care
Hand wash or machine wash on a gentle cycle in cool water, then reshape and dry flat. Avoid hot dryers, which can shrink cotton and distort the mesh.
Final Notes
The measurements build on each other. A gauge of 4 spaces = 2.25 in (5.7 cm) gives 24 spaces = 13.5 in (34.3 cm) around, or 6.75 in (17.1 cm) flat. Thirty-five mesh rounds and rows bring the tube to 17 in (43.2 cm). The 72-stitch band adds 1 in (2.5 cm), for 18 in (45.7 cm) total. If you check your size at each checkpoint, the finished holder will come out right.
Happy crocheting!