

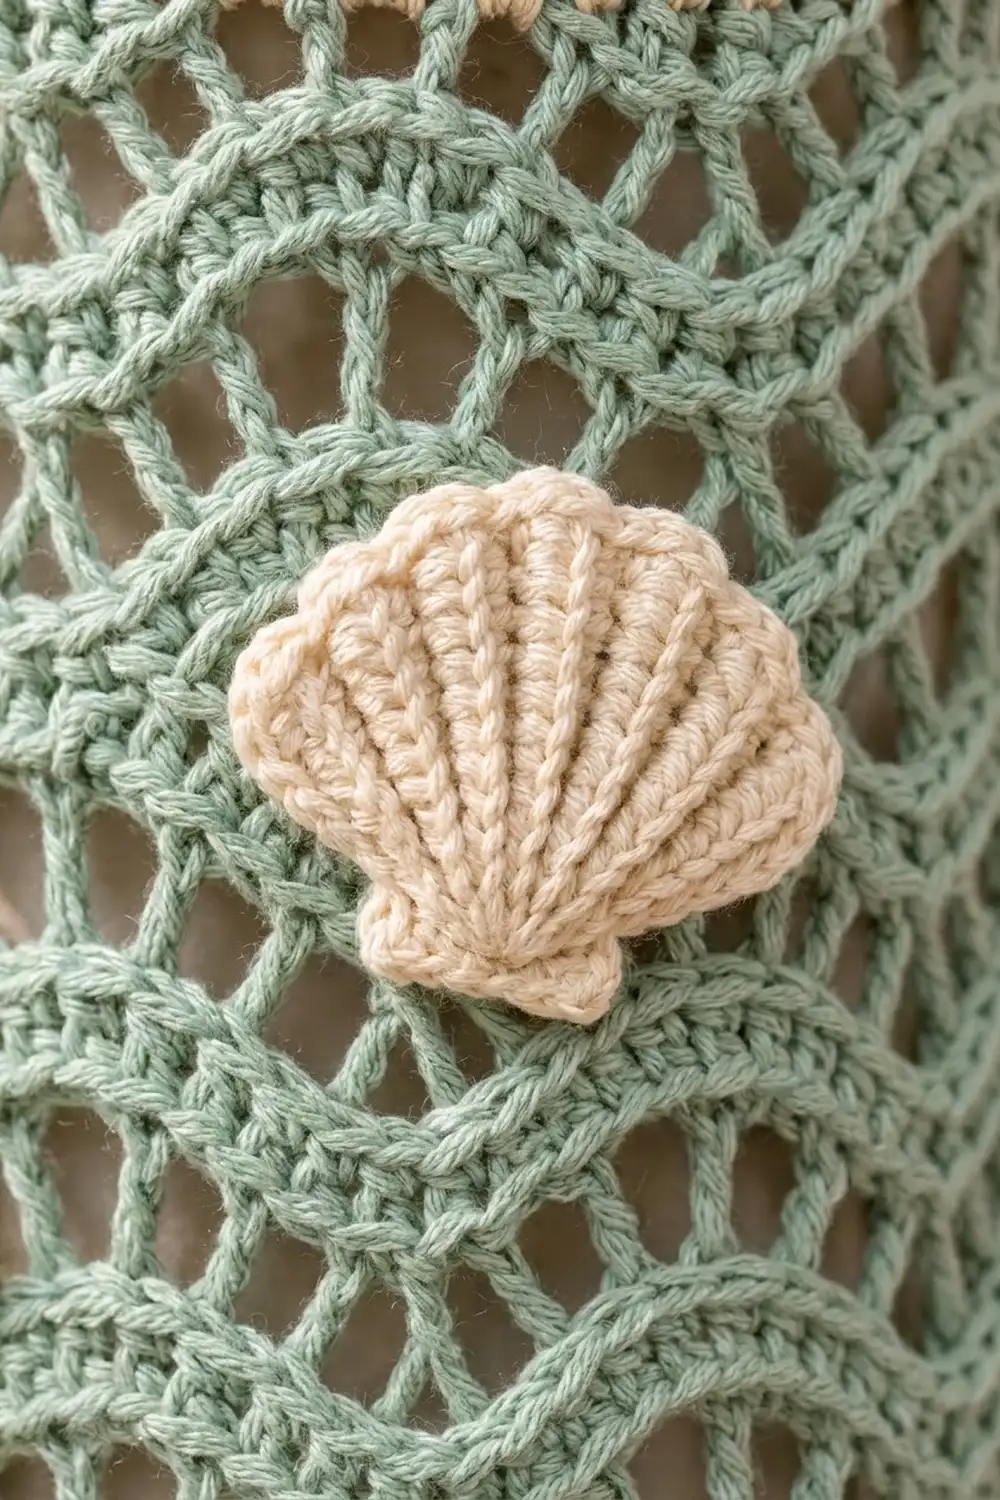
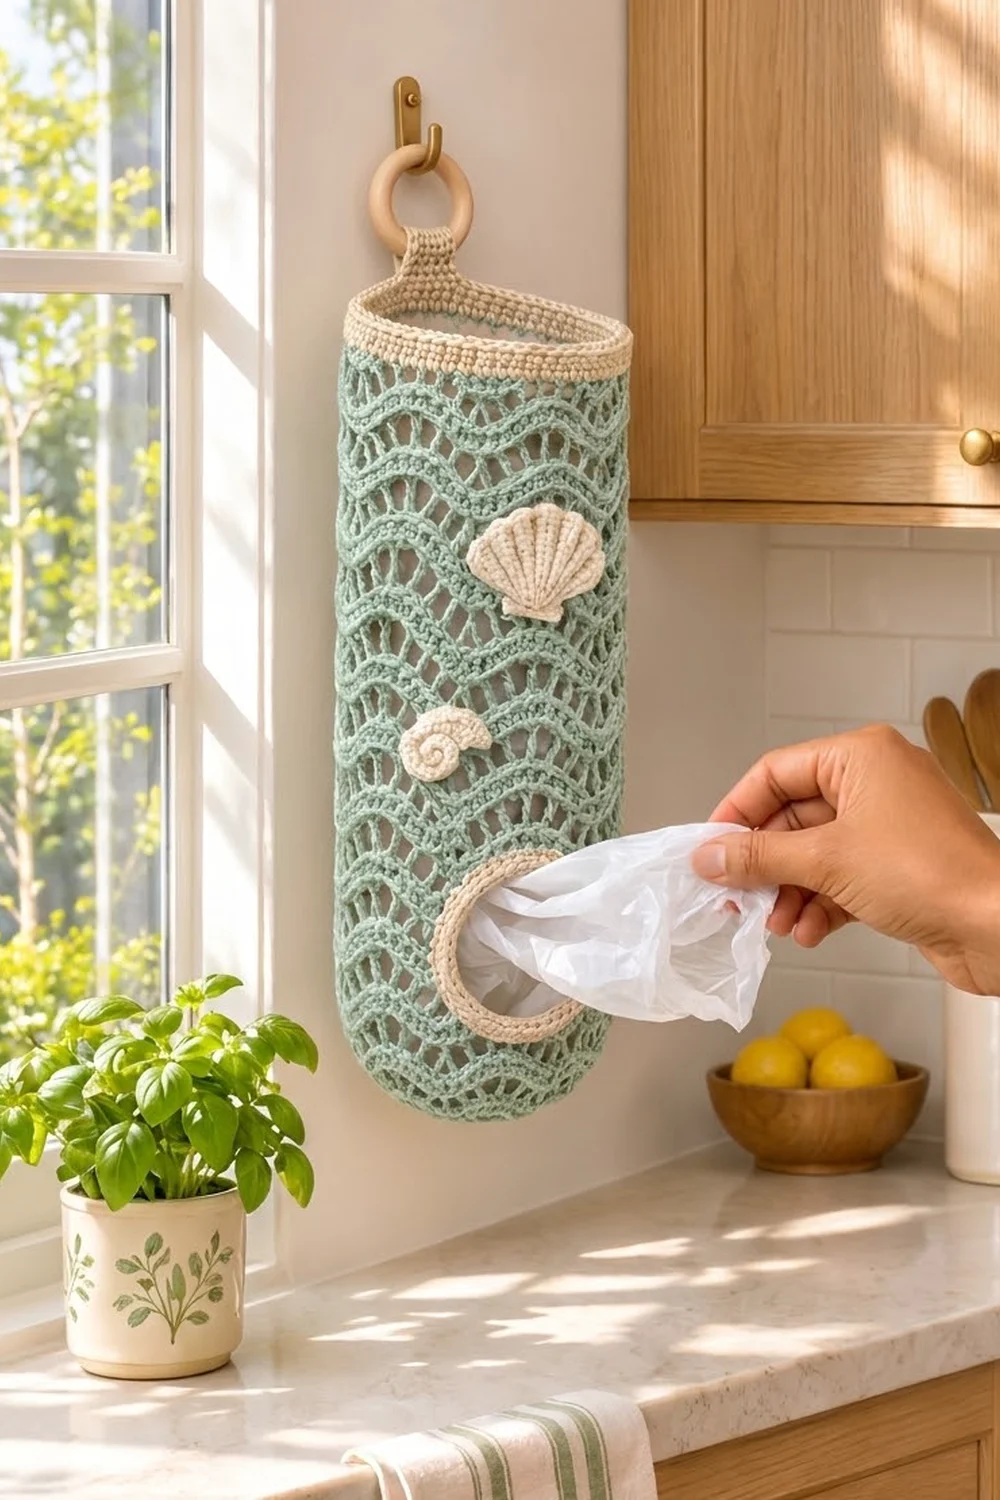
The Seafoam Tide Bag Holder is a tall hanging tube for storing plastic grocery bags. Soft sage-green waves run around the whole body, with open mesh rows between them. The cream details are a solid top band, a hanging tab, a corded trim around the round dispensing opening, and two small sewn-on seashells.
The style is relaxed and coastal, and it suits a kitchen, pantry, or laundry room. Because the lace is open, you can see when it needs refilling. You stuff bags in at the top and pull them out one at a time through the opening near the bottom.
This pattern uses US crochet terms. Laid flat, the finished holder is 7.5 in (19.1 cm) wide and about 21.75 in (55.2 cm) long from the folded bottom to the top edge, not counting the tab.
The holder is made in one piece. You start with a flat dc circle for the base, then work the wave-lace tube upward in joined rounds. To make the opening, you work six rows flat over part of the tube, then close the gap with a chain and go back to rounds. Last come the cream top band, the tab, the opening trim, and the two appliqués.
Finished Size and Construction
- Finished size: 7.5 in (19.1 cm) wide laid flat x about 21.75 in (55.2 cm) long, plus the tab
- Circumference: 15 in (38.1 cm)
- Skill level: Intermediate
- Terminology: US
- Yarn weight: Worsted (#4), cotton or cotton blend
- Hook: 5 mm (H-8) for the body; 4 mm (G-6) for the appliqués
- Number of pieces: 1 main body with the tab worked onto it, plus 2 sewn-on appliqués
- Layout: One tube, hung vertically from a ring
- Piece size: Base 4.75 in (12.1 cm) across; opening 3 in (7.6 cm) square before trim
- Size before border: 7.5 in (19.1 cm) x about 20.75 in (52.7 cm)
- Border depth: Top band 1 in (2.5 cm); opening trim 0.25 in (0.6 cm)
Materials
Choose a smooth worsted cotton or cotton-acrylic blend. Cotton keeps the wave lines crisp and resists stretching when the holder is full. Avoid fuzzy yarns, which blur the mesh.
- Color A, sage green: 200 g, about 340 m (base, body, mesh)
- Color B, cream: 50 g, about 85 m (band, tab, trim, shells)
Both amounts include a margin of about 15 percent for checking gauge and redoing a round or two.
Tools:
– 5 mm (H-8) and 4 mm (G-6) crochet hooks
– Wooden ring, 2.5 in (6.4 cm) across
– Stitch markers (at least 3)
– Tapestry needle
– Scissors and tape measure
– Rust-proof pins
– A tall jar or rolled towel about 4.75 in (12.1 cm) across, for blocking
Abbreviations (US Terms)
- ch: chain
- sl st: slip stitch
- sc: single crochet
- hdc: half double crochet
- dc: double crochet
- tr: treble crochet
- FPdc: front post double crochet
- rev sc: reverse single crochet (crab stitch)
- sk: skip
- st(s): stitch(es)
- sp: space
- RS / WS: right side / wrong side
Special stitch – rev sc: Work sc from left to right (right-handed). Insert the hook in the next stitch to the right, yarn over, pull up a loop, then yarn over and pull through both loops. This makes the corded edge around the opening.
Stitch patterns (multiple of 12 sts):
– Wave A: sc in next 2 sts, hdc in next 2, dc in next 2, tr in next 2, dc in next 2, hdc in next 2
– Wave C: tr in next 2 sts, dc in next 2, hdc in next 2, sc in next 2, hdc in next 2, dc in next 2
– Mesh B: dc in next st, ch 1, sk next st
In a Wave round, count each ch-1 sp from the Mesh round below as 1 stitch.
Gauge and Checkpoints
Gauge with the 5 mm hook:
– Wave pattern: 16 sts and 8 rounds = 4 in (10.2 cm). One 12-st repeat is 3 in (7.6 cm) wide. One 4-round repeat (A, B, C, B) is 2 in (5.1 cm) tall.
– Sc: 16 sts and 16 rounds = 4 in (10.2 cm).
Check gauge on the holder itself. Work the base and the first five body rounds, then measure before going further. Checkpoints:
- After base Rnd 5: 4.75 in (12.1 cm) across, lying flat
- After body Rnd 5: 2.25 in (5.7 cm) above the base edge; 7.5 in (19.1 cm) wide when flattened
- After Row 11: opening is 3 in (7.6 cm) square; body is 5.25 in (13.3 cm) tall
- After Rnd 13: 6.25 in (15.9 cm)
- After Rnd 37: 18.25 in (46.4 cm)
- After the top band: 19.25 in (48.9 cm)
If the width is too big, go down half a hook size and start again. If it’s too small, go up half a size. If only the height is off, add or remove whole 4-round repeats in Rnds 14–37, never single rounds.
Base
Use Color A and the 5 mm hook. The ch 3 at the start of each round doesn’t count as a stitch. Join each round with a sl st to the first dc.
Rnd 1: In a magic ring, 12 dc. Pull the ring closed. (12 sts)
Rnd 2: 2 dc in each st around. (24 sts)
Rnd 3: 2 dc in next st, dc in next st 12 times. (36 sts)
Rnd 4: 2 dc in next st, dc in next 2 sts 12 times. (48 sts)
Rnd 5: 2 dc in next st, dc in next 3 sts 12 times. (60 sts)
The base lies flat and measures 4.75 in (12.1 cm) across.
Body
Keep using Color A. Number the stitches of every round 1–60, starting from the join. Stitch 1 sits at center back.
Starting chains: Ch 1 before a round or row that starts with sc. Ch 2 before one that starts with dc. Ch 3 before one that starts with tr. None of these chains counts as a stitch.
Rnd 1 (set-up): Sc in each st around. Join. (60 sts)
Rnd 2: Work Wave A 5 times. Join. (60 sts)
Rnd 3: Work Mesh B 30 times. Join. (30 dc + 30 ch-1 sps = 60 sts)
Rnd 4: Work Wave C 5 times. Join. (60 sts)
Rnd 5: Repeat Rnd 3. Fasten off. (60 sts)
Opening Section (Worked Flat)
The opening sits over sts 25–36, one full repeat centered on the front. Leave those 12 sts of Rnd 5 unworked. Work back and forth over the other 48 sts. All Wave rows here are RS rows, so you always work the repeats in their normal order.
Row 6 (RS): Join A in st 37. Work Wave A 4 times, over sts 37–60 and then 1–24. Turn. (48 sts)
Row 7 (WS): Work Mesh B 24 times. Turn. (24 dc + 24 ch-1 sps = 48 sts)
Row 8 (RS): Work Wave C 4 times. Turn. (48 sts)
Row 9 (WS): Repeat Row 7. Turn. (48 sts)
Row 10 (RS): Work Wave A 4 times. Turn. (48 sts)
Row 11 (WS): Repeat Row 7. Don’t turn. (48 sts)
Closing chain: Ch 12. Carry the chain across the gap and sl st to the top of the first st of Row 11, above st 24. Fasten off. The opening is now 12 sts wide and 6 rows tall: 3 in x 3 in (7.6 cm x 7.6 cm).
Upper Body
Rnd 12: Join A in st 1 at center back. Work Wave C 5 times around. Over the opening, work into the back bumps of the 12 closing chains; these are sts 25–36. Join. (60 sts)
Rnd 13: Work Mesh B 30 times. Join. (60 sts)
Rnds 14–37: Work this 4-round sequence 6 times: Wave A, Mesh B, Wave C, Mesh B. (60 sts each round)
Rnds 2–37 make 9 complete repeats: 36 rounds at 0.5 in (1.3 cm) each, for 18 in. Add the 0.25 in (0.6 cm) set-up round and the body measures 18.25 in (46.4 cm). Fasten off A.
Shell Appliqués
Use Color B and the 4 mm hook.
Scallop Shell (make 1)
Row 1: In a magic ring, ch 2, 7 dc. Pull the ring snug but don’t join. Turn. (7 sts)
Row 2: Ch 2, 2 dc in each st. Turn. (14 sts)
Row 3 (ribs): Ch 2, dc in next st, FPdc around next st 7 times. Turn. (14 sts) The side facing you during this row is the shell’s right side.
Row 4 (scallops): Ch 1, sc in next st, 3 hdc in next st 7 times. (7 sc + 21 hdc = 28 sts)
Hinge: Don’t turn. Sl st down the row ends to the magic ring (4 sl sts). Ch 3, sl st in the ring, ch 3, sl st in the ring. This makes the two small ears at the base. Fasten off and leave a 12 in (30.5 cm) tail.
The scallop measures about 2.5 in (6.4 cm) wide and 2 in (5.1 cm) tall, with raised ribs fanning out from the base.
Spiral Shell (make 1)
Row 1: Ch 16. Starting in the 2nd ch from the hook, work:
– sl st in next 2 ch
– sc in next 3
– hdc in next 3
– dc in next 3
– 2 dc in each of next 2
– 2 tr in each of last 2
(2 + 3 + 3 + 3 + 4 + 4 = 19 sts over 15 ch)
Fasten off and leave a 12 in (30.5 cm) tail. Starting from the sl st end, roll the strip into a flat coil with the tr end on the outside, then tack the layers together from the back. The coil is about 1.5 in (3.8 cm) across.
Border
The border has two parts, the top band and the opening trim. Use Color B, the 5 mm hook, and the sc gauge (16 sts and 16 rounds = 4 in / 10.2 cm).
Top Band
Rnd 1: Join B in st 1 of Rnd 37. Ch 1, sc in each dc and each ch-1 sp around. Join. (30 + 30 = 60 sts; 0 added)
Rnds 2–4: Ch 1, sc in each st. Join. (60 sts)
Why the math works: At 4 sts per inch, 60 sc is 15 in (38.1 cm), the same as the body’s circumference, so the band neither flares nor pulls in. Four sc rounds at 0.25 in (0.6 cm) each make a 1 in (2.5 cm) band, bringing the body from 18.25 in to 19.25 in (48.9 cm).
Hanging Tab
Row 1: Without fastening off, sl st to st 58. Ch 1, sc in sts 58, 59, 60, 1, 2, and 3. Turn. (6 sts)
Rows 2–24: Ch 1, sc in each st. Turn. (6 sts)
The tab measures 1.5 in x 6 in (3.8 cm x 15.2 cm). Pass it through the wooden ring toward the inside of the holder. Whipstitch Row 24 to the inside of band Rnds 1–2, leaving enough slack for the ring to swing.
Opening Trim
Rnd 1: Join B at the bottom right corner of the opening. Ch 1 and work around the opening:
– Bottom edge: 12 sc, one in each unworked st of Rnd 5
– First side: 12 sc, 2 in each of the 6 row ends
– Top edge: 12 sc, one in each free loop of the closing chain
– Second side: 12 sc, 2 in each row end
Join. (12 + 12 + 12 + 12 = 48 sts)
Rnd 2: Ch 1, rev sc in each st. Join. (48 sts) Fasten off.
Why the math works: Each side of the opening is 3 in (7.6 cm), and 12 sc at 4 sts per inch also measures 3 in, so the edges lie flat. Because no extra stitches are added at the corners, the trim draws the square into a circle. The trim is 0.25 in (0.6 cm) deep on each side, which leaves a clear opening of about 2.5 in (6.4 cm).
Final Blocking
- Weave in all ends inside the solid wave rounds, where they won’t show through the mesh.
- Soak the holder in cool water for 10 minutes, then press out the water. Don’t wring it.
- Slide the holder over the jar or rolled towel so the base cups into a rounded bottom.
- Smooth each wave round so the crests stack in vertical lines.
- Shape the opening into a 2.5 in (6.4 cm) circle, pinning the trim if needed.
- Check the width, 7.5 in (19.1 cm), and the length, about 21.75 in (55.2 cm). Let the holder dry completely.
- Sew on the scallop about 10.5 in (26.7 cm) above the base edge and 1 in (2.5 cm) right of center.
- Sew on the spiral shell about 7.5 in (19.1 cm) above the base edge and 1.5 in (3.8 cm) left of center.
Final Quality-Control Checklist
- [ ] Base Rnd 5 has 60 sts and lies flat
- [ ] Every body round has 60 sts and every flat row has 48
- [ ] 5 wave crests go around the tube, stacked vertically
- [ ] The opening is centered on the front, opposite the seam
- [ ] The trim has 48 sts and the opening is round
- [ ] The top band has 60 sts and doesn’t flare
- [ ] The tab is centered over the back seam and firmly sewn
- [ ] Both shells are securely attached
- [ ] Finished size is 7.5 in x about 21.75 in (19.1 cm x 55.2 cm)
Troubleshooting
- Base ruffles: Your dc are too loose. Use a hook half a size smaller for the base.
- Base cups early: Your tension is too tight. Relax your grip or go up half a size.
- Waves drift sideways: You probably skipped a ch-1 sp. Each one counts as 1 stitch.
- Opening too short: Before the closing chain, work 2 more flat rows (Wave A, then Mesh B). Then add 4 sc to each side in trim Rnd 1.
- Band flares: Rework it with the 4 mm hook.
- Tab stretches: Add a second layer of sc rows or a felt backing.
Care
Hand wash in cool water and dry flat over a jar. Avoid the dryer, which can distort the lace waves.
Final Notes
Each measurement builds on the one before. At a gauge of 16 sts = 4 in (10.2 cm), the 60-st base is 4.75 in (12.1 cm) across, which sets a 15 in (38.1 cm) tube. The one-repeat opening is 3 in (7.6 cm) square, and the trim makes it a 2.5 in (6.4 cm) circle. The 36 pattern rounds plus the set-up round make an 18.25 in (46.4 cm) body. The band brings it to 19.25 in (48.9 cm), and the rounded base adds the rest of the 21.75 in (55.2 cm) length. If each checkpoint matches, the finished holder will too.
Happy crocheting!