

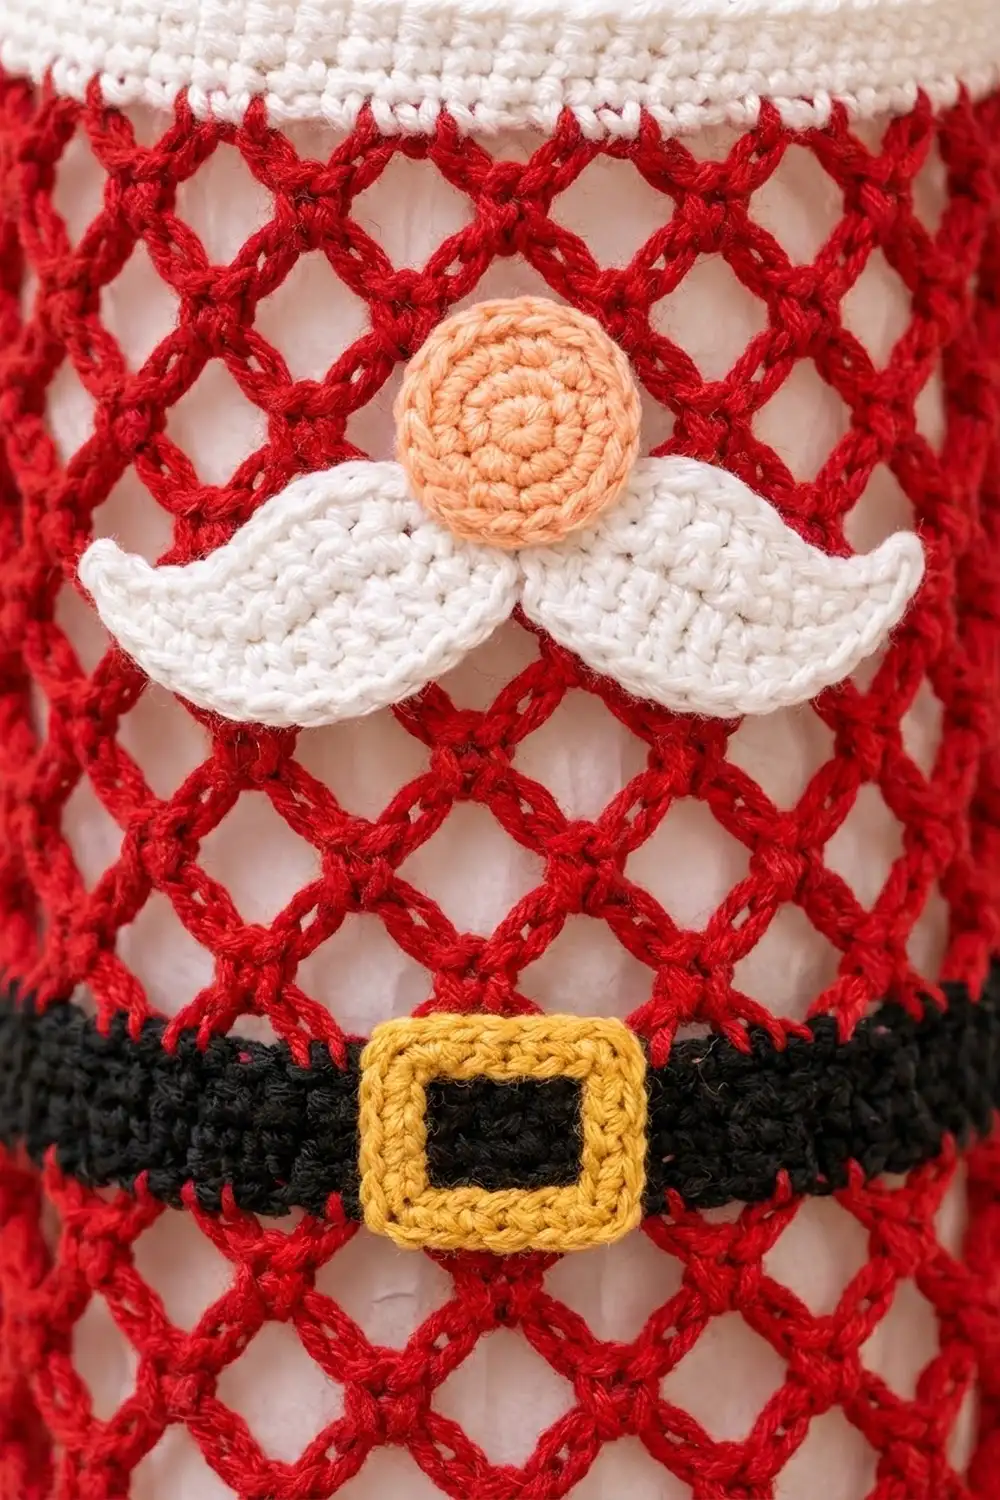
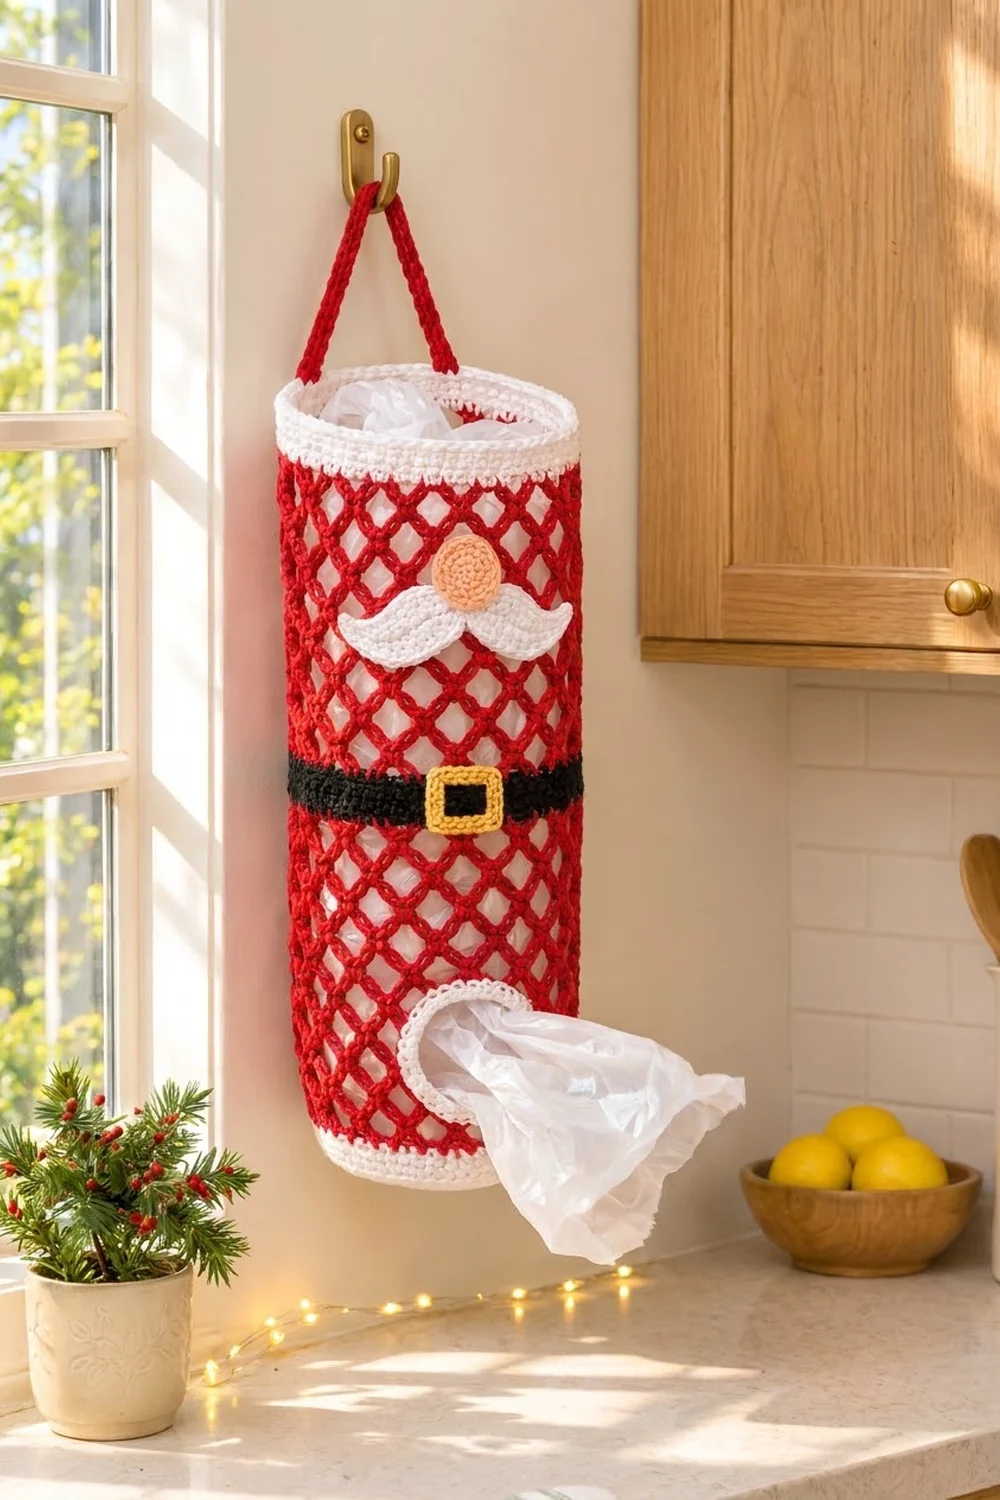
This Santa-themed bag holder hangs on a hook and keeps plastic grocery bags in one place. The red diamond mesh lets you see how full it is. A black belt with a gold buckle goes around the middle, and a white mustache with a round peach nose sits above it, so the tube reads as Santa’s coat at a glance.
The colors are classic Christmas: bright red, crisp white, black, golden yellow and soft peach. The look is cheerful but tidy, and it suits a holiday kitchen or a pantry door.
The pattern uses US crochet terms. The finished holder is about 17.8 in (45.2 cm) tall and 18 in (45.7 cm) around. That is 9 in (22.9 cm) wide when pressed flat and about 5.7 in (14.5 cm) across the base. The hanging strap adds a loop above the rim.
You make the body in one piece from the bottom up. It starts with a flat white circle base and a short white band. Next comes red mesh with the dispenser opening built in, then a solid black belt, more red mesh and a white top rim. You make the strap, nose, two mustache halves and buckle separately and sew them on.
Finished Size and Construction
- Finished size: 17.8 in (45.2 cm) tall x 18 in (45.7 cm) around; 9 in (22.9 cm) flat width
- Skill level: Intermediate
- Terminology: US crochet terms
- Yarn weight: Worsted (#4) cotton
- Hook: 5.0 mm (US H-8)
- Number of pieces: 1 body, 1 strap and 4 appliqués (nose, 2 mustache halves, buckle), which is 6 pieces in all
- Layout: One upright tube with a closed base and a dispenser opening on the front
- Piece size: Base 5.7 in (14.5 cm) across; opening about 3 in (7.6 cm) wide x 3.5 in (8.9 cm) tall inside the trim
- Size before border: 16.5 in (41.9 cm) tall, measured from the base edge
- Border depth: Top rim 1.3 in (3.3 cm); opening trim about 0.5 in (1.3 cm)
Materials
Use a smooth, firm worsted-weight cotton or cotton blend. Cotton holds the mesh shape and won’t stretch out under the weight of the bags. The amounts below assume a yarn of about 155 m per 100 g.
- Red: 80 g (123 m), for the mesh and strap
- White: 60 g (92 m), for the base, bands, opening trim and mustache
- Black: 15 g (23 m), for the belt and buckle center
- Golden yellow: 10 g (15 m), for the buckle frame
- Peach: 10 g (15 m), for the nose
All amounts include extra for your gauge swatch and small differences in tension.
Tools:
– 5.0 mm (US H-8) crochet hook
– Tapestry needle
– 4 stitch markers
– Rust-proof pins
– Scissors
– Measuring tape
Abbreviations (US Terms)
- ch: chain
- sl st: slip stitch
- sc: single crochet
- hdc: half double crochet
- dc: double crochet
- tr: treble crochet
- sc2tog: single crochet 2 together
- BLO: back loop only
- MR: magic ring
- st(s): stitch(es)
- sk: skip
Special stitch: mesh closing (ch 2, dc). At the end of a mesh round, ch 2 and dc in the first sc of the round. This takes the place of a ch-5 loop and leaves your hook at the top center of that loop, ready for the next round.
Gauge and Checkpoints
- Solid sc: 16 sts and 18 rnds = 4 in (10.2 cm)
- Mesh: 4 ch-5 loops and 8 mesh rnds = 4 in (10.2 cm). One loop is 1 in (2.5 cm) wide, and each mesh rnd adds 0.5 in (1.3 cm).
Make the base first, since it doubles as your gauge swatch. After Rnd 12 the circle should measure 5.7 in (14.5 cm) across. If it’s larger, use a hook 0.5 mm smaller. If it’s smaller, use a hook 0.5 mm larger. Then start over.
Checkpoints, measured from the base edge with the tube flattened:
– After the bottom band: 1.1 in (2.8 cm) tall and 9 in (22.9 cm) wide
– After the lower mesh: 8.1 in (20.6 cm)
– After the belt: about 9 in (22.9 cm)
– After the upper mesh: 16.5 in (41.9 cm)
– After the top rim: 17.8 in (45.2 cm)
If the mesh comes out too tall, your chains are loose, so pull each ch-5 snug. If the tube flares out or narrows, count the loops again. Every full mesh round has exactly 18.
Base (White)
Join each round with a sl st to the first sc. The ch 1 at the start of each round does not count as a stitch.
Rnd 1: 6 sc in MR. (6 sts)
Rnd 2: 2 sc in each st. (12 sts)
Rnd 3: Sc in next st, 2 sc in next st; repeat around. (18 sts)
Rnd 4: Sc in next 2 sts, 2 sc in next st; repeat around. (24 sts)
Rnds 5–12: Keep adding 6 sts per round, with 1 more sc between increases each round. Rnd 5 has 30 sts, Rnd 6 has 36, Rnd 7 has 42, Rnd 8 has 48, Rnd 9 has 54, Rnd 10 has 60, Rnd 11 has 66 and Rnd 12 has 72.
Checkpoint: 72 sts, 5.7 in (14.5 cm) across.
Bottom Band (White)
Rnd 13: Ch 1, sc in BLO of each st around. (72 sts) This turns the edge upward.
Rnds 14–17: Ch 1, sc in each st around. (72 sts)
Number the stitches of Rnd 17 from 1 to 72, starting at the join. Place markers in st 58 and st 72. Sts 58–72 (15 sts, 3.75 in / 9.5 cm) stay unworked and form the bottom of the dispenser opening. St 65, the middle of this section, marks the front of the holder.
Fasten off white. The band measures 1.1 in (2.8 cm).
Lower Mesh with Dispenser Opening (Red)
Work Rows 1–9 back and forth over sts 1–57 only, leaving the gap open.
Row 1: Join red in st 1. Sc in st 1, ch 5, sk 3 sts, sc in next st; repeat 14 times, ending with sc in st 57. (14 loops)
Row 2: Ch 5 (counts as dc + ch 2), turn, sc in first ch-5 loop, ch 5, sc in next loop; repeat 13 times, ch 2, dc in last sc. (13 full loops + 2 half loops)
Row 3: Ch 1, turn, sc in dc, ch 5, sc in next ch-5 loop; repeat 13 times, ch 5, sc in 3rd ch of turning ch. (14 loops)
Rows 4–9: Repeat Rows 2–3 three times. Row 9 is a 14-loop row that ends at the st-57 side.
The opening is now 4.5 in (11.4 cm) tall.
Rnd 10 (bridge round): Without turning, ch 15 across the gap, then sc in the first sc of Row 9 to close the tube. Make sure the bridge isn’t twisted. Ch 5, sc in first loop of Row 9, ch 5, sc in next loop; repeat 13 times. Ch 5, sc around the bridge chain one quarter of the way across. Ch 5, sc around the bridge at the center. Ch 5, sc around the bridge three quarters of the way across. Ch 2, dc in the sc where the round began. (18 loops: 1 + 13 + 1 + 2 + 1)
Rnds 11–14: Sc around the post of the closing dc, ch 5, sc in next loop; repeat 17 times, ch 2, dc in first sc. (18 loops each round)
Checkpoint: 8.1 in (20.6 cm) from the base edge. Fasten off red.
Belt (Black)
Belt Rnd 1 (conversion): Join black in any loop. Ch 1, 4 sc in each loop around, including 4 sc around the closing ch-2 and dc. (18 loops x 4 sc = 72 sts)
Belt Rnds 2–4: Ch 1, sc in each st around. (72 sts)
The belt is 0.9 in (2.3 cm) tall. Fasten off black.
Upper Mesh (Red)
Rnd 1: Join red in the belt st directly above st 1 of the band. Sc in same st, ch 5, sk 3 sts, sc in next st; repeat 17 times, ch 2, dc in first sc. (17 loops + 1 closing loop = 18 loops)
Rnds 2–15: Sc around the post of the closing dc, ch 5, sc in next loop; repeat 17 times, ch 2, dc in first sc. (18 loops each round)
Checkpoint: 16.5 in (41.9 cm) from the base edge. Fasten off red.
Strap (Red)
Ch 51.
Row 1: Sc in 2nd ch from hook and each ch across. (50 sts)
Row 2: Ch 1, turn, sc in each st. (50 sts)
The strap measures 12.5 in (31.8 cm) x about 0.5 in (1.3 cm). Leave a long tail.
Nose (Peach)
Rnd 1: 6 sc in MR. (6 sts)
Rnd 2: 2 sc in each st. (12 sts)
Rnd 3: Sc in next st, 2 sc in next st; repeat. (18 sts)
Rnd 4: Sc in next 2 sts, 2 sc in next st; repeat. (24 sts)
Rnd 5: Sl st loosely in each st. (24 sl sts)
The nose is about 1.8 in (4.6 cm) across. Leave a tail.
Mustache Halves (White, make 2)
Each half is a teardrop shape worked along both sides of a chain.
Ch 12.
Side 1: Starting in the 2nd ch from hook: sl st, sc, hdc, hdc, dc, dc, dc, tr, tr, tr, then 5 tr in the last ch. (15 sts)
Side 2: Working along the other side of the chain: tr, tr, tr, dc, dc, dc, hdc, hdc, sc, then sl st in the same ch as the first sl st. (10 sts; 25 sts total)
Tip curl: Ch 4, sl st in 2nd ch from hook and in next 2 ch, sl st into the tip.
Each half is about 2.75 in (7.0 cm) long and 1.25 in (3.2 cm) tall at the wide end. With 0.5 in (1.3 cm) of overlap, the two halves make a mustache about 5 in (12.7 cm) wide.
Buckle (Black and Golden Yellow)
Center (black): Ch 5. Row 1: Sc in 2nd ch from hook and next 3 ch. (4 sts) Rows 2–3: Ch 1, turn, sc in each st. (4 sts) Fasten off black. The center is 1 in (2.5 cm) x about 0.7 in (1.8 cm).
Frame Rnd 1 (gold): Join gold in the first st of Row 3. Ch 1, 3 sc in first st, sc in next 2 sts, 3 sc in last st. Sc in each of the 3 row-ends. Along the foundation chain, 3 sc in first ch, sc in next 2 ch, 3 sc in last ch. Sc in each of the 3 row-ends. Join. (8 + 3 + 8 + 3 = 22 sts)
Frame Rnd 2: Ch 1, sc in each st, with 3 sc in the center st of each corner. Join. (22 sts + 8 added at corners = 30 sts)
The buckle measures about 1.9 in (4.8 cm) x 1.6 in (4.1 cm).
Border: Top Rim and Opening Trim (White)
The border uses the solid sc gauge: 4 sts per 1 in (2.5 cm).
Top Rim
Rnd 1 (conversion): Join white in any loop of the last mesh round. Ch 1, 4 sc in each loop. (18 loops x 4 sc = 72 sts; 36 per side when flattened)
Rnds 2–6: Ch 1, sc in each st. (72 sts; 36 per side)
Fasten off. The rim is 1.3 in (3.3 cm) deep.
Why the numbers work: 72 sts at 4 sts per inch is 18 in (45.7 cm), the same as the base and the belt. The rim won’t flare out or pull in.
Opening Trim
Rnd 1: Join white at the lower right corner of the opening. Ch 1, then:
– Bottom: sc in each of the 15 unworked sts 58–72. (15 sts)
– Side: 2 sc in each of the 9 row-ends. (18 sts)
– Top: 15 sc worked around the bridge chain from below, covering it. (15 sts)
– Side: 2 sc in each of the 9 row-ends. (18 sts)
Join. (15 + 18 + 15 + 18 = 66 sts)
Rnd 2: Ch 1, sc in each st. At each of the 4 corners, sc2tog over the last st of one side and the first st of the next side. Join. (Bottom 13 + side 16 + top 13 + side 16 = 58 sc, plus 4 sc2tog = 62 sts)
Fasten off. The trim is about 0.5 in (1.3 cm) wide.
Why the numbers work: each mesh row is 0.5 in (1.3 cm) tall, so 2 sc per row-end gives 4 sts per inch, which matches the gauge. The bottom and top get 1 sc per available stitch or chain. The 4 corner decreases round off the rectangle, so the opening settles into a soft oval.
Final Blocking
- Weave in all ends, hiding the color changes on the inside.
- Mist the body lightly with water.
- Slide a rolled towel or a cylinder about 5.7 in (14.5 cm) wide inside the tube.
- Gently stretch the mesh lengthwise so the diamonds open evenly.
- Check that the body is 17.8 in (45.2 cm) tall and 9 in (22.9 cm) wide when flattened.
- Pin the nose, mustache halves and buckle flat on a towel. Curl each mustache tip upward and pin it.
- Let everything dry completely.
- Sew the buckle to the middle of the belt, directly above st 65.
- Overlap the mustache halves by 0.5 in (1.3 cm) at center front, about 2.75 in (7.0 cm) below the top rim. Sew them to the points where the mesh loops meet.
- Sew the nose just above the mustache, overlapping its center.
- Sew 1 in (2.5 cm) of each strap end inside the top rim at sts 11 and 47. These sit at the sides when the opening faces front.
Final Quality-Control Checklist
- Every full mesh round has 18 loops.
- The base, belt and top rim each have 72 sts.
- The opening is centered below the belt, at st 65.
- The appliqués line up vertically with the opening.
- The trim lies flat without ruffling.
- The strap is sewn securely to the rim.
- No yarn ends show on the outside.
Troubleshooting
The tube spirals. You aren’t closing each round in the same spot. Use the ch 2, dc closing at the end of every round.
The opening edge puckers. Work no more than 2 sc per row-end.
The bridge sags. Pull the ch-15 snug, or redo it with ch 14.
The mustache won’t curl. Wet the tips again and pin them tighter.
Bags slip through the mesh. Use a hook one size smaller and check your gauge again.
Care
Hand wash in cool water and lay flat to dry, reshaping the mesh while it’s damp. Don’t use the dryer, because it can shrink cotton.
Final Notes
The measurements build on each other in a simple chain. A 72-st base gives 18 in (45.7 cm) around. The bottom band adds 1.1 in (2.8 cm), the lower mesh adds 7 in (17.8 cm), the belt adds 0.9 in (2.3 cm), the upper mesh adds 7.5 in (19.1 cm) and the top rim adds 1.3 in (3.3 cm). That makes 17.8 in (45.2 cm) in total. Check each stage before moving on, and your Santa will hang straight and hold plenty of bags all season.
Happy crocheting!