

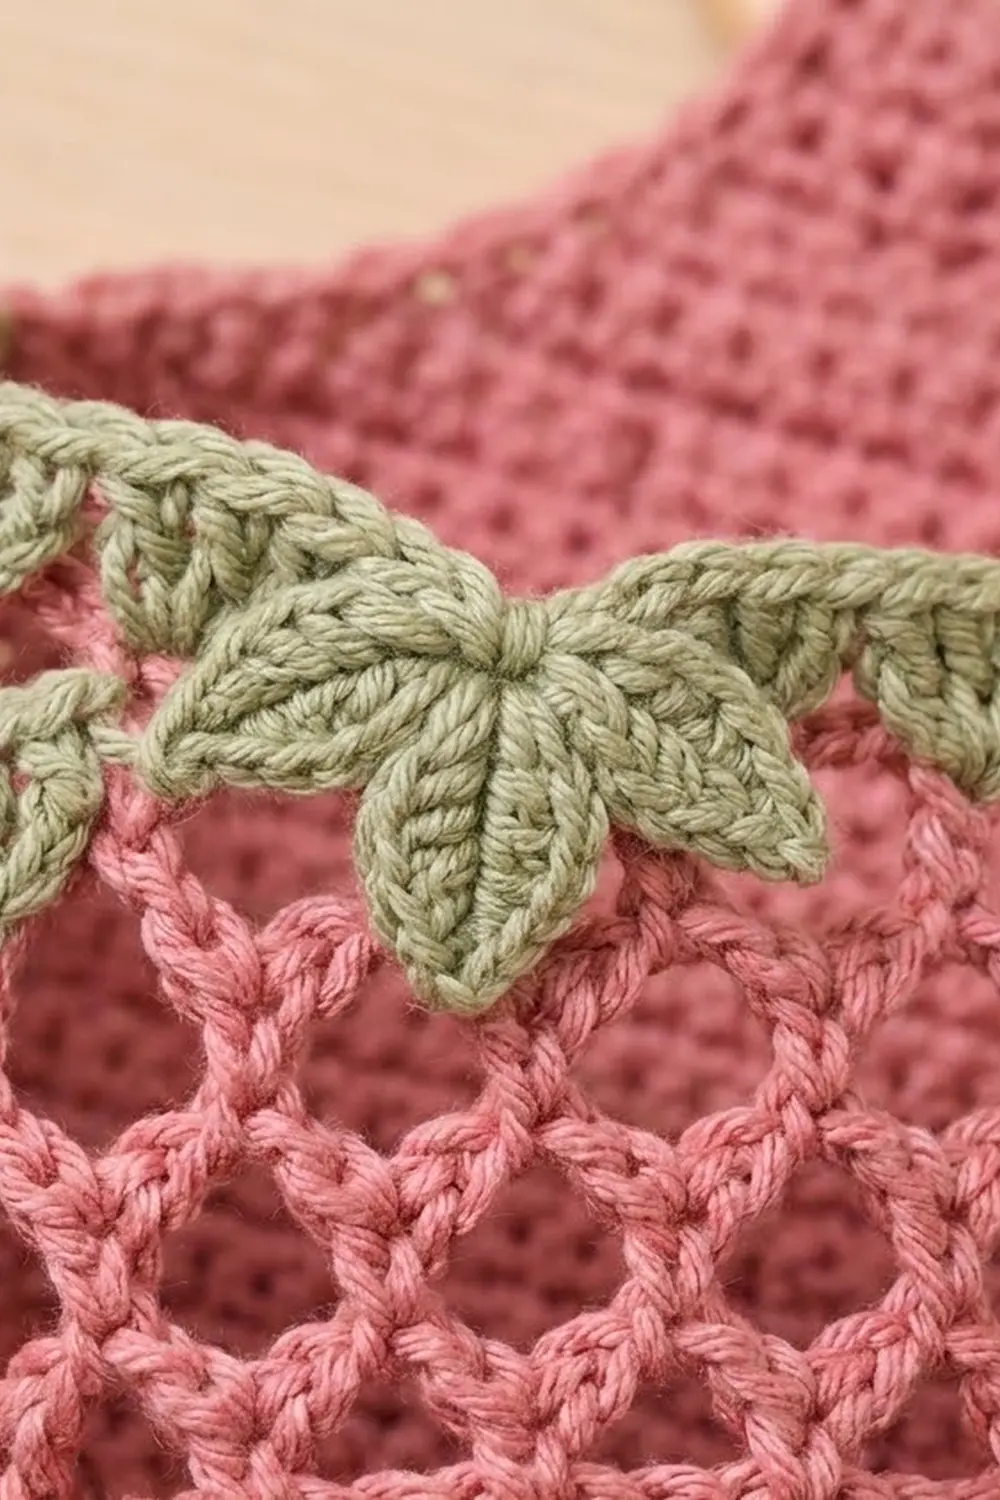
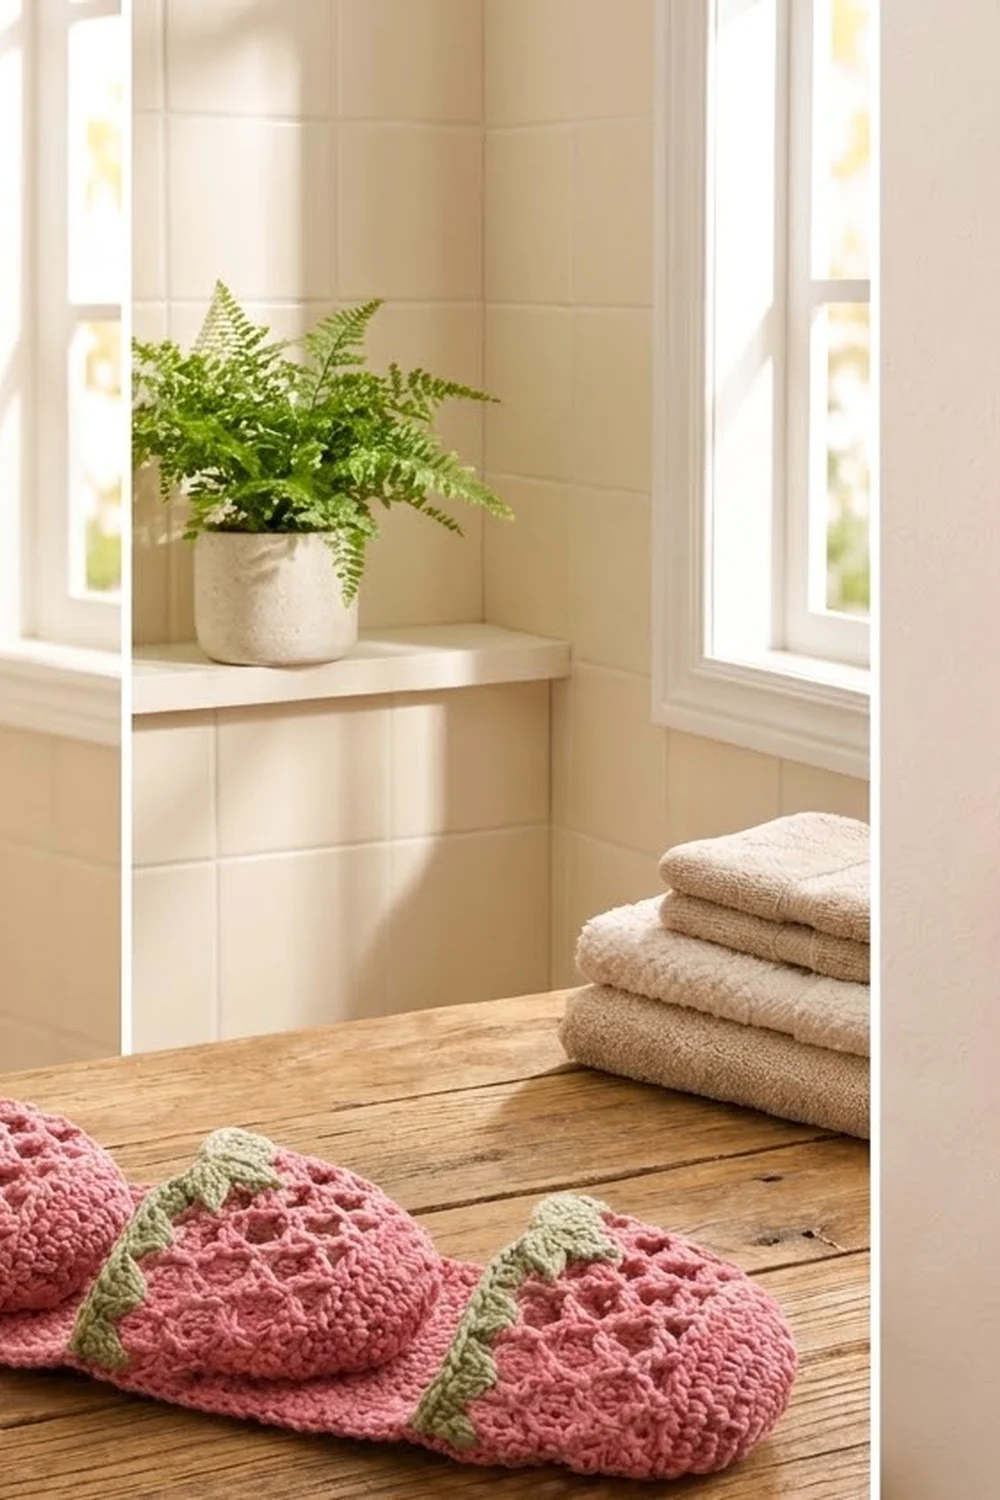
This hanging toilet paper holder makes spare rolls look like a row of strawberries. A long pink back panel hangs from a wooden ring. Three round mesh pockets are sewn down its front, and each pocket ends in a sage green rim of leaf points with a small leaf cluster at the front.
The colors are dusty rose pink and sage green. The style is cottage-bathroom: practical, a little playful, and easy to wipe down or wash. All instructions use US crochet terms.
The finished back panel measures 6.5 in (16.5 cm) wide by 22.5 in (57.2 cm) tall. With the hanging strap, the holder is about 24 in (61.0 cm) long. Each pocket holds one standard roll.
You will make one back panel worked flat in rows, add a one-round border and a strap, then make three pockets worked in the round from the bottom up. Three small leaf calyxes are sewn to the pockets, and the pockets are sewn to the panel at measured heights.
Finished Size and Construction
- Finished size: 6.5 in × 22.5 in (16.5 cm × 57.2 cm) panel; about 24 in (61.0 cm) long with the strap
- Skill level: Easy-intermediate
- Terminology: US
- Yarn weight: Worsted (#4) cotton
- Hook: 5.0 mm (H-8)
- Number of pieces: 7 (1 back panel, 3 pockets, 3 leaf calyxes) plus 1 wooden ring
- Layout: 3 pockets stacked vertically, 1 column
- Pocket size: 16 in (40.6 cm) opening circumference, about 4.5 in (11.4 cm) deep
- Panel size before border: 6 in × 22 in (15.2 cm × 55.9 cm)
- Border depth: 0.25 in (0.6 cm) on each edge
Materials
Use a smooth worsted-weight cotton or cotton blend. Cotton holds its shape in a damp bathroom and shows stitch texture well. The amounts below assume about 155 m (170 yd) per 100 g.
- Dusty rose pink: 160 g, about 248 m (271 yd)
- Sage green: 35 g, about 54 m (59 yd)
These quantities include a margin of about 20% for gauge differences and swatching.
Tools:
– 5.0 mm (H-8) crochet hook
– Wooden ring, 2.75 in (7.0 cm) outer diameter
– Tapestry needle
– Stitch markers (at least 6)
– Locking pins
– Measuring tape
– Scissors
Abbreviations (US Terms)
- ch: chain
- sl st: slip stitch
- sc: single crochet
- sc2tog: single crochet 2 together
- hdc: half double crochet
- dc: double crochet
- st(s): stitch(es)
- sk: skip
- RS: right side
- Rnd: round
Special stitch: Leaf scallop. Work (hdc, dc, ch 3, sl st in 3rd ch from hook, dc, hdc) all in the same stitch. The ch-3 picot makes the pointed leaf tip.
Gauge and Checkpoints
Gauge: 16 sc × 18 rows = 4 in (10.2 cm) in sc worked flat. That is 4 sc and 4.5 rows per inch.
Test one piece first. Make the first pocket before the panel, because the pocket is quicker and shows you whether your tension is right.
Checkpoints:
– Pocket base after Rnd 6: 3.75 in (9.5 cm) across
– Pocket opening after Rnd 16: 16 in (40.6 cm) around, 8 in (20.3 cm) wide when folded flat
– Panel after Row 7: 6 in (15.2 cm) wide, about 1.6 in (4.1 cm) tall
– Panel after Row 90: 20 in (50.8 cm) tall
– Panel after Row 99: 22 in (55.9 cm) tall
If your pieces are too big, go down to a 4.5 mm (US 7) hook. If they are too small, go up to a 5.5 mm (I-9) hook. Change the hook, not the stitch counts. All of the placement math depends on the counts staying the same.
Pocket (Make 3)
Each pocket is worked in joined rounds with the RS facing. Do not turn.
Solid base (pink)
Make a magic ring.
Rnd 1: Ch 1, 8 sc in ring, sl st to first sc. (8)
Rnd 2: Ch 1, 2 sc in each st around, sl st to first sc. (16)
Rnd 3: Ch 1, sc in next st, 2 sc in next st; repeat around, sl st to first sc. (24)
Rnd 4: Ch 1, sc in next 2 sts, 2 sc in next st; repeat around, sl st to first sc. (32)
Rnd 5: Ch 1, sc in next 3 sts, 2 sc in next st; repeat around, sl st to first sc. (40)
Rnd 6: Ch 1, sc in next 4 sts, 2 sc in next st; repeat around, sl st to first sc. (48)
Checkpoint: the base is 3.75 in (9.5 cm) across and lies flat.
Rnds 7–8: Ch 1, sc in each st around, sl st to first sc. (48)
These rounds have no increases, so the sides turn upward and form the solid pink band at the bottom of the bowl.
Diamond mesh (pink)
Rnd 9: Ch 1, sc in first st, ch 5, sk 2 sts, sc in next st; repeat from * 14 more times, ch 5, sk 2 sts, sl st to first sc. (16 ch-5 loops)
Check: 1 sc + 15 repeats of 3 sts + the final 2 skipped sts = 48 sts used.
Rnd 10: Sl st in next 3 ch to reach the center of the first loop. Ch 1, sc in same loop, ch 5, sc in next ch-5 loop; repeat from * 14 more times, ch 5, sl st to first sc. (16 loops)
Rnds 11–14: Repeat Rnd 10. (16 loops each round)
Each sc lands in the center of a loop from the round below. This staggers the loops into the diamond lattice. The mesh is about 3 in (7.6 cm) deep.
Rim
Rnd 15 (conversion round, pink): Sl st in next 3 ch. Ch 1, 4 sc in each ch-5 loop around, sl st to first sc. Count: 16 loops × 4 sc = 64 sc. Nothing is worked into the sc between the loops. Fasten off pink.
Rnd 16 (green): Join green in any st at what will be the back of the pocket. Ch 1, sc in each st around, sl st to first sc. (64)
Place a marker in the first st. This round is numbered sts 1–64.
Checkpoint: the opening measures 16 in (40.6 cm) around (64 sc ÷ 4 per inch).
Rnd 17 (leaf scallops, green): Sl st in first st. Sk 1 st, leaf scallop in next st, sk 1 st, sl st in next st; repeat from * 14 more times. Then sk 1 st, leaf scallop in next st, sk 1 st, and sl st into the first sl st. (16 leaf scallops)
Each repeat uses 4 sts, so 16 × 4 = 64. Fasten off and weave in the ends.
The finished pocket is about 4.5 in (11.4 cm) deep.
Leaf Calyx (Make 3)
Use green.
Make a magic ring.
Rnd 1: Ch 1, 5 sc in ring, sl st to first sc. (5)
Rnd 2: Ch 6. Working back along the chain: sl st in 2nd ch from hook, sc in next ch, hdc in next ch, dc in next ch, hdc in last ch. Sl st in next sc of Rnd 1. Repeat from * 4 more times. (5 leaves)
Each leaf is about 1 in (2.5 cm) long. The calyx is about 3 in (7.6 cm) across. Fasten off and leave a 12 in (30.5 cm) tail for sewing.
Back Panel
Use pink. The panel is worked flat in rows from the bottom up. Start every row with ch 1, and do not count the ch 1 as a stitch.
Rounded bottom
Ch 13.
Row 1 (RS): Sc in 2nd ch from hook and in each ch across. (12)
Row 2: Ch 1, turn, 2 sc in first st, sc in next 10 sts, 2 sc in last st. (14)
Row 3: Ch 1, turn, 2 sc in first st, sc in next 12 sts, 2 sc in last st. (16)
Row 4: Ch 1, turn, 2 sc in first st, sc in next 14 sts, 2 sc in last st. (18)
Row 5: Ch 1, turn, 2 sc in first st, sc in next 16 sts, 2 sc in last st. (20)
Row 6: Ch 1, turn, 2 sc in first st, sc in next 18 sts, 2 sc in last st. (22)
Row 7: Ch 1, turn, 2 sc in first st, sc in next 20 sts, 2 sc in last st. (24)
Checkpoint: the panel is 6 in (15.2 cm) wide.
Straight body
Rows 8–90: Ch 1, turn, sc in each st across. (24)
Checkpoints: 10 in (25.4 cm) tall at Row 45 and 20 in (50.8 cm) tall at Row 90.
Top dome
Row 91: Ch 1, turn, sc2tog, sc in next 18 sts, sc2tog. (20)
That is not a misprint in the stitch count. Check it this way: the 2 sc2tog stitches each use 2 sts and the 18 sc use 1 each, so 4 + 18 = 22 sts are used. To end Row 91 with 22 stitches, work the row as: sc2tog, sc in next 20 sts, sc2tog. (22)
Continue the same way. Each row starts and ends with sc2tog and has 2 fewer stitches than the row before:
- Row 92: sc2tog, sc in next 18 sts, sc2tog. (20)
- Row 93: sc2tog, sc in next 16 sts, sc2tog. (18)
- Row 94: sc2tog, sc in next 14 sts, sc2tog. (16)
- Row 95: sc2tog, sc in next 12 sts, sc2tog. (14)
- Row 96: sc2tog, sc in next 10 sts, sc2tog. (12)
- Row 97: sc2tog, sc in next 8 sts, sc2tog. (10)
- Row 98: sc2tog, sc in next 6 sts, sc2tog. (8)
- Row 99: sc2tog, sc in next 4 sts, sc2tog. (6)
Do not fasten off. Continue straight into the border.
Checkpoint: the panel is 22 in (55.9 cm) tall.
Make All Pieces
Pink:
– 1 back panel, with border and strap
– 3 pocket bodies (Rnds 1–15)
Green:
– Rnds 16–17 on all 3 pockets
– 3 leaf calyxes
Layout (front view, measured from the bottom of the unbordered panel):
          ( wooden ring )
              | strap |
            /   dome    \        Rows 91–99
   |  POCKET 3  rim at Row 81  |   18 in (45.7 cm)
   |  POCKET 2  rim at Row 54  |   12 in (30.5 cm)
   |  POCKET 1  rim at Row 27  |    6 in (15.2 cm)
            \  rounded  /        Rows 1–7
Each pocket has 1 calyx centered on its front.
Border
Border gauge: The border uses the same 4 sc per inch as the panel. Sc row ends are closer together than sc stitches: 4.5 rows per inch against 4 sc per inch. So you work 8 sc for every 9 row ends. That keeps the long sides flat instead of ruffled.
Work one round, continuing from Row 99 with pink and the RS facing.
Border Rnd:
1. Top edge, down the first side: Ch 1. Put 1 extra sc in the corner where the top edge meets the side.
2. First side: Sc in next 8 row ends, sk 1 row end; repeat 11 times. (99 row ends, 88 sc)
3. Bottom edge: 2 sc in first foundation ch (1 of these is the corner extra), sc in next 10 ch, 2 sc in last ch (corner extra). (12 sc + 2 corner extras)
4. Second side: Work as in step 2. (88 sc)
5. Top: 1 extra sc in the corner, then sc across the 6 sts of Row 99. (6 sc)
Sl st to first sc. Do not fasten off.
Count: (12 + 6 sts worked 1 per stitch) + (88 + 88 sts worked along the row ends) + 4 corner extras = 198 sc.
Why the math works: 88 sc ÷ 4 per inch = 22 in, the same as the panel height, so the sides lie flat. The 12 bottom stitches and 6 top stitches are worked 1-for-1, so the width does not change.
Each edge gains 0.25 in (0.6 cm). The bordered panel is 6.5 in × 22.5 in (16.5 cm × 57.2 cm).
Strap:
Row 1: Sl st to the first of the 6 top sc. Ch 1, sc in the same st and in the next 5 sts. (6)
Rows 2–14: Ch 1, turn, sc in each st across. (6)
The strap is 1.5 in (3.8 cm) wide and 3.1 in (7.9 cm) long. Fasten off and leave a 12 in (30.5 cm) tail. Thread the strap through the wooden ring and fold it to the back. Whipstitch Row 14 to the back of Row 99.
Joining
Method: Whipstitch with pink yarn through both loops.
Stitch-to-stitch logic: The bordered panel is 26 sts wide: 24 panel sts plus 1 border sc at each end.
For each pocket, take the 26 back stitches of Rnd 16: sts 52–64 and sts 1–13. Line them up 1-for-1 with the 26 stitches across the panel at the marked row: Row 27, Row 54, or Row 81.
The remaining 38 sts (9.5 in / 24.1 cm) form the curved front of the pocket. The leaf scallops stay free and tip slightly forward.
Steps:
1. Pin the pocket rim at the correct row, matching the pocket’s back-center point (between st 64 and st 1) to the panel’s center line.
2. Whipstitch the 26 matched pairs of stitches.
3. Flatten the back of the bowl against the panel. Tack the back half of Rnd 6 to the panel with about 12 small stitches, so the pocket hangs straight down.
4. Sew a calyx to the front of each pocket. Center the ring on Rnd 16 at sts 32–33, with 2 leaves over the rim and 3 leaves pointing down.
Tension: Pull each whipstitch snug but not tight. The panel row should stay the same width, 6.5 in (16.5 cm).
Checkpoint: The rims sit 6 in (15.2 cm) apart, and the bottom pocket clears the panel’s lower edge by about 0.5 in (1.3 cm).
Final Blocking
- Lightly mist the whole holder with water.
- Lay the panel flat and pin it to 6.5 in × 22.5 in (16.5 cm × 57.2 cm).
- Fill each pocket with a dry roll or a rolled towel so the bowl holds its shape.
- Open each leaf scallop picot and each calyx leaf with your fingers, then pin the tips.
- Let everything dry completely before hanging.
Final Quality-Control Checklist
- The panel is 6.5 in × 22.5 in (16.5 cm × 57.2 cm) and its sides do not ruffle.
- The border has 198 sc and the corners are smooth.
- The strap is 6 sts wide and firmly sewn behind Row 99.
- Each pocket has 48 base sc, 16 mesh loops, 64 rim sc, and 16 leaf scallops.
- The pocket rims are level at Rows 27, 54, and 81.
- The calyxes are centered on the pocket fronts.
- All ends are woven in at least 2 in (5.1 cm).
Troubleshooting
- The panel sides wave: You worked too many sc along the row ends. Redo the border at 8 sc per 9 row ends.
- The pocket base cups before Rnd 7: Your tension is tight. Go up a hook size for Rnds 1–6.
- The mesh slants: Make sure each sc lands in the center of a loop.
- The roll falls through the mesh: Shorten the loops to ch 4 and keep the stitch counts the same.
- The pocket is too wide for the panel: Sew exactly 26 back sts. Do not stretch the rim.
- The leaf points curl: Steam-block them and pin them open.
Care
Hand wash or machine wash on a gentle cold cycle in a laundry bag. Reshape and dry flat with the pockets stuffed.
Final Notes
The measurements build on each other:
– Gauge: 16 sc = 4 in (10.2 cm)
– Pocket: 48 sc base, 16 mesh loops, 64-st rim = 16 in (40.6 cm) around
– Panel: 24 sts × 99 rows = 6 in × 22 in (15.2 cm × 55.9 cm)
– Border: 198 sc for a 6.5 in × 22.5 in (16.5 cm × 57.2 cm) panel
– Pocket placement: every 27 rows, 6 in (15.2 cm) apart
If you keep each checkpoint on track, the three strawberries will line up neatly and each one will hold a roll securely.
Happy crocheting!