

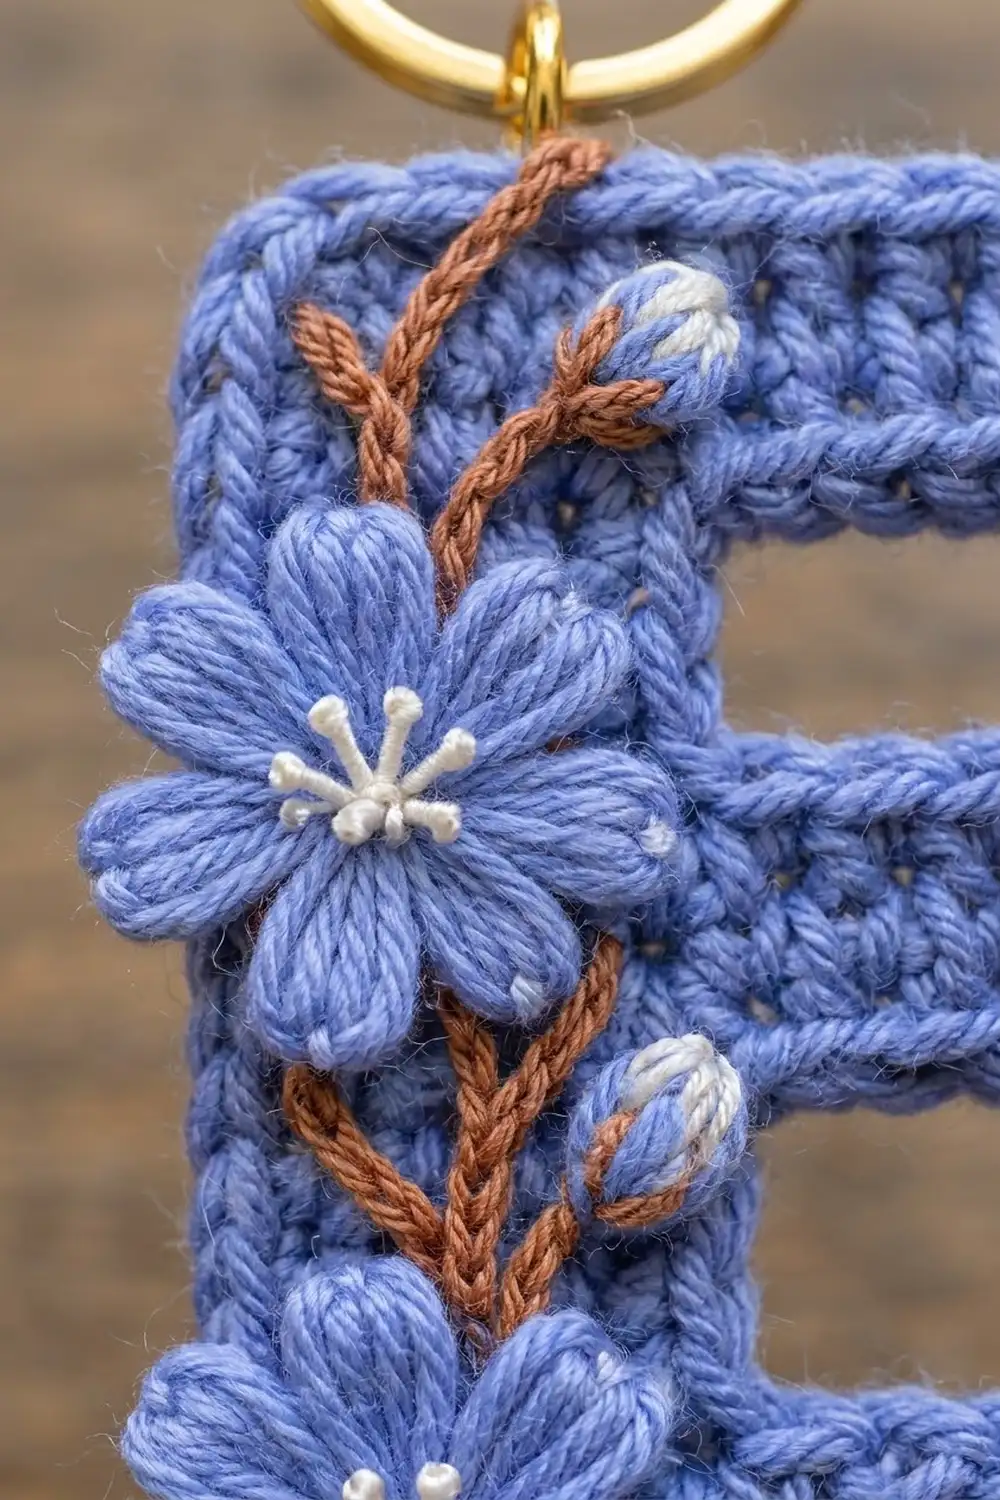
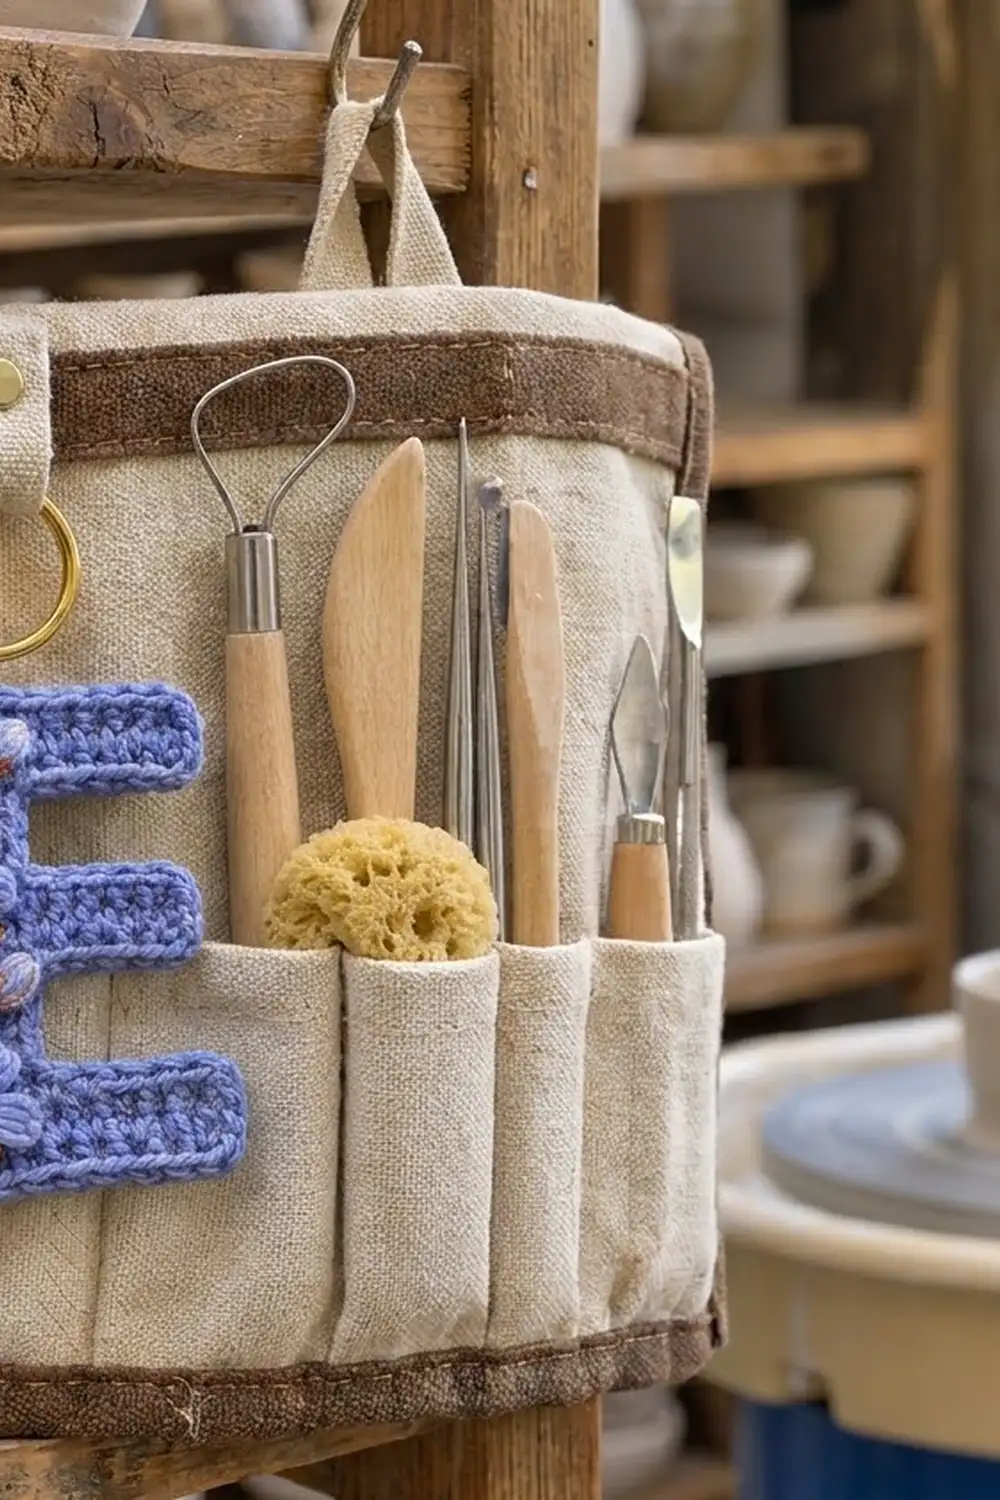
This little keychain is a capital letter E, crocheted flat in periwinkle blue and decorated with a rust-colored vine, two five-petal flowers, and two tiny buds. It is small enough to hold in your palm and sturdy enough to clip onto a bag, a tool roll, or a set of keys.
The colors are simple. Soft periwinkle is used for the letter, the flowers, and the buds. Warm rust is used for the embroidered vine, and bright white for the flower stamens and bud tips. A gold split ring and a small jump ring finish it off.
The pattern uses US crochet terms. The finished keychain is 2.8 in (7.1 cm) wide and 3.4 in (8.6 cm) tall, not counting the ring hardware.
You work the letter body in rows of single crochet from the bottom up. First you make the full-width bottom arm and then work the spine alone. Next you add chains to grow the middle arm, work the spine alone again, and add chains for the top arm. One round of single crochet border goes around the whole outline. Last, you embroider the vine, sew on the flowers and buds, and attach the ring.
Finished Size and Construction
- Finished size: 2.8 in (7.1 cm) wide x 3.4 in (8.6 cm) tall
- Skill level: Advanced beginner
- Terminology: US crochet terms
- Yarn weight: DK / light worsted (#3) cotton
- Hook: 3.5 mm (E-4)
- Number of pieces: 1 letter body, plus 2 flower appliqués and 2 bud appliqués sewn on
- Layout: Single letter E, spine on the left, three arms pointing right
- Piece size before border: 2.4 in (6.1 cm) wide x 3.0 in (7.6 cm) tall
- Border depth: 1 round of sc, about 0.2 in (0.5 cm) on every edge
Materials
Choose a smooth mercerized or combed cotton in DK weight. Cotton keeps the letter’s corners crisp and holds up well on a keyring. A soft acrylic will work, but the arms may curl more.
- Periwinkle blue (main color): 8 g, about 18 m (20 yd), for the letter, flowers, and buds
- Rust / copper: 2 g, about 5 m (5.5 yd), for the embroidered vine
- White: 1 g, about 2 m (2.2 yd), for stamens and bud tips (6-strand embroidery floss also works)
All quantities include extra for a gauge check and sewing tails.
Tools:
- 3.5 mm (E-4) crochet hook
- Tapestry needle with a blunt tip
- Sharp embroidery needle (for the white details)
- 1 gold split ring, 1 in (2.5 cm) diameter
- 1 gold jump ring, 0.3 in (0.8 cm) diameter
- 2 pairs of flat-nose pliers
- Scissors, rust-proof pins, blocking mat, spray bottle
- Stitch marker
Abbreviations (US Terms)
- ch = chain
- sl st = slip stitch
- sc = single crochet
- dc = double crochet
- sc2tog = single crochet 2 together: insert hook in first place, yo, pull up a loop; insert hook in second place, yo, pull up a loop; yo, pull through all 3 loops
- st(s) = stitch(es)
- yo = yarn over
- RS = right side
Special stitch – dc3tog cluster: (Yo, insert hook in the indicated st, yo, pull up a loop, yo, pull through 2 loops) 3 times in the same st, then yo and pull through all 4 loops on hook.
Gauge and Checkpoints
Gauge: 20 sc and 20 rows = 4 in (10.2 cm), which equals 5 sc and 5 rows per 1 in (2.5 cm).
The letter is small enough to act as its own gauge swatch. Make the bottom arm (Rows 1–3) and measure it before going further.
Checkpoints:
- After Row 3: 2.4 in (6.1 cm) wide x 0.6 in (1.5 cm) tall
- After Row 9: 1.8 in (4.6 cm) tall; middle arm is 2.0 in (5.1 cm) wide
- After Row 15: 2.4 in (6.1 cm) wide x 3.0 in (7.6 cm) tall
- After the border: 2.8 in (7.1 cm) wide x 3.4 in (8.6 cm) tall
If your bottom arm is wider than 2.4 in (6.1 cm), go down a hook size to 3.25 mm (D-3). If it is narrower, go up to 3.75 mm (F-5). Row height matters as much as width here, because the gaps between the arms are only 3 rows tall. If your rows come out short, pull up each loop a little taller instead of changing hooks.
Letter Body
The ch 1 at the start of each row does not count as a stitch. Turn at the end of every row. Each row also says where it ends, so you can check you are on the correct edge. The “spine side” is the left edge of the finished letter, and the “arm side” is the right edge.
Foundation: Ch 13. Leave a 6 in (15.2 cm) tail.
Bottom arm
Row 1: Sc in 2nd ch from hook and in each ch across. (12 sc) The row ends at the slip-knot end, which becomes the spine side.
Row 2: Ch 1, turn, sc in each st across. (12 sc) Ends at the arm side.
Row 3: Ch 1, turn, sc in each st across. (12 sc) Ends at the spine side.
Lower spine
Row 4: Ch 1, turn, sc in first 5 sts; leave the remaining 7 sts unworked. (5 sc) Ends at the inner edge of the spine.
Rows 5–6: Ch 1, turn, sc in each of the 5 sts. (5 sc) Row 6 ends at the inner edge of the spine.
Middle arm
Row 7: Ch 6, sc in 2nd ch from hook and in next 4 ch (5 sc), sc in each of the 5 spine sts. (10 sc) Ends at the spine side.
Rows 8–9: Ch 1, turn, sc in each st across. (10 sc) Row 9 ends at the spine side.
The middle arm is 2 sts, or 0.4 in (1.0 cm), shorter than the top and bottom arms. This gives the letter its classic E shape.
Upper spine
Row 10: Ch 1, turn, sc in first 5 sts; leave the remaining 5 sts unworked. (5 sc) Ends at the inner edge of the spine.
Rows 11–12: Ch 1, turn, sc in each of the 5 sts. (5 sc) Row 12 ends at the inner edge.
Top arm
Row 13: Ch 8, sc in 2nd ch from hook and in next 6 ch (7 sc), sc in each of the 5 spine sts. (12 sc) Ends at the spine side.
Rows 14–15: Ch 1, turn, sc in each st across. (12 sc) Row 15 ends at the spine side, at the top-left corner.
Do not fasten off. The side now facing you is the RS. Check that the spine is on your left and the three arms point right.
Border
The border is 1 round of sc worked counterclockwise around the whole letter, with the RS facing. Work 1 sc in each stitch and 1 sc in each row-end. At 5 sts and 5 rows per inch, a row-end is the same length as a stitch, so every edge lies flat.
Corner rules:
- Outer corners (8): work 3 sc in the corner stitch. This adds 2 sts at each corner.
- Inner corners (4): work sc2tog over the last place of one edge and the first place of the next. This removes 1 st at each corner.
Rnd 1: Ch 1 and turn the piece so you can work down the left edge.
- Left edge (spine): sc in each of the 15 row-ends. (15 sc)
- Bottom edge: working in the free loops of the foundation chain, 3 sc in first ch (bottom-left corner), sc in next 10 ch, 3 sc in last ch (bottom-right corner). (16 sc)
- Bottom arm, right end: sc in each of the 3 row-ends. (3 sc)
- Bottom arm, top edge: 3 sc in st 12 of Row 3 (corner), sc in next 5 sts, sc2tog over st 6 of Row 3 and the row-end of Row 4. (9 sts)
- Lower inner spine: sc in the row-end of Row 5, sc2tog over the row-end of Row 6 and the first free loop of the Row 7 chain. (2 sts)
- Middle arm, underside: sc in next 3 free loops, 3 sc in last free loop (corner). (6 sc)
- Middle arm, right end: sc in each of the 3 row-ends. (3 sc)
- Middle arm, top edge: 3 sc in st 10 of Row 9 (corner), sc in next 3 sts, sc2tog over st 6 of Row 9 and the row-end of Row 10. (7 sts)
- Upper inner spine: sc in the row-end of Row 11, sc2tog over the row-end of Row 12 and the first free loop of the Row 13 chain. (2 sts)
- Top arm, underside: sc in next 5 free loops, 3 sc in last free loop (corner). (8 sc)
- Top arm, right end: sc in each of the 3 row-ends. (3 sc)
- Top edge: 3 sc in st 12 of Row 15 (top-right corner), sc in next 10 sts, 3 sc in st 1 of Row 15 (top-left corner). (16 sc)
Join with a sl st to the first sc. Fasten off and weave in the end. (90 sts)
Why the math works: The letter’s outline has 78 places to work into:
- 12 foundation chains along the bottom
- 12 stitches along the top
- 15 row-ends down the left edge
- 3 row-ends at each of the 3 arm tips (9)
- 7 and 5 exposed stitches on top of the bottom and middle arms (12)
- 5 and 7 free loops under the middle and top arms (12)
- 3 inner row-ends in each of the 2 spine gaps (6)
That gives 12 + 12 + 15 + 9 + 12 + 12 + 6 = 78. The 8 outer corners add 2 each (+16) and the 4 inner corners remove 1 each (−4), so 78 + 16 − 4 = 90. The section counts above add up to the same total: 15 + 16 + 3 + 9 + 2 + 6 + 3 + 7 + 2 + 8 + 3 + 16 = 90.
The extra stitches at the outer corners let the border turn without pulling. The sc2tog at each inner corner keeps the notch sharp instead of puckered.
Flowers (Make 2)
Use periwinkle and the 3.5 mm hook.
Rnd 1: Make a magic ring, ch 1, 5 sc in ring. Pull the ring closed tightly and join with a sl st to the first sc. (5 sc)
Rnd 2: (Sl st, ch 2, 2 dc, ch 2, sl st) in each sc around. (5 petals)
Fasten off, leaving a 12 in (30.5 cm) tail for sewing. Each flower is about 1 in (2.5 cm) across.
Stamens: Thread white on the sharp needle. Work 5 straight stitches out from the flower center, one toward each petal, each about 0.25 in (0.6 cm) long. Finish the outer end of each with a small French knot. Tie off on the back.
Buds (Make 2)
With periwinkle, ch 3. Work a dc3tog cluster in the 3rd ch from hook, ch 1, fasten off, leaving an 8 in (20.3 cm) tail. Each bud is about 0.4 in (1.0 cm) long.
With white, work one short straight stitch over the rounded top of the cluster to make the pale bud tip.
Embroidery and Assembly
Block the letter first (see Final Blocking, steps 1–5). Then embroider the vine before sewing on the flowers, so the flowers cover the stem ends.
- Main stem: Thread the rust yarn on the tapestry needle. Start near the bottom of the spine, about 0.6 in (1.5 cm) above the lower edge. Work chain stitch straight up the center of the spine (between sts 2 and 3) to the top border.
- Branches: Add 4 short branches of chain stitch, each about 0.4 in (1.0 cm) long, angling up and out from the stem. Put two on the right side (one just below the top arm, one just below the middle arm) and two on the left side.
- Buds: Sew one bud at the tip of each right-hand branch, with the white tip pointing up and slightly outward.
- Flowers: Center the upper flower on the spine, level with the upper spine gap (about Rows 10–12). Center the lower flower over the lower spine and bottom arm (about Rows 2–5). Let each flower overlap the left border slightly. Sew around the center ring and tack down the base of each petal. Leave the petal tips loose so they stand up a little.
- Ring: Open the jump ring with two pairs of pliers. Pass it through the top border directly above the stem (about st 3 of the top edge). Hook on the split ring and close the jump ring fully.
Final Blocking
- Before any embroidery, pin the letter flat, RS up, on a blocking mat at 2.8 in (7.1 cm) wide and 3.4 in (8.6 cm) tall.
- Put a pin at each of the 8 outer corners, pulling gently so each arm is square.
- Check that the three arms are parallel and that the middle arm is 0.4 in (1.0 cm) shorter than the top and bottom arms.
- Mist with water until damp, not soaked.
- Let it dry completely, which takes at least a few hours.
- Unpin it, then add the embroidery, the flowers and buds, and the ring.
- If the flowers cup after sewing, hold a steam iron 1 in (2.5 cm) above them for a second or two. Then press the petals open with your fingers. Do not touch the iron to the yarn.
Final Quality-Control Checklist
- Letter measures 2.8 in (7.1 cm) x 3.4 in (8.6 cm)
- Border round has 90 sts
- Spine is on the left with the RS facing
- All 8 outer corners are square and the 4 inner notches are crisp
- Middle arm is clearly shorter than the top and bottom arms
- Vine runs up the center of the spine with 4 branches
- Both flowers have 5 petals and 5 white stamens with knots
- Both buds have white tips and sit at the ends of the right-hand branches
- Jump ring is fully closed and passes through the top border
- All ends are woven in and trimmed on the wrong side
Troubleshooting
Arms point to the left. You may be looking at the wrong side, or Row 4 was worked at the wrong edge. Check that Row 3 ended at the slip-knot side before you start the spine.
Gaps between arms look too short. Your rows are compact. Pull up each loop a little taller. You can also add 2 rows to each spine section, which keeps the row count odd so the yarn still ends where the pattern expects. Each added row also adds 1 border sc on the left edge and 1 in that gap.
Border ruffles at the corners. Your border tension is loose. Work the border with the next smaller hook.
Inner corners pucker or show holes. Make sure each sc2tog sits exactly on the corner, with one leg on each edge.
Flowers look too big for the spine. Work the flowers with a 3.0 mm hook, or use a slightly thinner cotton.
Chain-stitch vine pulls the fabric. Loosen each chain loop so it rests on the surface instead of gathering the stitches below.
Care
Spot clean or hand wash in cool water with mild soap. Press out the water in a towel and dry flat. Do not machine wash, since the hardware can snag the yarn.
Final Notes
The size of this keychain comes down to a few simple measurements. At 5 sc and 5 rows per 1 in (2.5 cm), 12 sts make the 2.4 in (6.1 cm) width and 15 rows make the 3.0 in (7.6 cm) height. One border round adds 0.2 in (0.5 cm) on every edge, which brings the letter to 2.8 in (7.1 cm) x 3.4 in (8.6 cm), with 90 sts in the border. Measure after Row 3, Row 9, Row 15, and the border. If each checkpoint matches, the letter will come out square and ready for its vine and flowers.
Happy crocheting!