

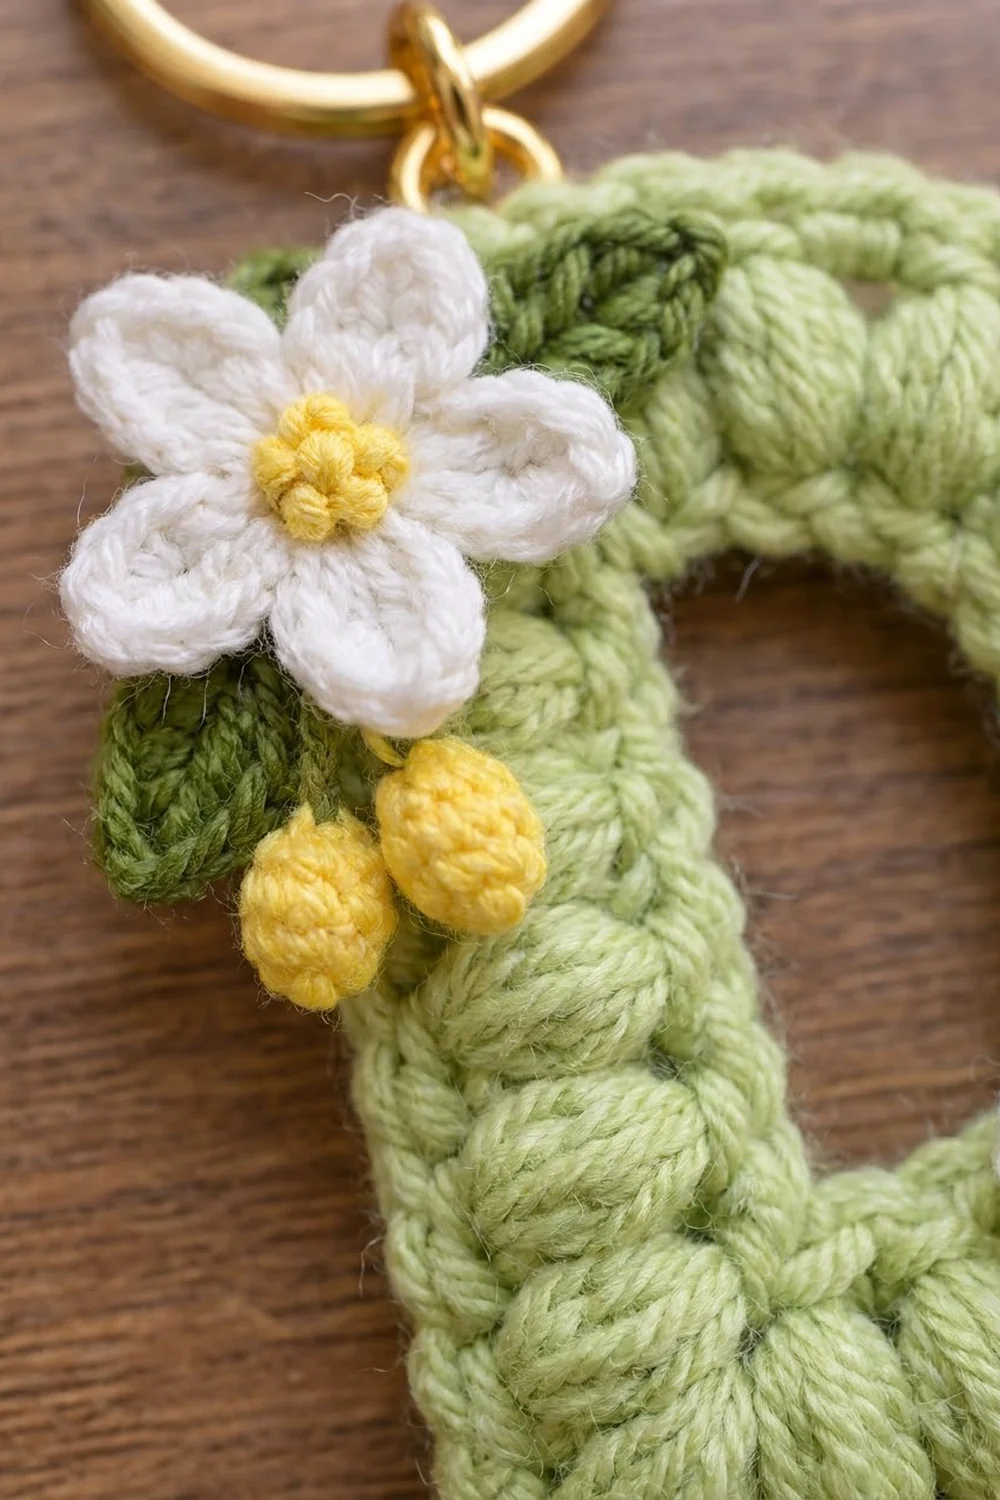
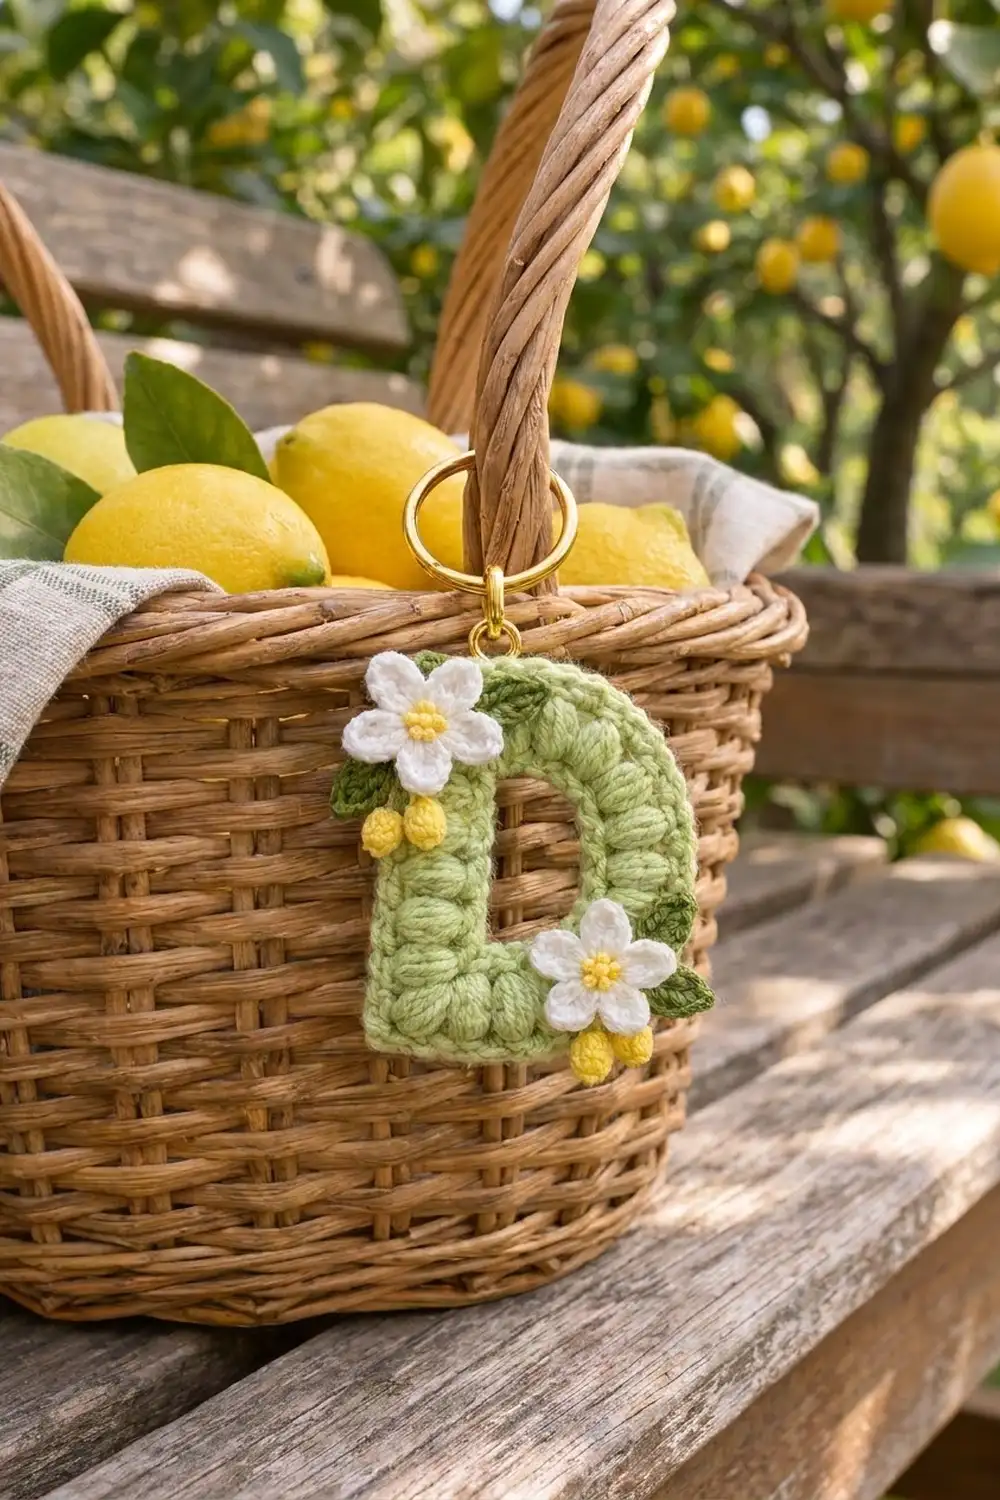
This little keychain is a chunky capital letter D in soft pistachio green. The body is one ring of plump, tightly packed puff stitches with a neat single crochet edge inside and out. Two white five-petal blossoms with sunny yellow centers sit on top, along with small dark green leaves and two pairs of mini yellow lemons.
The colors are fresh and summery: light green, white, lemon yellow and a deeper leaf green, finished with a gold split keyring. It makes a sweet initial gift, bag charm or basket tag.
This pattern uses US crochet terms. The finished letter is 4 in (10.2 cm) tall and 3.25 in (8.3 cm) wide, not counting the keyring hardware.
The construction is simple. You chain a ring, then work three rounds outward from it: a round of single crochet, a round of puffs and a single crochet border. Square corners on the left give the straight stem, and spread-out increases on the right give the rounded bowl. The flowers, leaves and lemons are made separately and sewn on.
Finished Size and Construction
- Finished size: 4 in (10.2 cm) tall x 3.25 in (8.3 cm) wide
- Skill level: Easy-Intermediate
- Terminology: US crochet terms
- Yarn weight: DK (light worsted, category 3) cotton
- Hook: 3.5 mm (US E-4)
- Number of pieces: 1 letter body plus 10 small appliqués (2 flowers, 4 leaves, 4 lemons)
- Layout: a single letter worked in the round; no motifs to join
- Piece size: 4 in x 3.25 in (10.2 cm x 8.3 cm)
- Size before border: 3.6 in x 2.85 in (9.1 cm x 7.2 cm)
- Border depth: 1 round of sc, 0.2 in (0.5 cm) on every side
- Band width: 0.8 in (2.0 cm) from inner edge to outer edge
Materials
Use a smooth mercerized or combed DK cotton. It shows puff stitches clearly and holds the letter shape better than acrylic. A slightly heathered light green gives the same soft look as the photo.
- Light green (letter body): 10 g, about 23 m
- White (flower petals): 3 g, about 7 m
- Yellow (flower centers and lemons): 3 g, about 7 m
- Dark green (leaves): 2 g, about 5 m
These amounts include extra for your gauge check and sewing tails.
Tools:
- 3.5 mm (US E-4) crochet hook
- Tapestry needle
- 4 locking stitch markers
- 1 in (2.5 cm) gold split keyring
- 0.3 in (0.8 cm) gold jump ring and two pairs of flat-nose pliers
- Blocking board with a grid, rustproof pins and a spray bottle
- Scissors and a small amount of fiberfill or yarn scraps (optional, for the lemons)
Abbreviations (US Terms)
- ch – chain
- sl st – slip stitch
- sc – single crochet
- hdc – half double crochet
- dc – double crochet
- sc2tog – single crochet 2 together
- MR – magic ring
- sp – space
- st(s) – stitch(es)
Special stitch – Puff: (Yarn over, insert hook in st, yarn over and pull up a loop to the height of a dc) 3 times, yarn over and pull through all 7 loops on the hook, ch 1 to close. The closing ch 1 is the top of the puff and does not count as a separate stitch.
Gauge and Checkpoints
Gauge: 20 sc and 20 rows = 4 in (10.2 cm), which is 5 sc per 1 in (2.5 cm). One sc round is 0.2 in (0.5 cm) deep, and the puff round is 0.4 in (1.0 cm) deep.
This is a small single piece, so the letter itself is your gauge test. Work Rounds 1 and 2, then measure before you add the border.
Checkpoints:
- Foundation ring: 36 ch, about 7.2 in (18.3 cm) when laid out straight and not stretched.
- After Round 1: 2.8 in (7.1 cm) tall x 2.05 in (5.2 cm) wide.
- After Round 2: 3.6 in (9.1 cm) tall x 2.85 in (7.2 cm) wide.
- After Round 3: 4 in (10.2 cm) tall x 3.25 in (8.3 cm) wide.
If your letter is too big or the puffs ripple, go down to a 3.25 mm hook and pull the puff loops up a little shorter. If it is too small or it cups, go up to a 3.75 mm hook. Being off by 0.25 in (0.6 cm) or less is fine at this size, because blocking will correct it.
Letter Body
Use light green. The chain ring forms the edge of the D-shaped opening:
- Chain 1 is the inner bottom-left corner.
- Chains 2–11 run up the stem.
- Chain 12 is the inner top-left corner.
- Chains 13–16 form the top.
- Chains 17–32 curve around the bowl.
- Chains 33–36 form the bottom.
Foundation: Ch 36 and sl st to the first ch to form a ring, without twisting it. (36 ch)
Round 1 – Inner Edge (conversion round)
Ch 1 (does not count as a st). 3 sc in the first ch (bottom-left corner), sc in the next 10 ch, 3 sc in the next ch (top-left corner), sc in the next 4 ch, sc in the next 3 ch, (2 sc in the next ch, sc in the next 3 ch) 3 times, sc in the next ch, sc in the last 4 ch. Sl st to the first sc to join.
Count: 36 sc (1 per ch) + 4 corner sc + 3 curve increases = 43 sc.
Mark the middle sc of each 3-sc group; these are the corner stitches. The round breaks down like this:
- Left side: 14 sc, including both corners
- Top, after the corner: 5 sc
- Curve: 19 sc
- Bottom, before the corner: 5 sc
14 + 5 + 19 + 5 = 43.
Round 2 – Puff Round (growth round)
Sl st in the next sc (the bottom-left corner sc). Ch 2 (does not count as a st).
(Puff, ch 1, puff, ch 1, puff) in the corner sc, puff in each of the next 12 sc, (puff, ch 1, puff, ch 1, puff) in the next corner sc, puff in each of the next 29 sc. Sl st to the top of the first puff to join.
Count: 41 sc with 1 puff each + 2 corners with 3 puffs each = 47 puffs and 4 ch-1 sps.
Move your markers to the middle puff of each corner group. The puffs around the bowl will fan out slightly. That gives the curve the extra length it needs, and the border makes use of it.
Round 2 Shape Check
Lay the piece flat. The left edge should be straight, the two left corners square and the opening a clear D shape. It should measure 3.6 in (9.1 cm) x 2.85 in (7.2 cm).
Border
The outer sc border pulls the puffs into a firm, tidy edge. Border gauge: 5 sc per 1 in (2.5 cm), the same as the body.
Round 3 – Outer Border (trim round)
Sl st in the next ch-1 sp and in the top of the next puff (the bottom-left corner puff). Ch 1 (does not count as a st).
- Left side: 3 sc in the corner puff, sc in the next ch-1 sp, sc in the next 14 puffs, sc in the next ch-1 sp.
- Top-left corner and top: 3 sc in the corner puff, sc in the next ch-1 sp, sc in the next 6 puffs.
- Curve: Sc in the next puff, (sc in the sp between puffs, sc in the next 2 puffs) 8 times, sc in the next 2 puffs.
- Bottom: Sc in the next 5 puffs, sc in the next puff, sc in the next ch-1 sp.
Sl st to the first sc to join. Fasten off, leaving a 6 in (15.2 cm) tail.
Count: 47 sc (1 per puff) + 4 sc (1 per ch-1 sp) + 4 corner sc + 8 curve sc = 63 sc.
Count per side, corners included:
- Left side: 20 sc = 4 in (10.2 cm). That is corner + 1 + 1 + 14 + 1 + 1 + corner.
- Top: 9 sc, including the top-left corner = 1.8 in (4.6 cm).
- Curve: 27 sc = 5.4 in (13.7 cm).
- Bottom: 9 sc, including the bottom-left corner = 1.8 in (4.6 cm).
The left side shares its corners with the top and bottom, so the total is 20 + 8 + 27 + 8 = 63.
Why the math works: At a square corner, each side has to grow by the width of the band on each end. The band is 0.8 in (2.0 cm) wide, which is 4 stitches at this gauge. At each corner, Round 1 adds 1 stitch per side, Round 2 adds 2 and Round 3 adds 1, for 4 in total. That takes the left side from 12 ch to 20 sc: a 2.4 in (6.1 cm) opening + 0.8 in (2.0 cm) + 0.8 in (2.0 cm) = 4 in (10.2 cm). The curve grows from 16 ch to 19 sc in Round 1 and to 27 sc in Round 3. That is enough length for the outer edge of the bowl to lie flat without ruffling.
Flowers (make 2)
Center: With yellow, MR, ch 1, 5 sc in the ring. Pull the ring closed and sl st to the first sc. (5 sc) Fasten off yellow.
Petals: Join white in any sc. In each sc around, work (sl st, ch 2, 2 dc, ch 2, sl st). You will have 5 petals. Fasten off, leaving a 10 in (25.4 cm) tail for sewing.
For the textured center, use yellow to make 3 small French knots over the yellow sc. Each flower is about 1.1 in (2.8 cm) across.
Leaves (make 4)
With dark green, ch 6. Starting in the 2nd ch from the hook: sl st, sc, hdc, dc, then (hdc, sc) in the last ch. Working along the other side of the chain: hdc, dc, hdc, sl st. Fasten off, leaving an 8 in (20.3 cm) tail. Each leaf is about 0.6 in (1.5 cm) long, with a pointed tip.
Mini Lemons (make 4)
Round 1: With yellow, MR, 6 sc in the ring. (6 sc)
Round 2: Sc in each sc around. (6 sc)
Round 3: Sc2tog 3 times. (3 sc)
Tuck a pinch of fiberfill or yarn scraps inside. Fasten off, thread the tail through the last 3 stitches and pull tight to form a small point. Each lemon is about 0.5 in (1.3 cm) long. Keep the starting tail for sewing.
Assembly of Appliqués
Block the letter first (see below), then sew everything on with matching tails:
- Upper flower: Center it over the top-left corner, overlapping both the stem and the top bar.
- Upper leaves: Tuck one leaf under the left edge of the flower and one under its top-right edge.
- Upper lemons: Sew 2 lemons side by side just below the flower, on the stem, hanging slightly past its left edge.
- Lower flower: Place it on the bottom right, where the bottom bar meets the curve.
- Lower leaves: Tuck 2 leaves under the right side of the flower, one higher and one lower.
- Lower lemons: Sew 2 lemons below the flower so they hang just past the bottom edge.
- Hardware: Open the jump ring with the two pliers. Pass it through the top-left corner sc of Round 3, just above the upper flower. Add the split keyring and close the jump ring fully.
Weave in all ends on the back and hide them inside the puff stitches.
Final Blocking
- Lightly mist the letter body until it is damp all the way through.
- Pin it flat on the grid board, right side up.
- Pin the left side straight, with both left corners at exactly 90 degrees.
- Pin the height to 4 in (10.2 cm) and the widest point to 3.25 in (8.3 cm).
- Ease the curve into a smooth arc using 4–5 pins around the outside.
- Use a fingertip to plump up any flattened puffs.
- Let it dry completely, at least 4 hours, before you unpin it and sew on the appliqués.
Final Quality-Control Checklist
- Round 1 = 43 sc, Round 2 = 47 puffs plus 4 ch-1 sps, Round 3 = 63 sc.
- Left side = 20 sc, top = 9 sc, curve = 27 sc, bottom = 9 sc (corners included).
- The letter measures 4 in (10.2 cm) x 3.25 in (8.3 cm).
- The left edge is straight and both left corners are square.
- The opening has square corners on the left and a rounded right side.
- Both flowers have 5 even petals and a yellow center.
- All 4 leaves and 4 lemons are sewn on securely.
- The jump ring is fully closed with no gap.
- No yarn ends show on the front.
Troubleshooting
- The letter cups like a bowl: Your puffs are too tight. Pull the loops up taller, or go up a hook size for Round 2.
- The curve ripples: Your border is too loose. Work Round 3 with a hook half a size smaller.
- The corners look rounded: You probably missed a 3-sc corner or a ch-1 sp. Recount the left side; it must have 20 sc.
- The puffs lean to one side: This is normal when working in the round. Blocking straightens them.
- The opening looks oval: Pin the left side straight when blocking, and check that the Round 1 corners fall on ch 1 and ch 12.
- The lemons look flat: Add a little more stuffing before closing them.
Care
Remove the metal keyring first so it can’t leave rust marks. Hand wash in cool water with mild soap, roll in a towel to press out the water, and dry flat in shape.
Final Notes
Each stage builds on the one before. A 36-ch ring of 7.2 in (18.3 cm) becomes 43 sc measuring 2.8 in x 2.05 in (7.1 cm x 5.2 cm). The 47-puff round brings it to 3.6 in x 2.85 in (9.1 cm x 7.2 cm). The 63-sc border finishes the letter at 4 in x 3.25 in (10.2 cm x 8.3 cm), with 20 sc along the left side. Check your size at each stage and block carefully, and your blossom-trimmed initial will be ready to clip on.
Happy crocheting!