

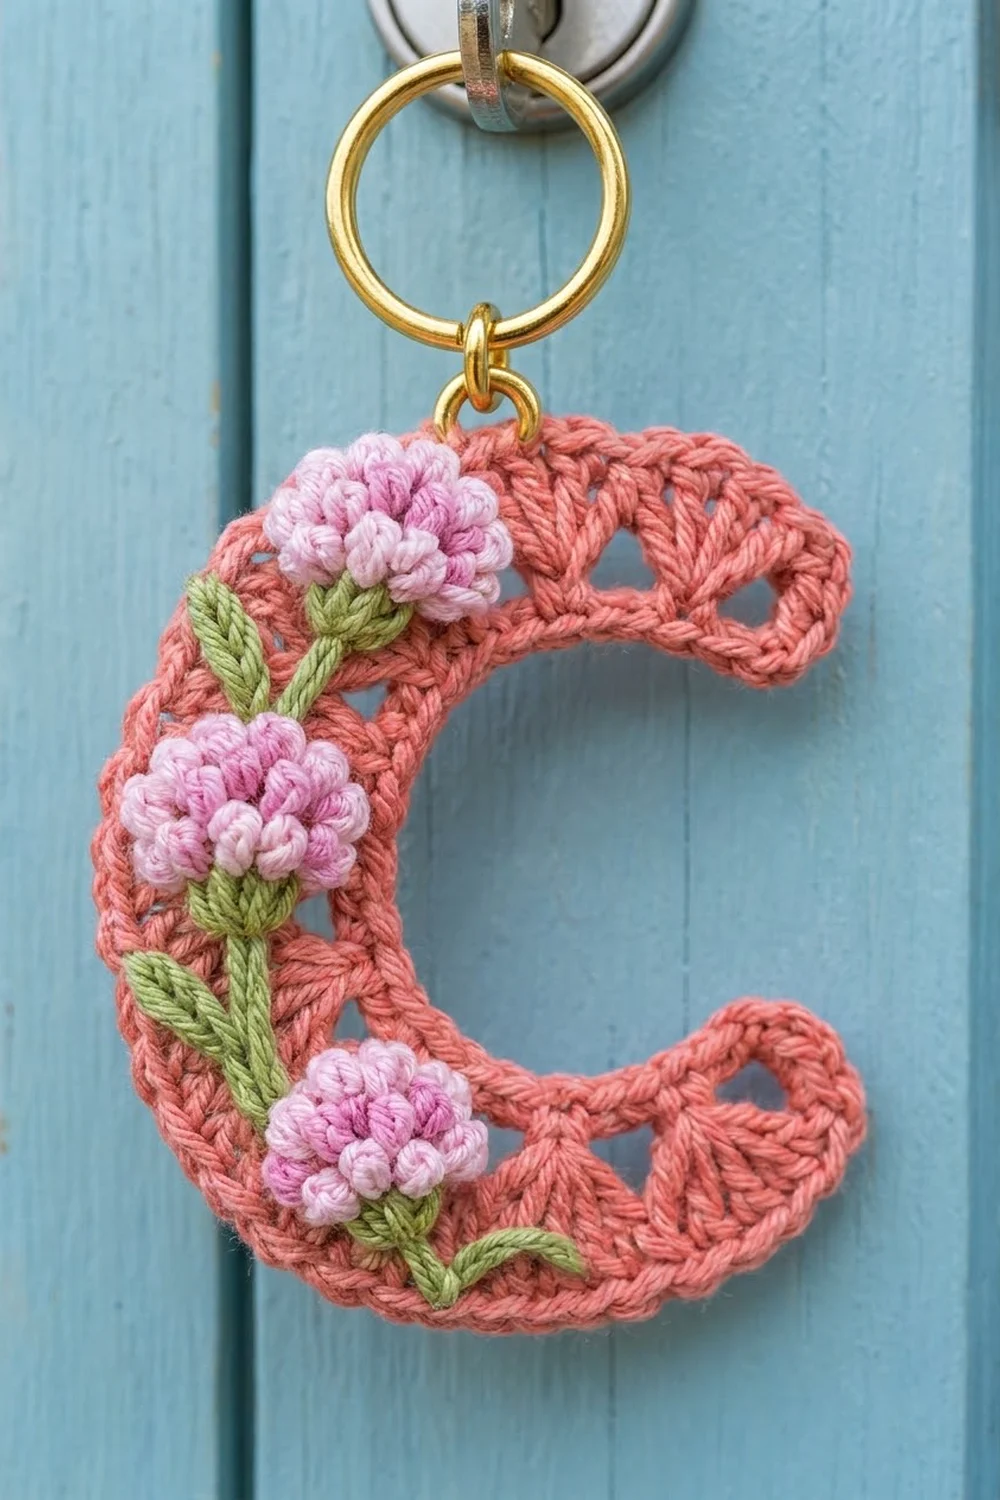
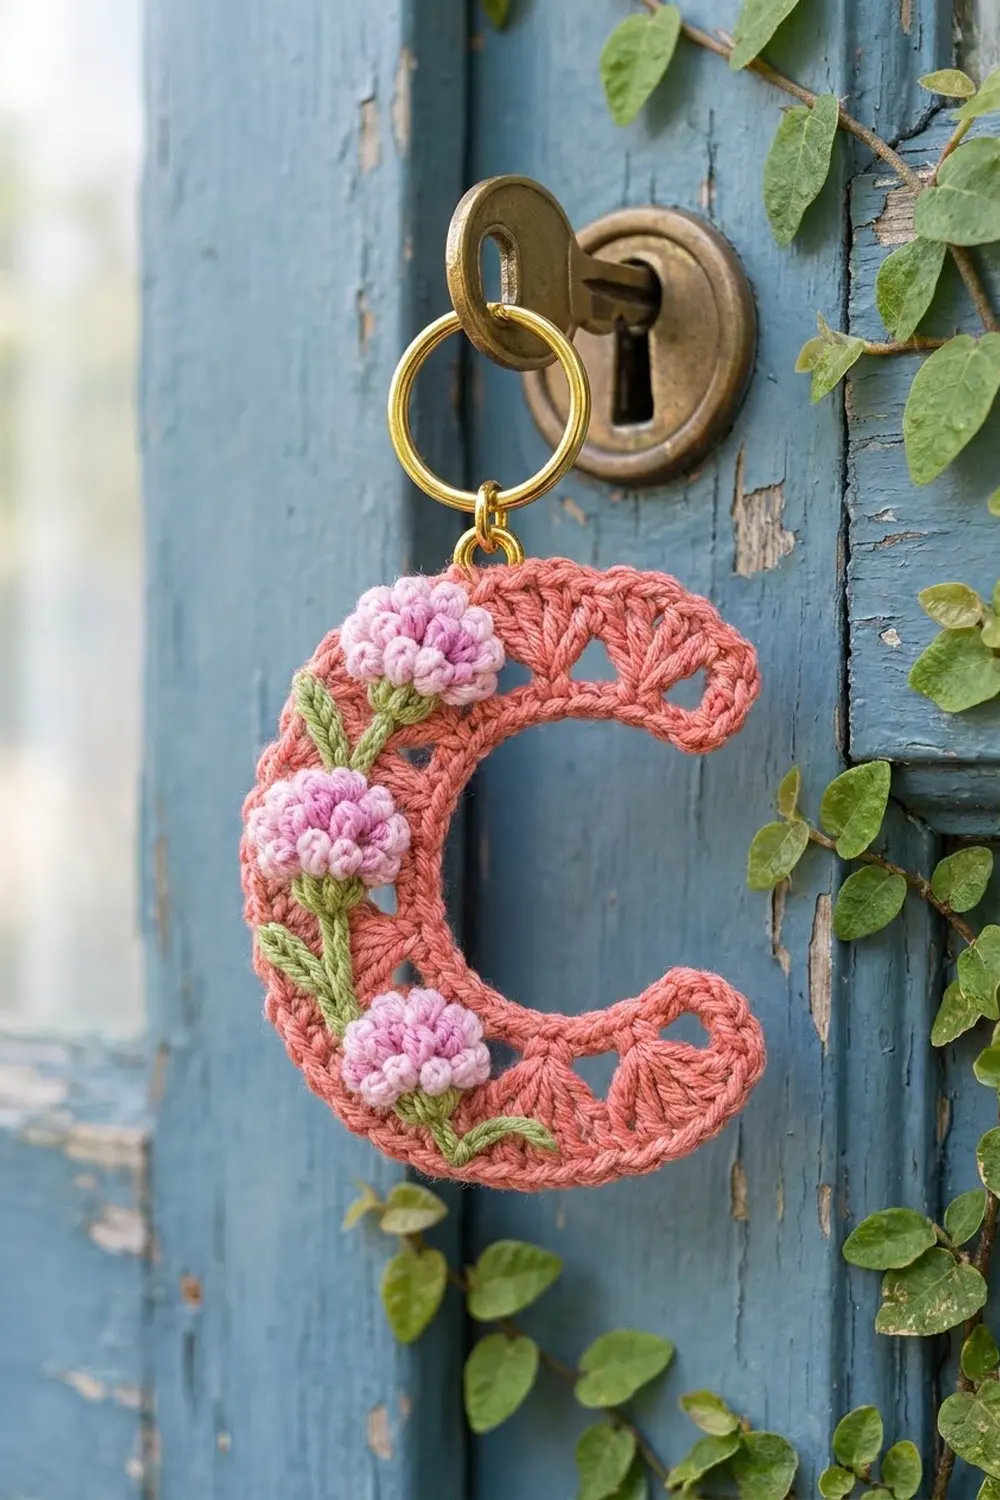
This little coral letter C keychain is small but has plenty of detail. It has a solid inner curve, shell fans with small open triangles along the outer edge, and a neat single crochet border that holds the outline crisp. Three pink clover blossoms with green stems climb the left side, so the charm looks like a pressed seaside flower.
The colors are coral for the letter, light and medium pink for the clover heads, and sage green for the stems and leaves. Gold hardware finishes it off. It makes a good monogram gift, a bag tag, or a quick way to tell your keys apart.
This pattern uses US crochet terms. The finished charm measures about 3.5 in (8.9 cm) tall and 3 in (7.6 cm) wide, and the band is about 0.75 in (1.9 cm) wide.
The construction is simple. You work a short strip in rows, and it curls into a C on its own because each row has more stitches than the one before. A single border round goes around the whole outline. Then you block the letter, embroider the clovers, and add the rings.
Finished Size and Construction
- Finished size: 3.5 in (8.9 cm) tall × 3 in (7.6 cm) wide
- Skill level: Easy to intermediate (basic stitches plus simple embroidery)
- Terminology: US crochet terms
- Yarn weight: Sport weight (#2) cotton
- Hook: 2.75 mm (C-2)
- Number of pieces: 1 (single letter, no joining)
- Layout: One curved strip shaped into a C
- Band width: about 0.75 in (1.9 cm)
- Size before border: about 3.25 in (8.3 cm) tall × 2.75 in (7.0 cm) wide
- Border depth: about 0.125 in (0.3 cm), one round of sc
Materials
Yarn: Use a smooth mercerized or combed cotton in sport weight. Cotton holds the shell edges crisp and survives life on a keyring. Avoid fuzzy or very stretchy yarns, because they blur the triangular openings.
- Coral (Main Color, MC): 10 g, about 20 m
- Light pink (A): 2 g, about 4 m
- Medium pink (B): 2 g, about 4 m
- Sage green (C): 2 g, about 4 m
These quantities include a generous margin. The letter itself uses roughly 6–7 g of coral.
Tools:
– 2.75 mm (C-2) crochet hook
– Tapestry needle and a sharp embroidery needle
– 8 mm gold jump ring
– 25 mm gold split ring
– 2 pairs of flat-nose pliers (or 1 pair plus fingers)
– Scissors
– Rust-proof pins and a blocking board or folded towel
– Spray bottle with water
– Optional: clear-drying fabric stiffener
Abbreviations (US Terms)
- ch – chain
- sc – single crochet
- dc – double crochet
- sl st – slip stitch
- sk – skip
- sp – space
- st(s) – stitch(es)
- RS / WS – right side / wrong side
Special stitch:
Fan: Work 5 dc in the same stitch.
Gauge and Checkpoints
Gauge: 6 sc and 7 rows = 1 in (2.5 cm) in sc with the 2.75 mm hook.
There is only one piece, so the letter itself is your gauge test. Measure at every checkpoint below before you move on.
- After Row 1: The straight strip is about 4.75 in (12.1 cm) long.
- After Row 2: The strip starts to curve gently on its own.
- After Row 3: Laid flat and eased into shape, the C is about 3.25 in (8.3 cm) tall × 2.75 in (7.0 cm) wide.
- After the border: About 3.5 in (8.9 cm) tall × 3 in (7.6 cm) wide.
If your piece is too big: Go down to a 2.5 mm hook. Don’t remove stitches, because the counts set the curve.
If your piece is too small: Go up to a 3.0 mm hook.
If the C won’t curve: Your Row 2 increases may be too loose compared with Row 1. Tighten Row 2 slightly, or work Row 1 a half size larger.
Pattern: The Letter C
Using MC, leave a 6 in (15.2 cm) starting tail.
Foundation: Ch 30.
Row 1 (inner edge): Sc in 2nd ch from hook and in each ch across, turn. (29 sc)
This row becomes the inner curve of the C. Check the strip length: about 4.75 in (12.1 cm).
Row 2 (growth row): Ch 1 (does not count as a st). Sc in first st, 2 sc in next st, sc in next st; repeat from * 13 more times (14 repeats in total), turn. (43 sc)*
Check: 1 opening sc + 14 repeats × 3 sc = 43 sc. You used 1 + 14 × 2 = 29 stitches, which is every stitch of Row 1. The extra 14 stitches make the outer edge longer than the inner edge, and that is what bends the strip into a crescent.
Row 3 (fan row): Ch 1. Sc in first st, *ch 2, sk 2 sts, Fan in next st, ch 2, sk 2 sts, sc in next st; repeat from * 6 more times (7 repeats in total), turn.
Count: 7 fans (35 dc) + 8 sc + 14 ch-2 sps.
Each repeat uses 6 stitches (2 skipped + 1 fan base + 2 skipped + 1 sc). With the opening sc, that is 1 + 7 × 6 = 43 stitches, which matches Row 2 exactly.
The ch-2 spaces beside each fan leave the small triangular openings you see between the shells.
Checkpoint: Lay the piece flat and ease it into a C. It should be about 3.25 in (8.3 cm) tall × 2.75 in (7.0 cm) wide. The gap between the two tips should be about 1.25 in (3.2 cm). Do not fasten off. Continue straight into the border.
Border
Border gauge: One round of sc at the same tension as the body, adding about 0.125 in (0.3 cm) all around.
The border goes all the way around the letter in one round. For counting, it has four sides: the outer edge, the first tip, the inner edge, and the second tip.
Round 4 (edging): Ch 1 and work along the outer edge of Row 3 as follows.
Outer edge:
1. 3 sc in first sc (corner).
2. 2 sc in ch-2 sp, sc in each of next 5 dc, 2 sc in next ch-2 sp.
3. Sc in next sc.
4. Repeat steps 2 and 3 five more times.
5. Work step 2 once more, then 3 sc in last sc (corner).
Outer edge count: 75 sc, made up of:
– 43 sc worked one in each existing stitch (8 sc + 35 dc)
– plus 28 sc worked into the 14 ch-2 spaces (2 per space)
– plus 4 extra corner sc (2 extra at each corner)
– 43 + 28 + 4 = 75
Working into the ch-2 spaces wraps the chains but leaves the triangular openings open underneath. That is the lacy look you want.
First tip: Work 3 sc evenly down the row ends of Rows 3, 2, and 1. (3 sc)
Inner edge: Working into the free loops of the foundation chain, 3 sc in first ch (corner), sc in each of next 27 ch, 3 sc in last ch (corner).
Inner edge count: 33 sc, made up of 29 sc worked one in each existing chain plus 4 extra corner sc.
Second tip: Work 3 sc evenly up the row ends of Rows 1, 2, and 3. (3 sc)
Join with a sl st to the first sc. Total: 75 + 3 + 33 + 3 = 114 sc.
Why the math works: Every existing stitch gets exactly one sc, so the edges stay flat and none are skipped. The 2 extra sc at each of the 4 corners turn the corners without cupping. The 2 sc per ch-2 space match the space’s width, so the shells don’t pucker or ruffle. The tips get 3 sc each, one per row, so they finish round and smooth like the tips in the photo.
Fasten off, leaving a 6 in (15.2 cm) tail. Weave in both tails along the inner sc band on the WS.
Checkpoint: About 3.5 in (8.9 cm) tall × 3 in (7.6 cm) wide.
Final Blocking
Block before you embroider. A flat, even base makes the embroidery much easier.
- Dampen. Mist the letter until it is evenly damp, but not dripping.
- Shape the C. Lay it RS up on the board. Ease it into a smooth C that is 3.5 in (8.9 cm) tall and 3 in (7.6 cm) wide.
- Pin the outline. Pin at each tip and at the top, middle, and bottom of the outer curve. Pin through the border sc, not through the fans.
- Open the shells. Gently nudge each fan open, and use the tip of a pin to open each triangular gap evenly.
- Check the opening. The gap between the tips should be about 1.25 in (3.2 cm). Make sure the band stays an even 0.75 in (1.9 cm) wide all the way around.
- Optional stiffening. For a firmer charm, brush a thin coat of diluted fabric stiffener onto the WS.
- Dry. Let it dry completely, usually 4–6 hours, before removing the pins.
Embroidered Clover Flowers
Place three clovers along the left side of the C, on the RS. All three sit on the solid inner band and the base of the fans.
- Top flower: about the 11 o’clock position
- Middle flower: about the 9 o’clock position
- Bottom flower: about the 7 o’clock position
Clover heads (A and B):
1. Use a single strand of A in a sharp needle. Work 8–10 French knots (3 wraps each) packed into a rounded oval about 0.5 in (1.3 cm) across.
2. Fill in with 5–6 French knots in B, mostly toward the bottom and outer edges, to give each head depth.
3. Keep the knots tight against each other so the head looks domed and raised.
Stems and leaves (C):
1. From the base of each clover head, work a stem in stem stitch about 0.5 in (1.3 cm) long. Angle the stems down and toward the lower right, following the curve.
2. Add 2 lazy-daisy leaves on each stem, each about 0.25 in (0.6 cm) long. Place them in pairs or alternating.
3. Give the bottom flower one longer leaf that sweeps toward the bottom tip, about 0.375 in (1.0 cm) long.
Secure every thread end on the WS by weaving it through the back of the stitches. Don’t carry threads across the triangular openings, because they will show from the front.
Attaching the Hardware
- Find the center border sc at the top of the outer curve, at the 12 o’clock position.
- Open the 8 mm jump ring with two pliers by twisting it sideways. Don’t pull it apart.
- Slide the jump ring through the border sc and the stitch just below it, so it holds two layers of yarn.
- Add the 25 mm split ring and close the jump ring fully. Check that the seam leaves no gap that could catch the yarn.
Final Quality-Control Checklist
- Letter measures 3.5 in (8.9 cm) tall × 3 in (7.6 cm) wide.
- Band is an even 0.75 in (1.9 cm) wide.
- Opening between the tips is about 1.25 in (3.2 cm).
- 7 even fans along the outer edge, with 14 open triangular gaps.
- Border is complete with 114 sc, and the corners lie flat.
- Tips are rounded, not pointed or flared.
- Three clover heads sit evenly spaced down the left side.
- Stems all angle the same way, and leaves are similar in size.
- No thread is carried across any opening.
- All ends are secured on the WS.
- Jump ring is fully closed and anchored through two layers.
Troubleshooting
The C ruffles along the outer edge. Your fans are too loose. Tighten your dc, or check that you worked exactly 5 dc per fan.
The piece stays almost straight. Row 2 is too tight. Rework it a little looser, or block more firmly into the C shape.
The triangular gaps are closed up. You may have worked more than 2 sc into a ch-2 space during the border. Rework with exactly 2.
The corners curl. Make sure each corner has exactly 3 sc, not 2 and not 4.
The French knots pull through. Wrap less tightly, or catch a strand of the yarn on the WS before you complete each knot.
The charm is floppy. Use a smaller hook, or add a light coat of stiffener.
The jump ring slides out. Re-anchor it through two stitch layers instead of one.
Care
Spot clean with mild soap and cool water, then reshape and dry flat. Avoid soaking if you used stiffener.
Final Notes
Here is the measurement chain to keep you on track:
– Row 1 strip: 4.75 in (12.1 cm)
– Row 2: 43 sc, and the strip begins to curve
– Row 3: 7 fans; the letter is 3.25 in (8.3 cm) × 2.75 in (7.0 cm)
– Border: 114 sc; the letter is 3.5 in (8.9 cm) × 3 in (7.6 cm)
Block the C to shape, embroider three clovers, and add the gold rings. If every checkpoint matches, your letter will hang neatly on your keys with the shells open and the flowers in place.
Happy crocheting!