

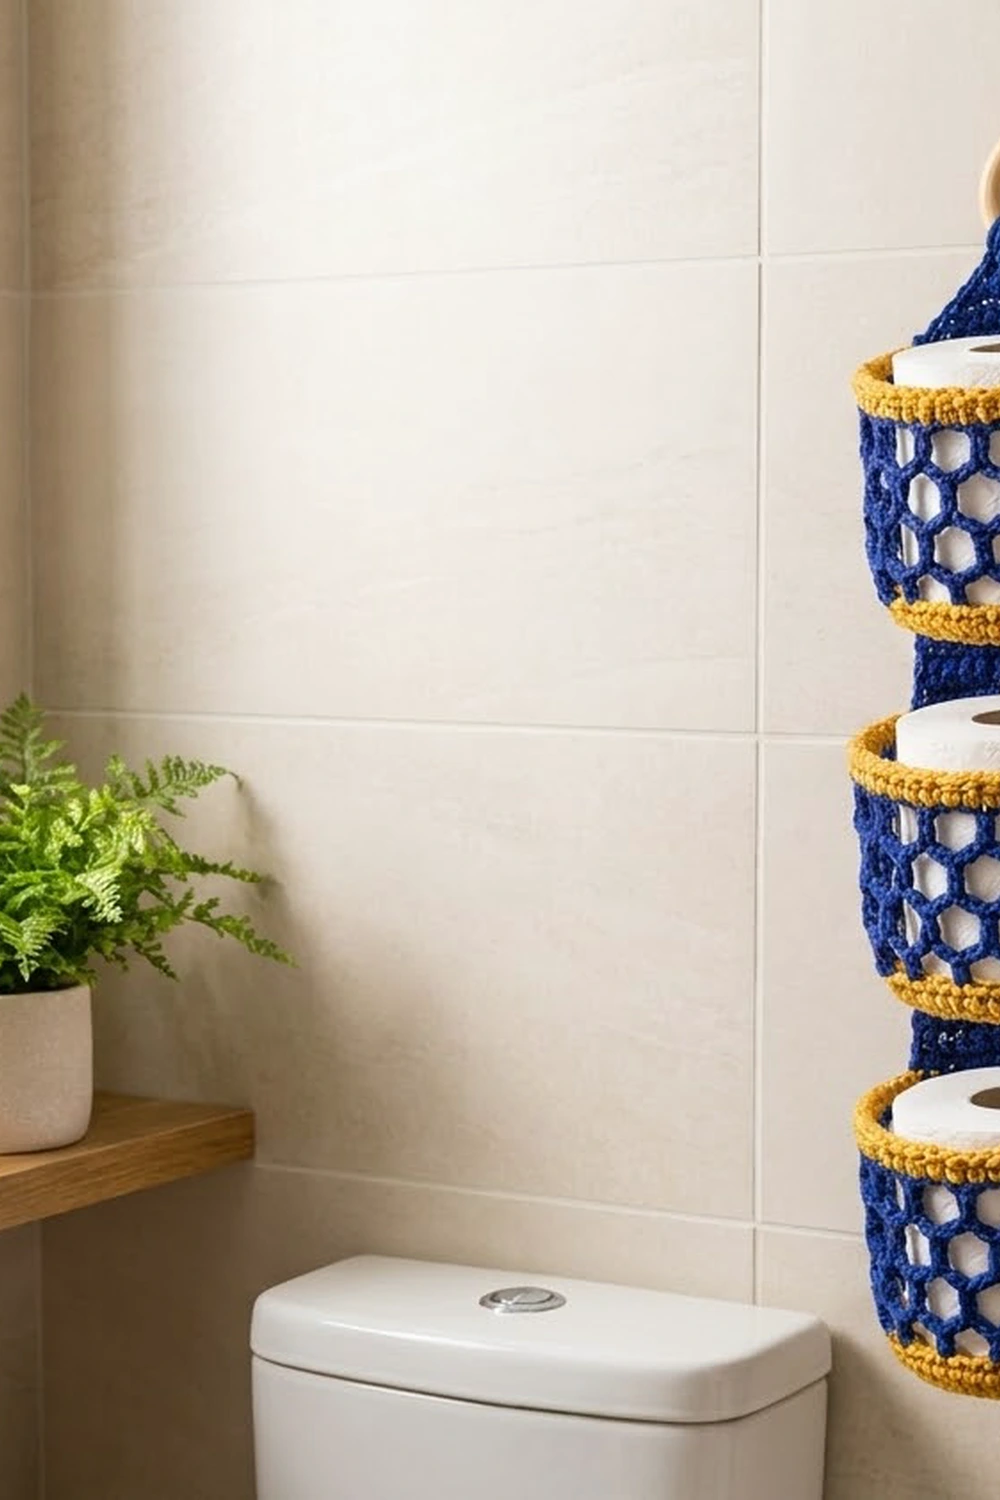
This hanging holder keeps three spare rolls tidy and in reach. A solid cobalt blue backing strip hangs from a wooden ring, and three open honeycomb cups are stitched down its front, each holding one standard roll.
The colors are bold: deep cobalt blue for the strip and mesh, with warm mustard for the cup bases, the first row of cells, and the rims. The open hexagon mesh lets the white rolls show through, so the holder looks light and graphic on the wall.
This pattern uses US crochet terms. The finished holder is about 4.5 in (11.4 cm) wide at the strip, the cups are 4.75 in (12.1 cm) across, and it hangs about 21 in (53.3 cm) long, not counting the ring.
You’ll make one backing strip in rows and three cups in joined rounds: a flat single crochet base, a honeycomb mesh body, and a solid rim. You then sew the cups to the strip, add a one-round edging, and fold the top tab over the ring.
Finished Size and Construction
- Finished size: 4.5 in (11.4 cm) wide x about 21 in (53.3 cm) hanging length
- Skill level: Easy-Intermediate
- Terminology: US
- Yarn weight: Worsted (#4) cotton
- Hook: 5.0 mm (H-8)
- Number of pieces: 4 (1 backing strip, 3 cups)
- Layout: 3 cups stacked vertically in a single column
- Cup size: 4.75 in (12.1 cm) diameter x 4.5 in (11.4 cm) tall
- Strip size before border: 4 in (10.2 cm) x 22.1 in (56.1 cm) laid flat, tab included
- Border depth: 1 round, about 0.25 in (0.6 cm) per edge
Materials
Use a smooth worsted-weight cotton or cotton blend. Cotton holds the cup shape well, doesn’t stretch much under a roll’s weight, and handles bathroom humidity well.
- Cobalt blue (Color A): about 90 g / 140 m. Used for the strip, the mesh, and the edging.
- Mustard yellow (Color B): about 70 g / 110 m. Used for the bases, the first mesh round, and the rims.
Both quantities include a margin of about 30% for gauge swatches and differences between brands.
Tools:
– 5.0 mm (H-8) crochet hook
– Wooden ring, 2.5 in (6.4 cm) outer diameter
– Tapestry needle
– 4–6 locking stitch markers
– Scissors
– Measuring tape
– Rust-proof pins and a blocking surface
Abbreviations (US Terms)
- ch – chain
- sl st – slip stitch
- sc – single crochet
- sc2tog – single crochet 2 together
- BLO – back loop only
- MR – magic ring
- st(s) – stitch(es)
- sp(s) – space(s)
- sk – skip
- Rnd – round
Special stitch: Honeycomb Cluster (HC): (sc, ch 1, sc) worked in the indicated space. Each HC forms the short flat side of a hexagon. The ch-4 arcs between clusters form the slanted sides.
Gauge and Checkpoints
Gauge: 16 sc x 17 rows = 4 in (10.2 cm) in sc worked in rows.
Make one cup first. It’s the best gauge test because the base diameter tells you whether a roll will fit.
Checkpoints:
– Base after Rnd 10: 4.75 in (12.1 cm) across, lying flat.
– After Rnd 12: the wall stands up about 0.5 in (1.3 cm).
– After Rnd 18: the mesh is about 3.3 in (8.4 cm) tall, or about 0.55 in (1.4 cm) per mesh round.
– Finished cup: 4.5 in (11.4 cm) tall. A standard roll drops in without forcing.
– Strip after Row 72: 4 in (10.2 cm) wide x 17 in (43.2 cm) long.
If your base is too big (over 5 in / 12.7 cm), go down to a 4.5 mm hook. If it’s too small (under 4.5 in / 11.4 cm) or a roll won’t fit, go up to a 5.5 mm hook. If the base ruffles, your increases are working, but your tension is tighter than your stitch height. Loosen up rather than removing stitches.
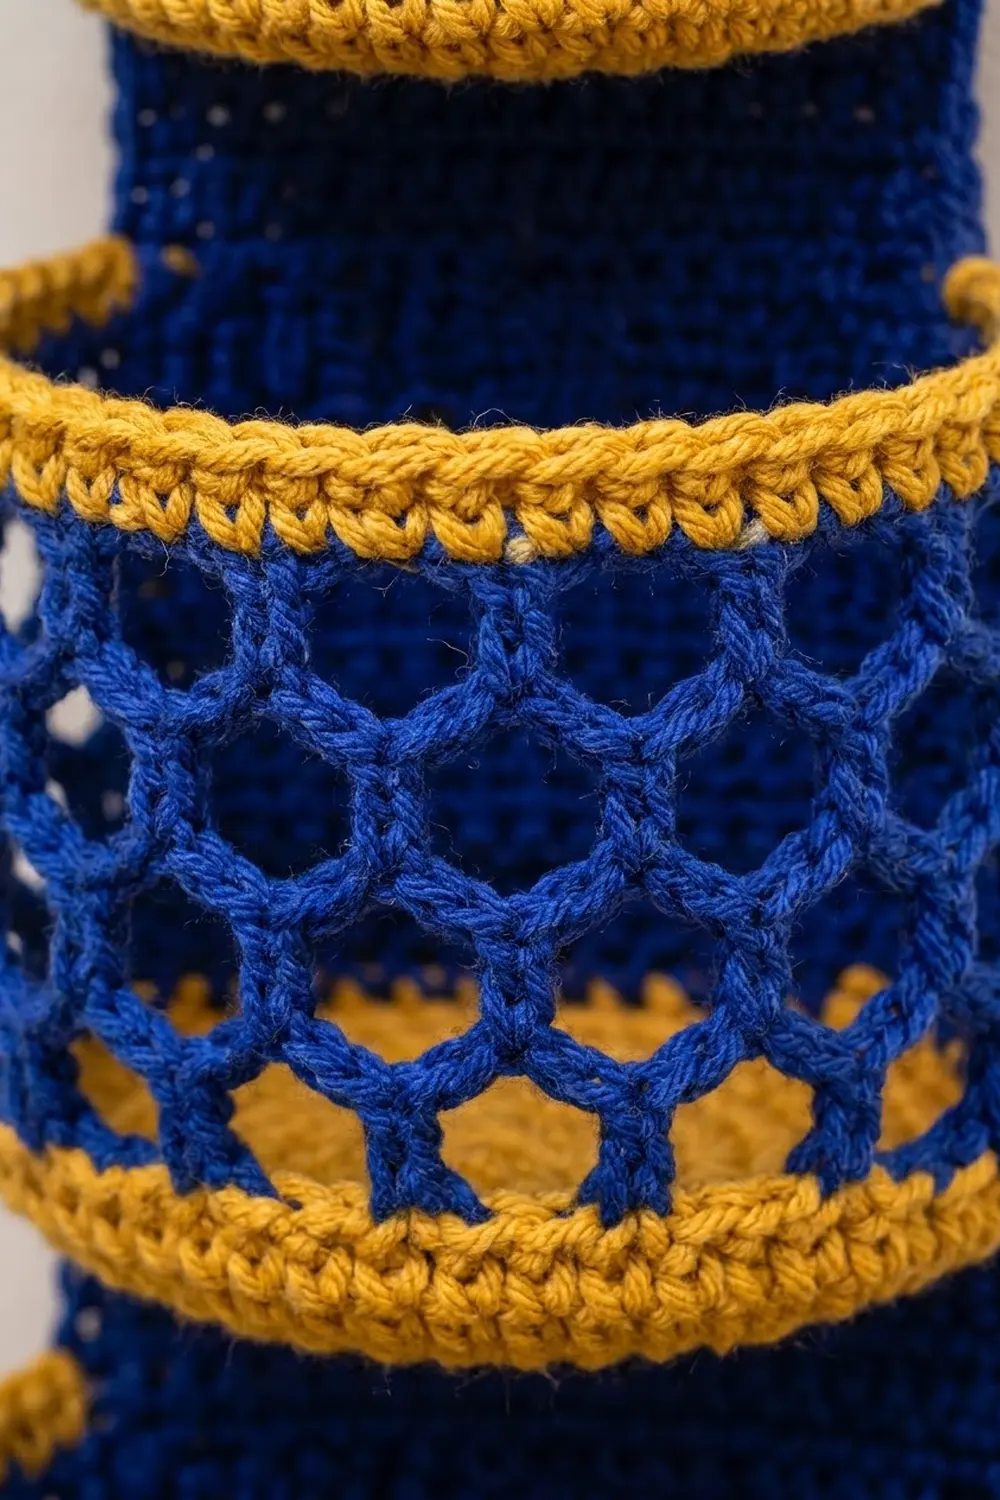
Cup (Make 3)
Work in joined rounds with the right side facing throughout. The first ch 1 of each round doesn’t count as a stitch.
Base
With Color B:
Rnd 1: MR, ch 1, 6 sc in ring, sl st to first sc. (6 sts)
Rnd 2: Ch 1, 2 sc in each st around, sl st to first sc. (12 sts)
Rnd 3: Ch 1, sc in next st, 2 sc in next st 6 times, sl st to first sc. (18 sts)
Rnd 4: Ch 1, sc in next 2 sts, 2 sc in next st 6 times, sl st to first sc. (24 sts)
Rnd 5: Ch 1, sc in next 3 sts, 2 sc in next st 6 times, sl st to first sc. (30 sts)
Rnd 6: Ch 1, sc in next 4 sts, 2 sc in next st 6 times, sl st to first sc. (36 sts)
Rnd 7: Ch 1, sc in next 5 sts, 2 sc in next st 6 times, sl st to first sc. (42 sts)
Rnd 8: Ch 1, sc in next 6 sts, 2 sc in next st 6 times, sl st to first sc. (48 sts)
Rnd 9: Ch 1, sc in next 7 sts, 2 sc in next st 6 times, sl st to first sc. (54 sts)
Rnd 10: Ch 1, sc in next 8 sts, 2 sc in next st 6 times, sl st to first sc. (60 sts)
Checkpoint: the base is 4.75 in (12.1 cm) across. The circumference is 60 sts ÷ 4 sts per inch = 15 in (38.1 cm).
Turning Ridge and Low Band
Rnd 11: Ch 1, sc in BLO of each st around, sl st to first sc. (60 sts) The unused front loops form a neat ridge, and the wall starts to rise.
Rnd 12: Ch 1, sc in each st around, sl st to first sc. (60 sts)
Honeycomb Mesh
Rnd 13 (Color B, setup): Ch 1, sc in first st, ch 4, sk 3 sts, sc in next st, ch 4, sk 3 sts 14 times, sl st to first sc. (15 sc, 15 ch-4 sps) Fasten off Color B. This round outlines the lowest row of cells in mustard.
Rnd 14 (Color A): Join Color A in any ch-4 sp. Ch 1, HC in same sp, ch 4, HC in next ch-4 sp, ch 4 14 times, sl st to first sc. (15 HC, 15 ch-4 sps)
Rnds 15–18: Sl st in next ch-1 sp, sl st in next sc, sl st in next ch-4 sp. Ch 1, HC in same sp, ch 4, HC in next ch-4 sp, ch 4 14 times, sl st to first sc. (15 HC, 15 ch-4 sps in each round) Fasten off Color A after Rnd 18.
Each round’s clusters sit in the arcs of the round below, so they shift half a cell each round. That offset makes the hexagon openings. Checkpoint: the mesh is about 3.3 in (8.4 cm) tall. The cells open fully once a roll is inside.
Rim
Rnd 19 (Color B, conversion round): Join Color B in any ch-4 sp. Ch 1, 3 sc in ch-4 sp, sc in ch-1 sp of next HC 15 times, sl st to first sc. Count: 45 sc worked into the ch-4 sps (3 x 15) + 15 sc worked into the ch-1 sps = 60 sts. The sc stitches of each HC are skipped.
Rnds 20–21: Ch 1, sc in each st around, sl st to first sc. (60 sts)
Fasten off and weave in ends. Checkpoint: the rim is about 0.7 in (1.8 cm) deep, and the cup is 4.5 in (11.4 cm) tall in total.
Backing Strip
With Color A, worked in rows.
Foundation: Ch 17.
Row 1: Sc in 2nd ch from hook and in each ch across. (16 sts)
Rows 2–72: Ch 1, turn, sc in each st across. (16 sts)
Checkpoint: 4 in (10.2 cm) wide x 17 in (43.2 cm) long.
Taper:
Row 73: Ch 1, turn, sc2tog, sc in next 12 sts, sc2tog. (14 sts)
Row 74: Ch 1, turn, sc across. (14 sts)
Row 75: Ch 1, turn, sc2tog, sc in next 10 sts, sc2tog. (12 sts)
Row 76: Ch 1, turn, sc across. (12 sts)
Row 77: Ch 1, turn, sc2tog, sc in next 8 sts, sc2tog. (10 sts)
Row 78: Ch 1, turn, sc across. (10 sts)
Row 79: Ch 1, turn, sc2tog, sc in next 6 sts, sc2tog. (8 sts)
Row 80: Ch 1, turn, sc across. (8 sts)
The taper is about 1.9 in (4.8 cm) long.
Hanging tab:
Rows 81–94: Ch 1, turn, sc across. (8 sts)
The tab is about 3.3 in (8.4 cm) long. Don’t fasten off. Keep the loop on a marker for the border.
Checkpoint: the strip is 94 rows long, about 22.1 in (56.1 cm) laid flat.
Make All Pieces
- Cups: 3. Each uses Color B for Rnds 1–13 and 19–21, and Color A for Rnds 14–18.
- Backing strip: 1, all in Color A.
Layout (front view, rows counted from the bottom of the strip):
        [ ring ]
        [ tab: Rows 81–94 ]
        [ taper: Rows 73–80 ]
        [ space: Rows 68–72 ]
        [ CUP 1: Rows 49–67 ]
        [ gap: Rows 44–48 ]
        [ CUP 2: Rows 25–43 ]
        [ gap: Rows 20–24 ]
        [ CUP 3: Rows 1–19 ]
Each cup covers 19 rows, or about 4.5 in (11.4 cm). Each gap is 5 rows, or about 1.2 in (3.0 cm).
Joining
Use Color A and a tapestry needle to whipstitch the cups on, working stitch to stitch.
- Mark each cup. Fold the cup flat with the Rnd 21 joining seam at the center back. Place markers 8 sts on each side of the seam on Rnd 21 and on Rnd 12, so 16 back stitches are marked on each round.
- Sew the base edge. For Cup 3, line up the 16 marked sts of Rnd 12 with the 16 sts of Row 1. Whipstitch 1 cup st to 1 strip st, for 16 stitches in all.
- Sew the rim. Line up the 16 marked sts of Rnd 21 with the 16 sts of Row 19 and whipstitch them 1 to 1.
- Tack the sides. At each side edge of the strip, tack the nearest HC of Rnds 14–18 to the strip edge. That’s 5 tacks per side, which stops the mesh from bowing away from the strip.
- Repeat for Cup 2 (base at Row 25, rim at Row 43) and Cup 1 (base at Row 49, rim at Row 67).
Tension: Pull each whipstitch snug, but not so tight that it puckers the strip. The strip should stay 4 in (10.2 cm) wide behind each cup. If it narrows, loosen the seam.
Size checkpoint: Lay the joined piece flat. The cups’ bottom and top edges should line up with the rows listed in the layout, and the gaps should measure 1.2 in (3.0 cm).
Border
Work one round of sc around the backing strip only. The edging goes on the strip’s outer edges, beside and behind the cups, not on the cups themselves.
Border gauge: Same as the main gauge, 4 sc per inch. Work 1 sc per row-end along the sides.
Corner definition: The strip has 4 corner stitches: the first and last sts of Row 1 and of Row 94. Each corner st gets 3 sc. These corner groups are counted separately below and are not included in the side counts.
Border Rnd (Color A): With the right side facing and the live loop from Row 94, ch 1, turn your work to the right side, and work:
– Top-right corner: 3 sc in first st of Row 94. (3 sts)
– Top edge: sc in next 6 sts. (6 sts)
– Top-left corner: 3 sc in last st. (3 sts)
– Left side: 1 sc in each row-end of Rows 93 down to 2. (92 sts)
– Bottom-left corner: 3 sc in first st of Row 1. (3 sts)
– Bottom edge: sc in next 14 sts. (14 sts)
– Bottom-right corner: 3 sc in last st. (3 sts)
– Right side: 1 sc in each row-end of Rows 2 up to 93. (92 sts)
Sl st to first sc. Total: 12 corner + 6 + 14 + 92 + 92 = 216 sts. Fasten off.
Why the math works: The top edge has 8 sts, made up of 2 corners and 6 between them. The bottom edge has 16 sts, made up of 2 corners and 14 between. Each side has 94 rows. The corner rows (1 and 94) belong to the corner groups, so 92 row-ends remain per side. At 16 sts and 17 rows per 4 in (10.2 cm), one sc per row-end is close to a 1:1 match, so the long sides lie flat without ruffling. The taper’s row-ends slant, but they still take 1 sc each. After the border, the strip is 4.5 in (11.4 cm) wide.
Attach the ring: Pass the tab through the wooden ring from front to back. Fold it down so the tab’s end lies on the back of the strip at the top of the taper (Row 80). Whipstitch the tab end and both side edges in place. The holder now hangs about 21 in (53.3 cm) long from the top of the fold to the bottom border.
Final Blocking
- Weave in all remaining ends along stitches of the same color.
- Spritz the whole piece lightly with water until it’s damp but not soaked.
- Lay the strip flat, face up, and pin the long edges straight at 4.5 in (11.4 cm) wide.
- Stuff each cup with a roll, or a rolled towel 4.5 in (11.4 cm) across, to open the honeycomb cells and round the rim.
- Smooth each base flat and press the Rnd 11 ridge into a crisp edge.
- Leave everything to dry completely, at least 12 hours, before unpinning.
Final Quality-Control Checklist
- Each cup base is 4.75 in (12.1 cm) across and lies flat.
- Each cup has 60 sts in Rnds 10–12 and 19–21.
- Each mesh round has 15 HC and 15 ch-4 sps.
- Each cup is 4.5 in (11.4 cm) tall.
- The strip is 16 sts wide for Rows 1–72 and 8 sts wide for Rows 79–94.
- The border round totals 216 sts, with no ruffling or cupping.
- The cups line up with Rows 1–19, 25–43, and 49–67.
- The ring is sewn securely, with both tab edges closed.
- All ends are woven in and nothing is loose inside the cups.
Troubleshooting
- The cup flares at the top: Your rim tension is loose. Redo Rnds 20–21 with a hook 0.5 mm smaller.
- The mesh looks like diamonds, not hexagons: Check that each HC has its ch 1. Block over a roll to open the cells.
- The roll won’t fit: Your base is too small. Remake it with a larger hook rather than adding rounds.
- The strip ruffles at the border: Skip one row-end every 15 rows, and take the same number of stitches off each side.
- The cups sag forward: Add the side tacks from Joining step 4, and check that the rim seam covers all 16 sts.
- The strip curls: Block it pinned flat, and check that you turned at every row.
Care
Hand wash cool and lay flat to dry. Reshape the cups around a roll while damp.
Final Notes
The measurement chain is short and checkable. The gauge of 4 sc per inch gives a 60-st base 4.75 in (12.1 cm) across. That holds a 15-unit honeycomb mesh, which turns back into 60 rim stitches, so each cup comes out 4.5 in (11.4 cm) tall. The strip’s 16 sts give a width of 4 in (10.2 cm), and the 216-st border brings it to 4.5 in (11.4 cm). Three cups on a 94-row strip hang about 21 in (53.3 cm) from a 2.5 in (6.4 cm) ring. Check each stage, and the finished holder will match.
Happy crocheting!