

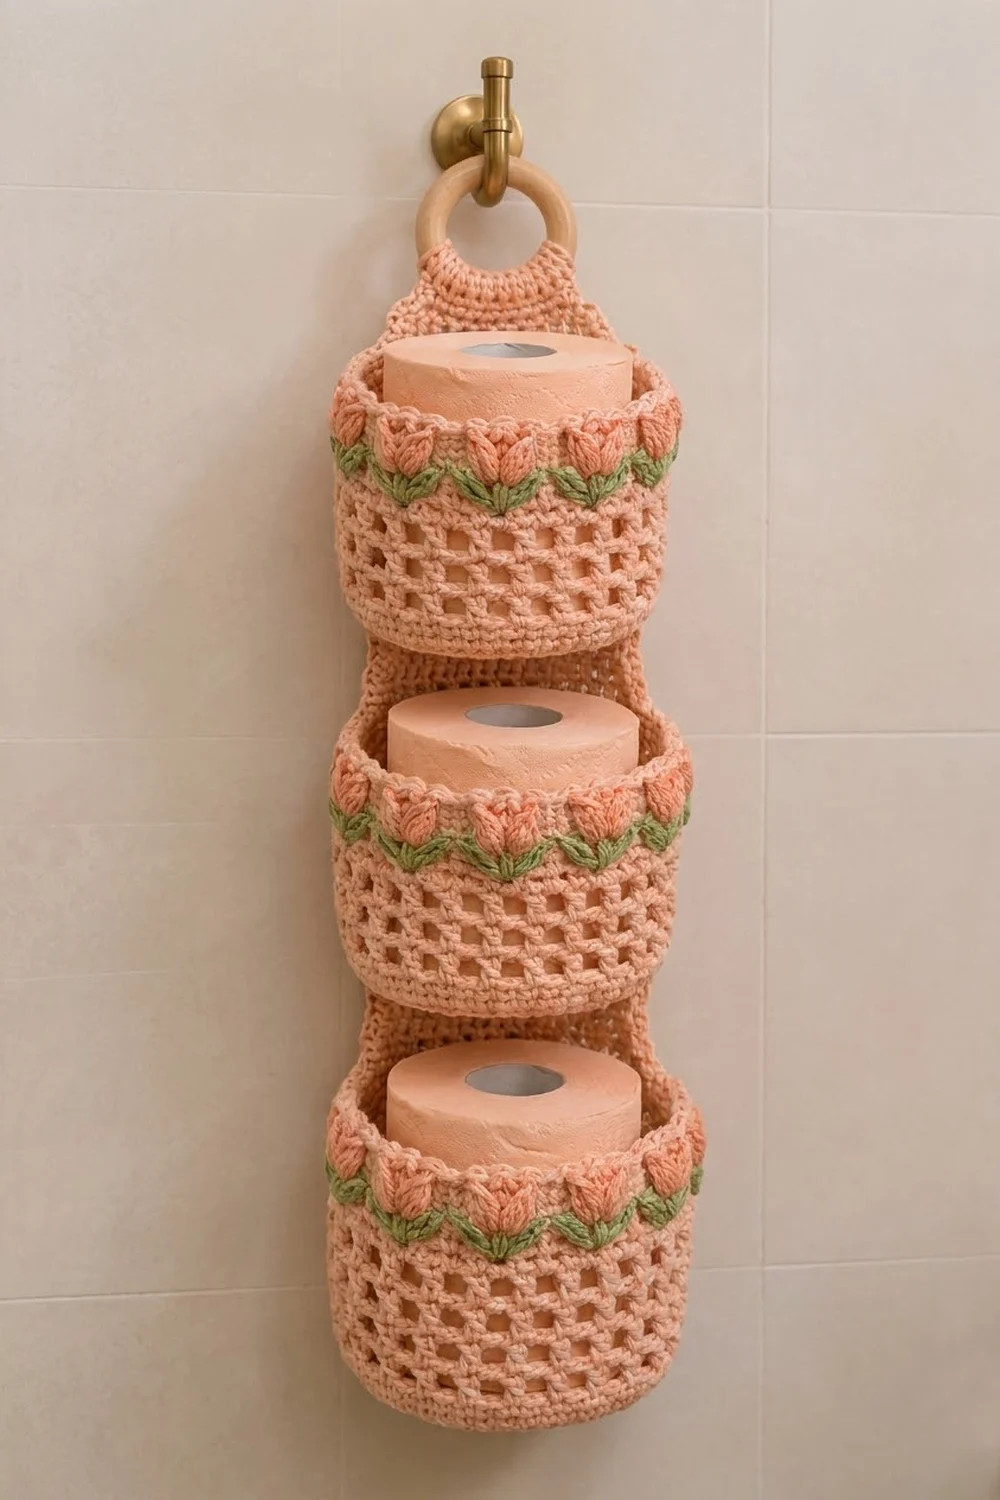
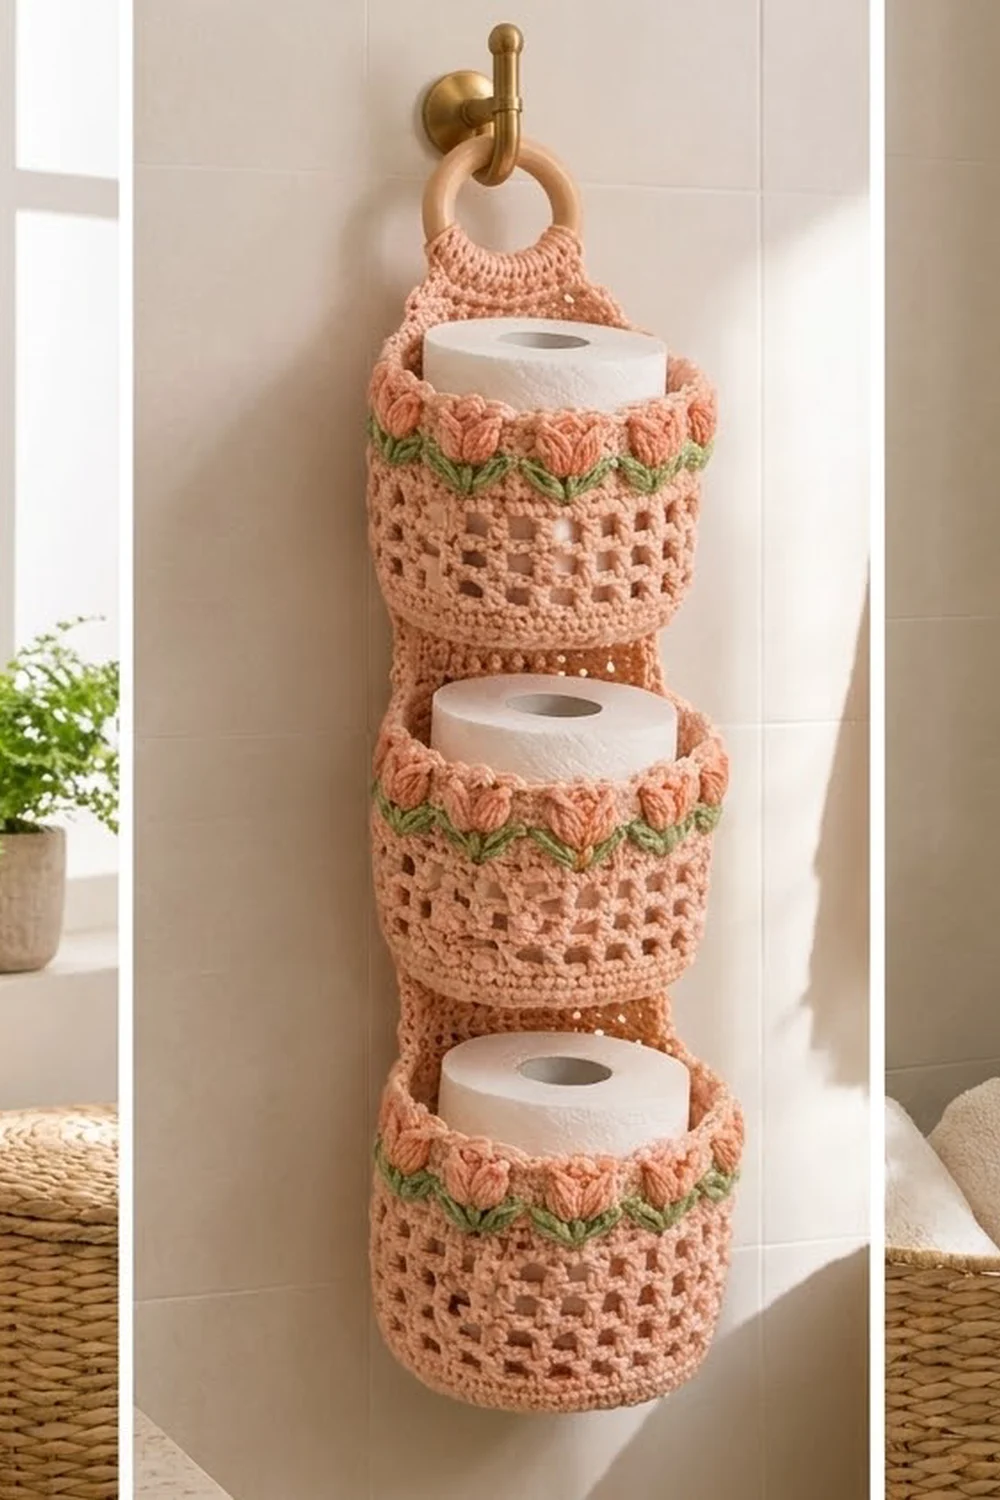
This hanging toilet paper holder has three open-mesh baskets stacked on one long back panel. A short tab at the top wraps around a wooden ring so the holder hangs from any hook. Each basket holds one standard roll, and about 1 in (2.5 cm) of the roll stays above the rim, so it’s easy to grab.
The main color is soft peach, with sage green for the stems and leaves. A row of puffy peach tulips sits near the top of each basket. Below the tulips is an airy filet mesh, and a ridged crab-stitch rim finishes the top edge. The look is light and cottage-style.
The pattern uses US terms. The panel is 4.75 in (12.1 cm) wide and 15 in (38.1 cm) tall from the bottom edge to the fold at the ring. Each basket is 4.8 in (12.2 cm) across and 3.25 in (8.3 cm) tall.
You’ll make one panel with its tab and three baskets. Each basket is worked in joined rounds from the base up. Sew the baskets to the panel stitch by stitch, then edge the panel, add the rims, and fold the tab over the ring.
Finished Size and Construction
- Finished size: 4.75 in (12.1 cm) wide x 15 in (38.1 cm) tall; baskets stick out 4.8 in (12.2 cm) from the wall
- Skill level: Intermediate
- Terminology: US
- Yarn weight: worsted (#4) cotton
- Hook: 5.0 mm (H-8)
- Number of pieces: 4 (1 panel with tab, 3 baskets)
- Layout: 1 column of 3 baskets
- Piece size: each basket is 4.8 in (12.2 cm) across x 3.25 in (8.3 cm) tall; the panel body is 4.25 in x 12.5 in (10.8 cm x 31.8 cm)
- Size before border: panel 4.25 in (10.8 cm) wide; basket wall 3 in (7.6 cm) tall
- Border depth: 0.25 in (0.6 cm) around the panel and on each basket rim
Materials
Use 100% cotton or a cotton blend. Cotton keeps its shape when the baskets are loaded with rolls, and it copes well with bathroom humidity. Avoid stretchy acrylic, because the baskets will sag.
- Peach (main color): 150 g, about 255 m (279 yd)
- Sage green: 20 g, about 34 m (37 yd)
These quantities include a margin of about 20%.
Tools:
- 5.0 mm (H-8) hook
- Wooden ring, 3 in (7.6 cm) across
- Tapestry needle
- Stitch markers
- Measuring tape
- Pins
Abbreviations (US Terms)
- ch: chain
- sl st: slip stitch
- sc: single crochet
- dc: double crochet
- sc2tog: single crochet 2 together
- BLO / FLO: back loop only / front loop only
- rev sc: reverse single crochet (crab stitch)
- sp: space
- st(s): stitch(es)
- rnd(s): round(s)
- RS / WS: right side / wrong side
Long single crochet (LSC): Insert the hook into the Rnd 15 ch-1 space directly below. Yarn over and pull up a loop to the height of the current round, then yarn over and draw through both loops. Skip the Rnd 16 stitch behind the LSC.
Tulip stitch (TS): All in one stitch: yarn over, insert the hook, pull up a loop, then yarn over and draw through 2 loops. Do this 4 times. Then yarn over and draw through all 5 loops. You work this stitch with the WS facing, so it puffs out toward the RS.
Gauge and Checkpoints
Gauge:
- 16 sc and 18 rows = 4 in (10.2 cm)
- 8 dc rows = 4 in (10.2 cm), so each mesh row is 0.5 in (1.3 cm)
Make one basket first. It is your swatch.
Checkpoints:
- Base after Rnd 5: 2.4 in (6.1 cm) across
- Base after Rnd 10: 4.8 in (12.2 cm) across
- Wall after Rnd 15: 2 in (5.1 cm)
- Wall after Rnd 19: 3 in (7.6 cm)
- Panel Row 1: 4.25 in (10.8 cm) wide
- Panel after Row 25: 12.5 in (31.8 cm) tall
If the base is too big, use a hook 0.5 mm smaller. If the base is under 4.6 in (11.7 cm), a roll may not fit, so go up 0.5 mm. If the base is right but the walls are short, loosen your dc and keep the counts the same.
Basket (Make 3)
Work joined rounds with the RS facing out unless the pattern says to turn. Join each round with a sl st to the first st, then ch 1 (the ch 1 doesn’t count). Begin each round in the join stitch. The join line becomes the center back of the basket.
Base
Use Peach.
Rnd 1: 6 sc in a magic ring. (6 sts)
Rnd 2: 2 sc in each st. (12 sts)
Rnd 3: Sc in next st, 2 sc in next st; repeat 6 times. (18 sts)
Rnds 4-10: Each round, work 1 more plain sc before each of the 6 increases.
| Round | Stitches |
|---|---|
| Rnd 4 | 24 |
| Rnd 5 | 30 |
| Rnd 6 | 36 |
| Rnd 7 | 42 |
| Rnd 8 | 48 |
| Rnd 9 | 54 |
| Rnd 10 | 60 |
The base should lie flat at 4.8 in (12.2 cm) across.
Wall
Rnd 11: Sc BLO in each st. (60 sts) This turns the wall up and leaves a ridge of front loops for joining.
Rnd 12: Sc in each st. (60 sts)
Rnd 13: Ch 4 (counts as dc and ch 1), skip next st, dc in next st, ch 1, skip next st; repeat 29 times. Join to the 3rd ch. (30 dc + 30 ch-1 sps = 60 sts)
Rnds 14-15: Ch 4, dc in next dc, ch 1; repeat 29 times. Join. (30 dc + 30 ch-1 sps = 60 sts)
Rnd 16 (conversion): Sc in each dc and each ch-1 sp. (30 + 30 = 60 sts) Change to Green.
Rnd 17 (stems): Sc in next 3 sts, LSC into the ch-1 sp below the next st; repeat 15 times. (45 sc + 15 LSC = 60 sts) Change to Peach and cut Green.
Rnd 18 (tulips): Turn so the WS faces you. Work TS in the first st (this lands on the last LSC). Then sc in next 3 sts, TS in next st; repeat 14 times, and finish with sc in the last 3 sts. (15 TS + 45 sc = 60 sts) Each tulip sits on top of a stem.
Rnd 19: Turn so the RS faces you. Sc in each st. (60 sts) Put the live loop on a marker; you’ll use it for the rim later.
Leaves: Use Green and a tapestry needle. Embroider 2 lazy-daisy leaves on Rnd 16 beside each of the 10 front tulips, at stitches 12 to 48 counted from the join. The 5 tulips at the back sit against the panel, so they don’t get leaves.
Back Panel and Tab
Use Peach. Ch 19.
Row 1: Dc in the 4th ch from the hook (the skipped chains count as a dc) and in each ch across. Turn. (17 sts)
Row 2: Ch 4 (counts as dc and ch 1), skip next st, dc in next st, ch 1, skip next st, dc in next st; repeat 7 times. Turn. (9 dc + 8 sps = 17 sts)
Rows 3-24: Ch 4, dc in next dc, ch 1; repeat 7 times, then dc in the 3rd ch of the turning ch. Turn. (17 sts)
Row 25: Ch 3, dc in each sp and each dc across. Turn. (17 sts) The panel now measures 4.25 in x 12.5 in (10.8 cm x 31.8 cm).
Row 26: Ch 1, sc2tog, sc in next 13 sts, sc2tog. Turn. (15 sts)
Row 27: Ch 1, sc2tog, sc in next 11 sts, sc2tog. Turn. (13 sts)
Row 28: Ch 1, sc2tog, sc in next 9 sts, sc2tog. Turn. (11 sts)
Row 29: Ch 1, sc2tog, sc in next 7 sts, sc2tog. Turn. (9 sts)
Rows 30-41: Ch 1, sc in each st. Turn. (9 sts) Don’t fasten off.
Make All Pieces
- Peach: 1 panel, plus all 3 baskets except Rnd 17
- Green: Rnd 17 and the leaves on each of the 3 baskets
Layout, top to bottom:
[ Tab + ring  ]  Rows 26-41
[ Panel only  ]  Row 25
[ Basket A    ]  Rows 19-24
[ Gap         ]  Rows 16-18
[ Basket B    ]  Rows 10-15
[ Gap         ]  Rows 7-9
[ Basket C    ]  Rows 1-6
Joining
Use Peach and a whipstitch. On each basket, find the 17 back stitches: sts 52-60 and sts 1-8, centered on the join line. The panel is also 17 sts wide, so every seam is worked 1 stitch to 1 stitch.
Base seam: Sew the 17 Rnd 10 front loops to 17 panel sts:
- Basket C: the base of the Row 1 stitches
- Basket B: the top of Row 9
- Basket A: the top of Row 18
Rim seam: Sew the 17 Rnd 19 back loops to the top of Row 6 (C), Row 15 (B) and Row 24 (A).
Each rim sits 3 in (7.6 cm), or 6 rows, above its base, which matches the wall height. Keep your tension even. Pull each stitch just snug, so the panel doesn’t pucker and the basket stays round.
Checkpoint: The top rim seam should be 12 in (30.5 cm) above the bottom edge, and the gaps between baskets should be 1.5 in (3.8 cm).
Border
Border gauge: 4 sc per inch (1.6 cm per 4 sc).
Panel edging (RS facing)
Join Peach at the first foundation ch, at the bottom right. Work the four sides as follows:
- Bottom edge: 3 sc in the first ch, sc in the next 15 chs, 3 sc in the last ch.
- First long side: 2 sc in each dc row end (25 rows = 50 sc), then 1 sc in each sc row end (16 rows = 16 sc).
- Tab top: 3 sc in the first st of Row 41, sc in the next 7 sts, 3 sc in the last st.
- Second long side: 16 sc down the tab and 50 sc down the dc rows. Join to the first sc.
The corner stitch is the middle sc of each 3-sc group. Counting both corners, each side has:
- Bottom: 19 sts
- Tab top: 11 sts
- Each long side: 70 sts
Total: 19 + 11 + 70 + 70 − 4 shared corners = 166 sts.
Why the math works:
- Each dc row is 0.5 in (1.3 cm) tall, so 2 sc per dc row = 4 sc per inch, which matches gauge.
- The sc rows run 4.5 per inch, and 1 sc per row is close enough to 4 per inch to lie flat.
- The bottom edge places 1 sc per foundation chain.
- The 3-sc corners turn each 90-degree corner cleanly.
Basket rim (Rnd 20)
Put the live loop back on the hook. Ch 1, then work rev sc in FLO of each st around. (60 sts) Working 1 rev sc into each stitch keeps the rim at 15 in (38.1 cm) around, so it won’t ruffle. Fasten off.
Ring
Slip the tab through the ring. Fold it back between Rows 35 and 36, and sew the top edge to the back of Row 30.
Final Blocking
- Spray the whole piece lightly with water until it’s damp.
- Pin the panel to 4.75 in (12.1 cm) wide, keeping the mesh squares straight.
- Stuff each basket with a rolled towel about 4.8 in (12.2 cm) across.
- Line up the tulips and leaves so they’re straight.
- Let it dry completely before you hang it.
Final Quality-Control Checklist
- Each basket has 60 sts and 15 tulips
- Every tulip sits on a green stem
- Each basket base measures 4.8 in (12.2 cm)
- The seams are centered and the joins are hidden at the back
- The panel edging has 166 sts and lies flat
- The tab fold is secure on the ring
- The rims don’t ruffle
- All ends are woven in
Troubleshooting
- Tulips puff inward: You worked Rnd 18 with the RS facing. Redo the round with the WS facing.
- Tulips sit between the stems: Your Rnd 17 count drifted. Recount: 3 sc, then 1 LSC.
- Base cups upward: Your tension is too tight, so go up 0.5 mm.
- Base ruffles: Your tension is too loose, or a round has extra stitches. Recount.
- Panel edge waves: Use 2 sc per dc row, not 3.
- Basket tilts: Make sure both seams use the same 17 stitches.
Care
Hand wash in cool water, press out the water in a towel, and lay flat to dry. Reshape the baskets while they’re damp.
Final Notes
Here’s how the measurements connect:
- Each 60-st base measures 4.8 in (12.2 cm).
- The wall reaches 3 in (7.6 cm) after Rnd 19.
- The 17-st panel is 4.25 in (10.8 cm) wide, and 6 mesh rows equal one basket wall.
- The 166-st edging brings the panel to 4.75 in (12.1 cm) wide.
- The finished holder is 15 in (38.1 cm) tall.
If all your checkpoints match, the rolls will drop in neatly.
Happy crocheting!