

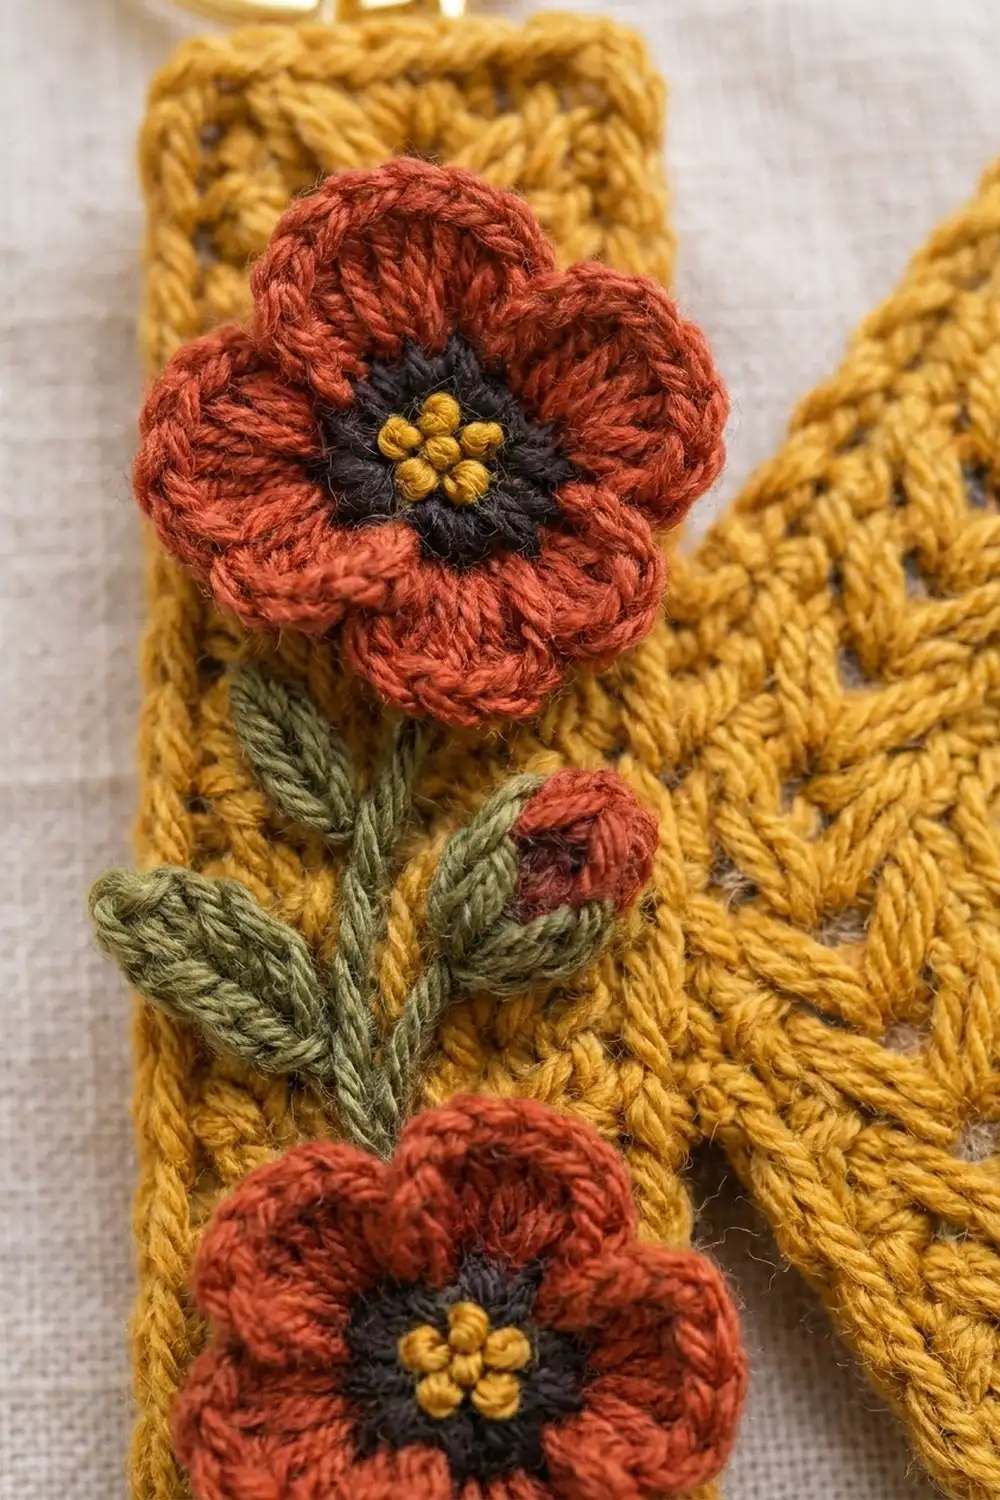
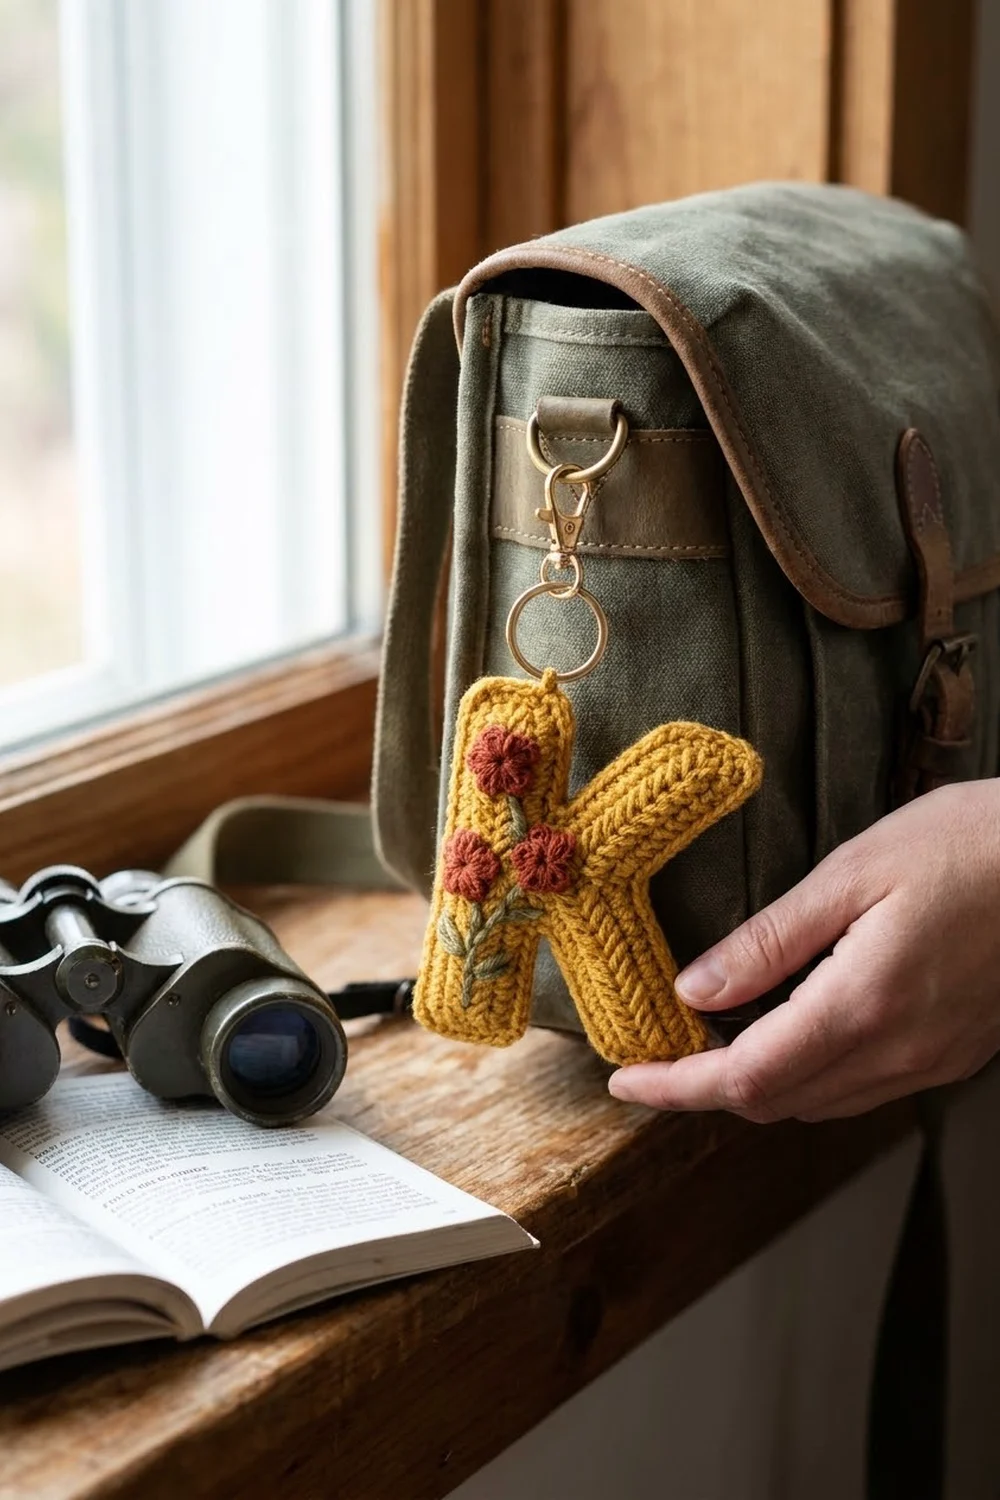
This Wildflower Initial K is a small, flat letter keychain. It has a cozy knit-look texture and a little trail of folk-style flowers down the stem. The letter is golden mustard. Two rust-red blossoms with near-black centers sit on the stem, joined by an olive-green vine with leaves and a bud.
The style is part vintage embroidery, part outdoor gear tag. It works well clipped to a bag, a binocular case, or a set of keys. This pattern uses US crochet terms throughout.
The finished letter is 4.5 in (11.4 cm) tall and 3.25 in (8.3 cm) wide, including the border.
The letter is made from three small strips worked lengthwise in camel stitch, which gives the knit-look chevrons: a stem, an upper leg, and a lower leg. You sew the strips into one flat K, then work one single crochet border around the whole outline. Last, you crochet the flowers, leaves, and bud, sew them onto the stem, and attach the hardware.
Finished Size and Construction
- Finished size: 4.5 in x 3.25 in (11.4 cm x 8.3 cm)
- Skill level: Easy-intermediate
- Terminology: US crochet terms
- Yarn weight: DK (light worsted, #3)
- Hook: 3.5 mm (E-4)
- Number of pieces: One finished letter. It is built from 3 strips plus 6 small appliqués.
- Layout: A single capital K, stem on the left, legs on the right
- Stem size: 4.25 in x 1 in (10.8 cm x 2.5 cm)
- Size before border: 4.25 in x 3 in (10.8 cm x 7.6 cm)
- Border depth: 0.125 in (0.3 cm) on every edge
Materials
Use a smooth DK yarn so the camel-stitch Vs show clearly. Wool-acrylic blends and mercerized cotton both work. Cotton gives the crispest stitch definition and holds its shape best on a keychain that gets handled a lot.
- Color A (mustard): 10 g / 25 m, for the letter, border, and French knots
- Color B (rust red): 3 g / 8 m, for the flowers and bud
- Color C (olive green): 2 g / 5 m, for the leaves and embroidered vine
- Color D (near-black): 1 g / 2 m, for the flower centers
All quantities include a margin for a gauge swatch and sewing tails.
Tools:
- 3.5 mm (E-4) crochet hook
- Tapestry needle
- Sharp embroidery needle
- 1 gold swivel lobster clasp with split ring, about 1.5 in (3.8 cm) long
- 1 gold jump ring, 6 mm
- 2 pairs of flat-nose pliers
- Rustproof pins and a blocking mat
- Scissors
Abbreviations (US Terms)
- ch: chain
- sl st: slip stitch
- sc: single crochet
- sc2tog: single crochet 2 together
- hdc: half double crochet
- dc: double crochet
- st(s): stitch(es)
- RS: right side
Special stitch: hdc3L (camel stitch). Work a half double crochet into the third loop only. On a hdc row, the third loop is the horizontal bar on the side facing you, just below the front loop.
Working into this loop pushes the top two loops forward, and they lie flat as a V. Every 2 rows make one braided chevron line running along the strip. The 4 rows in each strip give the 2 chevron lines you see on the stem and legs.
Special stitch: 4-dc cluster. Yarn over and insert the hook in the stitch. Yarn over and pull up a loop, then yarn over and pull through 2 loops. Do this 4 times in the same stitch, then yarn over and pull through all 5 loops on the hook.
Gauge and Checkpoints
Gauge: 18 sts and 16 rows = 4 in (10.2 cm), worked in hdc3L.
That means each stitch is about 0.22 in wide and each row is 0.25 in (0.6 cm) tall. So 4 rows make 1 in (2.5 cm).
Make the stem first and use it as your gauge test. All the other measurements depend on it.
- After stem Row 1: the strip measures 4.25 in (10.8 cm) long.
- After stem Row 4: the strip measures 1 in (2.5 cm) wide.
- Upper leg: the longest edge (Row 4) measures 2.9 in (7.4 cm).
- Lower leg: the longest edge (Row 4) measures 2.7 in (6.9 cm).
- Assembled, before border: 4.25 in x 3 in (10.8 cm x 7.6 cm).
- After border: 4.5 in x 3.25 in (11.4 cm x 8.3 cm).
If your stem is too long, go up to a 3.75 mm hook. If it is too short, go down to a 3.25 mm hook. Don’t change the stitch counts. The legs and border are calculated from these exact counts.
If the length is right but the width is over 1 in (2.5 cm), your hdc3L rows are too tall. Pull up shorter loops before the final yarn over.
Stem
With Color A, ch 21.
Row 1 (RS): Hdc in 3rd ch from hook and in each ch across. Turn. (19 hdc) The skipped ch-2 does not count as a stitch.
Row 2: Ch 1 (does not count as a stitch here and throughout), hdc3L in each st across. Turn. (19 sts)
Rows 3–4: Repeat Row 2. (19 sts)
Fasten off and weave in the ends. The stem measures 4.25 in x 1 in (10.8 cm x 2.5 cm).
The foundation chain edge becomes the left side of the K. The Row 4 edge becomes the right side, where the legs attach. Number the Row 4 stitches 1–19, counting from the bottom.
Upper Leg
The upper leg grows by 1 stitch per row along one edge. This makes a slanted end that sits almost vertical against the stem when the leg is tilted at 45 degrees. The other end stays square and becomes the tip.
With Color A, ch 12.
Row 1 (RS): Hdc in 3rd ch from hook and in each ch across. Turn. (10 hdc)
Row 2: Ch 1, hdc3L in each st to last st, 2 hdc3L in last st. Turn. (11 sts)
Row 3: Ch 1, 2 hdc3L in first st, hdc3L in each st across. Turn. (12 sts)
Row 4: Ch 1, hdc3L in each st to last st, 2 hdc3L in last st. (13 sts)
Fasten off and leave an 8 in (20.3 cm) tail for sewing. All the increases are on the same edge. That slanted edge is the stem end.
Lower Leg
The lower leg is a mirror image of the upper leg and is 1 stitch shorter.
With Color A, ch 11.
Row 1 (RS): Hdc in 3rd ch from hook and in each ch across. Turn. (9 hdc)
Row 2: Ch 1, 2 hdc3L in first st, hdc3L in each st across. Turn. (10 sts)
Row 3: Ch 1, hdc3L in each st to last st, 2 hdc3L in last st. Turn. (11 sts)
Row 4: Ch 1, 2 hdc3L in first st, hdc3L in each st across. (12 sts)
Fasten off and leave an 8 in (20.3 cm) tail.
Assembling the K
- Lay the stem RS up, with the Row 4 edge on the right.
- Place the upper leg RS up. Its slanted end goes against stem sts 7–12, and its tip points up and to the right. The Row 4 edge (13 sts) is the lower, inner edge of the leg. The Row 1 edge (10 sts) faces up and to the left.
- Check the placement. The top of the tip should be level with the top of the stem. Then whipstitch the 4 row ends of the slanted end to stem sts 7–12.
- Slide the slanted end of the lower leg under the base of the upper leg. Its end should butt against the same stem sts 7–12, and its tip should point down and to the right. Its Row 4 edge (12 sts) is the upper, inner edge.
- Adjust until the bottom of the lower leg tip is level with the bottom of the stem. From the wrong side, sew the lower leg to the stem and to the underside of the upper leg. Keep the stitches out of sight from the front.
Checkpoint: the K measures 4.25 in (10.8 cm) tall and 3 in (7.6 cm) wide. The lower leg should come out from under the upper leg about 1 in (2.5 cm) from the stem. That leaves about 4 sts of the lower leg’s Row 4 hidden.
Border
Border gauge: 1 sc per stitch along stitch edges and 1 sc per row end. Each hdc3L stitch is 0.22 in wide and each row is 0.25 in tall, so 1 sc fits each one without ruffling or pulling.
Corners:
- Outer corners: work 3 sc in the corner stitch. That stitch is counted once, as part of its own edge. There are 8 outer corners.
- Inner corners: sc2tog over the last stitch of one edge and the first stitch of the next. There are 3 inner corners.
Setup: With the K RS up and Color A, join with a sl st in the first foundation loop at the bottom left of the stem. Ch 1. Work clockwise.
Border Round:
- Stem left edge: 3 sc in first st, sc in next 17 sts, 3 sc in last st. (23 sc)
- Stem top: sc in each of 4 row ends. (4 sc)
- Stem right, upper part: 3 sc in st 19, then sc in sts 18–14. (8 sc)
- Inner corner: sc2tog over stem st 13 and the first st of the upper leg’s Row 1. (1 st)
- Upper leg outer edge: sc in the next 8 sts, then 3 sc in the last st. (11 sc)
- Upper leg tip: sc in each of 4 row ends. (4 sc)
- Upper leg inner edge: 3 sc in the first st of Row 4, then sc in the next 7 sts. (10 sc)
- Notch: sc2tog over the 9th exposed upper-leg st and the first exposed lower-leg st. (1 st)
- Lower leg inner edge: sc in the next 6 sts, then 3 sc in the last st. (9 sc)
- Lower leg tip: sc in each of 4 row ends. (4 sc)
- Lower leg outer edge: 3 sc in the first st of Row 1, then sc in the next 7 sts. (10 sc)
- Inner corner: sc2tog over the last lower-leg st and stem st 6. (1 st)
- Stem right, lower part: sc in sts 5–2, then 3 sc in st 1. (7 sc)
- Stem bottom: sc in each of 4 row ends. (4 sc)
Join with a sl st to the first sc. (97 sts) Fasten off and weave in the ends.
Why the math works: The open edges have 84 stitches and row ends: 19 + 4 + 7 + 10 + 4 + 9 + 8 + 4 + 9 + 6 + 4.
- The 8 outer corners each add 2 sc: +16.
- The 3 inner corners each remove 1 st: −3.
- 84 + 16 − 3 = 97.
The border adds 0.125 in (0.3 cm) on every edge. So 4.25 in becomes 4.5 in (10.8 cm becomes 11.4 cm), and 3 in becomes 3.25 in (7.6 cm becomes 8.3 cm).
If your hidden overlap is slightly different, you may have 1 more or 1 fewer exposed stitch on the notch edges. Work 1 sc per exposed stitch either way.
Flowers (Make 2)
Round 1: With Color D, make a magic ring. Ch 1, work 10 sc in the ring and pull it closed. Join with a sl st to the first sc. (10 sc) Fasten off.
Round 2: Join Color B in any sc. Sl st in that st, then work (hdc, 2 dc, hdc) in the next st. Repeat from * to * 4 more times, for 5 petals in total. Join with a sl st to the first sl st. (25 sts)
Fasten off and leave a 6 in (15.2 cm) tail. Each flower measures 1 in (2.5 cm) across.
With Color A, work 3 French knots close together in the center of each flower.
Leaves (Make 3)
With Color C, ch 6.
Starting in the 2nd ch from hook: sc, hdc, dc, hdc, sc. Ch 1 at the tip. Turn the leaf and work along the other side of the chain: sc, hdc, dc, hdc, sc. Sl st to the first sc. (10 sts)
Fasten off and leave a tail. Each leaf measures 0.75 in (1.9 cm) long.
Bud (Make 1)
With Color B, ch 3. Work a 4-dc cluster in the 3rd ch from hook, then ch 1 to close. Fasten off and leave a tail. The bud measures 0.375 in (1.0 cm).
Appliqué Placement
- Sew the first flower centered on the stem, 0.5 in (1.3 cm) below the top. Its petals will overlap the border slightly.
- Sew the second flower centered on the stem, 0.5 in (1.3 cm) above the bottom.
- With Color C, chain-stitch a vine from the top flower down to the bottom flower.
- Sew 1 leaf on the left of the vine just below the top flower.
- Sew a second leaf on the right of the vine, a little lower, and sew the bud just above it.
- Sew the third leaf at the bottom left of the lower flower.
- Tack down every petal tip so nothing catches when the keychain is in use.
Final Blocking
- Spray the K lightly with water until it is damp but not wet.
- Pin it to 4.5 in x 3.25 in (11.4 cm x 8.3 cm) on a blocking mat. Use the grid to keep the stem straight.
- Pin each squared tip so the corners stay sharp.
- Gently push the appliqués flat with your fingers. Don’t press them with an iron.
- Let it dry completely. This takes about 6 hours.
- Use pliers to open the jump ring. Thread it through the border at the top center of the stem, add the clasp, and close the ring.
Final Quality-Control Checklist
- [ ] The letter measures 4.5 in x 3.25 in (11.4 cm x 8.3 cm).
- [ ] The stem is 1.25 in (3.2 cm) wide and shows 2 straight chevron lines.
- [ ] The tops and bottoms of the leg tips line up with the top and bottom of the stem.
- [ ] The border round has 97 sts and lies flat, with no ruffles.
- [ ] No seam stitches show on the front.
- [ ] Each flower has 5 petals and 3 knots in the center.
- [ ] The jump ring is fully closed.
Troubleshooting
- Chevrons look like ridges instead of Vs: you are working into the back loop. Use the third loop, on the side facing you.
- The strips curl: your tension is too tight. Go up 0.25 mm in hook size, or block the piece firmly.
- A gap shows where the legs meet the stem: add a few hidden stitches from the back.
- The border ruffles: skip one of the extra corner sc. The border pulls: add 1 sc per tip.
- The flowers cup: loosen Round 2, or press the flowers flat while damp.
Care
Hand wash in cool water, press out the water with a towel, and dry flat. Take off the metal hardware first if you’re using a wool blend.
Final Notes
Every measurement in this pattern builds on the one before it. The 18-stitch, 16-row gauge sets the stem at 4.25 in x 1 in (10.8 cm x 2.5 cm). The legs grow from 10 to 13 sts and from 9 to 12 sts. Assembled, the K measures 4.25 in x 3 in (10.8 cm x 7.6 cm). The 97-stitch border brings it to 4.5 in x 3.25 in (11.4 cm x 8.3 cm). Check each step before you move on, and the flowers will sit exactly where they should.
Happy crocheting!