

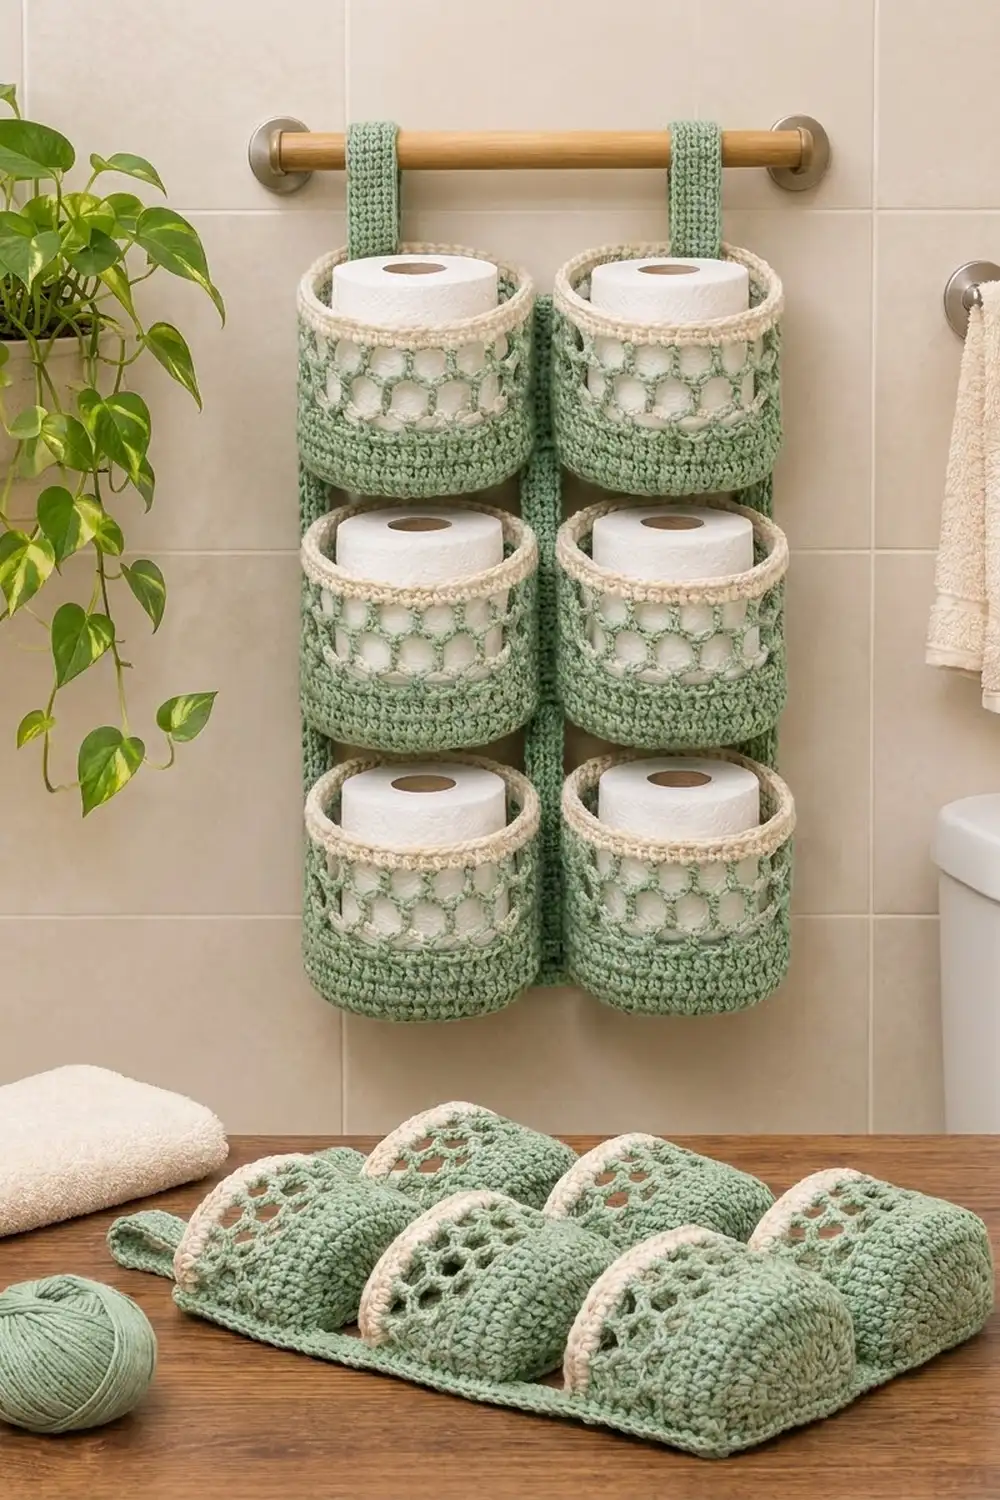
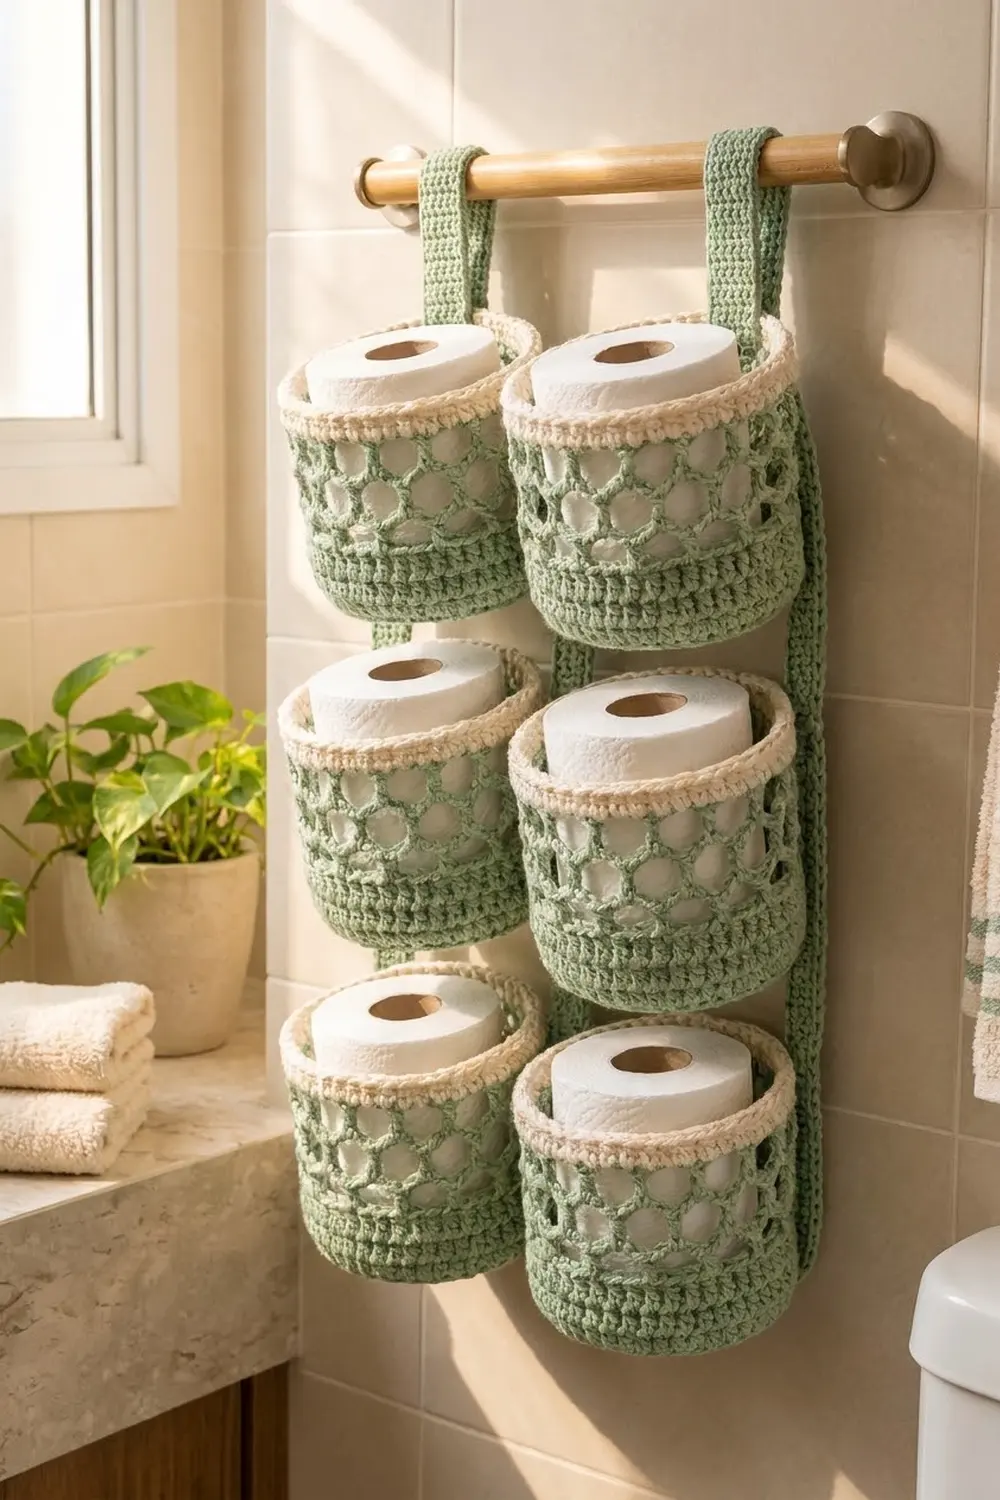
This hanging toilet paper holder keeps six spare rolls tidy and within reach. Six round baskets sit in two columns of three. They are joined to two slim back straps that loop over a towel bar. Each basket has a solid lower band, an open honeycomb mesh that shows the rolls inside, and a crisp cream rim.
The colors are calm and spa-like: sage green for the bases, walls, mesh and straps, and cream for the rims. The style is modern farmhouse. It is practical and easy to wash.
This pattern uses US crochet terms. The finished organizer measures about 10 in (25.4 cm) wide and 17.5 in (44.5 cm) tall including the hanging loops. Each basket is about 5 in (12.7 cm) across and 4.5 in (11.4 cm) tall.
You will crochet six baskets in the round from the base up, then two straps in rows. Sew the baskets onto the straps and tack them to each other side by side. Then fold the strap tops into loops.
Finished Size and Construction
- Finished size: about 10 in x 17.5 in (25.4 cm x 44.5 cm), loops included
- Skill level: Easy-intermediate
- Terminology: US crochet terms
- Yarn weight: Worsted (#4), cotton or cotton blend
- Hook: 5 mm (H-8)
- Number of pieces: 8 (6 baskets + 2 straps)
- Layout: 2 columns x 3 rows of baskets
- Basket size: 5 in (12.7 cm) diameter x 4.5 in (11.4 cm) tall
- Basket height before rim: about 3.8 in (9.7 cm)
- Rim (border) depth: about 0.7 in (1.8 cm), 3 rounds
- Strap size: 1.5 in x 20 in (3.8 cm x 50.8 cm) before folding
Materials
Choose a smooth worsted-weight cotton or cotton blend. Cotton holds its shape, stands up to bathroom humidity and washes well. Avoid very stretchy acrylic, which lets loaded baskets sag.
- Sage green: 200 g, about 380 m (416 yd)
- Cream: 50 g, about 95 m (104 yd)
These quantities include a comfortable margin. One basket uses about 22 g of sage and 4 g of cream. Each strap uses about 15 g of sage.
Tools:
- 5 mm (H-8) crochet hook
- Tapestry needle
- 6 stitch markers
- Locking pins or clips for assembly
- Measuring tape
- Scissors
- Blocking mat and pins
- Spray bottle
- Six toilet paper rolls (for shaping and testing)
Abbreviations (US Terms)
- ch – chain
- sl st – slip stitch
- sc – single crochet
- hdc – half double crochet
- BLO – back loop only
- st(s) – stitch(es)
- sk – skip
- inc – 2 hdc in the same st
- rnd(s) – round(s)
Special stitch – Honeycomb mesh loop (ch-5 loop): Ch 5, then sc into the next ch-5 loop of the previous round. Each new sc lands in the center of the loop below, so every round shifts half a loop sideways. After two or more rounds, the offset loops form hexagonal openings.
Gauge and Checkpoints
- hdc gauge: 15 sts x 9 rnds = 4 in (10.2 cm)
- sc gauge: 16 sts x 18 rows = 4 in (10.2 cm)
Make one complete basket before anything else. It is your real gauge test. It should fit a toilet paper roll with a little room to spare.
Checkpoints:
- After Rnd 3 (30 sts): the base is about 2.7 in (6.9 cm) across.
- After Rnd 6 (60 sts): the base is 5 in (12.7 cm) across.
- After Rnd 10: the solid wall is about 1.8 in (4.6 cm) tall above the ridge.
- After Rnd 14: the total wall height is about 3.8 in (9.7 cm).
- After the rim: the basket is 4.5 in (11.4 cm) tall.
Too big? Go down to a 4.5 mm hook. Too small? Go up to a 5.5 mm hook. Change hooks rather than stitch counts, because the mesh repeat depends on 60 sts.
Basket (make 6)
Work in joined rounds with the right side always facing. The ch 2 at the start of hdc rounds and the ch 1 at the start of sc rounds do not count as stitches. Join each round with a sl st to the first st.
Base
With sage, make a magic ring.
Rnd 1: Ch 2, 10 hdc in ring, join. (10 sts)
Rnd 2: Ch 2, inc in each st around, join. (20 sts)
Rnd 3: Ch 2, hdc in next st, inc in next st; rep from * around, join. (30 sts)
Rnd 4: Ch 2, hdc in next 2 sts, inc in next st; rep from * around, join. (40 sts)
Rnd 5: Ch 2, hdc in next 3 sts, inc in next st; rep from * around, join. (50 sts)
Rnd 6: Ch 2, hdc in next 4 sts, inc in next st; rep from * around, join. (60 sts)
Check: the base should lie flat and measure 5 in (12.7 cm) across.
Solid Wall
Rnd 7: Ch 2, hdc BLO in each st around, join. (60 sts)
The unworked front loops form a ridge, and the wall turns upward from it.
Rnds 8–10: Ch 2, hdc in each st around, join. (60 sts)
Place a marker at the join. This line becomes the back center of the basket and is hidden against the strap.
Honeycomb Mesh
Rnd 11: Ch 1, sc in first st, ch 5, sk 2 sts, sc in next st, ch 5, sk 2 sts; rep from * around, join to first sc. (20 sc, 20 ch-5 loops)
Check: 20 repeats x 3 sts each = 60 sts used.
Rnd 12: Sl st in each of the first 3 ch of the next loop to reach its center. Ch 1, sc in the same loop, ch 5, sc in next ch-5 loop, ch 5; rep from * around, join to first sc. (20 ch-5 loops)
Rnds 13–14: Repeat Rnd 12. (20 ch-5 loops in each round)
Fasten off sage. The mesh section should be about 2 in (5.1 cm) tall, with clear hexagonal openings.
Now work the cream rim from the Border section on this basket. Every basket gets its rim before any joining.
Straps (make 2)
With sage, ch 7.
Row 1: Sc in 2nd ch from hook and in each ch across, turn. (6 sts)
Rows 2–90: Ch 1, sc in each st across, turn. (6 sts)
Fasten off, leaving a 12 in (30.5 cm) tail. The strap measures 1.5 in x 20 in (3.8 cm x 50.8 cm).
Strap row map:
- Rows 1–2: bottom margin
- Rows 3–22: bottom basket
- Rows 23–24: gap
- Rows 25–44: middle basket
- Rows 45–46: gap
- Rows 47–66: top basket
- Rows 67–68: top margin
- Rows 69–90: hanging loop (22 rows, about 4.9 in / 12.4 cm)
Each basket section is 20 rows, about 4.4 in (11.2 cm). This matches the basket wall from the ridge to the top of the rim. Rows 1–68 measure about 15.1 in (38.4 cm).
Make All Pieces
- Baskets: 6, each with a sage base, wall and mesh, plus a cream rim
- Straps: 2, in sage
Use sage for all 6 baskets and both straps. Use cream only for the 6 rims.
Layout grid (front view):
   Strap A           Strap B
[Basket 1]        [Basket 2]    top row
[Basket 3]        [Basket 4]    middle row
[Basket 5]        [Basket 6]    bottom row
Strap A runs behind the left column. Strap B runs behind the right column.
Joining
Method: Whipstitch with sage yarn and a tapestry needle.
- Lay both straps flat, right side down, 5 in (12.7 cm) apart center to center.
- Place a basket on Strap A so the marked back-center line sits in the middle of the strap. Line up the ridge round (Rnd 7) with strap Row 3 for the bottom basket, Row 25 for the middle basket and Row 47 for the top basket.
- The strap covers 6 wall sts: the 3 sts on each side of the marker.
Stitch-to-stitch logic:
- Solid wall (Rnds 7–10): One hdc round equals 2 strap rows, because there are 2.25 hdc rounds per inch and 4.5 sc rows per inch. Sew each strap edge to the wall with 2 whipstitches per hdc round. That is 8 strap rows for 4 rounds.
- Mesh (Rnds 11–14): The mesh is about 2 in (5.1 cm) tall, so it spans 9 strap rows. Tack each strap edge only to the sc of each mesh round, for 4 tacks per edge. Do not pull the loops closed.
- Rim (3 rounds): Sew 1:1, one rim round per strap row, for 3 rows.
That gives 8 + 9 + 3 = 20 strap rows per basket, which matches the row map.
Side seams: Where Basket 1 touches Basket 2, sew the two walls together over 3 sts on each basket. Sew through Rnds 7–10 and through all 3 rim rounds. Repeat for each row.
Tension: Pull each stitch snug enough to close the gap but not so tight that it puckers. The strap should stay flat behind the basket.
Hanging loops: Fold Row 90 to the back of the strap so it lines up with Row 68. Whipstitch across all 6 sts. The loop hangs about 2.4 in (6.1 cm) deep and fits bars up to 1.25 in (3.2 cm) thick. If the bar is fixed to the wall, pass the strap over the bar before you sew.
Size checkpoint: The joined body should measure about 10 in (25.4 cm) wide and 15.1 in (38.4 cm) tall. The loops add about 2.4 in (6.1 cm), for a total of about 17.5 in (44.5 cm).
Border: Cream Rim
Work this rim on each basket directly after Rnd 14.
Border gauge: 16 sc = 4 in (10.2 cm). 3 rounds = about 0.7 in (1.8 cm).
Rnd 15 (conversion round): Join cream in any ch-5 loop. Ch 1, 3 sc in each ch-5 loop around, join. (20 loops x 3 sc = 60 sts)
When the basket is laid flat, there are 30 sts across the front half and 30 sts across the back half.
Rnd 16: Ch 1, sc in each st around, join. (60 sts; 30 front, 30 back)
Rnd 17: Ch 1, sc in each st around, join. (60 sts; 30 front, 30 back)
Fasten off and weave in the ends on the inside.
Why the math works: The rim returns to exactly 60 sts, the same count as the solid wall. Sc is slightly narrower than hdc, so 60 sc measure 15 in (38.1 cm) around, against 16 in (40.6 cm) for the wall. The top pulls in by about 1 in (2.5 cm) of circumference, leaving an opening about 4.8 in (12.2 cm) across. This firm lip holds the roll without getting in the way.
Final Blocking
- Weave in all remaining ends.
- Place a toilet paper roll inside each basket.
- Mist the whole piece evenly with water until it is damp.
- Lay it face up on a blocking mat with the straps straight and parallel.
- Pin the straps 5 in (12.7 cm) apart center to center.
- Gently open each hexagon in the mesh with your fingertips.
- Pin the rims so they are round and level.
- Let it dry completely, for at least 24 hours, before removing the rolls.
Final Quality-Control Checklist
- Each base is flat and 5 in (12.7 cm) across.
- Each basket has 60 sts in the wall and rim and 20 loops in each mesh round.
- Each basket is 4.5 in (11.4 cm) tall.
- The mesh openings are even and hexagonal.
- Each rim has three clean cream rounds.
- All round joins are hidden at the back center.
- The straps are straight, 6 sts wide, and sewn on both edges.
- The gaps between baskets are even, at 2 strap rows each.
- The loops are secure and the same length.
- The finished piece measures 10 in x 17.5 in (25.4 cm x 44.5 cm).
Troubleshooting
- The base cups or ruffles: Cupping means your tension is tight, and ruffling means it is loose. Change hook size and remake the base.
- The mesh looks square, not hexagonal: Make sure every sc goes into the center of a loop, not into the sc below.
- The loop count is wrong: Count 20 loops before you start Rnd 12. Rework Rnd 11 if needed.
- The rim flares: Work Rnds 15–17 with a hook one size smaller, keeping 60 sts.
- A basket leans forward: Add more whipstitches along the rim and wall.
- The loops stretch: Sew a second line of stitches across the fold.
Care
Hand wash, or machine wash cold on a gentle cycle in a laundry bag. Reshape the baskets around rolls and lay flat to dry.
Final Notes
The measurement chain is simple. Six base rounds give a 60-stitch base that is 5 in (12.7 cm) across. The wall holds 60 sts, the mesh uses 20 loops of 3 sts each, and the rim converts back to 60 sts. Each basket covers 20 strap rows. Three baskets plus the margins and gaps fill Rows 1–68, and the last 22 rows form the hanging loop. Check your first basket, and the rest will follow.
Happy crocheting!