

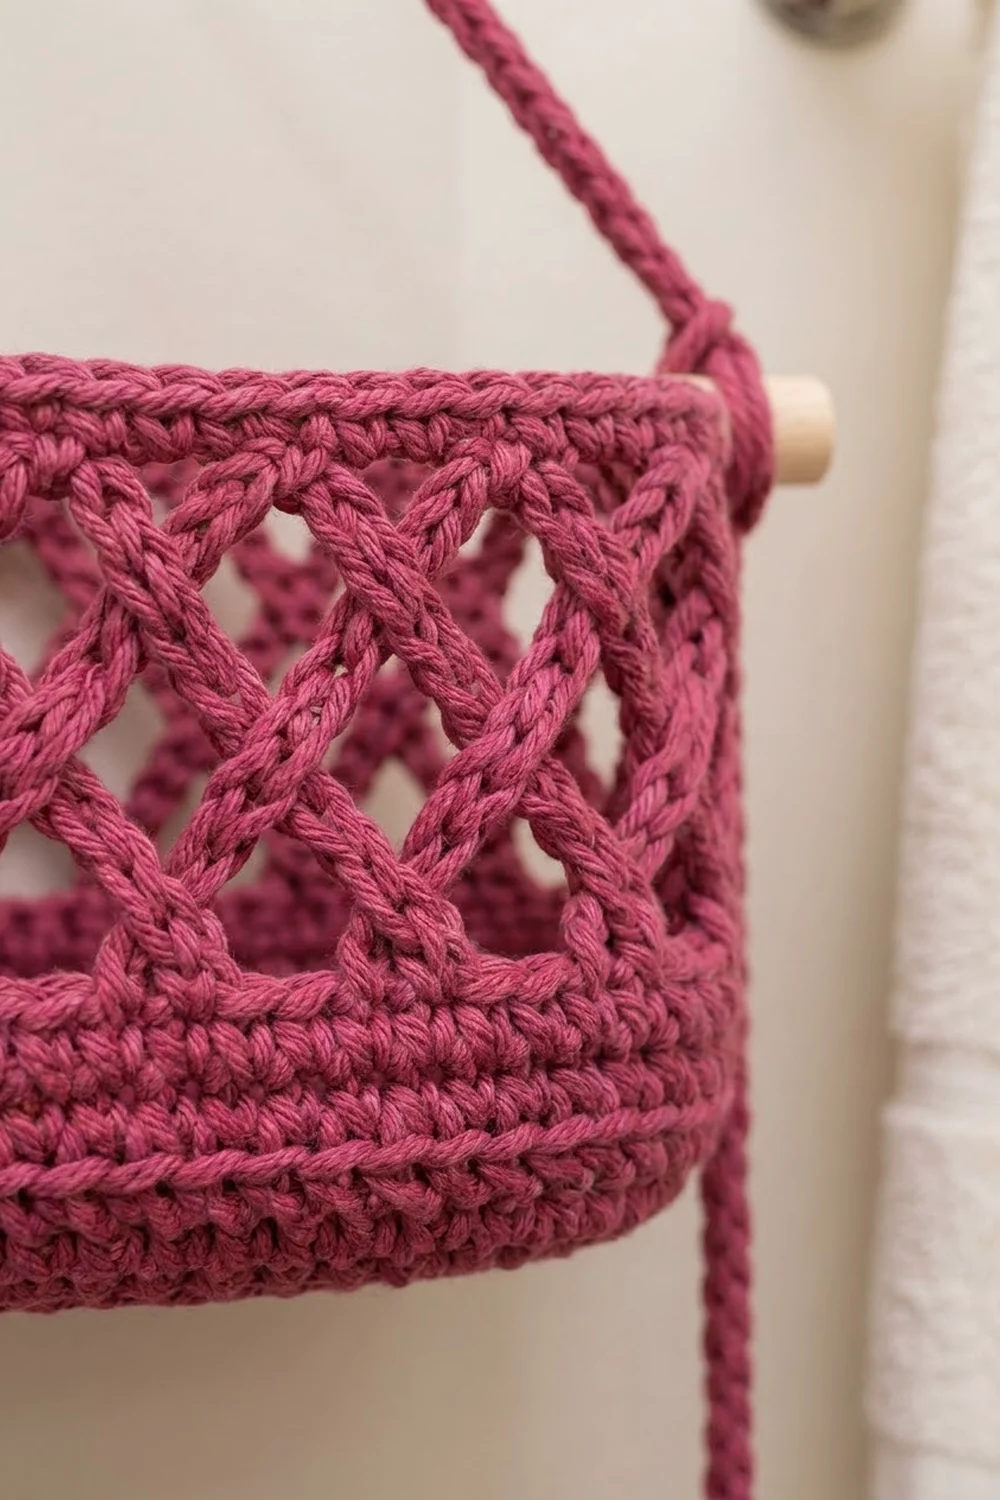
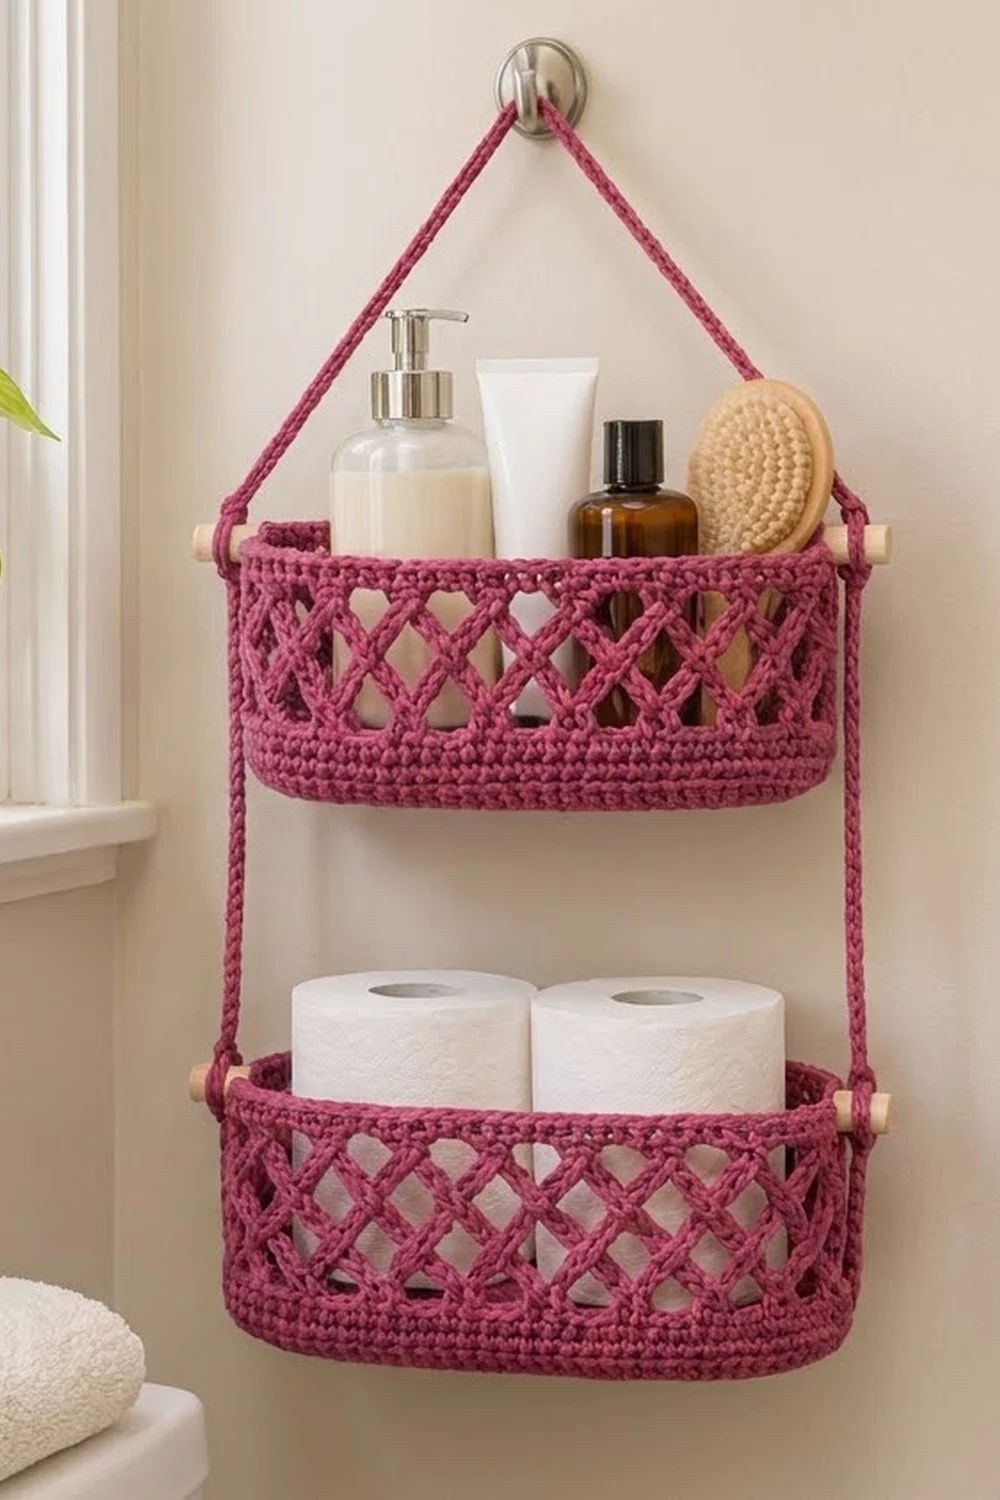
This hanging organizer has two oval baskets stacked one above the other on crocheted cords. Each basket has a sturdy solid base, a band of open diamond lattice around the middle, and a firm single crochet rim. Short wooden dowels go through each rim and give the cords something solid to hold.
The sample is worked in one raspberry pink cotton. A single color shows off the lattice, and cotton keeps its shape in a humid bathroom. The top basket fits pump bottles, tubes and a small brush. The bottom basket holds two standard toilet paper rolls side by side.
The pattern uses US crochet terms. Each basket measures 10″ (25.4 cm) long, 4.5″ (11.4 cm) wide and about 4.4″ (11.2 cm) tall after the border. The organizer hangs about 21″ (53.3 cm) from the hook to the bottom of the lower basket.
Each basket starts with an oval base worked in joined rounds. Then you work the wall straight up: a solid band, four lattice rounds, and a solid rim with two dowel holes. You make two cords with back-bump slip stitches, push the dowels through the holes, wrap the cords around them, and finish each rim with one slip stitch border round.
Finished Size and Construction
- Finished basket size: 10″ x 4.5″ x 4.4″ (25.4 x 11.4 x 11.2 cm)
- Overall hanging length: about 21″ (53.3 cm)
- Skill level: Easy-Intermediate
- Terminology: US crochet terms
- Yarn weight: worsted (#4) cotton
- Hook: 5.0 mm (H-8)
- Number of pieces: 4 crocheted pieces (2 baskets, 2 cords) plus 4 dowels
- Layout: 2 baskets stacked vertically, 5″ (12.7 cm) apart
- Piece size (base): 10″ x 4.5″ (25.4 x 11.4 cm), 104 stitches around
- Size before border: basket wall 4.25″ (10.8 cm) tall
- Border depth: 1 slip stitch round, about 1/8″ (0.3 cm)
Materials
Choose a smooth worsted-weight yarn that is 100% cotton or mostly cotton. Acrylic works too, but the baskets will be softer and may sag under heavy bottles. Pick a mid-tone color so the shadows in the lattice show.
- Raspberry pink (one color): 200 g, about 340 m (two 100 g balls at about 170 m each)
The finished organizer uses about 140 g. The quantities above include a margin of about 60 g for gauge differences and swatching.
Tools:
- 5.0 mm (H-8) crochet hook
- 4 wooden dowels, 3″ (7.6 cm) long and 5/16″ (0.8 cm) in diameter
- 6 locking stitch markers
- Tapestry needle
- Scissors and measuring tape
- Wall hook rated for at least 5 lb (2.3 kg)
Abbreviations (US Terms)
- ch – chain
- sc – single crochet
- sl st – slip stitch
- sk – skip
- sp – space
- st(s) – stitch(es)
- BLO – back loop only
- rep – repeat
- rnd – round
Special stitch – back-bump slip stitch (bb sl st): Turn the chain over so the bumps on the back face you. Insert your hook under the bump of the indicated chain, yarn over, and pull through the bump and the loop on your hook. This makes a firm, rounded cord that barely stretches.
Gauge and Checkpoints
Gauge: 16 sc and 18 rnds = 4″ (10.2 cm) in sc worked in rounds.
Make one basket base first and use it as your gauge test. Every later measurement depends on the base, so check it before you start the walls.
Checkpoints:
- After Rnd 5: base is about 7.75″ x 2.25″ (19.7 x 5.7 cm).
- After Rnd 10: base is 10″ x 4.5″ (25.4 x 11.4 cm).
- After Rnd 15: solid wall is 1.1″ (2.8 cm) tall.
- After Rnd 19: wall is 3.3″ (8.4 cm) tall.
- After Rnd 23: wall is 4.25″ (10.8 cm) tall.
Base too big: If it is more than 1/4″ (0.6 cm) over size, go down to a 4.5 mm hook and start again. Base too small: go up to a 5.5 mm hook. Base cupping: your increases at the ends are too tight, so loosen up or go up a hook size. Base ruffling: go down a hook size.
Basket Pattern (Make 2)
Join each round with a sl st to the first sc. The beginning ch 1 never counts as a stitch.
Oval Base
Ch 25.
Rnd 1: Sc in 2nd ch from hook, sc in next 22 ch, 3 sc in last ch. Rotate to work in the bottom loops of the chain: sc in next 22 ch, 2 sc in the same ch as the first sc. Join. (50 sts)
This gives 22 sts on each long side and 3 sts in each end group.
Rnd 2: Ch 1, 2 sc in first st, sc in next 22 sts, 2 sc in each of next 3 sts, sc in next 22 sts, 2 sc in each of next 2 sts. Join. (56 sts)
Rnd 3: Ch 1, sc in first st, 2 sc in next st, sc in next 22 sts, (sc in next st, 2 sc in next st) 3 times, sc in next 22 sts, (sc in next st, 2 sc in next st) 2 times. Join. (62 sts)
From here on, each round adds 3 increases at each end and keeps 22 plain sts on each long side. Spread the increases evenly around each curved end, and shift their positions slightly each round so the ends stay round instead of pointed.
Rnds 4–10: Ch 1, sc around, working 3 evenly spaced increases on each end. Join.
- Rnd 4: 68 sts
- Rnd 5: 74 sts
- Rnd 6: 80 sts
- Rnd 7: 86 sts
- Rnd 8: 92 sts
- Rnd 9: 98 sts
- Rnd 10: 104 sts
After Rnd 10, each long side has 22 sts and each end has 30 sts: 22 + 30 + 22 + 30 = 104. The base now measures 10″ x 4.5″ (25.4 x 11.4 cm).
Solid Lower Wall
Rnd 11: Ch 1, sc in BLO of each st around. Join. (104 sts) The unworked front loops form the ridge where the wall turns up.
Rnds 12–15: Ch 1, sc in each st around. Join. (104 sts)
There are no increases, so the wall rises straight up. Check: the wall is 1.1″ (2.8 cm) tall.
Diamond Lattice
Rnd 16: Ch 1, sc in first st, ch 5, sk 3 sts, sc in next st; rep from * 24 more times, ch 5, sk 3 sts, join to first sc. (26 sc, 26 ch-5 sps)*
Math check: each repeat covers 4 sts (1 sc + 3 skipped), and 26 x 4 = 104.
Rnd 17: Sl st in next 3 ch to reach the center of the first loop, ch 1, sc in same ch-5 sp, ch 5, sc in next ch-5 sp; rep from * 24 more times, ch 5, join to first sc. (26 sc, 26 ch-5 sps)*
Each new sc sits at the center of a loop below, so the loops cross into diamonds.
Rnds 18–19: Rep Rnd 17. (26 sc, 26 ch-5 sps each round)
Check: the wall is 3.3″ (8.4 cm) tall. Gently stretch the lattice upward so the diamonds open evenly.
Solid Rim and Dowel Holes
Rnd 20 (conversion round): Ch 1, sc in same sc as join, 3 sc in next ch-5 sp, sc in next sc, 3 sc in next ch-5 sp; rep from * 24 more times. Join. (26 sc worked 1-per-existing sc + 78 sc worked into the ch-5 sps = 104 sts)*
Rnd 21: Ch 1, sc in each st around. Join. (104 sts)
Place markers: The lattice shifts the start of the round, so re-find the ends now. Fold the basket flat with the long sides together and mark the stitch at each fold; these are the end centers. From each fold, count 15 sts in each direction and mark the outer edge. Each end zone now has 30 sts, and each long side between the zones has 22 sts.
Rnd 22 (dowel holes): Ch 1, sc in each st to the first end zone. In the end zone: sc in next 14 sts, ch 2, sk 2 sts, sc in next 14 sts. Sc in each st of the long side, then work the second end zone the same way. Sc in each remaining st. Join. (100 sc + 2 ch-2 sps = 104 sts, counting each ch as 1 st)
Rnd 23: Ch 1, sc in each sc and 2 sc in each ch-2 sp. Join. (100 sts worked 1-per-existing sc + 4 sc worked into the ch-2 sps = 104 sts)
Fasten off and weave in the ends. Check: the wall is 4.25″ (10.8 cm) tall, and each dowel hole is centered on its short end.
Hanging Cords (Make 2)
Ch 96.
Row 1: Bb sl st in 2nd ch from hook and in each ch across. (95 sl sts) Fasten off and leave a 10″ (25.4 cm) tail at each end.
Each cord measures 24″ (61.0 cm). If yours is shorter, add chains in multiples of 4 (each 4 ch adds 1″ or 2.5 cm) and make the second cord to match.
Make All Pieces
Make these pieces in raspberry pink:
- 2 baskets (Rnds 1–23), about 65 g each
- 2 cords, about 5 g each
Layout grid:
            [ hanging loop ]
             /            \
        cord A            cord B
           |                 |
 [dowel]=[ UPPER BASKET ]=[dowel]
           |                 |
           |   5" gap        |
           |                 |
 [dowel]=[ LOWER BASKET ]=[dowel]
Joining
Insert the dowels: Push one dowel through each dowel hole from the inside out. Leave 1.25″ (3.2 cm) inside the basket and 1.75″ (4.4 cm) outside.
Lower basket: Starting 2″ (5.1 cm) from the end of cord A, wrap the cord twice around one outside dowel stub, right against the wall. Use the tail to sew the wraps to each other. Then sew the cord to the 3 sts of Rnd 23 just above the dowel hole, one stitch at a time and going through both loops. This stops the dowel from tilting. Repeat with cord B on the other end.
Upper basket: Measure 9.25″ (23.5 cm) of cord up from the lower dowel. That is the rim-to-rim distance: the 5″ (12.7 cm) gap plus the 4.25″ (10.8 cm) wall. Wrap and sew the cord around the upper dowel the same way, using 2″ (5.1 cm) of cord. Repeat on the other side.
Hanging loop: Each cord has 10.75″ (27.3 cm) left. Overlap the last 1″ (2.5 cm) of the two cords and whipstitch them together to form a peak. Leave about 0.75″ (1.9 cm) open as a loop for the hook.
Tension advice: Sew firmly, but don’t pull the cord tight against the wall. Both sides must use exactly the same lengths, or the baskets will hang crooked.
Size checkpoint: Hang the organizer empty. Both rims should be level and 9.25″ (23.5 cm) apart, and the total height should be about 21″ (53.3 cm).
Border
Border gauge: 16 sl sts = 4″ (10.2 cm). This matches the sc gauge, so the rim neither flares nor pulls in.
With the markers still in place, join yarn at the start of one long side.
Rnd 24: Sl st loosely in BLO of each st around: 22 sts on each long side and 30 sts on each end, passing behind the cord wraps. Join. (22 + 30 + 22 + 30 = 104 sts) Fasten off and weave in.
Why the math works: Rnd 23 has exactly 104 sts in the same 22/30/22/30 split as the base. One sl st per st keeps the same count, so the rim stays 26″ (66.0 cm) around, just like the base. The border firms up the top edge and adds only 1/8″ (0.3 cm), which brings each basket to 4.4″ (11.2 cm) tall.
Final Blocking
- Fill each basket with a towel folded to 10″ x 4.5″ (25.4 x 11.4 cm).
- Mist the baskets until they are damp but not soaked.
- Shape the oval ends round and the long sides straight.
- Pull the lattice band upward a little so the diamonds open evenly.
- Let the baskets dry completely with the towels inside, about 24 hours.
- Take out the towels and check the measurements again.
Final Quality-Control Checklist
- Base is 10″ x 4.5″ (25.4 x 11.4 cm) and lies flat.
- Wall is 4.4″ (11.2 cm) tall and doesn’t lean.
- Each lattice round has 26 even loops.
- Rnds 20, 21, 23 and 24 each have 104 sts.
- Dowel holes are centered on the short ends.
- Both cords are 24″ (61.0 cm) long.
- Rims are level and 9.25″ (23.5 cm) apart.
- All ends are woven in securely.
Troubleshooting
Oval ends are pointed: Your increases are stacking on top of each other. Move them 1 st over each round.
Base curls up: Your tension is too tight. Go up a hook size or work the increases more loosely.
Lattice is twisted: A round started in the wrong place. Always sl st to the center of the first loop before you begin.
Rim flares after Rnd 20: You worked more than 3 sc in some spaces. Recount to 104.
Dowel is too tight: Stretch the hole gently. Or, in Rnd 22, work ch 3, sk 3 instead of ch 2, sk 2, and in Rnd 23 work 3 sc in each space (still 104 sts).
Basket tilts forward: Sew the cord to more rim stitches above the dowel.
Care
Remove the dowels, hand wash in cool water, reshape, and air dry flat. Don’t put the baskets in the dryer.
Final Notes
Each measurement builds on the one before it. The 16-st gauge gives a 104-st base of 10″ x 4.5″ (25.4 x 11.4 cm), and the wall keeps those 104 sts all the way up. The 26 lattice repeats convert back to exactly 104 sts, and the rim keeps the 22/30/22/30 split for the dowel holes and the border. The 24″ (61.0 cm) cords set the 9.25″ (23.5 cm) rim spacing so both baskets hang level.
Happy crocheting!