

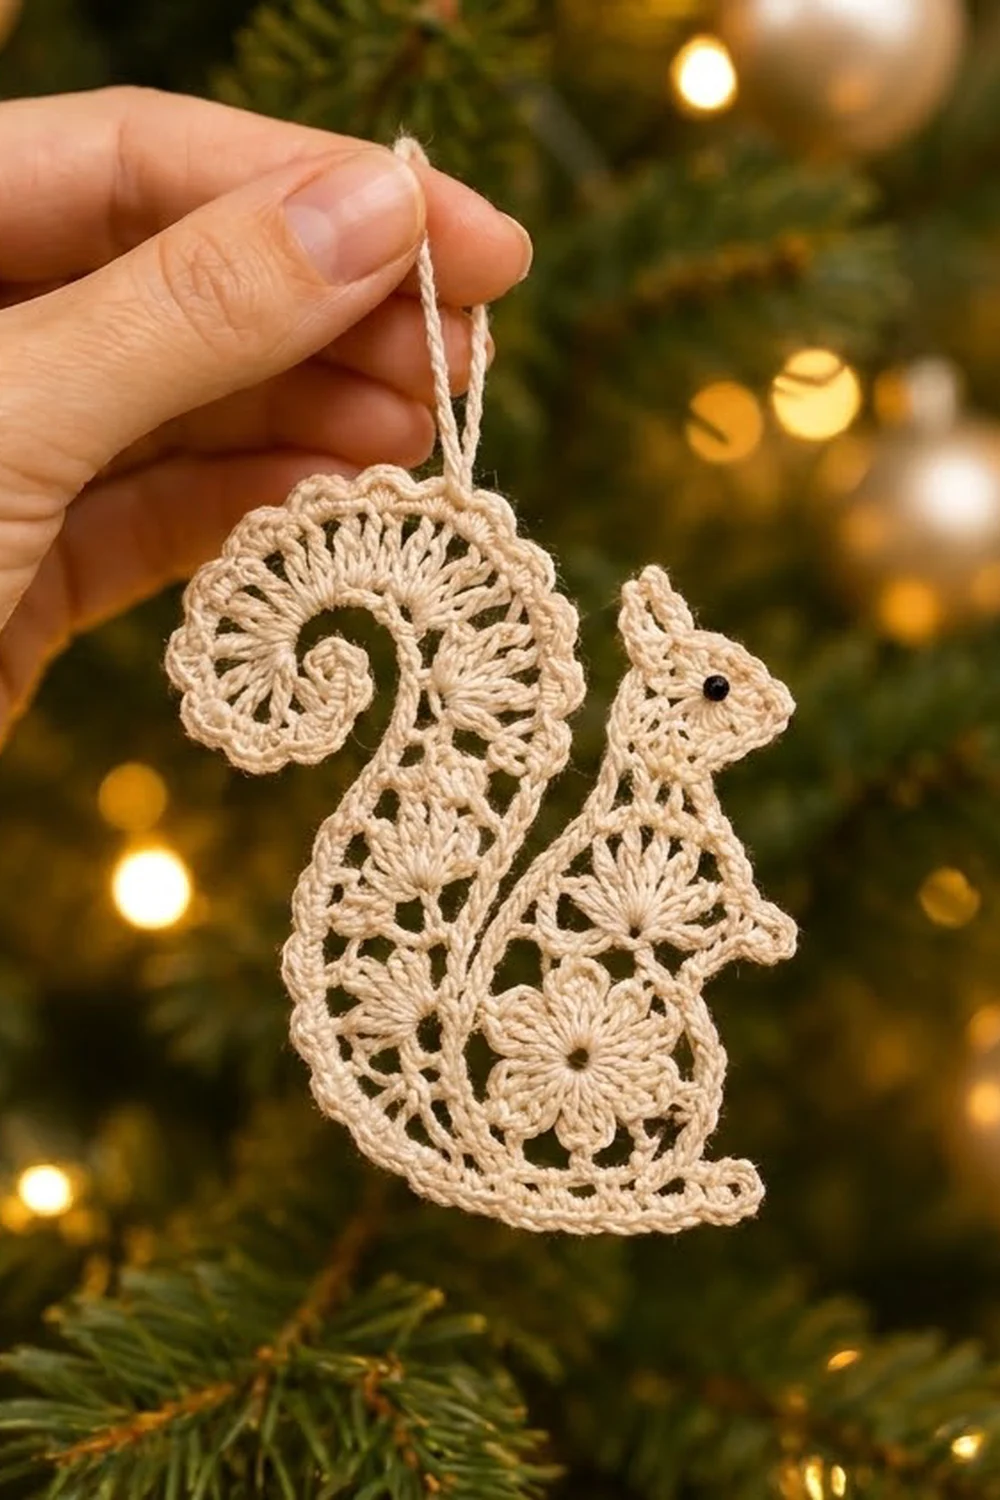
This little squirrel is a flat lace ornament made in fine cotton thread. Its curled tail, spoked fans and tiny flower give it the airy look of Irish crochet. It still holds a clear, readable silhouette on the tree.
It is worked in one color, cream or ecru, with a black bead for the eye. The look is soft and vintage, and the ornament looks just as good alone as it does in a set of matching squirrels. This pattern uses US crochet terms throughout.
The finished ornament measures 3 1/4 in (8.3 cm) tall by 2 5/8 in (6.7 cm) wide, not counting the hanging loop.
You make five small motifs: a scalloped tail strip, two half-circle fans, a flower and a head. Next you join them stitch to stitch into one flat squirrel. Then you work a two-round border of single crochet and reverse single crochet around the whole outline, adding a paw and a foot as you go. Last, you add a chain hanging loop at the top of the tail coil.
Finished Size and Construction
- Finished size: 3 1/4 in (8.3 cm) tall x 2 5/8 in (6.7 cm) wide
- Skill level: Intermediate
- Terminology: US crochet terms
- Yarn weight: Size 10 cotton crochet thread (lace weight)
- Hook: 1.5 mm steel hook
- Number of pieces: 5 motifs per ornament (1 tail, 2 fans, 1 flower, 1 head)
- Layout: Tail on the left; head, chest fan, flower and lower fan stacked on the right
- Largest piece: Tail strip, about 3 in (7.6 cm) long before coiling
- Size before border: 3 in (7.6 cm) x 2 3/8 in (6.0 cm)
- Border depth: 1/8 in (0.3 cm) on every edge
Materials
Use a mercerized cotton thread in size 10. It gives crisp stitch definition and holds its shape well after blocking. Avoid fuzzy or very soft thread, because the spokes and scallops will blur.
- Cream/ecru size 10 cotton thread: 5 g (about 25 m)
- Black seed bead: one, 3 mm, for the eye
- 1.5 mm steel crochet hook
- Fine tapestry needle that fits your thread
- Sewing needle and black thread for the bead
- Rustproof pins and a foam blocking board
- Spray bottle with water, or a light spray starch
- Small sharp scissors and a stitch marker
The quantity above includes a margin of about 30% for your gauge swatch and for joining tails.
Abbreviations (US Terms)
- ch – chain
- sl st – slip stitch
- sc – single crochet
- hdc – half double crochet
- dc – double crochet
- tr – treble crochet
- MR – magic ring
- sp – space
- st(s) – stitch(es)
- RS / WS – right side / wrong side
- rev sc – reverse single crochet
Special stitch – reverse single crochet (rev sc): Work from left to right (right-handed). Insert the hook into the next stitch to the right, yarn over, and pull up a loop. Yarn over and pull through both loops. This makes a twisted, corded edge.
Gauge and Checkpoints
Gauge: 16 sc = 1 in (2.5 cm) with size 10 thread and a 1.5 mm hook.
Make the flower first as your test piece. It is quick and shows your tension clearly. Check it against the measurement below before you make anything else.
Checkpoints:
- Flower: 7/8 in (2.2 cm) across, petal tip to petal tip
- Fan: 7/8 in (2.2 cm) along the straight edge and 1/2 in (1.3 cm) tall
- Head: 3/4 in (1.9 cm) from nose to back edge
- Tail strip before coiling: about 3 in (7.6 cm) long
- Assembled squirrel before border: 3 in (7.6 cm) x 2 3/8 in (6.0 cm)
- After border: 3 1/4 in (8.3 cm) x 2 5/8 in (6.7 cm)
If your flower is bigger than 7/8 in (2.2 cm), change to a 1.25 mm hook. If it is smaller, change to a 1.75 mm hook. Don’t add or skip stitches to fix the size. Every motif’s stitch count is matched to its neighbors for joining.
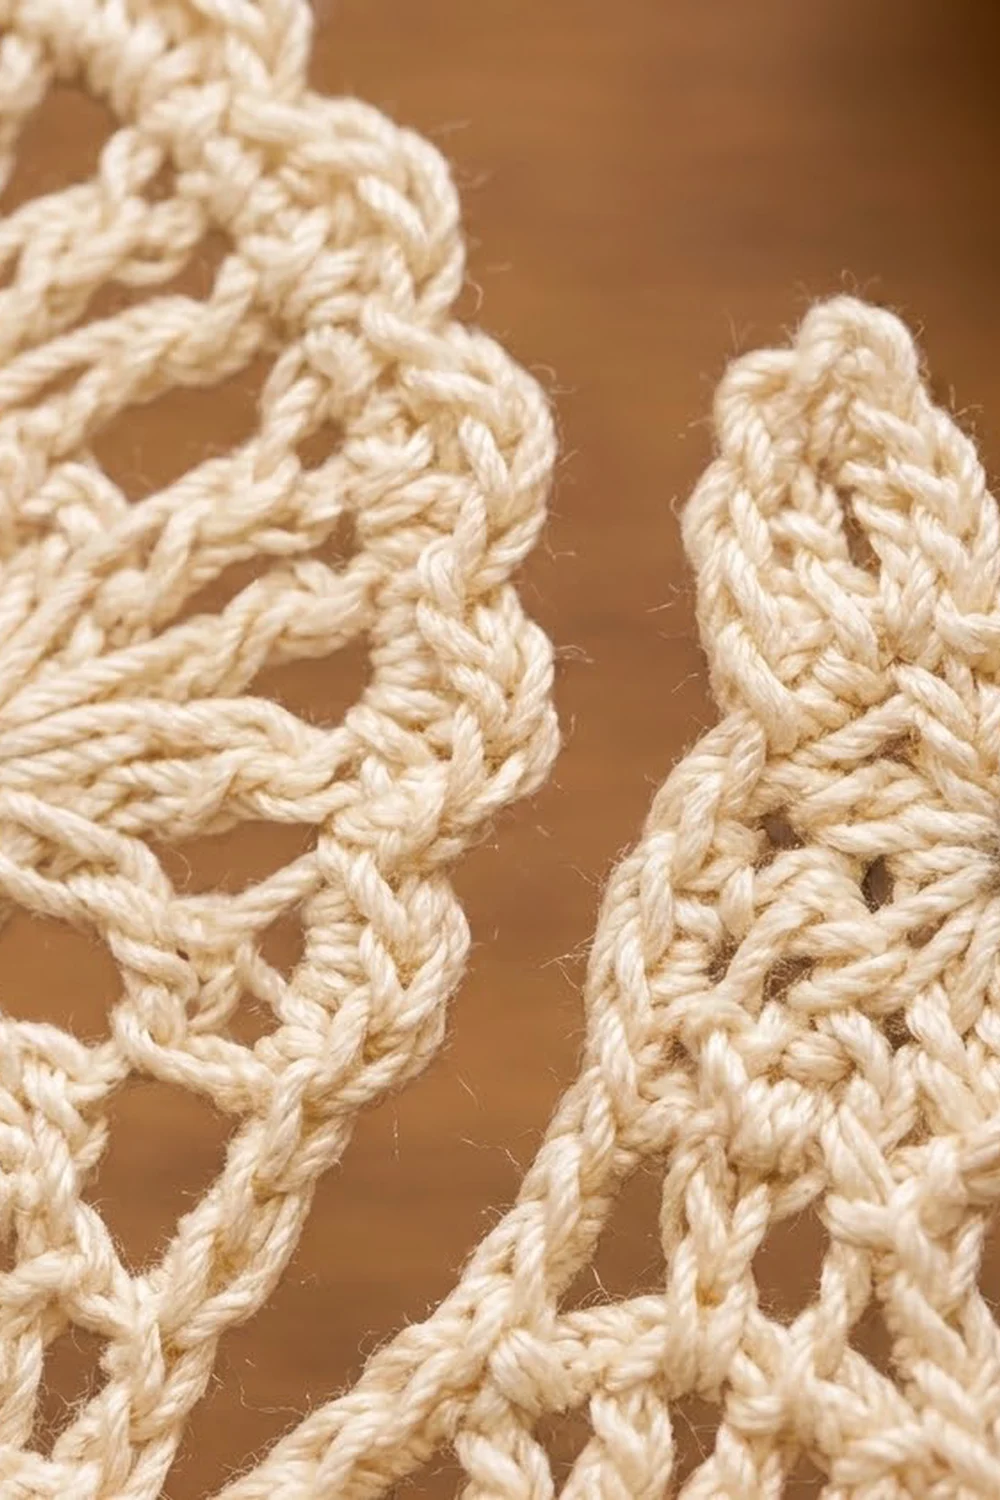
Tail (make 1)
The tail is a strip worked in rows. Increases at one end make that end curl into the spiral.
Row 1: Ch 49. Sc in 2nd ch from hook and in each ch across. (48 sc)
The slip-knot end of this row is End A, and the hook end is End B.
Row 2: Ch 3, turn (counts as first dc). Dc in each of the next 30 sc. Then work 2 dc in each of the last 17 sc. (31 + 34 = 65 dc)
The first 31 dc form the flat section at End B. The 34 dc form the increase section at End A.
Row 3 (scallop row): Ch 1, turn. Sc in first dc, *skip 1 dc, 5 dc in next dc, skip 1 dc, sc in next dc; repeat from * 15 more times. (16 scallops: 16 sc + 80 dc + the first sc = 97 sts)
Fasten off, leaving a 6 in (15.2 cm) tail for sewing.
Coiling: The increase end will already ruffle. Starting at End A, roll it into a tight spiral with the scallops on the outside. The first sc and the first 4 scallops (25 sts) disappear inside the coil. Tack the coil flat from the WS with the thread tail.
That leaves 12 scallops (72 sts) on the outer edge. The flat section’s foundation edge (31 sts) becomes the tail’s inner edge, facing the body.
Fans (make 2)
Each fan is a half circle with radiating tr spokes.
Row 1: MR, ch 3 (counts as dc), 8 dc in ring. Pull the ring snug, leaving a small open center. (9 dc)
Row 2: Ch 4, turn (counts as tr). Tr in the same st, then 2 tr in each dc across. (18 tr)
Row 3: Ch 1, turn. *Sc in each of the next 5 tr, 2 sc in next tr; repeat from * 2 more times. (21 sc arc)
Edging (straight edge): Do not turn. Rotate the piece and work along the straight edge. Work 1 sc in the Row 3 end, 3 sc in the Row 2 end and 2 sc in the Row 1 end. Work 1 sc into the ring. Then work 2 sc in the Row 1 end, 3 sc in the Row 2 end and 1 sc in the Row 3 end. Sl st to the first sc of Row 3. (13 sc straight edge; 21 + 13 = 34 sts around)
Fasten off and weave in the end. Check the size: 7/8 in (2.2 cm) wide and 1/2 in (1.3 cm) tall.
Flower (make 1)
Rnd 1: MR, ch 1, 12 sc in ring. Pull snug but leave a visible hole. Join with sl st to the first sc. (12 sc)
Rnd 2: Ch 1, sc in the same st, ch 3, skip 1. *Sc in next st, ch 3, skip 1; repeat from * 4 more times. Join to the first sc. (6 sc, 6 ch-3 sps)
Rnd 3: In each ch-3 sp work (sc, hdc, 3 dc, hdc, sc). Join to the first sc. (6 petals, 7 sts each = 42 sts)
Fasten off. Check that it measures 7/8 in (2.2 cm) across.
Head (make 1)
The head is a triangle worked from the nose back. The ear is added during the edging.
Row 1: Ch 2, 3 sc in 2nd ch from hook. (3)
Row 2: Ch 1, turn. 2 sc in first st, sc in next, 2 sc in last. (5)
Row 3: Ch 1, turn. Sc across. (5)
Row 4: Ch 1, turn. 2 sc in first, sc in next 3, 2 sc in last. (7)
Row 5: Ch 1, turn. Sc across. (7)
Row 6: Ch 1, turn. 2 sc in first, sc in next 5, 2 sc in last. (9)
Row 7: Ch 1, turn. Sc across. (9)
Row 8: Ch 1, turn. 2 sc in first, sc in next 7, 2 sc in last. (11)
Edging: Do not turn. Ch 1 and work 8 sc evenly down the row ends (throat edge). Work 3 sc in the foundation ch at the point (nose). Work 8 sc evenly up the other row ends (top of head).
Ear: Ch 4, sl st in 2nd ch from hook, sc in next ch, hdc in next ch.
Then work 1 sc in each of the 11 sts of Row 8 (back of head). Join with sl st to the first sc. (8 + 3 + 8 + 3 + 11 = 33 sts)
Fasten off. Sew the black bead about 1/4 in (0.6 cm) behind the nose, just below the top edge.
Make All Pieces
Each ornament uses 5 motifs, all in cream/ecru:
- Tail: 1
- Fans: 2 (chest fan and lower fan)
- Flower: 1
- Head: 1
Layout (RS up, squirrel facing right):
[ Tail coil ]   [ Head      ]
[ Tail      ]   [ Chest fan ]
[ Tail      ]   [ Flower    ]
[ Tail      ]   [ Lower fan ]
The fans sit with their straight edges against the tail’s inner edge and their arcs bulging right. The flower sits in the notch where the two fan arcs meet.
Joining
Join with RS facing up. Whipstitch through both loops of matching stitches using the tapestry needle, always 1 stitch to 1 stitch. On the tail’s inner edge, sew through the free loops of the foundation chain.
Joins along the tail’s inner edge (31 sts, from the coil down):
- 5 sts to the lowest 5 sts of the head’s back edge
- 13 sts to the chest fan’s straight edge (13 sc)
- 13 sts to the lower fan’s straight edge (13 sc)
Check the total: 5 + 13 + 13 = 31.
Other joins:
- The last 4 throat sts of the head, nearest the back, go to the first 4 arc sts of the chest fan.
- The 3 dc and following hdc of one flower petal go to the last 4 arc sts of the chest fan.
- The 3 dc and following hdc of the next flower petal go to the first 4 arc sts of the lower fan.
The petal between the two joined petals faces in toward the tail. Leave it free as an open lace space.
Tension: Pull each stitch just snug enough that the edges meet flat. If the seam puckers, loosen it. If you can see a gap, add one more pass through the same pair of stitches.
Checkpoint: The assembled squirrel should measure 3 in (7.6 cm) x 2 3/8 in (6.0 cm) and lie flat.
Border
Border gauge: 1 border sc on each exposed edge stitch, at 16 sc = 1 in (2.5 cm). The two rounds together add 1/8 in (0.3 cm) to every edge.
Exposed stitches per motif:
- Tail: 72 outer scallop sts + 3 row ends at the bottom of the flat section
- Head: 33 sts − 9 joined = 24
- Chest fan: 21 arc sts − 8 joined = 13
- Flower: 42 sts − 21 used by the two joined petals and the free inner petal = 21 (3 outer petals)
- Lower fan: 21 arc sts − 4 joined = 17
Rnd 1 (sc): Join thread at the top of the tail coil, at the middle of the 72 outer scallop sts. Work clockwise, 1 sc in each exposed st unless noted:
- A. Tail, top right half: 36 sc
- B. Head: 28 sc (24 sts, with 3 sc in the nose’s center sc and 3 sc in the ear’s sl st, adding 2 at each point)
- C. Front paw: Ch 5, sc in 2nd ch from hook and next 3 ch. (4 sc)
- D. Chest fan: 13 sc
- E. Flower: 21 sc
- F. Foot: Ch 5, sc in 2nd ch from hook and next 3 ch. (4 sc)
- G. Lower fan: 17 sc
- H. Tail bottom row ends: 1 sc in the Row 1 end, 2 sc in the Row 2 end. (3 sc)
- I. Tail outer side, up to start: 36 sc
Join to the first sc.
Rnd 1 total: 36 + 28 + 4 + 13 + 21 + 4 + 17 + 3 + 36 = 162 sc.
Rnd 2 (rev sc): Ch 1. Work rev sc in each sc around, including the 4 sc on each tab. Join. (162 rev sc)
Hanging loop: Ch 34, which makes about 3 in (7.6 cm) of chain. Sl st into the same st at the top of the coil to form a loop 1 1/2 in (3.8 cm) long. Fasten off.
Why the math works: Each exposed edge stitch gets exactly one border stitch, so the border is the same length as the edge and lies flat. Extra stitches go only at the two sharp points, the nose and the ear tip, where the edge turns. The paw and foot tabs are self-contained, so they don’t change any motif count. Joined stitches are never counted twice, because each motif’s border count is its total minus its joined stitches.
Final Blocking
- Weave in all ends on the WS, splitting the plies so they can’t work loose.
- Wet the ornament fully, then gently press out the water in a towel.
- Pin it RS up on the board to 3 1/4 in (8.3 cm) x 2 5/8 in (6.7 cm).
- Pin out each of the 12 tail scallops and each outer flower petal.
- Pin the nose, ear tip, paw and foot into points.
- Spray lightly with starch if you want a stiffer ornament.
- Let it dry completely before unpinning, usually 6–8 hours.
Final Quality-Control Checklist
- The tail coil is tight and flat, with 12 scallops showing.
- Both fans have 18 even spokes and an open center.
- The flower has 6 petals and an open center.
- Rnd 1 has 162 sc and Rnd 2 has 162 rev sc.
- The ornament measures 3 1/4 in (8.3 cm) x 2 5/8 in (6.7 cm).
- The bead eye is secure and level.
- The hanging loop is 1 1/2 in (3.8 cm) long and firmly anchored.
- There are no loose ends on the RS.
Troubleshooting
- The tail won’t coil: Your Row 2 increases are too loose. Redo Row 2 with tighter dc, or roll the coil damp and pin it while it dries.
- A fan cups: Check that you have 21 sc in Row 3. If the count is right, block it flat while damp.
- A fan ruffles: Your Row 2 tr may be too tall. Shorten them by pulling the loops snug.
- The border waves: You added extra sc somewhere. Recount each section against the list.
- The border pulls in: Work Rnd 2 more loosely, or use a hook 0.25 mm larger for that round only.
- Seams show on the RS: Whipstitch through the back loops only, from the WS.
Care
Hand wash in cool water with mild soap, press dry in a towel, and re-block flat. Store it flat between tissue paper so the coil and points keep their shape.
Final Notes
The measurement chain is simple. A gauge of 16 sc = 1 in (2.5 cm) gives a 7/8 in (2.2 cm) flower and fans and a 3 in (7.6 cm) tail strip. Those pieces join into a 3 in (7.6 cm) x 2 3/8 in (6.0 cm) squirrel. A 162-stitch border adds 1/8 in (0.3 cm) on every edge, for a finished 3 1/4 in (8.3 cm) x 2 5/8 in (6.7 cm) ornament. Check each stage before moving on, and every squirrel in your set will match.
Happy crocheting!