

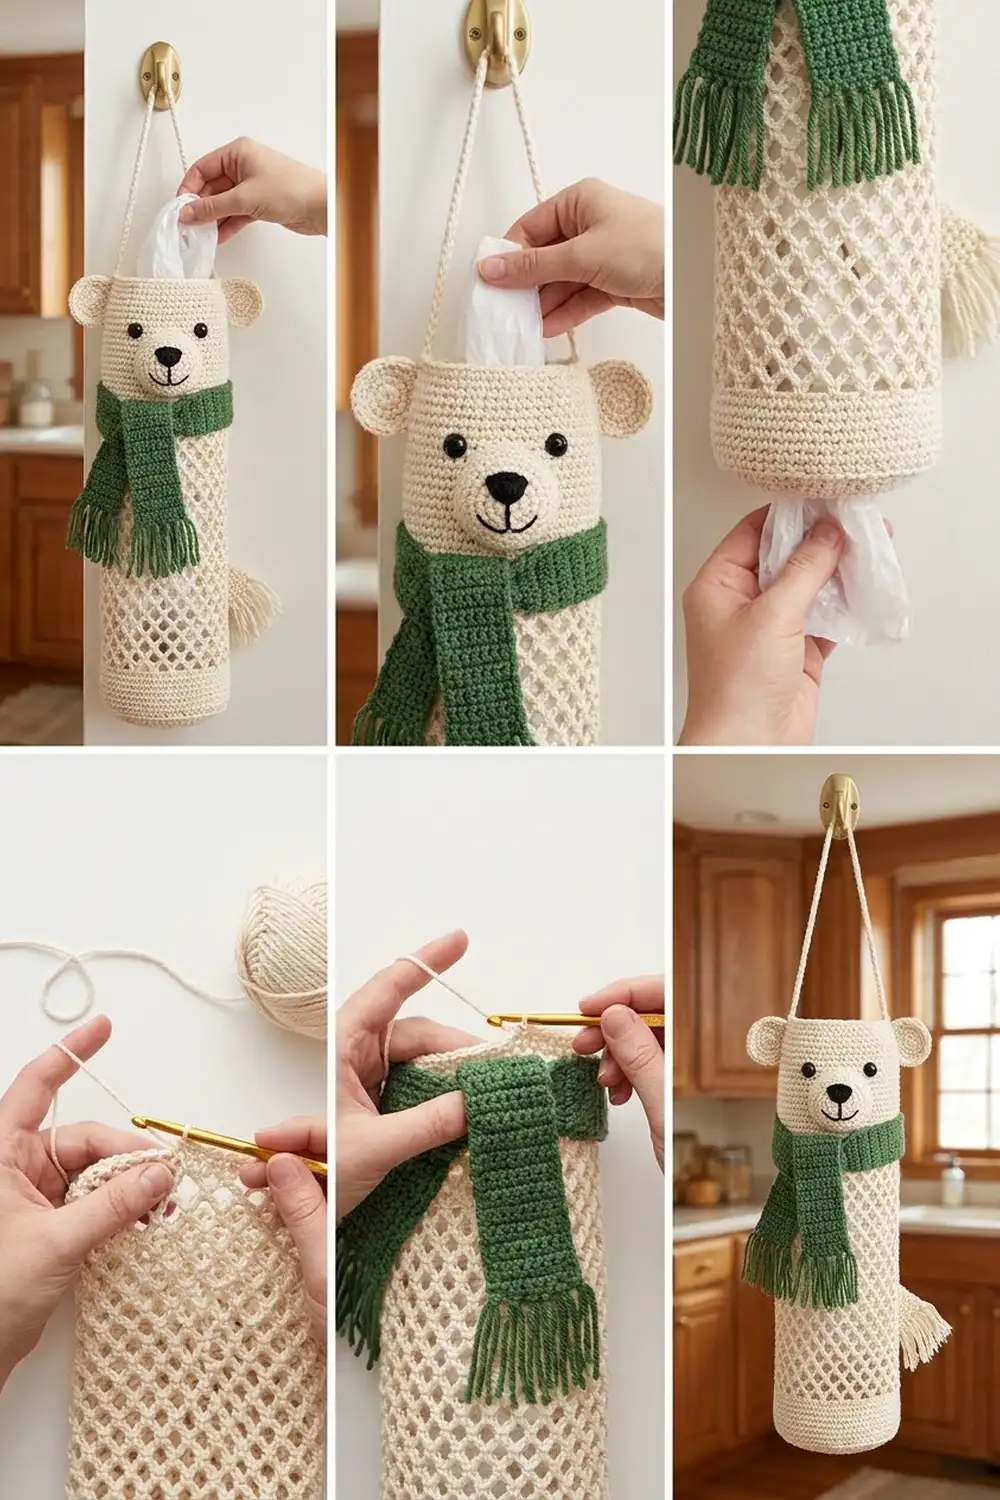
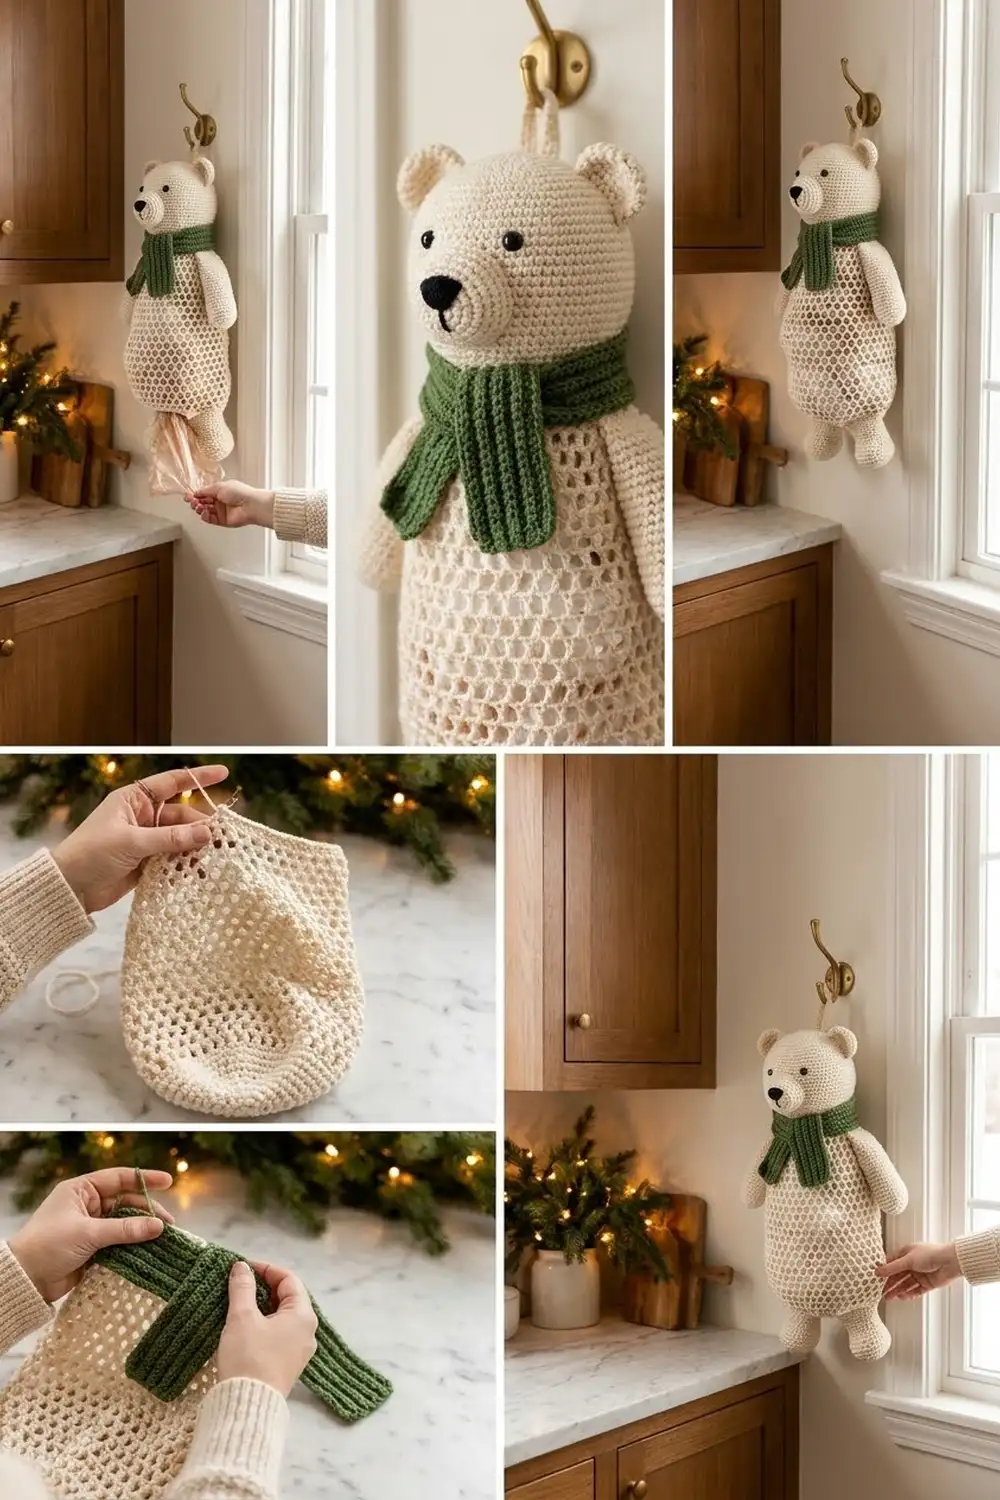
This cozy polar bear keeps your plastic grocery bags tidy and adds a little winter cheer to the kitchen. The body is a tube of open diamond mesh in soft cream, with solid bands at the top and bottom. A sweet bear face sits at the top, and a green scarf with a fringed tail wraps around the neck.
The palette is simple: cream for the bear, forest green for the scarf, and black for the eyes, nose, and smile. The clean, farmhouse-friendly style works all winter, not just at Christmas. This pattern uses US crochet terms throughout.
Laid flat, the finished holder measures 6 in (15.2 cm) wide and 14.6 in (37.1 cm) tall, not counting the ears or the hanging strap. Stuff bags in through the top opening and pull them out one at a time from the smaller bottom opening.
Construction is straightforward. You work the body bottom-up as one seamless tube: a solid bottom band, a ch-5 mesh section, and a solid top band. Next you add a slip-stitch strap at the top. Last, you crochet small ears, a muzzle, and a two-part scarf, and sew them on.
Finished Size and Construction
- Finished size (flat): 6 in (15.2 cm) wide x 14.6 in (37.1 cm) tall
- Bottom opening (flat): 5 in (12.7 cm) wide
- Skill level: Easy to intermediate
- Terminology: US
- Yarn weight: Worsted (#4)
- Hook: 5.0 mm (H-8)
- Number of pieces: 1 tubular body plus 5 small appliqué parts (2 ears, 1 muzzle, 1 scarf band, 1 scarf tail)
- Layout: Single vertical tube, hung from one strap
- Body stitch count: 48 sts around, or 24 sts per flat side
- Size before top border: 6 in (15.2 cm) wide x 13.3 in (33.8 cm) tall
- Top border depth: 1.3 in (3.3 cm), 6 rounds
- Hanging strap: 8 in (20.3 cm) long, rising about 3.5 in (8.9 cm) above the top edge
Materials
Choose a smooth worsted-weight cotton or cotton blend. Cotton holds the mesh shape well and does not stretch out under the weight of the bags. The quantities below assume about 170 m per 100 g.
- Cream: 75 g / 128 m (body, ears, muzzle)
- Forest green: 15 g / 26 m (scarf and fringe)
- Black: about 2 m of worsted yarn or embroidery floss (nose and mouth)
All quantities include a margin of roughly 15 percent, so you will have a little left over.
Tools:
- 5.0 mm (H-8) crochet hook
- 2 black safety eyes, 9 mm
- 4 locking stitch markers
- Yarn needle
- Scissors
- Measuring tape
- Rust-proof pins for blocking
- Spray bottle
Abbreviations (US Terms)
- ch – chain
- sl st – slip stitch
- sc – single crochet
- hdc – half double crochet
- inc – 2 sc in the same stitch
- BLO – back loop only
- MR – magic ring
- st(s) – stitch(es)
- ( ) x N – repeat the sequence in parentheses N times
Special stitch – mesh loop: ch 5, then sc in the next ch-5 loop (or the stitch named). Each mesh loop spans the width of 4 sc from the band below.
Gauge and Checkpoints
Sc gauge: 16 sc and 18 rounds = 4 in (10.2 cm), worked in sc in the round.
Mesh gauge: 4 mesh rounds = 3 in (7.6 cm) tall when the tube hangs naturally, so each mesh round is about 0.75 in (1.9 cm).
Test before you commit: work the bottom band (Rounds 1–6) as your swatch. It is part of the finished piece, so nothing is wasted.
Checkpoints:
- After Round 2 (40 sts): the tube lies flat at 5 in (12.7 cm) wide.
- After Round 6 (48 sts): flat width is 6 in (15.2 cm) and height is 1.3 in (3.3 cm).
- After Mesh Round 8 (Round 14): total height is about 7.3 in (18.5 cm).
- After Mesh Round 16 (Round 22): total height is about 13.3 in (33.8 cm).
- After Round 28: total height is 14.6 in (37.1 cm).
If your tube is too wide, go down half a hook size (4.5 mm). If it is too narrow, go up to 5.5 mm. Do not change the stitch count, because the mesh depends on exactly 48 sts. If only the mesh is too long, work fewer mesh rounds.
Body: Bottom Band
With cream, ch 40 and join with sl st to the first ch to form a ring. Check that the chain is not twisted.
Round 1: Ch 1, sc in each ch around, join with sl st to first sc. (40 sts)
Round 2: Ch 1, sc in each st around, join. (40 sts)
Round 3 (growth round): Ch 1, (sc in next 4 sts, inc in next st) x 8, join. (48 sts)
Rounds 4–6: Ch 1, sc in each st around, join. (48 sts)
Starting with 40 sts makes the bottom opening slightly narrower than the body. This gives the base its rounded, gathered look and keeps the bags from falling out.
Body: Diamond Mesh
Mesh Round 1 (Round 7): Ch 1, sc in first st, (ch 5, skip next 3 sts, sc in next st) x 11, ch 5, skip last 3 sts, join with sl st to first sc. (12 sc and 12 ch-5 loops)
Check the math: 12 repeats x 4 sts each = 48 sts used. This uses every stitch of Round 6.
Mesh Round 2 (Round 8): Sl st in each of the first 3 ch of the next loop to reach its center. Ch 1, sc in the same loop, (ch 5, sc in next ch-5 loop) x 11, ch 5, join with sl st to first sc. (12 ch-5 loops)
Mesh Rounds 3–16 (Rounds 9–22): Repeat Mesh Round 2. (12 ch-5 loops each round)
Each new sc sits in the center of a loop below, so the loops shift by half a loop every round. That offset creates the diamonds. Keep your chains even. A tight chain gives small, stiff diamonds, and a loose one lets the bags bulge through.
Lay the tube flat with the round join at one side fold. You should have 6 loops on the front and 6 on the back. Measure: it should be 6 in (15.2 cm) wide and 13.3 in (33.8 cm) tall.
Ears (Make 2)
With cream, make a MR.
Round 1: Ch 1, 6 sc in ring, join. (6 sts)
Round 2: Ch 1, inc in each st around, join. (12 sts)
Round 3: Working in BLO, ch 1, (sc in next st, inc in next st) x 6, join. (18 sts)
Fasten off, leaving a 10 in (25.4 cm) tail. The unworked front loops of Round 2 form a small ridge that outlines the inner ear. Each ear is a flat circle about 1.5 in (3.8 cm) across.
Muzzle
With cream, ch 6.
Round 1: Sc in 2nd ch from hook, sc in next 3 ch, 3 sc in last ch. Turn the piece and work along the other side of the chain: sc in next 3 ch, 2 sc in the last ch (the same ch as the first sc). Join. (12 sts)
Round 2 (growth round): Ch 1, inc in first st, sc in next 3 sts, inc in each of next 3 sts, sc in next 3 sts, inc in each of last 2 sts, join. (18 sts)
Fasten off, leaving a 12 in (30.5 cm) tail. The muzzle is an oval about 2 in (5.1 cm) wide and 1.25 in (3.2 cm) tall.
With black, embroider a triangular nose in satin stitch near the top center of the oval. Make one straight stitch down from the tip of the nose. Then add two short curved stitches, one on each side, for the smile.
Scarf
Scarf band: With green, ch 62.
Row 1: Hdc in 3rd ch from hook and in each ch across. (60 hdc)
Rows 2–3: Ch 2 (does not count as a st), turn, hdc in BLO of each st across. (60 hdc)
Fasten off, leaving a 12 in (30.5 cm) tail. The band measures 15 in (38.1 cm) long and 1.25 in (3.2 cm) wide. The BLO rows create the ribbed lines on the scarf.
Scarf tail: With green, ch 14.
Row 1: Hdc in 3rd ch from hook and in each ch across. (12 hdc)
Rows 2–3: Ch 2 (does not count), turn, hdc in BLO across. (12 hdc)
Fasten off. The tail is 3 in (7.6 cm) long and 1.25 in (3.2 cm) wide.
Fringe: Cut 5 strands of green, each 3.5 in (8.9 cm) long. Fold each strand in half and knot it through one short end of the tail, spacing the knots evenly. Trim to 1.5 in (3.8 cm).
Top Border, Hanger, and Assembly
The top border turns the open mesh back into solid fabric, which gives the face a firm base.
Border gauge: the same as the sc gauge, 16 sc = 4 in (10.2 cm).
Round 23 (conversion round): Ch 1, sc in first sc, 3 sc in next ch-5 loop, (sc in next sc, 3 sc in next ch-5 loop) x 11, join. Count: 12 sc worked 1-per-existing-sc + 36 sc worked into the 12 loops (3 each) = 48 sts.
Rounds 24–28: Ch 1, sc in each st around, join. (48 sts)
Per side: with the join at one fold, each flat side has 24 sts, front and back.
Why the math works: each mesh loop first replaced 4 sts (the sc plus 3 skipped sts). The conversion round puts back exactly 4 sts per loop: 1 in the sc and 3 in the loop, so 12 x 4 = 48. That matches the bottom band, so the tube stays straight, with no flare or pinch at the top. The border is 6 rounds, or 1.3 in (3.3 cm) deep.
Hanger: Do not fasten off after Round 28. Ch 36, then sl st into st 25 of Round 28, directly opposite the join. Turn and sl st in the back bump of each ch on the way back (36 sl sts), then sl st into st 1. Fasten off. The strap is 8 in (20.3 cm) long and makes a firm cord.
Assembly:
- Lay the tube flat with the strap ends at the side folds. Choose one side as the front and count its 24 sts from right to left.
- Eyes: insert the safety eyes in Round 25, one between sts 9 and 10 and one between sts 15 and 16. They sit 6 sts, or 1.5 in (3.8 cm), apart. Snap the washers on from inside the tube.
- Muzzle: center it below the eyes, with its top edge 1 round below them. It overlaps Round 23 and the top of the last mesh round. Whipstitch around the edge, catching the mesh strands behind it.
- Ears: pin one ear to each top front corner, over sts 2–5 and sts 20–23, so about half of each circle rises above Round 28. Sew the lower half to the top border.
- Scarf: wrap the band around the tube 2.25 in (5.7 cm) below the top edge, just under the muzzle. Overlap the ends on the right front by 3 in (7.6 cm). Tuck the plain end of the scarf tail under the overlap so the fringe hangs down, and sew through all layers. Tack the band to the mesh at the back and sides so it cannot slide.
Final Blocking
- Weave in all ends on the inside of the tube.
- Lay the holder flat on a blocking mat, face up.
- Mist it evenly with water until it is damp but not soaked.
- Gently ease it to 14.6 in (37.1 cm) long and 6 in (15.2 cm) wide.
- Pin the top and bottom bands straight, and open the diamonds so they look even.
- Smooth the ears, muzzle, and scarf flat with your fingers.
- Let it dry completely before you hang it.
Final Quality-Control Checklist
- Rounds 3–6 and 23–28 each have 48 sts.
- Every mesh round has 12 ch-5 loops.
- The body is 6 in (15.2 cm) wide flat.
- The bottom opening is 5 in (12.7 cm) wide flat.
- Total height is 14.6 in (37.1 cm).
- The eyes are level and 1.5 in (3.8 cm) apart.
- The muzzle is centered, with the nose at its top center.
- The ears match each other at both top corners.
- The scarf is snug and does not slide, and the fringe is trimmed evenly.
- The strap is secured at sts 1 and 25.
Troubleshooting
Diamonds are uneven: your ch-5 tension varies. Count your chains carefully and keep your hook motion the same each time.
Tube twists or spirals: this usually happens when you skip the sl sts to the loop center at the start of a mesh round. Check the first stitch of every round.
Top border ruffles: you may have worked 4 sc into a loop. Recount to 48.
Top border pulls in: you may have worked only 2 sc into some loops. Recount to 48.
Bags fall out of the bottom: make your starting chain tighter, or add one more 40-st round to the bottom band before the increase round.
Safety eyes feel loose: place them in solid sc, never in the mesh, and press the washers all the way down.
Scarf is too short: add 4 ch to the starting chain for each extra 1 in (2.5 cm) you need.
Care
Hand wash in cool water and lay flat to dry. Avoid the dryer, which can shrink cotton and loosen the safety eyes.
Final Notes
Every measurement builds on the one before it. A gauge of 16 sc = 4 in (10.2 cm) gives 48 sts and a flat width of 6 in (15.2 cm). Those 48 sts divide into 12 mesh loops, and 16 mesh rounds at 0.75 in (1.9 cm) each add 12 in (30.5 cm). The conversion round brings the count back to 48 sts. The two 1.3 in (3.3 cm) bands bring the total height to 14.6 in (37.1 cm). Check each measurement as you go, and your bear will hang straight and hold plenty of bags.
Happy crocheting!