

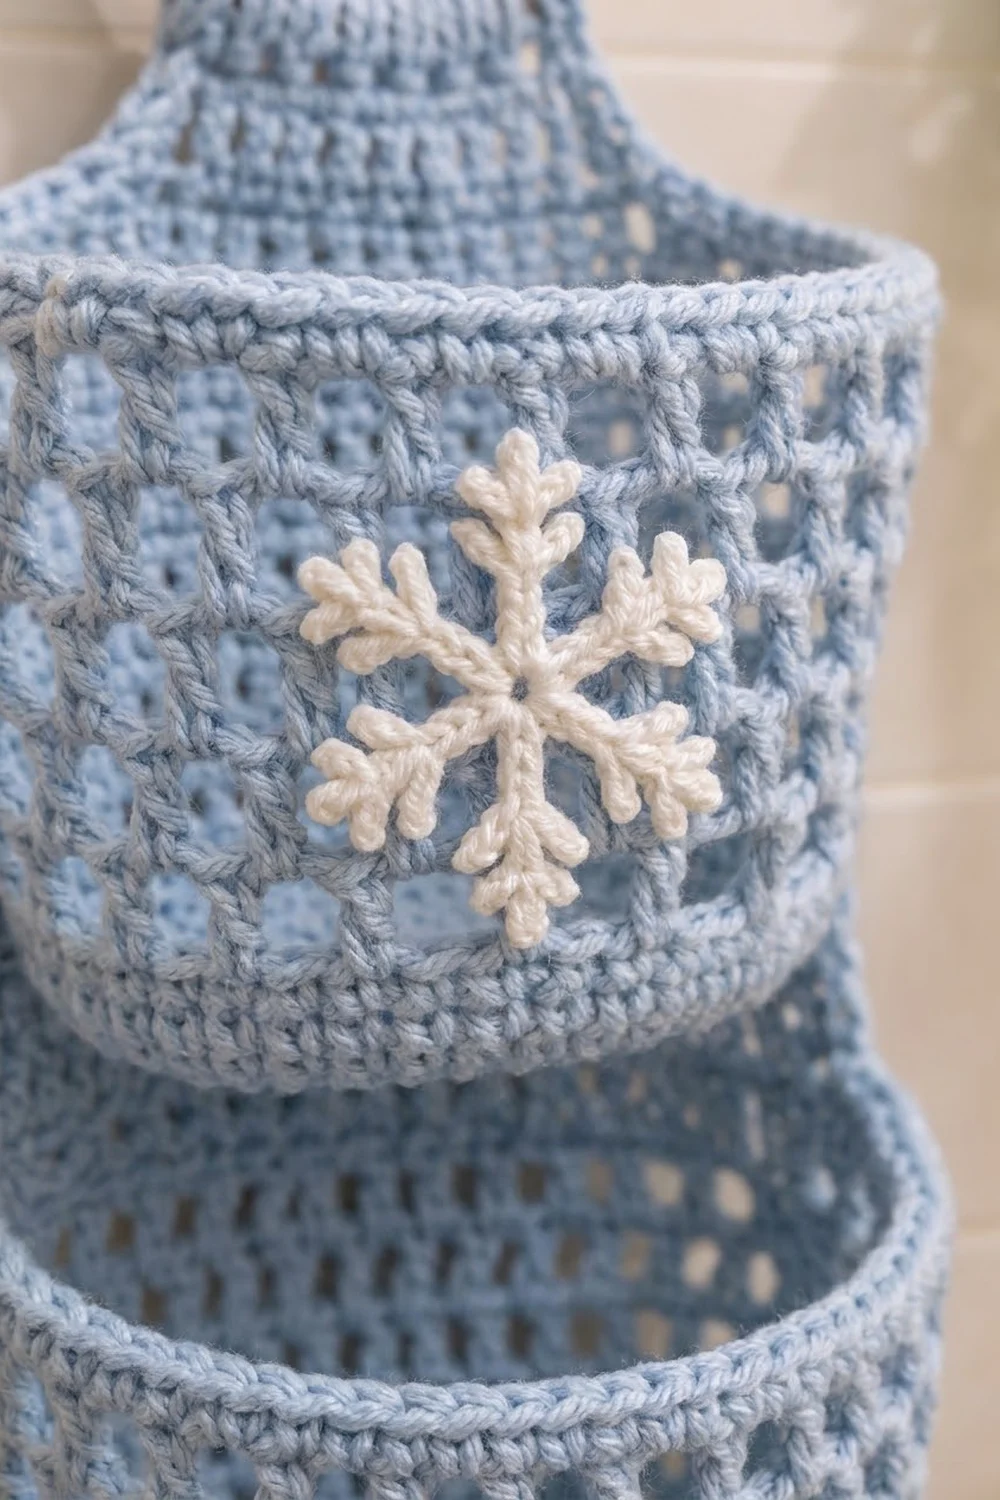
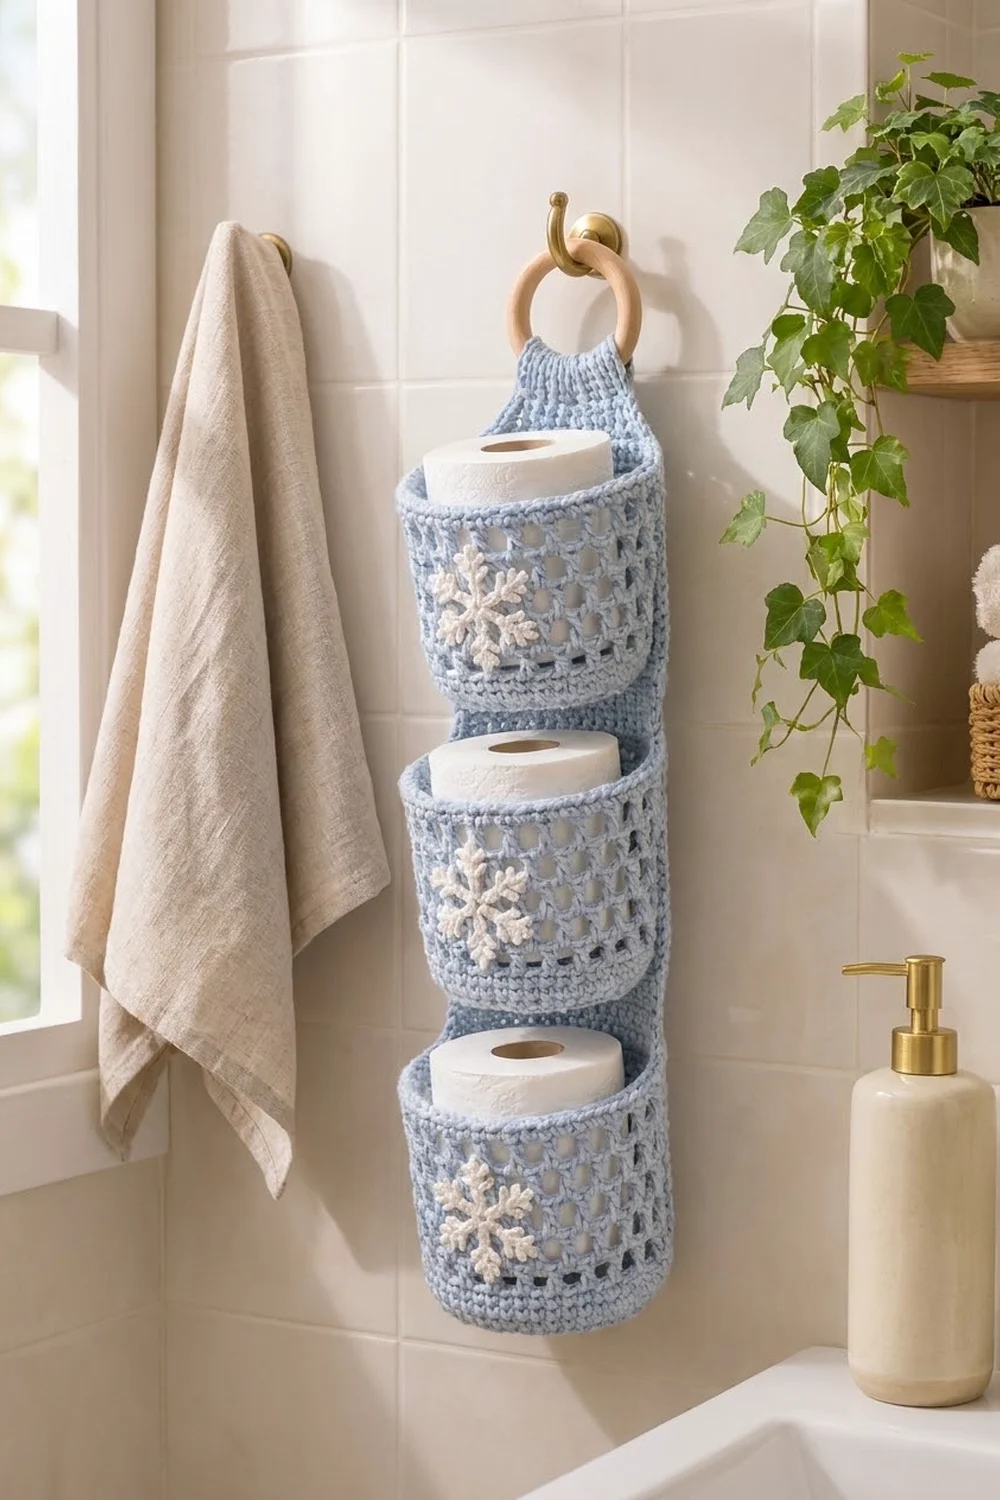
This hanging holder keeps three spare rolls in sight and within reach. Three soft mesh pockets are stacked on a solid back panel, and the whole piece hangs from a wooden ring. Each pocket has a white snowflake on the front, which adds a wintry touch without making the bathroom look themed.
The palette has just two colors: powder light blue for the structure and creamy white for the snowflakes. The style is clean and slightly Scandinavian. The open mesh lets the white rolls show through, and the solid bands at the base and rim keep each pocket firm.
This pattern is written in US crochet terms. The finished holder is about 7″ (17.8 cm) wide including the border and hangs about 21″ (53.3 cm) from the top of the ring fold to the bottom edge. Each pocket is a cylinder about 15″ (38.1 cm) around and 4″ (10.2 cm) tall.
Construction is simple. You crochet the back panel flat in rows and work each pocket in the round from a flat circular base. You make the snowflakes separately and sew them on. Then you sew the pockets to the panel stitch-for-stitch, add a two-round border, and fold the strap around the ring.
Finished Size and Construction
- Finished size: 7″ x 21″ (17.8 cm x 53.3 cm), hanging
- Skill level: Easy-intermediate
- Terminology: US
- Yarn weight: Worsted (#4), cotton recommended
- Hooks: 5.0 mm (H-8) for the main pieces; 4.0 mm (G-6) for the snowflakes
- Number of pieces: 7 (1 back panel, 3 pockets, 3 snowflakes), plus 1 wooden ring
- Layout: 3 pockets stacked vertically on one panel
- Panel size before border: 6″ x 22″ (15.2 cm x 55.9 cm), flat
- Pocket size: 15″ (38.1 cm) around x 4″ (10.2 cm) tall
- Border depth: 0.5″ (1.3 cm), 2 rounds
Materials
Choose a smooth worsted-weight cotton or cotton blend. Cotton holds its shape, tolerates bathroom humidity, and shows off the mesh clearly. Avoid fuzzy yarns, because they blur the snowflake picots.
- Light blue: 220 g, about 340 m (372 yd)
- White: 15 g, about 25 m (27 yd)
Tools:
- 5.0 mm (H-8) and 4.0 mm (G-6) crochet hooks
- Wooden ring, 3″ (7.6 cm) diameter
- Tapestry needle
- Stitch markers (at least 4)
- Scissors
- Measuring tape
- Blocking mat and pins
Yarn quantities include a margin of about 15% for gauge differences and swatching.
Abbreviations (US Terms)
- ch – chain
- sl st – slip stitch
- sc – single crochet
- dc – double crochet
- sc2tog – single crochet 2 together
- BLO – back loop only
- sk – skip
- sp – space
- st(s) – stitch(es)
- rev sc – reverse single crochet (crab stitch)
Special stitch – reverse sc: Work from left to right (right to left if you’re left-handed). Insert the hook into the next stitch to the right, yarn over, pull up a loop, then yarn over and pull through both loops. This makes a corded, twisted edge.
Picot (snowflake): Ch 3, then sl st into the stitch or chain named in the instructions.
Gauge and Checkpoints
Main gauge (5.0 mm hook): 16 sc x 18 rows = 4″ (10.2 cm).
Mesh gauge: 4 mesh repeats (12 sts) = 3″ (7.6 cm), and 4 mesh rounds = 2″ (5.1 cm).
Make one pocket before anything else. It’s the best gauge test, because it shows whether a roll fits.
Checkpoints:
- Pocket base after Round 10: a flat circle about 4.75″ (12.1 cm) across
- Pocket after Round 13: 15″ (38.1 cm) around and 0.67″ (1.7 cm) tall
- Pocket after Round 23: 4″ (10.2 cm) tall from the base edge
- Panel after Row 63: 6″ x 14″ (15.2 cm x 35.6 cm)
- Panel after Row 99: 22″ (55.9 cm) long
If your pocket is too small, go up half a hook size. If it’s too big, go down half a size. A roll should slide in with gentle ease and sit with its top level with the rim or just above it. If the base ruffles, you have too many stitches for your tension, so go down a hook size. If it cups before Round 11, go up a size.
Back Panel
The panel is worked in rows with the 5.0 mm hook and light blue.
Row 1: Ch 25, sc in 2nd ch from hook and in each ch across, turn. (24 sc)
Rows 2–63: Ch 1, sc in each st across, turn. (24 sc)
Checkpoint: 6″ x 14″ (15.2 cm x 35.6 cm).
Neck (Rows 64–81): The neck narrows with a decrease row every third row.
- Decrease rows (64, 67, 70, 73, 76, 79): Ch 1, sc2tog, sc in each st to the last 2 sts, sc2tog, turn.
- All other neck rows: Ch 1, sc in each st across, turn.
Stitch counts after each decrease row: Row 64: 22 sc. Row 67: 20 sc. Row 70: 18 sc. Row 73: 16 sc. Row 76: 14 sc. Row 79: 12 sc. Rows 80–81: 12 sc.
The neck is 4″ (10.2 cm) tall, and its top edge is 3″ (7.6 cm) wide.
Strap (Rows 82–99): Ch 1, sc in each st across, turn. (12 sc)
The strap is 4″ (10.2 cm) long. Fasten off and weave in the ends.
Mark Rows 2, 20, 22, 40, 42 and 60 with stitch markers at the right edge. Also mark the center 12 sts (sts 7–18). These are your pocket placement lines.
Pockets (Make 3)
Work in joined rounds with the 5.0 mm hook and light blue. The beginning of each round is the back of the pocket.
Base
Round 1: Make a magic ring, ch 1, 6 sc in the ring, sl st to the first sc. (6)
Round 2: Ch 1, 2 sc in each st around, sl st to the first sc. (12)
Round 3: Ch 1, sc in next st, 2 sc in next st; repeat around, sl st to join. (18)
Round 4: Ch 1, sc in next 2 sts, 2 sc in next st; repeat around, sl st to join. (24)
Rounds 5–10: Continue the same way, working 1 more plain sc before each increase in every round. Round 5: 30. Round 6: 36. Round 7: 42. Round 8: 48. Round 9: 54. Round 10: 60.
Checkpoint: the circle lies flat and is about 4.75″ (12.1 cm) across.
Bottom band
Round 11: Ch 1, sc in BLO of each st around, sl st to join. (60) This turns the work upward and leaves the front loops of Round 10 free. You’ll use those loops for joining later.
Rounds 12–13: Ch 1, sc in each st around, sl st to join. (60)
Mesh section
Round 14: Ch 5 (counts as dc + ch 2), sk next 2 sts, dc in next st, ch 2, sk next 2 sts; repeat 18 more times, sl st in the 3rd ch of the beginning ch-5. (20 dc, 20 ch-2 sps)
Rounds 15–17: Ch 5 (counts as dc + ch 2), dc in next dc, ch 2; repeat 19 times, sl st in the 3rd ch of the beginning ch-5. (20 dc, 20 ch-2 sps)
The dc columns stack straight on top of each other and form open square holes.
Top band
Round 18 (conversion): Ch 1, sc in each dc and 2 sc in each ch-2 sp around, sl st to join. That’s 20 sc (1 per dc) + 40 sc (2 per space) = 60 sc.
Rounds 19–23: Ch 1, sc in each st around, sl st to join. (60)
Fasten off and leave a 30″ (76.2 cm) tail for sewing.
The wall has 3 solid rounds of 0.67″ (1.7 cm), 4 mesh rounds of 2″ (5.1 cm), and 6 solid rounds of 1.33″ (3.4 cm), for a total height of 4″ (10.2 cm).
Snowflake Appliqués (Make 3)
Use the 4.0 mm hook and white.
Round 1: Make a magic ring, ch 1, 6 sc in the ring, sl st to the first sc. (6)
Round 2: Ch 1, 2 sc in each st around, sl st to join. (12)
Round 3 (arms): Sl st in next st, ch 7, sl st in the 4th ch from hook to form the tip loop. [Ch 3, sl st in the same ch] twice, which makes a three-loop tip. Sl st in the next ch, then [ch 3, sl st in the same ch] twice, which makes the V-shaped side picots. Sl st in the next 2 ch to return to the center, then sl st in the next st of Round 2. Repeat from * to * 5 more times.
Each repeat uses 2 sts of Round 2, so you get 6 arms. Fasten off and leave a 12″ (30.5 cm) tail. The finished flake is about 3″ (7.6 cm) from tip to tip.
Pin the snowflake over the center front of a pocket, directly opposite the round joins, so it covers the mesh section and slightly overlaps both bands. Whipstitch around the center and up each arm, catching only the back loops so the stitches stay hidden.
Make All Pieces
| Piece | Qty | Color |
|---|---|---|
| Back panel | 1 | Light blue |
| 3 | Light blue | |
| Snowflake | 3 | White |
Layout, from top to bottom:
      [ RING ]
      [strap ]
     [  neck  ]
   [ panel top  ]
   [ POCKET 3 * ]   rows 42–60
   [ POCKET 2 * ]   rows 22–40
   [ POCKET 1 * ]   rows 2–20
   [ panel base ]
   * = snowflake
Joining
Pockets are sewn to the panel at two lines each: the base edge and the rim. The 12 back-center sts of each pocket match the 12 center sts of the panel, one stitch to one stitch.
Back-center stitches: On the pocket, these are the last 6 and first 6 sts of the round, centered on the joins.
Pocket 1:
- Flatten the pocket’s back against the panel.
- Using light blue, whipstitch the 12 free front loops of Round 10 at the back center to sts 7–18 of panel Row 2.
- Whipstitch the 12 back-center sts of Round 23 to sts 7–18 of panel Row 20.
From Row 2 to Row 20 is 18 rows, or 4″ (10.2 cm). That matches the 4″ (10.2 cm) pocket wall, so the back lies flat without pulling.
Pocket 2: Sew the base to Row 22 and the rim to Row 40.
Pocket 3: Sew the base to Row 42 and the rim to Row 60.
The other 48 sts of each pocket stay free, so the pocket rounds out to hold a roll.
Tension: Make one whipstitch per stitch pair and pull each stitch snug but not tight. Tight seams pucker the panel. Loose seams let a heavy pocket sag.
Checkpoint: The panel should still measure 6″ (15.2 cm) across at every pocket line. If it pinches, unpick that seam and sew it again more loosely.
Border
Border gauge: 4 sc per 1″ (2.5 cm) along every edge. Stitches match this directly. Row-ends (4.5 per inch) are worked as 8 sc per 9 row-ends.
Round 1: With the panel right side facing, use the 5.0 mm hook to join light blue in the first foundation st at the bottom edge.
- Bottom edge: Ch 1, 3 sc in the corner st, sc in the next 22 sts, 3 sc in the last st. That’s 24 sts worked 1 per st + 4 extra corner sts = 28.
- Right body side: 63 row-ends; sc in 8, sk 1, repeated 7 times. (56)
- Right neck slant: 18 row-ends; sc in each row-end except skip the last one. (17)
- Right strap side: 18 row-ends; sc in 8, sk 1, repeated twice. (16)
- Strap top: 3 sc in the first st, sc in the next 10 sts, 3 sc in the last st. That’s 12 + 4 extra = 16.
- Left strap side: 16. Left neck slant: 17. Left body side: 56.
Sl st to the first sc. Total: 28 + 56 + 17 + 16 + 16 + 16 + 17 + 56 = 222 sc. The side counts do not include corner stitches, because those are already counted in the bottom and strap-top totals.
Round 2: Ch 1, rev sc in each st around, sl st to join. (222) Fasten off and weave in the ends.
Why the math works:
- 56 sc ÷ 4 sc per inch = 14″, which matches the body’s 14″ (35.6 cm) height.
- 16 sc = 4″ (10.2 cm), which matches the strap.
- The neck slant rises 4″ (10.2 cm) and steps in 1.5″ (3.8 cm) per side, so it’s about 4.25″ (10.8 cm) long. 17 sc = 4.25″ (10.8 cm).
- The corner increases let the border turn without cupping.
Attach the ring: Pass the strap through the ring from front to back. Fold 2″ (5.1 cm) of the strap down behind itself and whipstitch it in place along both sides and across the end.
Final Blocking
- Wet the holder thoroughly and press out the water in a towel. Don’t wring it.
- Lay it flat with the pockets facing up and pin the panel to 7″ (17.8 cm) wide.
- Stuff each pocket with a roll in a plastic bag so it dries round.
- Pin each snowflake’s arms straight and open the tip loops with a pin.
- Let it dry completely, at least 24 hours.
- Remove the pins and rolls, and steam the rev sc border lightly if needed.
Final Quality-Control Checklist
- [ ] Each pocket base has 60 sts and lies flat
- [ ] Each mesh round has 20 dc and 20 ch-2 spaces, with columns aligned
- [ ] The pocket walls measure 4″ (10.2 cm)
- [ ] The panel has 24 sts in the body and 12 in the strap
- [ ] Every pocket seam is 12 sts to 12 sts, at the correct rows
- [ ] Snowflakes are centered opposite the round joins
- [ ] Border Round 1 has 222 sc
- [ ] The strap fold is secure around the ring
- [ ] All ends are woven in and the finished size is 7″ x 21″ (17.8 cm x 53.3 cm)
Troubleshooting
Mesh columns spiral: Make sure each dc goes into the dc below, not into the chain space.
Pocket too tight for a roll: Go up a hook size, or add 6 sts with an extra base round (Round 11 would then have 66 sts, and the mesh would need 22 repeats).
Panel sags under the rolls: Your seams are too loose. Re-sew them with firmer tension, or add a second whipstitch pass.
Border ruffles: Skip one more row-end per side.
Border pulls in: Skip one fewer row-end per side.
Snowflake arms curl: Block them pinned flat before sewing, and use the smaller hook.
Care
Hand wash in cool water with mild soap, press flat in a towel, and dry flat. Re-block the pockets around rolls if they lose their shape.
Final Notes
The measurement chain runs like this:
- Gauge is 16 sc x 18 rows = 4″ (10.2 cm).
- Each pocket is 60 sts = 15″ (38.1 cm) around and 18 rows’ worth = 4″ (10.2 cm) tall.
- The panel is 24 sts = 6″ (15.2 cm) wide, with pocket seams exactly 18 rows apart.
- The 2-round border adds 0.5″ (1.3 cm) per side, bringing the width to 7″ (17.8 cm).
- Folding 2″ (5.1 cm) of the strap around the ring brings the hanging length to 21″ (53.3 cm).
Check each link in that chain as you go, and the finished holder will hang straight and hold three rolls neatly.
Happy crocheting!