

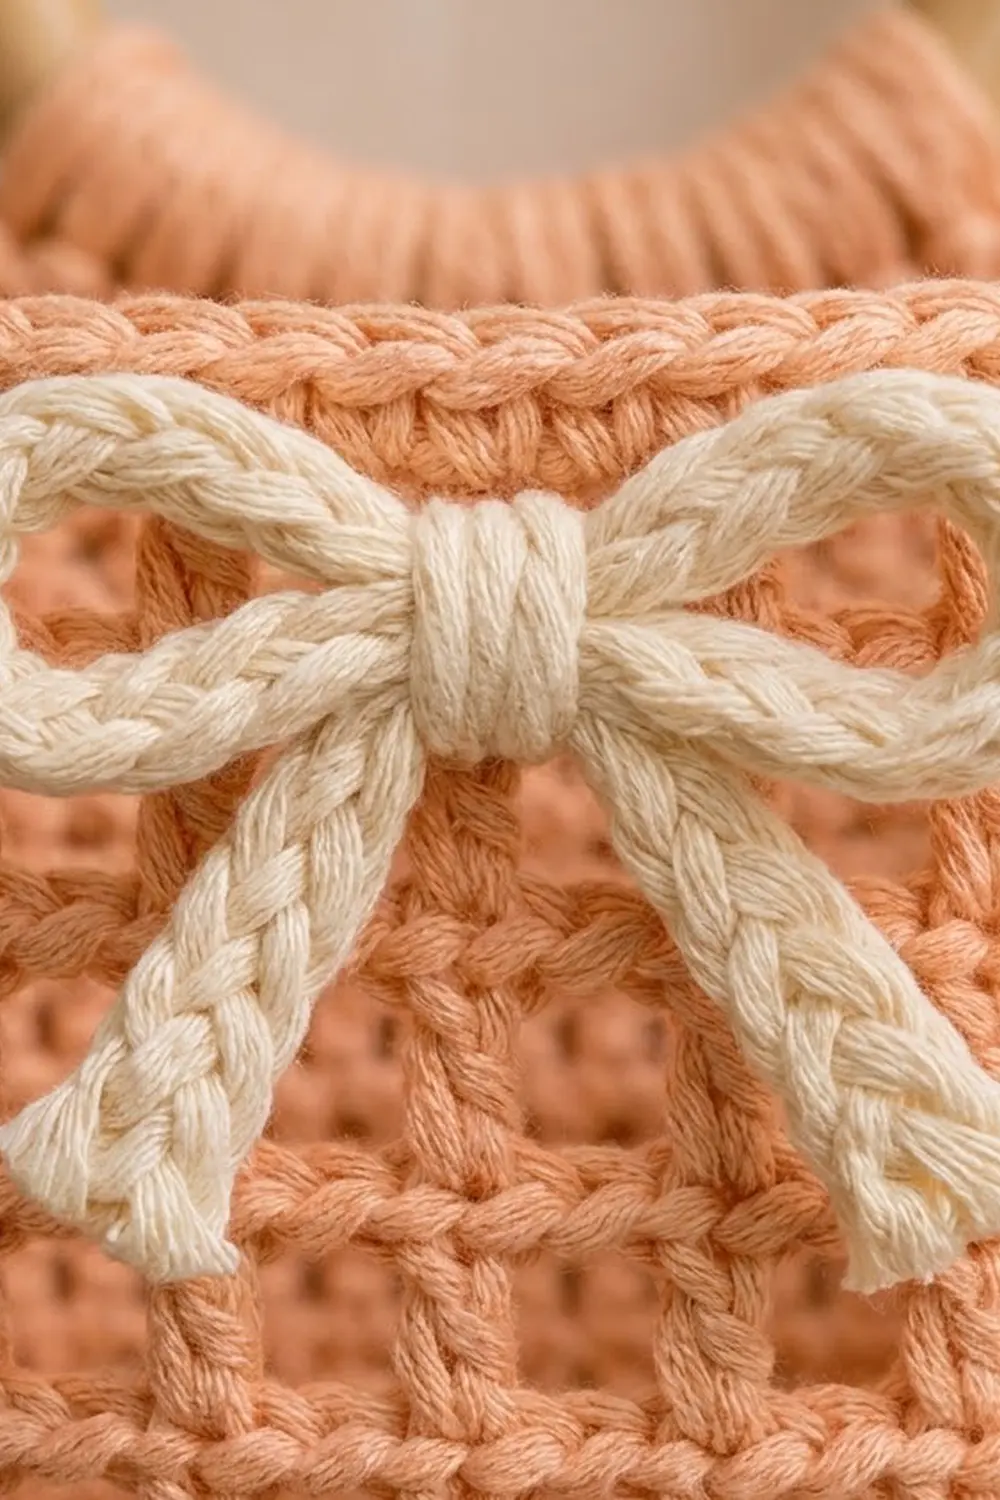
This hanging toilet paper holder stores three spare rolls in a single column of soft, rounded pockets. Each pocket has an open filet mesh body framed by solid bands, and a small cream bow sits on the front like a ribbon on a gift box.
The design uses two colors: a warm peach for the back panel and pockets, and a cream for the bows. The look is sweet, a little vintage, and practical enough for everyday bathroom use. The holder hangs from a 3 in (7.6 cm) wooden ring.
This pattern uses US crochet terms. The flat back panel measures 7 × 23 in (17.8 × 58.4 cm) with its border. Hung on the ring, the holder is about 23.5 in (59.7 cm) long. Each pocket is about 4.5 in (11.4 cm) across the base and 4.1 in (10.4 cm) tall.
Construction is simple. You crochet the back panel flat in rows, taper it into a strap, and add a two-round border. Each pocket is worked in the round from a flat circle base. The bows are short single crochet cords tied into shape. Then you sew the pockets to the panel and wrap the strap around the ring.
Finished Size and Construction
- Finished size: panel 7 × 23 in (17.8 × 58.4 cm); hanging length about 23.5 in (59.7 cm)
- Skill level: Easy-Intermediate
- Terminology: US
- Yarn weight: worsted (#4) cotton
- Hook: 5.0 mm (H-8)
- Number of pieces: 7 (1 back panel, 3 pockets, 3 bows), plus 1 wooden ring
- Layout: 3 pockets stacked in 1 vertical column
- Pocket size: base 4.5 in (11.4 cm) diameter; sides 4.1 in (10.4 cm) tall
- Panel size before border: 6 × 22 in (15.2 × 55.9 cm), including taper and strap
- Border depth: 2 rounds, 0.5 in (1.3 cm)
Materials
Choose a smooth worsted-weight cotton or cotton blend. Cotton holds the pocket shape well and handles bathroom humidity. The amounts below assume a yarn of about 85 m per 50 g.
- Peach (Color A): 250 g, about 425 m — back panel, border, and pockets
- Cream (Color B): 15 g, about 25 m — bows
Quantities include a margin of roughly 10-15 percent for gauge swatches and differences in tension.
Tools:
– 5.0 mm (H-8) crochet hook
– 1 wooden ring, 3 in (7.6 cm) diameter
– Tapestry needle
– 6 locking stitch markers
– Rust-proof pins
– Measuring tape
– Scissors
Abbreviations (US Terms)
- ch – chain
- sl st – slip stitch
- sc – single crochet
- dc – double crochet
- sc2tog – single crochet 2 together
- BLO – back loop only
- MR – magic ring
- st(s) – stitch(es)
- sp – space
- rnd – round
Special stitch – mesh square: one dc plus one ch-1 space. Every mesh square counts as 2 stitches.
Gauge and Checkpoints
Solid gauge: 14 sc and 16 rows = 4 in (10.2 cm).
Mesh gauge: 7 mesh squares and 7 mesh rounds = 4 in (10.2 cm).
Make one pocket first. It works as your gauge test and shows how the mesh behaves with your yarn.
Checkpoints:
– Pocket after Rnd 9: base is 4.5 in (11.4 cm) across and lies flat.
– Pocket after Rnd 19: sides are 4.1 in (10.4 cm) tall. The five mesh rounds measure about 2.9 in (7.4 cm).
– Panel after Row 1: 6 in (15.2 cm) wide.
– Panel after Row 64: 16 in (40.6 cm) long.
– Panel after Row 88: 22 in (55.9 cm) long.
If your piece is too big: go down one hook size, to 4.5 mm.
If your piece is too small: go up one hook size, to 5.5 mm.
Test with a standard roll. It is usually about 4.3 in (10.9 cm) wide and 4 in (10.2 cm) tall, and it should drop in easily.
Pocket (Make 3, Color A)
The base is a flat circle, and the sides rise straight up from it.
Base
Rnd 1: MR, 6 sc in ring. Join with sl st to first sc. (6 sts)
Rnd 2: Ch 1, 2 sc in each st around. Join. (12 sts)
Rnd 3: Ch 1, sc in next st, 2 sc in next st; repeat around. Join. (18 sts)
Rnd 4: Ch 1, sc in next 2 sts, 2 sc in next st; repeat around. Join. (24 sts)
Rnd 5: Ch 1, sc in next 3 sts, 2 sc in next st; repeat around. Join. (30 sts)
Rnd 6: Ch 1, sc in next 4 sts, 2 sc in next st; repeat around. Join. (36 sts)
Rnd 7: Ch 1, sc in next 5 sts, 2 sc in next st; repeat around. Join. (42 sts)
Rnd 8: Ch 1, sc in next 6 sts, 2 sc in next st; repeat around. Join. (48 sts)
Rnd 9: Ch 1, sc in next 7 sts, 2 sc in next st; repeat around. Join. (54 sts)
Checkpoint: the base is 4.5 in (11.4 cm) across.
Lower solid band
Rnd 10: Ch 1, sc in BLO of each st around. Join. (54 sts)
The front loops of Rnd 9 stay unused. They form a ridge that marks the bottom edge, and you will sew along it later.
Rnd 11: Ch 1, sc in each st around. Join. (54 sts)
Mesh body
Rnd 12: Ch 4 (counts as dc and ch 1), skip next st, dc in next st, ch 1, skip next st; repeat from * 25 more times. Join with sl st to 3rd ch of beginning ch-4. (27 dc and 27 ch-1 sps = 27 mesh squares, 54 sts)
Rnds 13–16: Ch 4 (counts as dc and ch 1), dc in next dc, ch 1; repeat from * 25 more times. Join to 3rd ch of beginning ch-4. (27 mesh squares, 54 sts per round)
Each dc sits directly on the dc below, so the grid comes out square and straight.
Upper solid rim
Rnd 17 (conversion): Ch 1, sc in same st, sc in next ch-1 sp, sc in next dc, sc in next ch-1 sp; repeat around. Join. (27 sc worked 1 per dc + 27 sc worked into the ch-1 sps = 54 sts)
Rnds 18–19: Ch 1, sc in each st around. Join. (54 sts)
Fasten off and leave a 24 in (61.0 cm) tail for sewing.
Checkpoint: the sides are 4.1 in (10.4 cm) tall. That is 5 solid rounds at 1.25 in (3.2 cm) plus 5 mesh rounds at about 2.9 in (7.4 cm).
Mark the back section: Lay the pocket flat with the round’s joining seam at the center back. Place markers to mark off the 19 sts of Rnd 19 centered on the seam: the seam st and 9 sts on each side of it. Mark the matching 19 unused front loops of Rnd 9 directly below. The other 35 sts form the rounded front.
Back Panel (Color A)
The panel is worked flat in rows. Turn at the end of every row. The ch 1 at the start of a row does not count as a stitch.
Foundation: Ch 22.
Row 1: Sc in 2nd ch from hook and in each ch across. (21 sts)
Rows 2–64: Ch 1, turn, sc in each st across. (21 sts)
Checkpoint: 6 × 16 in (15.2 × 40.6 cm).
Taper
Rows 65–72: Ch 1, turn, sc2tog, sc across to last 2 sts, sc2tog. Each row decreases by 2 stitches.
Row counts: Row 65 (19 sts), Row 66 (17 sts), Row 67 (15 sts), Row 68 (13 sts), Row 69 (11 sts), Row 70 (9 sts), Row 71 (7 sts), Row 72 (5 sts).
The taper adds 2 in (5.1 cm) and gives a total length of 18 in (45.7 cm).
Strap
Rows 73–88: Ch 1, turn, sc in each st across. (5 sts)
Checkpoint: 22 in (55.9 cm) total length. Do not fasten off. Continue to the border.
Make All Pieces
- Color A: 1 back panel, 3 pockets
- Color B: 3 bows (instructions below)
Bow (Make 3, Color B): Ch 36. Sc in back bump of 2nd ch from hook and each ch across. (35 sts) Fasten off and leave a 12 in (30.5 cm) tail.
The cord curls slightly into a rounded rope about 10 in (25.4 cm) long. Fold two loops of about 1.25 in (3.2 cm) each, and let the ends hang as tails about 1.75 in (4.4 cm) long. Wrap the tail around the center 5 times and secure it at the back. Each finished bow is about 2.75 in (7.0 cm) wide.
Layout (front view, top to bottom):
        [ ring ]
         |strap|
        / taper \
   [ panel rows 61-64 ]
   [ POCKET 3 + bow   ]  base Row 44, rim Row 60
   [ gap rows 40-43   ]
   [ POCKET 2 + bow   ]  base Row 23, rim Row 39
   [ gap rows 19-22   ]
   [ POCKET 1 + bow   ]  base Row 2,  rim Row 18
   [ bottom border    ]
The pockets repeat every 21 rows, which is 5.25 in (13.3 cm).
Border (Back Panel)
Border gauge: along the side edges, work 7 sc for every 8 rows. Row height is 16 rows per 4 in and stitch width is 14 sts per 4 in, so 7 sc per 8 rows lays the edge flat without stretching or ruffling it.
Rnd 1: Ch 1, turn the work 90 degrees and sc down the side.
– Side (each): Rows 88–73 of the strap: 14 sc (7 per 8 rows). Rows 72–65 of the taper: 8 sc (1 per row, because the diagonal edge is longer). Rows 64–1: 56 sc (7 per 8 rows). Side total: 78 sts.
– Bottom: working into the opposite side of the foundation ch, 3 sc in first ch, sc in next 19 ch, 3 sc in last ch. (25 sts, both corner groups included)
– Other side: 78 sts, worked as above in reverse order.
– Top of strap: 3 sc in first st, sc in next 3 sts, 3 sc in last st. (9 sts, both corner groups included)
Join to first sc. (78 + 25 + 78 + 9 = 190 sts)
Rnd 2: Ch 1, sc in each st around, working 3 sc in the center st of each of the 4 corner groups. Join. (Bottom 29, sides 78 each, top 13 = 198 sts)
Fasten off and weave in the ends.
Why the math works: each corner gains 2 sts per round. Four corners × 2 = 8, and 190 + 8 = 198. The panel grows by 0.5 in (1.3 cm) on each edge, so 6 × 22 in becomes 7 × 23 in (17.8 × 58.4 cm). The strap becomes about 2.4 in (6.1 cm) wide.
Joining
Method: whipstitch with Color A and the pocket’s long tail.
Stitch-to-stitch logic: the 19 marked back sts of each pocket match 19 panel sts exactly. Use panel sts 2–20 of the target row. That leaves panel st 1, panel st 21, and the border free on each side.
- Pocket 1 rim: pin the 19 marked sts of Rnd 19 to sts 2–20 of panel Row 18. Whipstitch through both loops of the pocket and the matching panel st, 1 stitch to 1 stitch.
- Pocket 1 base: pin the 19 marked front loops of Rnd 9 to sts 2–20 of panel Row 2. Whipstitch 1 to 1 in the same way.
- Pocket 2: rim to Row 39 and base to Row 23.
- Pocket 3: rim to Row 60 and base to Row 44.
Because the seams are straight and only 19 sts long, the 35 front sts bulge forward into the rounded D-shape.
Tension: pull each stitch snug, but stop before the panel puckers. The panel should stay 7 in (17.8 cm) wide across every seam line.
Bows: center a bow on the front of each pocket over mesh Rnds 13–15. Sew through the wrapped center and the mesh, and tack each loop tip down with one small stitch.
Ring: pass the strap through the wooden ring from front to back. Fold it down until the strap’s top edge reaches Row 74, then whipstitch the top edge and both strap sides to the back.
Size checkpoint: the panel is still 7 in (17.8 cm) wide, and the hanging length is about 23.5 in (59.7 cm) to the top of the ring.
Final Blocking
- Lightly mist the holder with water, or soak the panel only and press out the water in a towel.
- Lay it flat face up on a blocking mat.
- Pin the panel to 7 × 23 in (17.8 × 58.4 cm) before you fold the strap, or check the 7 in (17.8 cm) width if the strap is already sewn.
- Square the mesh by gently pulling each pocket’s grid so the columns run straight up.
- Fill each pocket with a rolled towel or a toilet paper roll in a plastic bag so it dries in its rounded shape.
- Fluff the bow loops with your fingers.
- Leave everything in place until it is completely dry.
Final Quality-Control Checklist
- Each pocket has 54 sts in every round and 27 mesh squares in each mesh round.
- Each pocket base is 4.5 in (11.4 cm) across and lies flat.
- Each pocket’s sides are 4.1 in (10.4 cm) tall.
- The panel has 21 sts for Rows 1–64, tapers to 5 sts, and has 16 strap rows.
- Border Rnd 1 has 190 sts and Rnd 2 has 198 sts.
- Each pocket is attached at 19 sts along the rim and 19 sts along the base.
- The pockets sit at even 5.25 in (13.3 cm) intervals.
- The bows are centered and secure.
- The strap is firmly sewn around the ring.
- All ends are woven in.
Troubleshooting
- Base cups or ruffles: your tension is changing. Cupping means it is too tight; ruffling means it is too loose. Redo Rnds 7–9 with even tension.
- Mesh leans or spirals: make sure you join into the 3rd ch of the ch-4 and work every dc into the dc below.
- Roll does not fit: your mesh gauge is tight. Go up a hook size for Rnds 12–16 only.
- Panel edges wave: you worked too many border sts. Keep to 7 sc per 8 rows.
- Pockets droop forward: the base seam is too loose. Resew it at 1 stitch to 1 stitch.
- Bows look flat: wrap the center tighter and tack the loop tips down.
Care
Hand wash in cool water with mild soap, press out the water, and dry flat. Reshape the pockets with rolled towels while they dry.

Final Notes
The measurement chain is short and easy to check. The gauge of 14 sc × 16 rows = 4 in (10.2 cm) gives a pocket base 4.5 in (11.4 cm) across, with 54 sts at 27 mesh squares per round. Five solid rounds and five mesh rounds make 4.1 in (10.4 cm) sides. The 21-st panel is 6 in (15.2 cm) wide and reaches 22 in (55.9 cm) with the taper and strap. The 190/198-st border brings it to 7 × 23 in (17.8 × 58.4 cm). Nineteen-stitch seams set the three pockets 21 rows apart, and the ring gives a hanging length of about 23.5 in (59.7 cm).
Check each stage before you move on, and the holder will come together smoothly. Happy crocheting!