

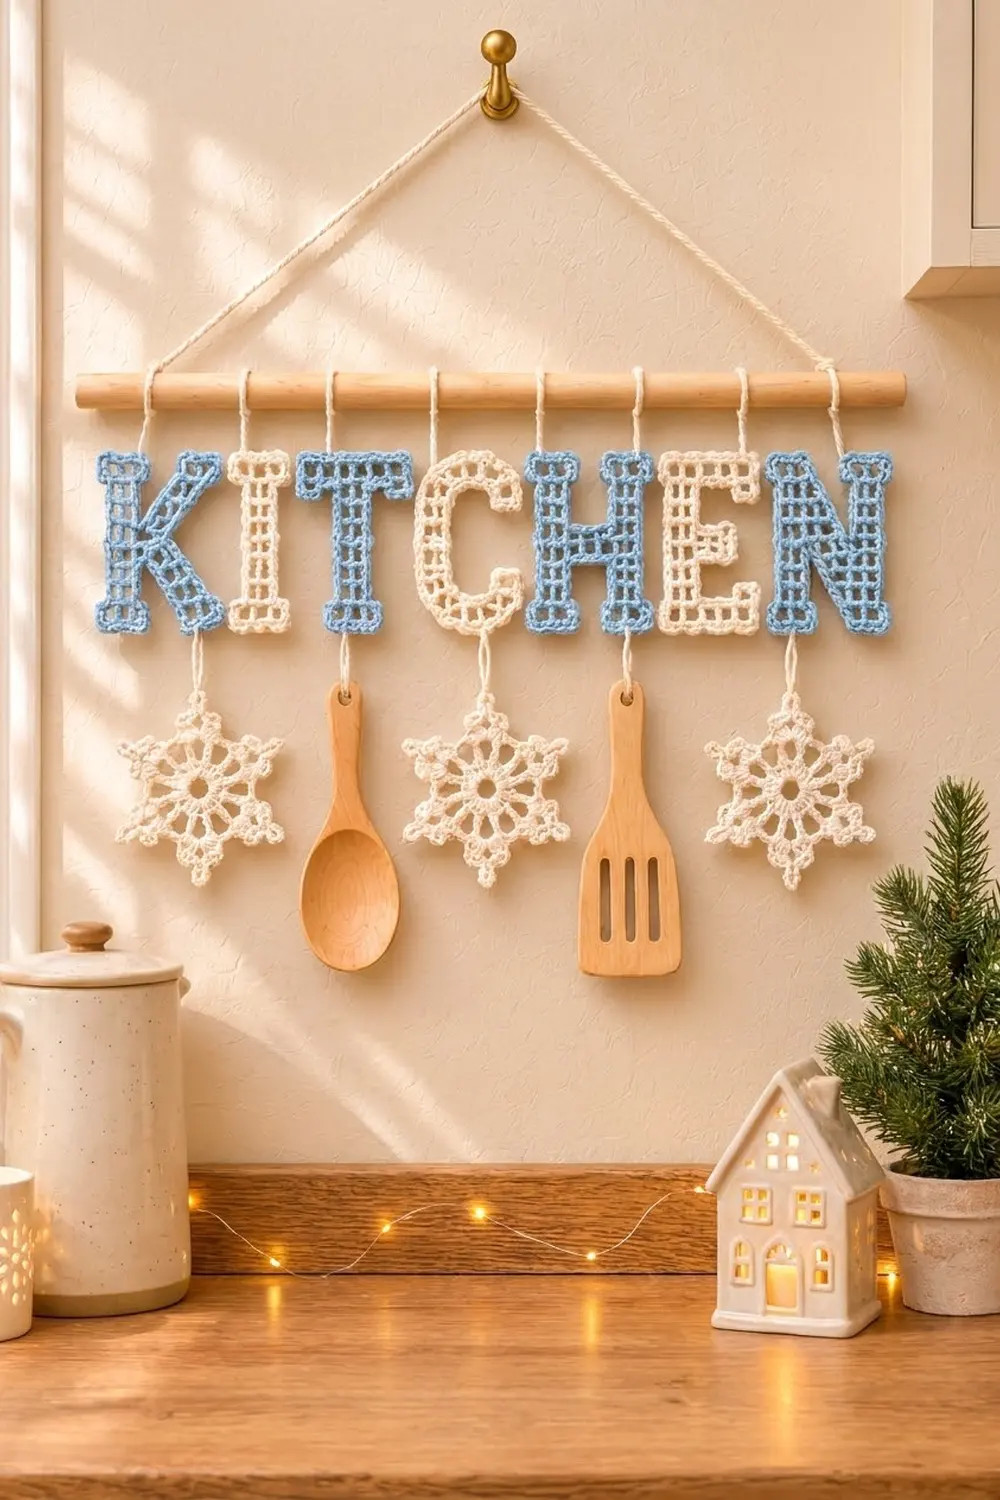
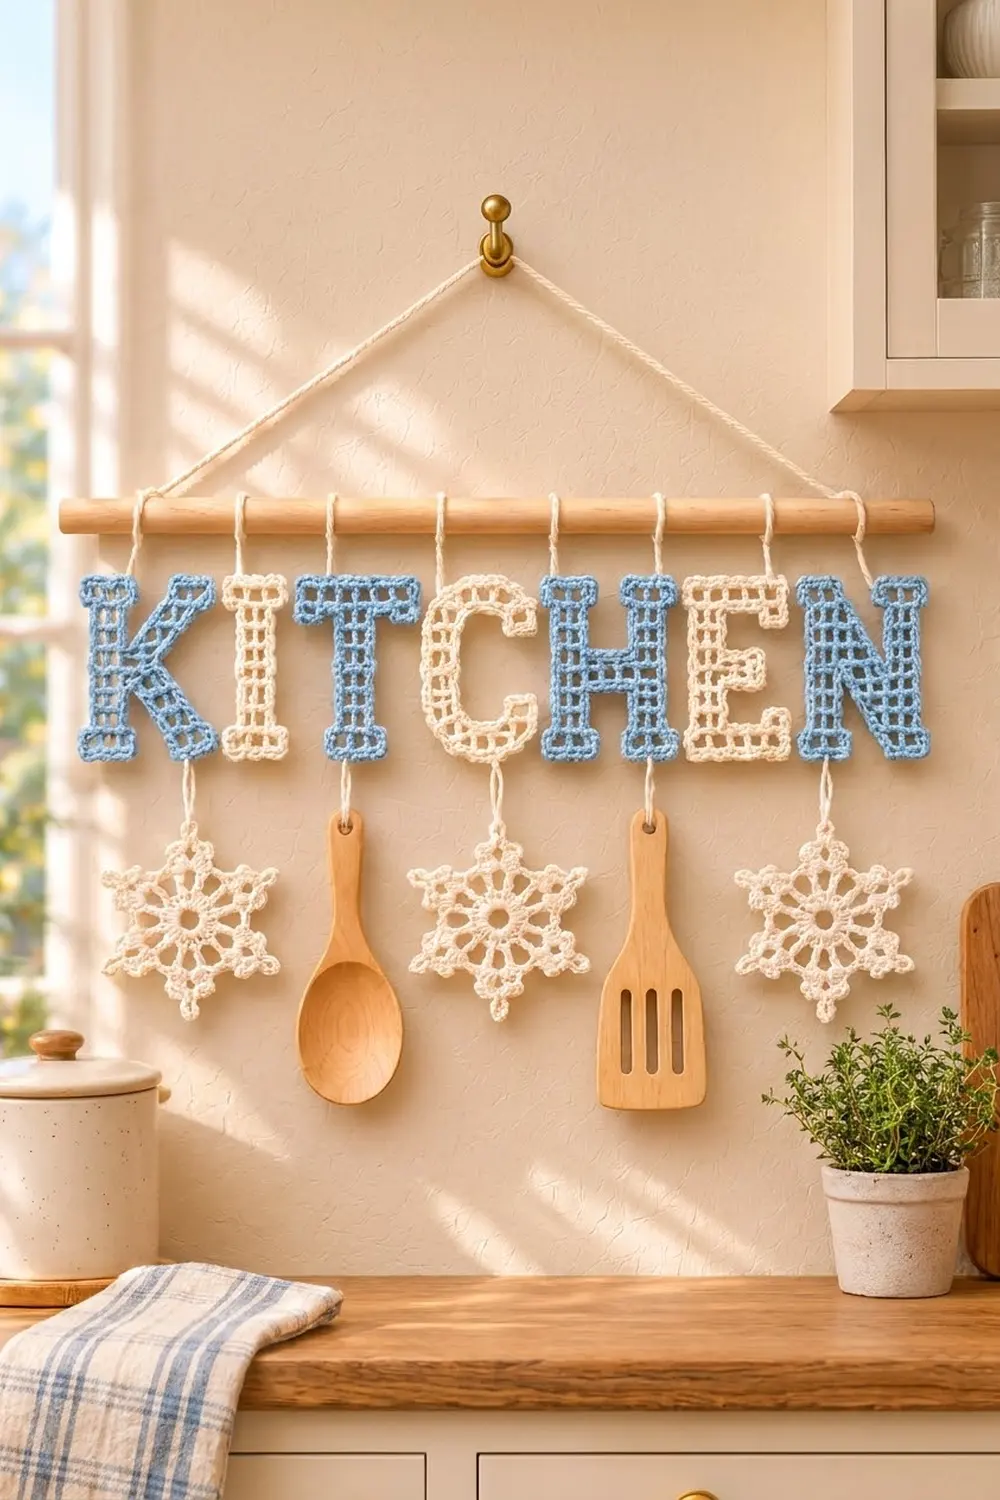
This cozy wall hanging spells “KITCHEN” in chunky, open-grid letters. Each letter is built from square filet-style mesh cells and finished with a crisp single-crochet outline, so the letters read clearly from across the room. Three lacy snowflakes hang below the K, C and N. A wooden spoon and a wooden spatula fill the spaces in between.
The colors are soft powder blue and warm cream. The K, T, H and N are blue, and the I, C, E and all three snowflakes are cream. The look is Scandinavian farmhouse with a gentle winter touch.
The pattern uses US crochet terms. Each finished letter measures 3.5 in × 4.5 in (8.9 cm × 11.4 cm); the narrower I measures 2.5 in × 4.5 in (6.4 cm × 11.4 cm). Each snowflake measures 4 in (10.2 cm) from point to point. The full letter row is 26.5 in (67.3 cm) wide.
Each letter is made from small rectangular mesh blocks. You seam the blocks into the letter shape, then work one outline round to unify the letter. The snowflakes are worked in the round. Finally, every piece is tied to a 30 in (76.2 cm) dowel.
Finished Size and Construction
- Finished letter size: 3.5 × 4.5 in (8.9 × 11.4 cm); the I is 2.5 × 4.5 in (6.4 × 11.4 cm)
- Letter size before the outline: 3 × 4 in (7.6 × 10.2 cm); the I is 2 × 4 in (5.1 × 10.2 cm)
- Outline (border) depth: 0.25 in (0.6 cm) on every side
- Snowflake: 4 in (10.2 cm) point to point
- Skill level: Intermediate
- Terminology: US
- Yarn weight: Worsted (#4) cotton
- Hook: 4.0 mm (G-6)
- Number of pieces: 10 (7 letters and 3 snowflakes), hung separately
- Layout: one row of 7 letters, with 3 snowflakes and 2 wooden utensils below
- Cell size: 0.5 in (1.3 cm) square
- Hanging height (dowel to bottom of the snowflakes): about 10.5 in (26.7 cm)
Materials
Use a smooth, mercerized or matte worsted cotton. Cotton holds the square mesh shape and blocks crisply. The amounts below assume about 1.54 m per gram, which is typical for a 71 g / 109 m cotton ball.
- Powder blue: 35 g (54 m)
- Cream: 45 g (69 m), plus 2 yd (1.8 m) for the hanging ties
The quantities include a margin of about 25% for gauge swatches and seaming tails.
Tools:
– 4.0 mm (G-6) hook
– Tapestry needle
– Scissors
– Rust-proof pins and a blocking mat
– Wooden dowel, 30 in (76.2 cm) long and 0.5 in (1.3 cm) thick
– 36 in (91.4 cm) of cream cotton cord for the hanger
– 1 small wooden spoon and 1 slotted wooden spatula, about 6 in (15.2 cm) long, each with a hanging hole
– Fabric stiffener (optional)
Abbreviations (US Terms)
- ch – chain
- sl st – slip stitch
- sc – single crochet
- dc – double crochet
- sk – skip
- sp(s) – space(s)
- sc2tog – single crochet 2 together
- rep – repeat
- RS – right side
Mesh cell: one dc plus the ch-1 sp beside it. Each finished cell is a 0.5 in (1.3 cm) open square.
Block W × H: a rectangle of mesh that is W cells wide and H rows tall.
Gauge and Checkpoints
Test one block before you start the letters. Make a 2 × 2 block (see the block recipe below). It should measure 1 × 1 in (2.5 × 2.5 cm).
- If the block is too big: go down to a 3.5 mm hook.
- If it’s too small: go up to a 4.5 mm hook.
- If the cells are taller than they are wide: shorten your dc by pulling the first loop snug.
Checkpoints:
– Each block: W × 0.5 in wide by H × 0.5 in tall.
– Each assembled letter before the outline: 3 × 4 in (7.6 × 10.2 cm). The I should be 2 × 4 in (5.1 × 10.2 cm).
– After the outline: the letter grows by 0.5 in (1.3 cm) in each direction.
– Snowflake: see the measurements after each round.
Block Recipe (All Letters)
Foundation: Ch (2W + 4).
Row 1: Dc in 6th ch from hook. The skipped ch count as the first dc and a ch-1 sp. *Ch 1, sk 1 ch, dc in next ch; rep from * across. (W + 1 dc, W ch-1 sps)
Row 2 and all following rows: Ch 4 (counts as dc and ch 1), turn. Sk the first ch-1 sp, dc in next dc, *ch 1, sk ch-1 sp, dc in next dc; rep from * across, working the last dc into the turning chain. (W + 1 dc, W ch-1 sps)
Work H rows in total. Fasten off and leave an 8 in (20.3 cm) tail for seaming.
Example: a 2 × 8 post starts with ch 8 and has 3 dc and 2 ch-1 sps in every one of its 8 rows.
Letter Block Maps
The letters sit on a grid 6 cells wide and 8 cells tall; the I is 4 cells wide. Columns are numbered from the left and rows from the bottom.
K (blue)
– Post: 2 × 8 in columns 1–2
– Middle block: 2 × 4 in columns 3–4, rows 3–6
– Upper arm: 2 × 3 in columns 5–6, rows 6–8
– Lower arm: 2 × 3 in columns 5–6, rows 1–3
I (cream)
– Top bar: 4 × 2 in rows 7–8
– Stem: 2 × 4 in columns 2–3, rows 3–6
– Bottom bar: 4 × 2 in rows 1–2
T (blue)
– Top bar: 6 × 2 in rows 7–8
– Stem: 2 × 6 in columns 3–4, rows 1–6
C (cream)
– Post: 2 × 8
– Top arm: 4 × 2 in columns 3–6, rows 7–8
– Bottom arm: 4 × 2 in columns 3–6, rows 1–2
H (blue)
– Two posts: 2 × 8 each, in columns 1–2 and 5–6
– Bar: 2 × 2 in columns 3–4, rows 4–5
E (cream)
– Post: 2 × 8
– Top arm: 4 × 2 in rows 7–8
– Bottom arm: 4 × 2 in rows 1–2
– Middle arm: 3 × 2 in columns 3–5, rows 4–5
N (blue)
– Two posts: 2 × 8 each, in columns 1–2 and 5–6
– Diagonal step: 1 × 4 in column 3, rows 4–7
– Diagonal step: 1 × 4 in column 4, rows 2–5
The two 1 × 4 steps create a stair-stepped diagonal from upper left to lower right.
Make All Pieces
Blue blocks:
– 2 × 8: 6 (K post, two H posts, two N posts, and the C/E posts are cream, below)
– 2 × 4: 1
– 2 × 3: 2
– 2 × 6: 1
– 6 × 2: 1
– 2 × 2: 1
– 1 × 4: 2
That’s 14 blue blocks in total: K 4, T 2, H 3, N 4. (The count of 2 × 8 posts in blue is 5: one for K, two for H, two for N.)
Cream blocks:
– 2 × 8: 2 (C and E posts)
– 4 × 2: 6
– 2 × 4: 1
– 3 × 2: 1
That’s 10 cream blocks in total: I 3, C 3, E 4.
Snowflakes: 3, in cream.
Layout:
=========== DOWEL 30 in (76.2 cm) ===========
 [K]  [I]  [T]  [C]  [H]  [E]  [N]
  |         |    |         |    |
 (*)      spoon (*)    spatula (*)
The gap between neighboring letters is 0.5 in (1.3 cm).
Joining: Seaming the Blocks
- Lay each letter’s blocks RS up on the grid shown in its block map.
- Butt the edges together so the dc posts line up with each other.
- Whipstitch with a tail: work 2 stitches per cell edge, catching one strand from each block.
Seam lengths:
– K: middle to post, 4 cells. Upper arm to middle at row 6, 1 cell. Lower arm to middle at row 3, 1 cell.
– I and T: stem to bar(s), 2 cells each.
– C and E: each arm to post, 2 cells.
– H: bar to each post, 2 cells.
– N: column 3 to the left post, 4 cells. Column 3 to column 4, 2 cells. Column 4 to the right post, 4 cells.
Tension: pull each stitch only until the edges meet. If you pull tighter, the seam puckers and the cells stop being square.
Size check: each seamed letter should measure 3 × 4 in (7.6 × 10.2 cm), or 2 × 4 in (5.1 × 10.2 cm) for the I.
Border: Letter Outline
Border gauge: 4 sc = 1 in (2.5 cm), which is 2 sc per cell edge.
Join the letter’s own color at any outer corner. Work 1 round of sc around the letter:
- Side edges: work 2 sc around each row-end post.
- Top and bottom edges: work 2 sc in each ch-1 sp, skipping the dc.
- Each outer corner: work 1 extra sc into the corner dc.
- Each inner corner: work the last sc of one edge and the first sc of the next edge as one sc2tog.
Sl st to the first sc and fasten off.
Why the math works: each cell edge on the outline gets 2 sc, so 2 × P sc in total, where P is the number of cell edges around the letter. Each outer corner adds 1 sc and each inner corner removes 1. Any closed outline made only of straight lines and right-angle turns has exactly 4 more outer corners than inner ones. That makes every letter’s total 2P + 4.
Totals per letter:
| Letter | Cell edges (P) | Outline total |
|---|---|---|
| K | 40 | 84 sc |
| I | 28 | 60 sc |
| T | 28 | 60 sc |
| C | 36 | 76 sc |
| H | 40 | 84 sc |
| E | 42 | 88 sc |
| N | 40 | 84 sc |
Per-side breakdown for the H (it adds up to 80, then +8 for outer corners and −4 for inner corners = 84):
– Outer left side: 16
– Top of the left post: 4
– Top notch: down 6, across 4, up 6
– Top of the right post: 4
– Outer right side: 16
– Bottom of the right post: 4
– Bottom notch: up 6, across 4, down 6
– Bottom of the left post: 4
Snowflakes (Make 3, Cream)
Rnd 1: Ch 6 and sl st to form a ring. Ch 3 (counts as dc), work 11 dc in the ring, sl st to the top of the ch-3. (12 dc)
Checkpoint: 1.25 in (3.2 cm) across.
Rnd 2: Ch 3, dc in next dc, ch 3. Dc in next 2 dc, ch 3; rep from * 4 more times. Sl st to the top of the ch-3. (12 dc, 6 ch-3 sps)
Checkpoint: 2 in (5.1 cm) across.*
Rnd 3: Sl st in next dc and into the ch-3 sp. Ch 3, work (2 dc, ch 3, 3 dc) in the same sp, ch 2. Work (3 dc, ch 3, 3 dc) in next ch-3 sp, ch 2; rep from * 4 more times. Sl st to the top of the ch-3. (36 dc, 6 ch-3 tips, 6 ch-2 sps)
Checkpoint: 3 in (7.6 cm) across.*
Rnd 4: Sl st in next 2 dc and into the ch-3 tip. Ch 1, then work (sc, ch 3, sc, ch 5, sc, ch 3, sc) in the same tip. Ch 4, sc in next ch-2 sp, ch 4. Work (sc, ch 3, sc, ch 5, sc, ch 3, sc) in next tip, ch 4, sc in next ch-2 sp, ch 4; rep from * 4 more times. Sl st to the first sc. (30 sc, 6 ch-5 points, 12 ch-3 picots, 12 ch-4 sps)
Checkpoint: 4 in (10.2 cm) point to point.*
Fasten off and weave in the ends.
Hanging
- Letters: cut seven 10 in (25.4 cm) cream strands. Thread one through the center of each letter’s top outline. Tie it around the dowel so the top of the letter hangs 1 in (2.5 cm) below the dowel.
- Snowflakes: tie each snowflake by one ch-5 point to the bottom center of the K, C or N, leaving a 1 in (2.5 cm) gap.
- Utensils: tie the spoon below the T and the spatula below the E the same way.
- Hanger: knot the 36 in (91.4 cm) cord to both ends of the dowel.
Final Blocking
- Wet-block each letter and snowflake separately. Do this before hanging.
- Soak them in cool water, then press them between towels.
- Pin each letter to 3.5 × 4.5 in (8.9 × 11.4 cm), or 2.5 × 4.5 in (6.4 × 11.4 cm) for the I. Use a ruler so every cell is square.
- Pin each snowflake to 4 in (10.2 cm), with a pin in each ch-5 point and each picot.
- If you want crisper pieces, brush on stiffener now.
- Dry them completely, at least 12 hours.
Final Quality-Control Checklist
- Every cell is open and square, 0.5 in (1.3 cm).
- Each letter’s outline total matches the table.
- The letters’ tops line up evenly, 1 in (2.5 cm) below the dowel.
- The letter row measures 26.5 in (67.3 cm) wide.
- The snowflakes measure 4 in (10.2 cm), with 6 even points.
- All ends are woven in, and the ties are knotted securely.
Troubleshooting
- Letter edges ruffle: you have too many sc. Recount the inner corners and make sure each one is an sc2tog.
- Letter edges cup: you have too few sc. Check for exactly 2 sc per cell edge.
- Cells look like rectangles: adjust your dc height, or block harder along the short direction.
- Floppy K arms: re-sew the 1-cell seams with 3 stitches instead of 2.
- Snowflake dome: loosen the ch-4 sps in Rnd 4 to ch 5.
Care
Hand wash in cool water and lay flat to dry. If you used stiffener, dust the pieces instead of washing them, and re-stiffen if they soften.
Final Notes
Here’s the measurement chain:
– One 0.5 in (1.3 cm) cell
– A 3 × 4 in (7.6 × 10.2 cm) letter grid
– A 0.25 in (0.6 cm) outline, giving a 3.5 × 4.5 in (8.9 × 11.4 cm) letter
– Seven letters with 0.5 in (1.3 cm) gaps, making a 26.5 in (67.3 cm) row on a 30 in (76.2 cm) dowel
– 4 in (10.2 cm) snowflakes underneath
If your gauge block and each checkpoint match, the hanging will come together evenly. Happy crocheting!