

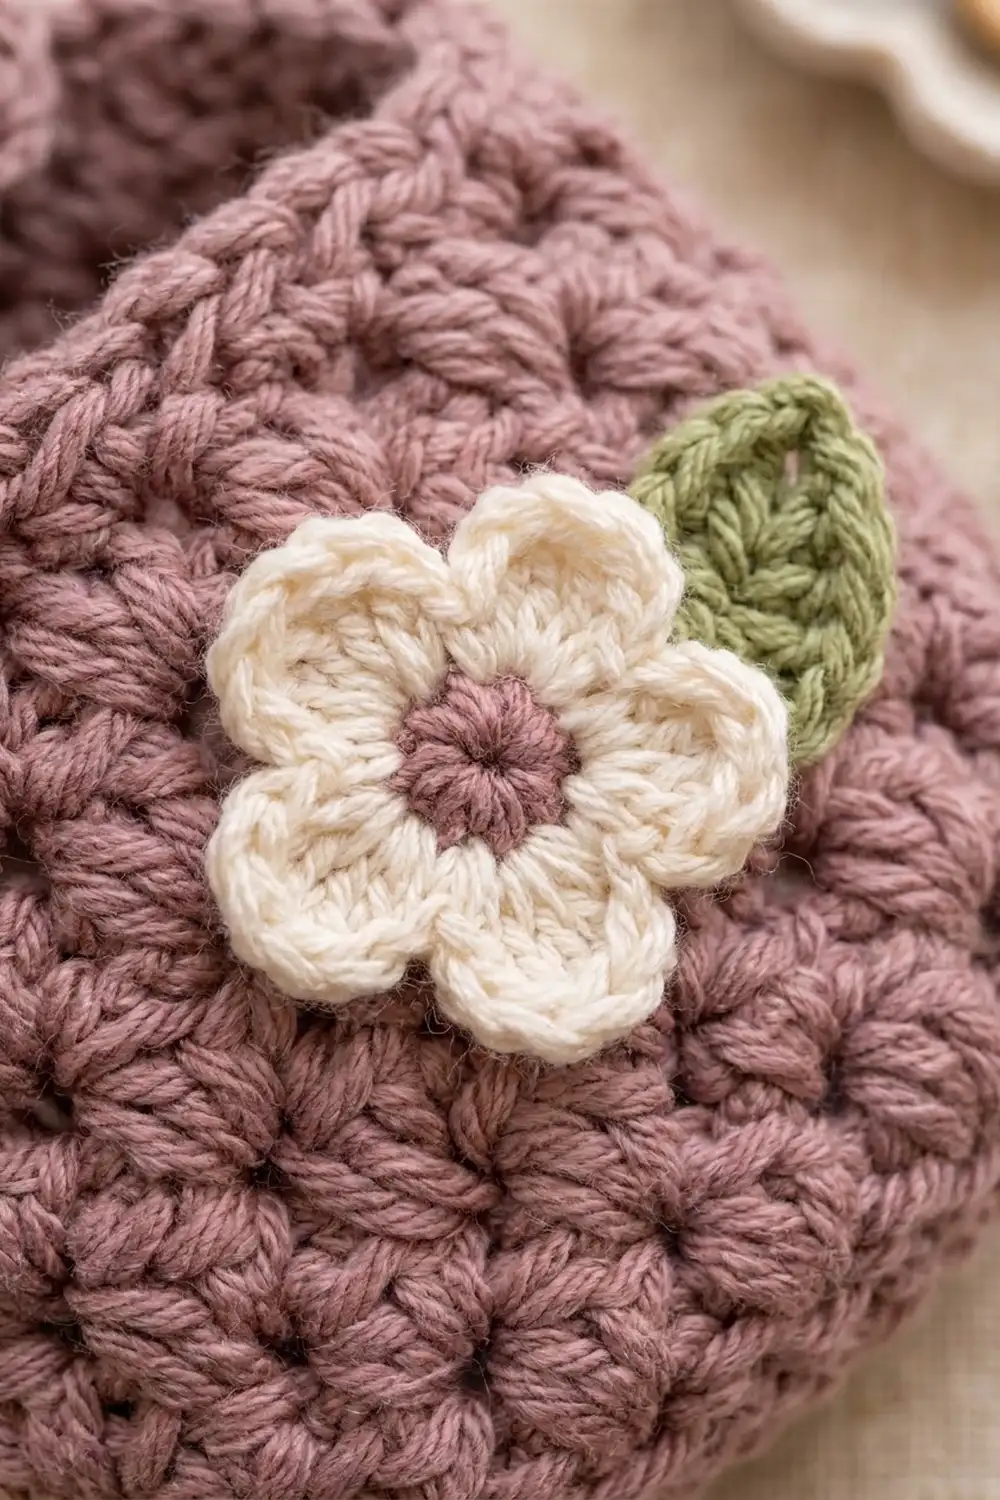
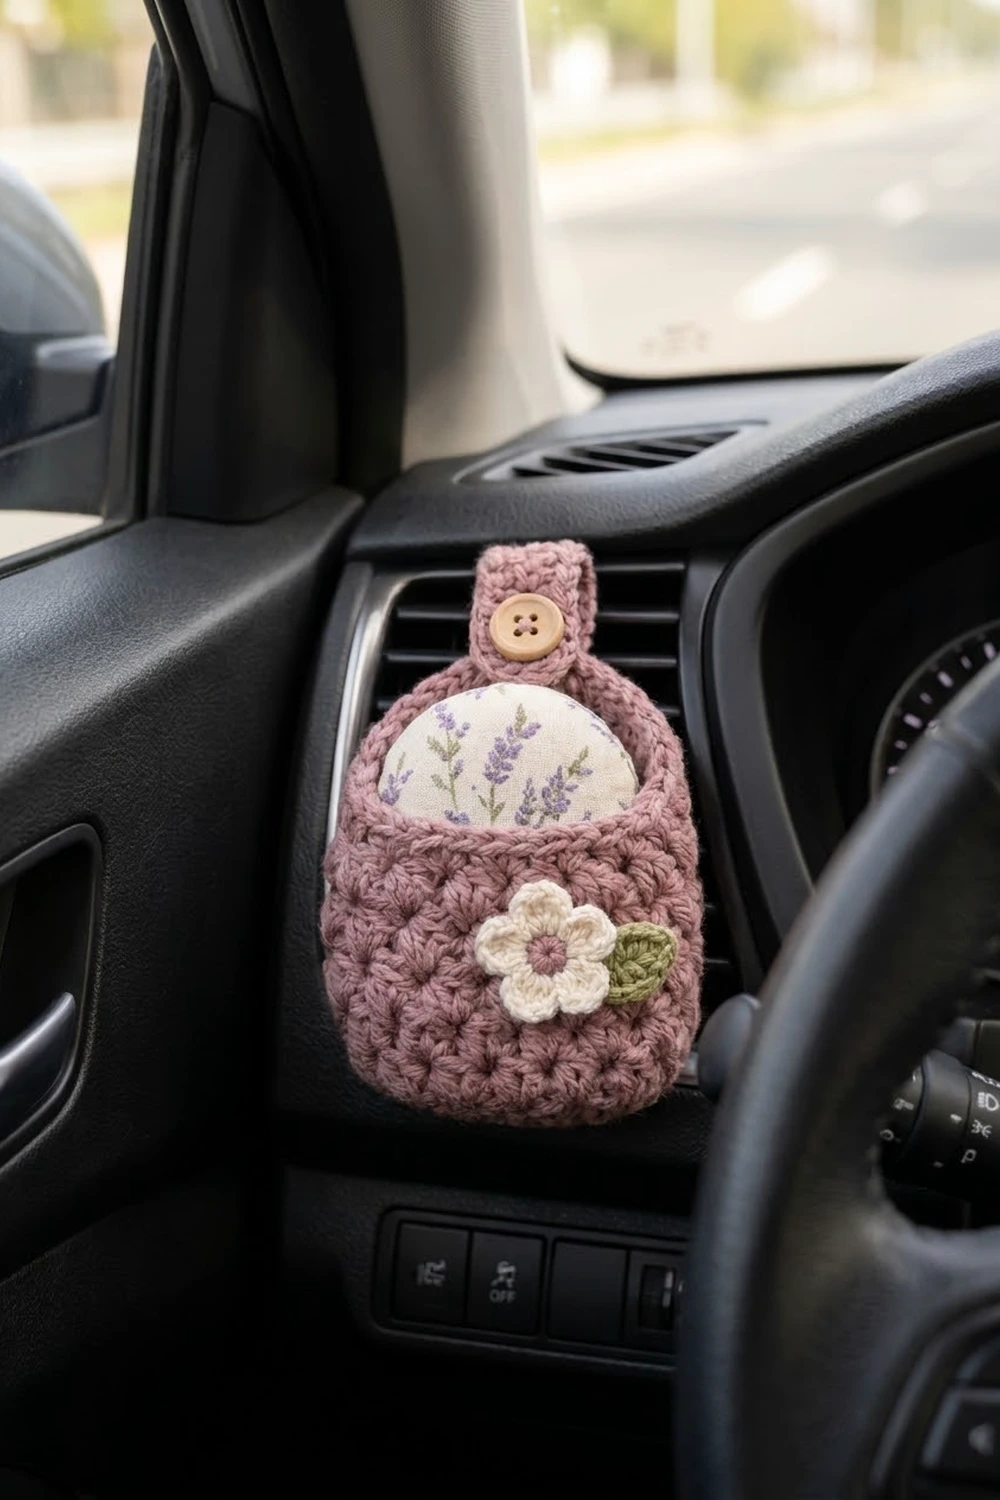
This little pouch clips onto a car air vent and holds a scented sachet, a lip balm or a folded note. It is worked in dusty-mauve cotton and covered in small offset shells that look like tiny stars. A cream flower with a mauve center and a sage-green leaf sit on the lower front. A wooden button closes the strap around the vent slat.
The style is soft and cottage-like, and it works up quickly. A round lavender-print sachet tucked inside adds a gentle scent each time the air runs. This pattern uses US crochet terms throughout.
The finished pouch measures about 3.5 in (8.9 cm) wide, 3.2 in (8.1 cm) tall at the front and 5 in (12.7 cm) tall at the back. Laid flat with the strap open, it measures about 9 in (22.9 cm) from base to strap tip.
You start with a single crochet oval base, then work the walls in the round with alternating shell rounds. Next, the back half is worked in rows that shape a curved panel and narrow into the strap with its buttonhole. One edging round finishes all open edges. Last, you add the flower, the leaf and the button.
Finished Size and Construction
- Finished size: 3.5 in (8.9 cm) wide, 3.2 in (8.1 cm) front height, 5 in (12.7 cm) back height
- Total flat length (strap open, after border): 9 in (22.9 cm)
- Skill level: Easy-intermediate
- Terminology: US
- Yarn weight: Worsted (#4) cotton
- Hook: 4.0 mm (G-6)
- Number of pieces: 1 pouch, plus 2 small sewn-on appliqués (flower and leaf)
- Layout: single item, no joining
- Base size: 3.25 in × 1 in (8.3 × 2.5 cm)
- Size before border: 8.8 in (22.4 cm) flat length
- Border depth: 1 round of sc, about 0.2 in (0.5 cm)
Materials
Choose a smooth worsted-weight cotton or cotton blend. Cotton holds the shell texture crisply and doesn’t go limp in a warm car. Avoid very fuzzy yarn, because it hides the star pattern.
- Dusty mauve (main color, MC): 25 g / 45 m
- Cream (flower petals): 3 g / 6 m
- Sage green (leaf): 2 g / 4 m
All quantities include a margin of about 20% for gauge swatching and weaving in ends.
Tools:
– 4.0 mm (G-6) crochet hook
– Tapestry needle
– 1 wooden 4-hole button, 5/8 in (1.6 cm)
– 2 stitch markers
– Scissors and a ruler
– Optional: round fabric sachet with dried lavender, about 2.75 in (7.0 cm) across
Abbreviations (US Terms)
- ch – chain
- sl st – slip stitch
- sc – single crochet
- hdc – half double crochet
- dc – double crochet
- sc2tog – single crochet 2 together
- blo – back loop only
- st(s) – stitch(es)
- rnd – round
- sk – skip
Special stitch: shell. Work 3 dc in the same stitch. The center dc of each shell is the anchor for the next round.
Gauge and Checkpoints
- Single crochet: 16 sts and 18 rows = 4 in (10.2 cm), so each sc row is about 0.22 in (0.6 cm) tall.
- Shell pattern: 16 sts (4 repeats of shell + sc) = 4 in (10.2 cm), and 4 rnds = 2 in (5.1 cm).
The pouch is small, so the pouch itself serves as your swatch. Measure at each checkpoint:
- After Rnd 2: the base oval measures 3.25 in × 1 in (8.3 × 2.5 cm).
- After Rnd 8: the walls measure about 2.75 in (7.0 cm) tall, and the flattened width is 3.5 in (8.9 cm).
- After Rnd 10: the front height is 3.2 in (8.1 cm).
- After Row 8: the back height is 5 in (12.7 cm).
- After Row 25: the total flat length is 8.8 in (22.4 cm).
If the piece is too big, go down to a 3.75 mm hook. If it is too small, go up to a 4.5 mm hook. A pouch that comes out too wide will hang loosely and may tip forward on the vent, so check the base first.
Pattern
Base (MC)
Foundation: Ch 11.
Rnd 1: Sc in 2nd ch from hook, sc in next 8 ch, 3 sc in last ch. Rotate and work along the underside of the chain: sc in next 8 ch, 2 sc in the same ch as the first sc. Join with sl st to first sc. (22 sts)
Rnd 2: Ch 1. 2 sc in first st, sc in next 8 sts, 2 sc in each of next 3 sts, sc in next 8 sts, 2 sc in each of last 2 sts. Join. (28 sts: 2 + 8 + 6 + 8 + 4)
Checkpoint: the base should be an oval 3.25 in × 1 in (8.3 × 2.5 cm).
Walls
Rnd 3 (base ridge): Ch 1, sc blo in each st around. Join. (28 sts)
This round turns the base into the walls and leaves a neat ridge around the bottom edge.
Rnd 4 (shell round A): Ch 1, sc in first st. Sk 1, shell in next st, sk 1, sc in next st. Repeat from * 5 more times, then sk 1, shell in next st, sk 1. Join to first sc. (7 shells + 7 sc = 28 sts)
Rnd 5 (shell round B): Ch 3 (counts as dc), 2 dc in the same st as the join. Sc in center dc of next shell, shell in next sc. Repeat from * 5 more times, then sc in center dc of last shell. Join to top of ch-3. (7 shells + 7 sc = 28 sts)
Rnd 6 (shell round A): Sl st in next dc (the center dc). Ch 1, sc in the same st. Shell in next sc, sc in center dc of next shell. Repeat from * 5 more times, then shell in last sc. Join to first sc. (7 shells + 7 sc = 28 sts)
Rnd 7: Repeat Rnd 5. (28 sts)
Rnd 8: Repeat Rnd 6. (28 sts)
Each shell sits directly above a sc from the round below. That offset is what creates the star-like texture.
Checkpoint: the walls should be about 2.75 in (7.0 cm) tall and the flattened width 3.5 in (8.9 cm).
Rnd 9: Ch 1, sc in each st around (1 sc in every sc and every dc). Join. (28 sts)
Rnd 10: Ch 1, sc in each st around. Join. (28 sts)
Checkpoint: the front height should be 3.2 in (8.1 cm).
Back Panel and Strap (worked in rows)
Flatten the pouch so the join sits at one side fold. Place a marker in the 14th st from the join. Stitches 1–14 form the back, and stitches 15–28 form the front rim. Because of the shell offset, the join may drift by 1 st. That’s fine, as long as the panel is centered on one flat side.
Row 1: Ch 1, sc in each of first 14 sts, turn. (14 sts)
Row 2: Ch 1, sc in each st, turn. (14 sts)
Row 3: Ch 1, sc2tog, sc in next 10 sts, sc2tog, turn. (12 sts)
Row 4: Ch 1, sc in each st, turn. (12 sts)
Row 5: Ch 1, sc2tog, sc in next 8 sts, sc2tog, turn. (10 sts)
Row 6: Ch 1, sc2tog, sc in next 6 sts, sc2tog, turn. (8 sts)
Row 7: Ch 1, sc2tog, sc in next 4 sts, sc2tog, turn. (6 sts)
Row 8: Ch 1, sc2tog, sc in next 2 sts, sc2tog, turn. (4 sts)
The decreases come faster from Row 5 onward, which curves the panel into the rounded arch.
Checkpoint: the back height should be 5 in (12.7 cm).
Rows 9–22 (strap): Ch 1, sc in each st, turn. (4 sts per row, 14 rows)
Row 23 (buttonhole): Ch 1, sc in first st, ch 2, sk 2, sc in last st, turn. (2 sc + ch-2 space)
Row 24: Ch 1, sc in first st, 2 sc in ch-2 space, sc in last st, turn. (4 sts)
Row 25: Ch 1, sc in each st. Do not fasten off. (4 sts)
The strap is 17 rows long, about 3.8 in (9.7 cm), and 1 in (2.5 cm) wide.
Checkpoint: the total flat length should be 8.8 in (22.4 cm).
Flower Appliqué
Center (MC): Make a magic ring and work 5 sc into it. Pull the ring closed and join. Fasten off. (5 sts)
Petals (cream): Join cream in any st. (Ch 2, 2 dc, ch 2, sl st) in the same st, sl st in next st. Repeat from * 4 more times, ending the last repeat in the starting st. (5 petals)
Fasten off and leave a 10 in (25.4 cm) tail. The flower measures about 1.5 in (3.8 cm) across.
Leaf Appliqué (sage green)
Ch 6. Work along the chain: sl st in 2nd ch from hook, sc in next ch, hdc in next ch, dc in next ch, then (hdc, sc) in last ch. Fasten off and leave a tail. The leaf is about 1 in (2.5 cm) long.
Border
Border gauge: this is sc edging at 4 sts per inch (1.6 per cm). Work 1 sc per stitch along stitch tops and 1 sc per row end along row edges.
Continue with the loop still on the hook from Row 25. The round below starts at the first front-rim stitch, so for a clean start, sl st along the edge to the first front-rim stitch next to the marker (st 15). Alternatively, fasten off after Row 25 and join fresh MC in st 15.
Edging Rnd:
– Front rim: sc in each of the 14 front sts (sts 15–28 of Rnd 10). (14)
– Back panel, first side: 1 sc in each row end of Rows 1–8. (8)
– Strap, first side: 1 sc in each row end of Rows 9–24. (16)
– Strap tip: 3 sc in the first st of Row 25, sc in next 2 sts, 3 sc in last st. (8)
– Strap, second side: 1 sc in each row end of Rows 24 back down to 9. (16)
– Back panel, second side: 1 sc in each row end of Rows 8 back down to 1. (8)
– Join to the first sc. Total: 14 + 8 + 16 + 8 + 16 + 8 = 70 sts. Fasten off.
Why the math works: the front rim takes one sc per existing stitch, so its width stays at 3.5 in (8.9 cm) with no ruffling. On the sides, sc rows (18 per 4 in) are only slightly shorter than sc stitches (16 per 4 in). That means 1 sc per row end lies flat on these short edges. The strap tip’s two 3-sc corners add the 4 extra stitches needed to turn each corner, and they are counted only once, inside the 8. The border adds about 0.2 in (0.5 cm), bringing the total flat length to 9 in (22.9 cm).
Final Blocking
- Weave in all ends except the tails on the flower and leaf.
- Lightly mist the pouch with water.
- Stuff the pouch loosely with a folded washcloth so it holds an oval shape 3.5 in (8.9 cm) wide.
- Pin the back panel flat and smooth the arch evenly. Pin the strap straight at 1 in (2.5 cm) wide.
- Let it dry completely, then remove the filler.
- Pin the flower to the lower right of the front, with its center about 1 in (2.5 cm) above the base ridge. Tuck the leaf behind the flower’s right edge so it points up and outward.
- Sew around the flower center and petal bases, then along the middle of the leaf.
- Sew the button to the outer face of the strap at Row 12, about 0.9 in (2.3 cm) above the top of the back panel.
- Test the fit by folding the strap around a vent slat and passing the button through the buttonhole.
Final Quality-Control Checklist
- The base has 28 sts and a crisp blo ridge all the way around.
- Every shell round has 7 shells and 7 sc, and the shells alternate cleanly.
- The front height is 3.2 in (8.1 cm) and the width is 3.5 in (8.9 cm).
- The back arch is symmetrical, with decreases at both ends of each shaping row.
- The strap is 4 sts wide along its whole length.
- The edging has 70 sts and lies flat with no ruffles or puckers.
- The button passes through the buttonhole snugly.
- The appliqués are sewn securely with no loose petals.
Troubleshooting
- The base cups or ruffles: check that Rnd 2 has exactly 28 sts and that the increases sit only at the curved ends.
- The shells stack instead of alternating: each shell must go into a sc, and each sc into a center dc.
- The pouch flares at the top: work Rnds 9–10 more tightly, or with a hook 0.25 mm smaller.
- The arch is lopsided: count each decrease row again. Both ends need an sc2tog on Rows 3 and 5–8.
- The buttonhole is too loose: work the buttonhole as ch 1, sk 1 in the center, and adjust the stitches on either side to keep 4 sts.
- The strap edging waves: skip 1 row end every 8 rows, then remove the same number of stitches from the opposite side.
- The pouch tips forward on the vent: use a lighter insert, or move the button 1 row lower so the loop is tighter.
Care
Remove the button-closed pouch from the vent and hand wash it in cool water with mild soap. Lay it flat to dry, reshaping the oval while damp.
Final Notes
The measurement chain is simple. The 28-stitch base sets the 3.5 in (8.9 cm) width. Five shell rounds plus three sc rounds give a front height of 3.2 in (8.1 cm). Eight shaped rows raise the back to 5 in (12.7 cm). The 17-row strap adds 3.8 in (9.7 cm). The 70-stitch edging brings the flat length to 9 in (22.9 cm). If you hit each checkpoint, the pouch will hang neatly on any standard vent slat.
Happy crocheting!