

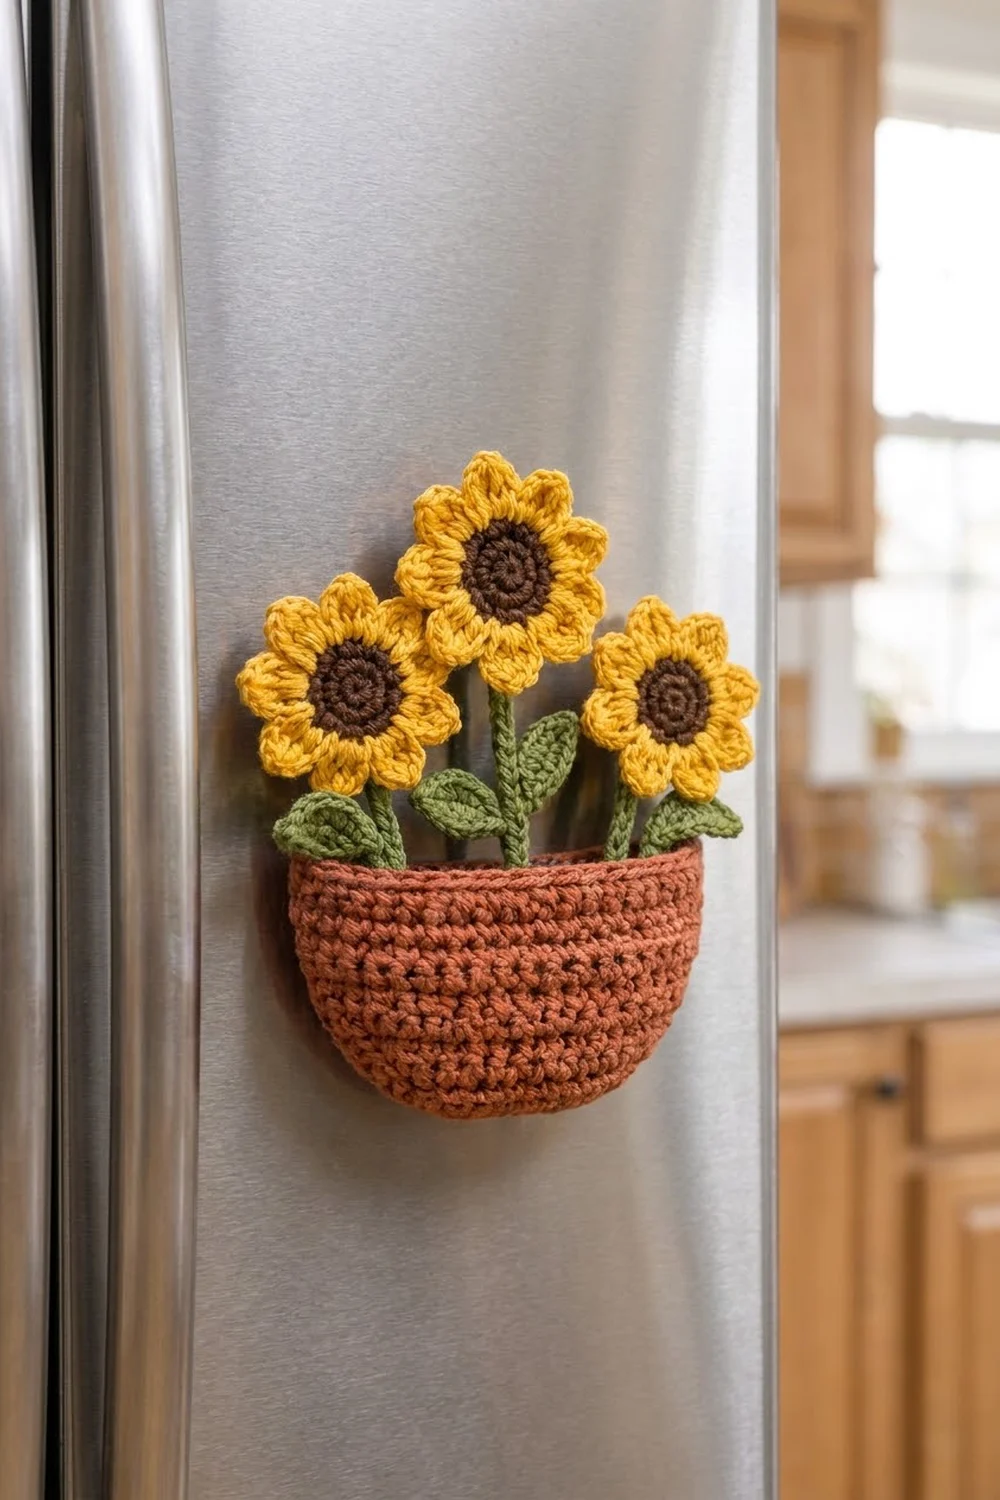
This little sunflower pot brings a bit of summer to the kitchen all year long. Three golden sunflowers with chocolate-brown centers rise from a terracotta pocket pot. Each one sits on a green stem with two pointed leaves. A flat magnet on the back holds it to the fridge. The pot is a real pocket, so it can hold a note, a pencil or a shopping list.
The colors are simple and warm: golden yellow petals, dark brown centers, olive green stems and leaves, and a rusty terracotta pot. The style is cheerful and cottage-kitchen. The stitches are dense and tidy, so they look neat from the front and stay firm on a metal door.
The pattern uses US crochet terms. The finished magnet measures about 6 in (15.2 cm) wide and 6.5 in (16.5 cm) tall. The pot alone is about 5.4 in (13.7 cm) wide and 3.3 in (8.4 cm) tall.
The magnet is built from separate pieces:
– three flowers worked in the round
– three slip-stitch stems
– six leaves
– two identical pot panels worked in rows
You join the panels with single crochet around the sides and bottom. A two-round rim finishes the opening, and then you sew the flowers in place. A bonus single-flower magnet uses the same flower pattern.
Finished Size and Construction
- Finished size: about 6 in (15.2 cm) wide x 6.5 in (16.5 cm) tall
- Skill level: Advanced beginner
- Terminology: US
- Yarn weight: DK / light worsted (#3) cotton
- Hook: 3.5 mm (E-4)
- Number of pieces: 14 (3 flowers, 3 stems, 6 leaves, 2 pot panels)
- Layout: 3 flowers in a fan above 1 pocket pot, with the center flower highest
- Piece size: flower 3 in (7.6 cm) across; pot panel 5 in (12.7 cm) wide x 2.75 in (7.0 cm) tall
- Size before border: joined pot 5.4 in (13.7 cm) x 2.9 in (7.4 cm)
- Border depth: pot rim 0.4 in (1.0 cm)
Materials
Choose a smooth DK cotton, either mercerized or matte. Cotton holds its shape, shows stitch definition and does not stretch when it hangs on a vertical surface. Avoid fuzzy yarns, because they blur the petal points.
- Golden yellow: 12 g / 28 m (petals for 4 flowers, including the bonus)
- Chocolate brown: 5 g / 12 m (flower centers)
- Olive green: 5 g / 12 m (stems and leaves)
- Terracotta: 15 g / 35 m (pot)
These quantities include a margin of about 25% for swatching and tails.
Tools:
- 3.5 mm (E-4) crochet hook
- Tapestry needle
- Stitch markers
- Scissors
- 2 round craft magnets, 1 in (2.5 cm) across (3 if you make the bonus flower)
- Scrap of linen or felt, about 4 in (10.2 cm) square, for the magnet covers
- Cream sewing thread and a sharp needle
Abbreviations (US Terms)
- ch: chain
- sl st: slip stitch
- sc: single crochet
- hdc: half double crochet
- dc: double crochet
- tr: treble crochet
- st(s): stitch(es)
- MR: magic ring
- inc: 2 sc in the same st
- RS / WS: right side / wrong side
Special stitches:
- Picot: ch 2, sl st in 2nd ch from hook.
- Petal: in the next st work (hdc, dc, tr), picot, then in the following st work (tr, dc, hdc). One petal uses 2 sts of the previous round.
Gauge and Checkpoints
Gauge: 20 sc x 22 rows = 4 in (10.2 cm) in sc worked in rows. That works out to 5 sc and 5.5 rows per 1 in (2.5 cm).
Make one flower and one pot panel first, and measure them before you make the rest.
- Flower center after Round 4: 1.5 in (3.8 cm) across
- Flower after Round 5: 1.75 in (4.4 cm) across
- Finished flower: 3 in (7.6 cm) from tip to tip
- Pot panel after Row 8: 5 in (12.7 cm) wide, 1.5 in (3.8 cm) tall
- Pot panel after Row 15: 5 in (12.7 cm) wide, 2.75 in (7.0 cm) tall
If your pieces are too big, change to a 3.25 mm (D-3) hook. If they are too small, change to a 3.75 mm (F-5) hook. Check your gauge again before you continue. A difference of 0.25 in (0.6 cm) on a panel is enough to throw off the flower spacing.
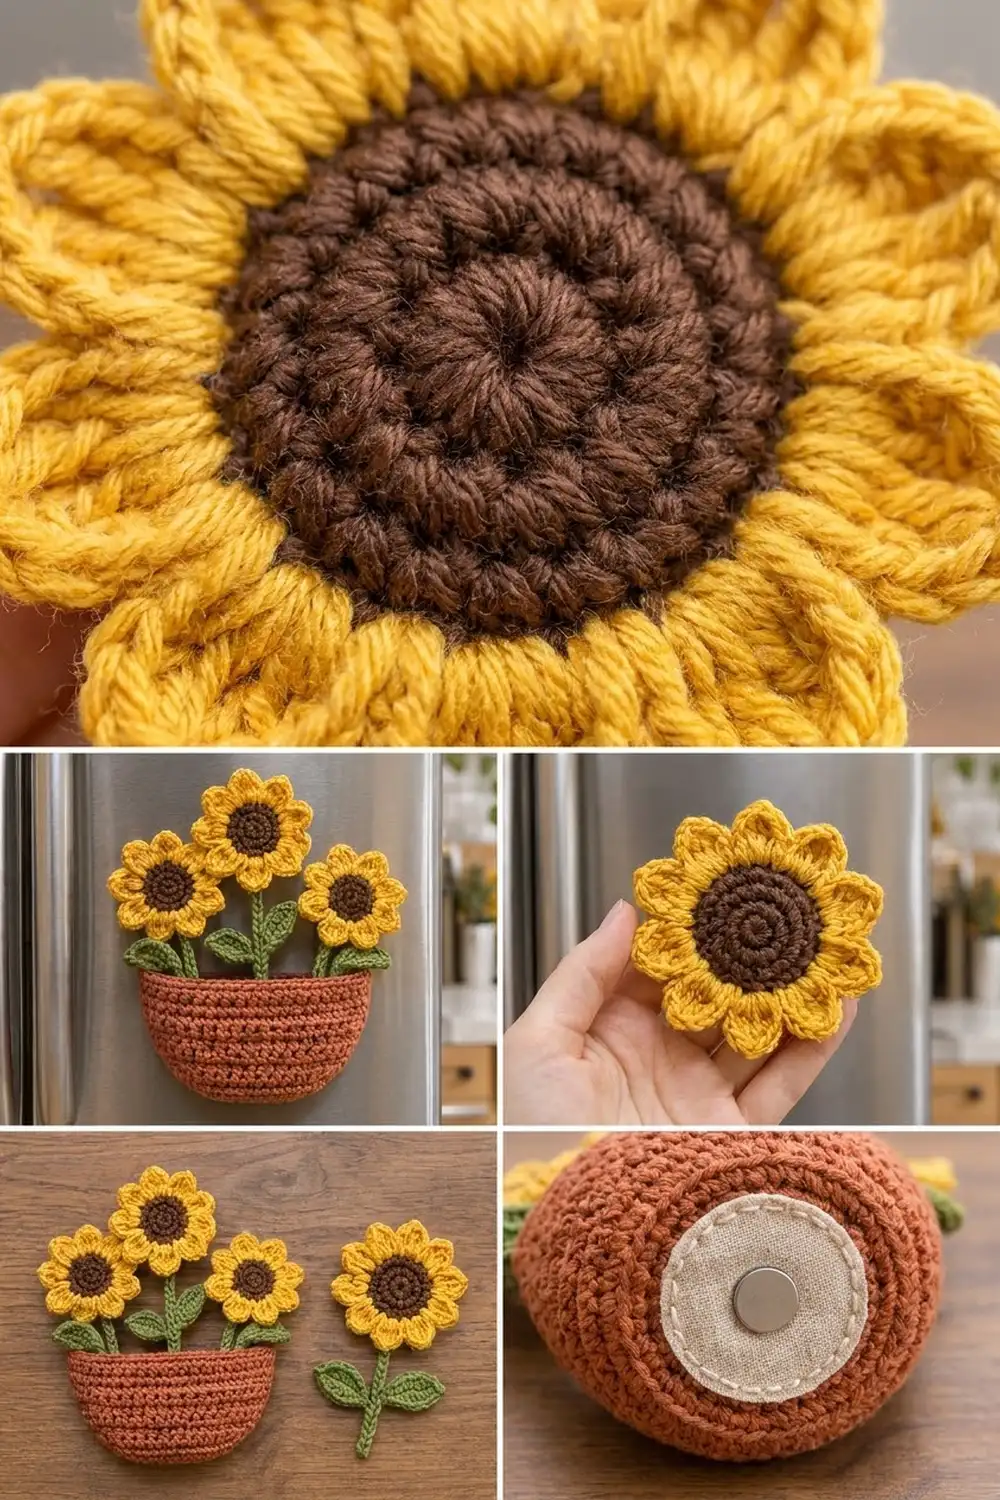
Sunflower (Make 3, plus 1 for the Bonus)
Center (brown). Work in continuous rounds, and place a marker in the first st of each round.
- Round 1: MR, 6 sc in ring. (6 sts)
- Round 2: inc in each st around. (12 sts)
- Round 3: [sc in next st, inc] 6 times. (18 sts)
- Round 4: [sc in next 2 sts, inc] 6 times. (24 sts)
Checkpoint: 1.5 in (3.8 cm). The center should lie flat, with no cupping. Change to yellow on the last pull-through of Round 4. Cut the brown yarn and weave the tail in later on the back.
- Round 5 (yellow): [sc in next 3 sts, inc] 6 times. (30 sts)
Checkpoint: 1.75 in (4.4 cm). This narrow yellow round gives the petals a clean base and stops brown from showing between them.
- Round 6: [sl st in next st, Petal over next 2 sts] 10 times, ending with a sl st in the first sl st. (10 petals)
Each repeat uses 3 sts, and 10 x 3 = 30, so the petals spread evenly with no gaps. The tr stitches and the picot at the middle of each petal form the pointed tip.
Fasten off, leaving a 10 in (25.4 cm) tail for sewing. Gently pull each petal point outward with your fingers.
Stem (Make 3)
Use green. The chain gauge is about 5 ch per 1 in (2.5 cm).
- Side stems (make 2): ch 13. Sl st in the back bump of the 2nd ch from hook and in each ch across. (12 sl sts, about 2.4 in / 6.1 cm)
- Center stem (make 1): ch 16. Sl st in the back bump of the 2nd ch from hook and in each ch across. (15 sl sts, about 3 in / 7.6 cm)
Fasten off, leaving a 6 in (15.2 cm) tail at both ends. Working into the back bump gives a round, cord-like stem that does not curl.
Leaf (Make 6)
Use green.
Ch 7. Starting in the 2nd ch from hook, work: sc, hdc, dc in next 2 chs, hdc, 3 sc in last ch. Rotate to work along the opposite side of the chain: hdc, dc in next 2 chs, hdc, sc in next ch. Work a picot, then sl st in the first sc. (13 sts plus picot)
The 3-sc end is the rounded base that attaches to the stem. The picot end is the pointed tip. Each leaf is about 1.25 in (3.2 cm) long and 0.6 in (1.5 cm) wide. Fasten off, leaving a 6 in (15.2 cm) tail.
Optional vein: with a scrap of darker green, work surface sl sts along the center chain, from the base to the tip.
Pot Panel (Make 2)
Use terracotta. The panel is worked in rows from the bottom up. The ch 1 at the start of each row does not count as a st.
- Row 1: ch 16, sc in 2nd ch from hook and in each ch across, turn. (15 sts)
- Row 2: ch 1, inc in first st, sc in next 13 sts, inc in last st, turn. (17 sts)
- Row 3: ch 1, inc in first st, sc in next 15 sts, inc in last st, turn. (19 sts)
- Row 4: ch 1, inc in first st, sc in next 17 sts, inc in last st, turn. (21 sts)
- Row 5: ch 1, sc in each st across, turn. (21 sts)
- Row 6: ch 1, inc in first st, sc in next 19 sts, inc in last st, turn. (23 sts)
- Row 7: ch 1, sc in each st across, turn. (23 sts)
- Row 8: ch 1, inc in first st, sc in next 21 sts, inc in last st, turn. (25 sts)
Checkpoint: 5 in (12.7 cm) wide (25 sts at 5 per in). The fast increases at the bottom and the slower ones higher up create the rounded bowl curve.
- Rows 9–15: ch 1, sc in each st across, turn. (25 sts)
Checkpoint: 2.75 in (7.0 cm) tall (15 rows at 5.5 per in). Fasten off the first panel. On the second panel, leave the yarn attached for joining.
Make All Pieces
Before you start assembly, check that you have:
- Brown + yellow: 3 flowers (plus 1 bonus)
- Green: 2 side stems, 1 center stem, 6 leaves
- Terracotta: 2 pot panels
Layout (front view):
              [ F2 ]
     [ F1 ]     |      [ F3 ]
   L  |  L    L | L    L  |  L
 +-------------------------------+
 |           POT RIM             |
 |          POT FRONT            |
 |                               |
   +---------------------------+
F1 and F3 sit on the side stems and tilt slightly outward. F2 sits on the center stem, about 1 in (2.5 cm) higher, and overlaps the inner petals of both side flowers. Each stem has one leaf on each side, just above the rim.
Joining the Pot
Method: an sc join through both layers, worked with the panel yarn that is still attached.
Hold the two panels with WS together, lining up the tops and edges. Work through both layers at once.
- Ch 1. Working down the side, sc in each row end. (15 sc)
- Working along the bottom in the foundation loops: 2 sc in first st, sc in next 13 sts, 2 sc in last st. (15 + 2 = 17 sc)
- Working up the other side, sc in each row end. (15 sc)
Joining total: 15 + 17 + 15 = 47 sc. The 2 extra sts sit at the bottom corners, where the edge turns, so the curve lies flat without pulling.
Tension: keep the joining sc a little looser than your panel sts. Insert the hook under both loops of both layers so the seam forms a neat, even ridge. Do not join across the top, because it stays open as the pocket.
Checkpoint: the joined pot measures 5.4 in (13.7 cm) wide and 2.9 in (7.4 cm) tall. The joining sts add about 0.2 in (0.5 cm) at each side and at the bottom. Fasten off.
Border: Pot Rim
The border gauge is the same as the body: 5 sc and 5.5 rounds per 1 in (2.5 cm).
Join terracotta at the top right corner of the front panel. Work in joined rounds around the open top.
- Round 1: ch 1, sc in each st across the front (25 sc), then sc in each st across the back (25 sc), sl st to first sc. (25 + 25 = 50 sts)
- Round 2: ch 1, sc in each st around, sl st to first sc. (50 sts)
That is 25 sts across the front and 25 sts across the back. Fasten off and weave in the ends.
Why the math works: the top row of each panel has exactly 25 sts, and the rim works 1 sc into each of them with nothing added. That keeps the opening at 5 in (12.7 cm) per panel, so the rim does not ruffle or pucker. The two rounds add 0.4 in (1.0 cm), which brings the pot to 3.3 in (8.4 cm) tall.
Assembly
- Sew one stem to the back of each flower, with the top of the stem reaching the middle of the brown circle.
- Sew two leaves to each stem, 0.5 in (1.3 cm) above the point where the stem will meet the rim. Point them up and outward.
- Slide the stems into the pocket. Tuck the side stems in about 1 in (2.5 cm) and the center stem about 1.25 in (3.2 cm).
- Sew the bottom of each stem to the inside of the back panel only, so the front stays open.
- Tack the overlapping petals together with a few hidden stitches.
Magnets: cut two circles of linen, each 1.5 in (3.8 cm) across. Place one magnet in the center of the back of the pot and another behind the center flower. Cover each magnet with a linen circle and whipstitch around the edge with cream thread. For the bonus flower, add one magnet the same way.
Final Blocking
- Lightly mist the finished piece with water.
- Lay it face down on a towel or blocking mat.
- Pin each flower to 3 in (7.6 cm), with a pin at every petal tip.
- Pin the pot to 5.4 in (13.7 cm) wide, keeping the rim straight.
- Pull each leaf tip to a point and pin it.
- Let the piece dry completely, for at least 6 hours.
- Remove the pins and check the measurements again.
Do not apply heat near the magnets.
Final Quality-Control Checklist
- Each flower has 10 evenly spaced petals with pointed tips.
- No brown shows between the petals.
- The brown centers lie flat at 1.5 in (3.8 cm).
- The stems are straight and the leaves point upward.
- The pot measures 5.4 in (13.7 cm) x 3.3 in (8.4 cm).
- The rim has 50 sts and lies flat.
- The pocket opens freely, and the stems are sewn to the back panel only.
- The magnets are fully covered and secure.
- All ends are woven in on the back.
- The piece hangs straight on the fridge without tipping forward.
Troubleshooting
- The center cups like a bowl: your tension is tight. Go up half a hook size for the center only.
- The center ruffles: recount Round 4. You may have extra increases.
- The petals look uneven: recount Round 5. You need exactly 30 sts for 10 petals.
- The petal tips are rounded: make the picot tighter and pull the tip into a point when blocking.
- The pot leans or curls: block it flat and recount Row 8. Both panels need 25 sts.
- The rim flares: you added sts at the corners. Round 1 must be exactly 50 sts.
- The piece slides down the door: add a second magnet behind a side flower.
Care
Spot clean with a damp cloth and mild soap. Remove or protect the magnets before any wash, and dry flat.
Final Notes
The measurement chain is short and easy to check. Each flower center reaches 1.5 in (3.8 cm), the yellow round brings it to 1.75 in (4.4 cm), and the petals finish it at 3 in (7.6 cm). Each pot panel grows from 15 to 25 sts and reaches 5 in (12.7 cm) by 2.75 in (7.0 cm). The 47-sc join brings the pot to 5.4 in (13.7 cm) by 2.9 in (7.4 cm). The 50-st rim finishes it at 3.3 in (8.4 cm) tall. With the flowers in place, the whole magnet is about 6 in (15.2 cm) by 6.5 in (16.5 cm).
Measure early, keep your counts exact, and your sunflowers will bloom on the fridge all year.
Happy crocheting!