

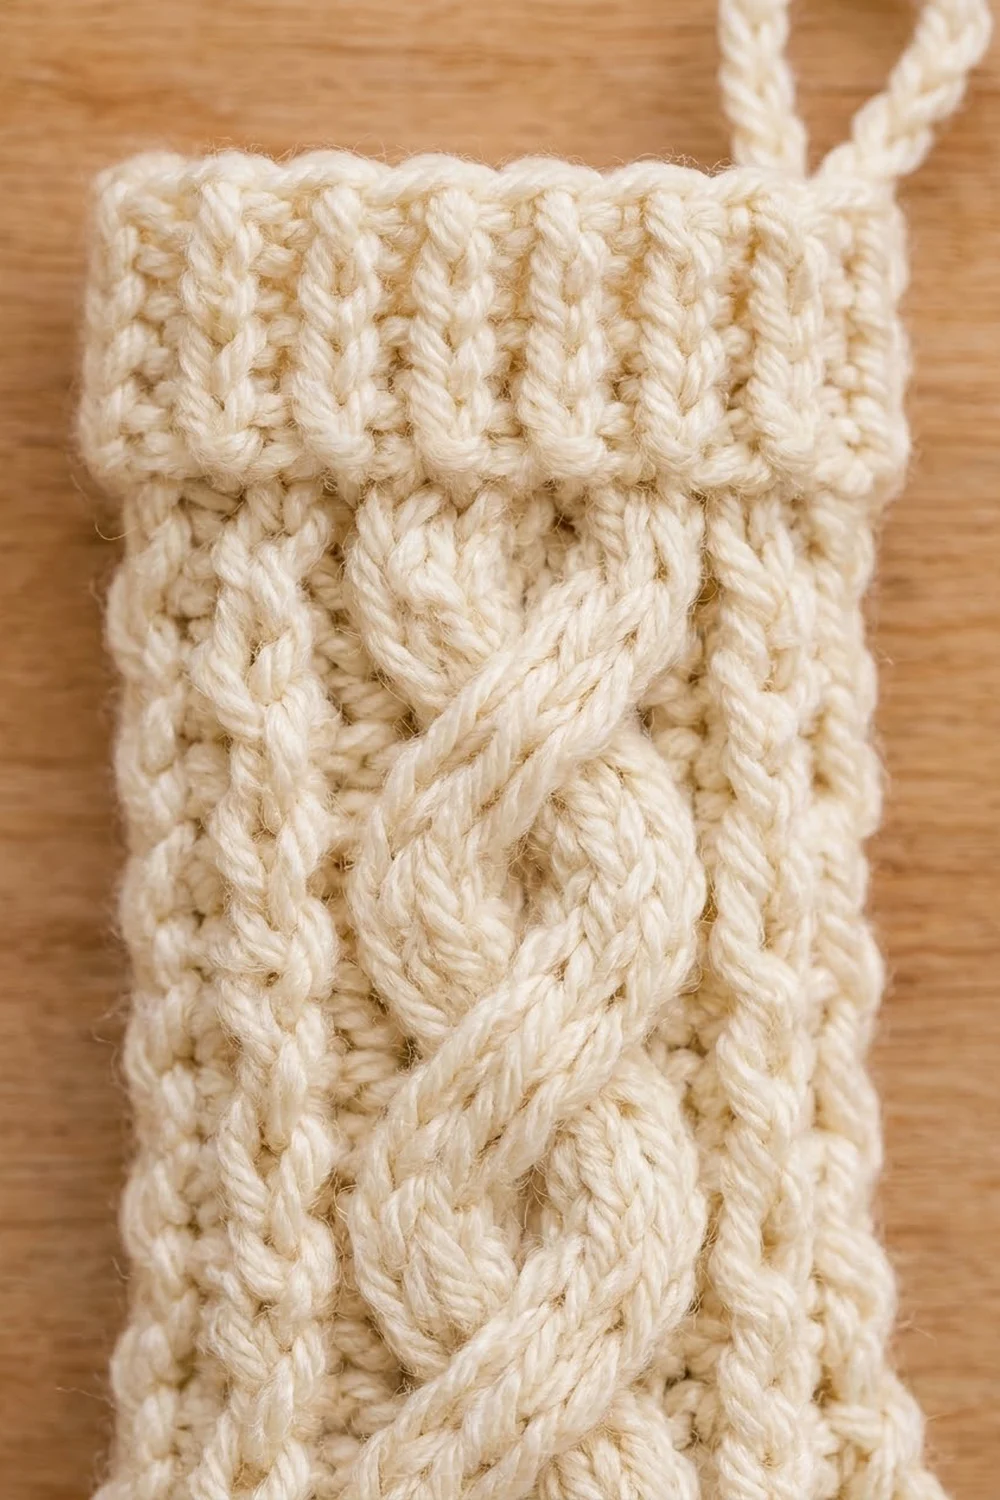
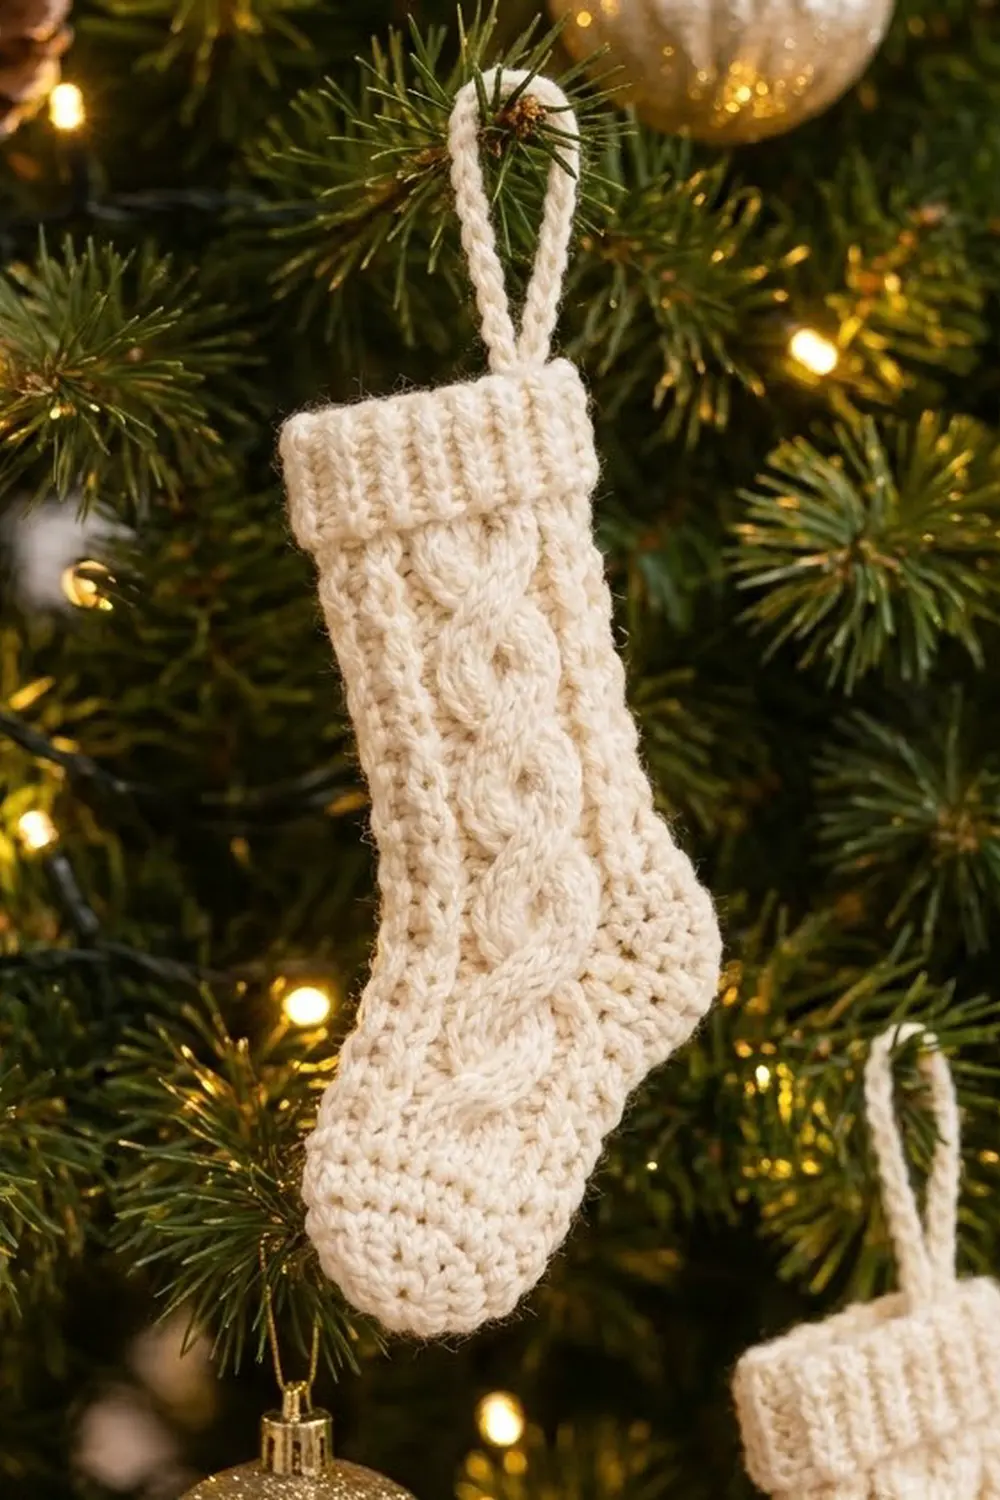
This little stocking looks like a tiny hand-knit Christmas sock. A twisted rope cable runs down the center front between two raised rib lines, and a ribbed cuff sits at the top. The heel and toe are softly rounded, and a slim chain loop at the top corner lets you hang it on a branch.
The ornament is worked in one solid cream yarn for a classic fisherman-sweater look. Ivory or oatmeal shades suit both rustic and elegant trees, and the plain color shows the cable texture clearly. All instructions use US crochet terms.
The finished ornament measures about 3 in (7.6 cm) wide at the leg, 4 in (10.2 cm) wide across the foot, and 6.1 in (15.5 cm) tall without the loop. The loop adds about 1.25 in (3.2 cm).
You work it in one piece, in joined rounds from the cuff down. You crochet the cuff, then the cabled leg, then increase on one side to push the foot out toward the toe. Two single crochet rounds round off the heel and toe, and the sole is closed with a row of single crochet through both layers. A slip-stitch top edge and a chain loop finish it. Nothing needs sewing except the yarn ends.
Finished Size and Construction
- Finished size: 3 in (7.6 cm) wide at the leg × 6.1 in (15.5 cm) tall, plus a 1.25 in (3.2 cm) loop
- Foot width: 4 in (10.2 cm) at the widest point
- Skill level: Intermediate (front post stitches and a simple cable cross)
- Terminology: US
- Yarn weight: Worsted (#4 medium)
- Hook: 4.5 mm (US 7)
- Number of pieces: 1
- Layout: One tube worked from cuff to sole, pressed flat
- Piece size: 24 sts around the leg (12 front, 12 back), 32 sts around the foot
- Size before border: 3 in (7.6 cm) × 6.1 in (15.5 cm)
- Border depth: A slip-stitch edge around the cuff top, which adds no measurable height
Materials
Yarn: Use a smooth worsted-weight yarn in wool, a wool blend, or soft acrylic. A plied yarn shows the cable best. Avoid fuzzy or very loosely spun yarn, because it blurs the post stitches.
- Cream: 18 g, about 36 m (39 yd) per ornament
This amount includes a margin for your gauge swatch and yarn tails. If you are making a set, multiply by the number of ornaments and buy one extra ball.
Tools:
- 4.5 mm (US 7) crochet hook
- 2 locking stitch markers (beginning of round and toe-side fold)
- Tapestry needle
- Scissors
- Pins and a spray bottle for blocking
Abbreviations (US Terms)
- ch – chain
- sl st – slip stitch
- sc – single crochet
- hdc – half double crochet
- sc2tog – single crochet 2 together
- FPhdc – front post half double crochet
- BPhdc – back post half double crochet
- FPdc – front post double crochet
- FPtr – front post treble crochet
- st(s) – stitch(es)
- rnd(s) – round(s)
Special stitch – 6-st cable cross (C6F): Skip the next 3 sts. Work FPtr around each of the next 3 FPdc in the round below. Then, working in front of the 3 FPtr you just made, work FPtr around each of the 3 skipped FPdc. This counts as 6 sts.
Post stitch note: Every post stitch is worked around a stitch in the round below. Skip the stitch behind each post stitch, so the count stays the same.
Gauge and Checkpoints
Gauge: 16 sts and 12 rnds = 4 in (10.2 cm) in hdc worked in joined rounds.
There is only one piece, so the stocking is its own swatch. Work through Rnd 5 and measure before you continue.
- After Rnd 3 (cuff): The tube lies flat at about 3 in (7.6 cm) wide and is 1 in (2.5 cm) tall.
- After Rnd 5: The leg is still 3 in (7.6 cm) wide flat, and the piece is 1.67 in (4.2 cm) tall.
- After Rnd 11 (end of leg): 3.67 in (9.3 cm) tall
- After Rnd 16 (end of foot): 5.33 in (13.5 cm) tall and 4 in (10.2 cm) wide across the foot
- After closing: 6.1 in (15.5 cm) tall
If the piece is too big, go down a half size to a 4 mm hook and start again. If it is too small, go up to a 5 mm hook. The cable pulls the front in slightly, so the leg may measure 2.9 in (7.4 cm) before blocking. That is normal.
Cuff
Foundation: Ch 24 and join with a sl st to the first ch to form a ring. Make sure the chain is not twisted.
Rnd 1: Ch 1 (does not count as a st here or in later rounds). Work 1 hdc in each ch. Join with a sl st to the first hdc. (24 sts)
Place a marker in the first st of the round. This is the heel-side fold of the stocking.
Rnd 2: Ch 1. FPhdc around the next st, BPhdc around the next st; repeat from * around. Join. (24 sts)
Rnd 3: Ch 1. FPhdc around the FPhdc, BPhdc around the BPhdc; repeat from * around. Join. (24 sts)
The cuff is now 1 in (2.5 cm) tall. Sts 1–12 are the front, and sts 13–24 are the back. Place the second marker between st 12 and st 13. This is the toe-side fold.
Leg
The front panel is 3 hdc, a 6-st cable, then 3 hdc, with one FPdc rib line in the middle of each 3-st group. The back is plain hdc.
Rnd 4 (setup): Ch 1. Hdc in the first st, FPdc around the next st, hdc in the next st, FPdc around each of the next 6 sts, hdc in the next st, FPdc around the next st, hdc in the next st. Then hdc in each of the 12 back sts. Join. (24 sts: 12 front, 12 back)
Rnd 5: Ch 1. Hdc, FPdc around the FPdc, hdc, FPdc around each of the next 6 FPdc, hdc, FPdc around the FPdc, hdc, hdc in each of the 12 back sts. Join. (24 sts)
Rnd 6 (cross): Ch 1. Hdc, FPdc around the FPdc, hdc, C6F, hdc, FPdc around the FPdc, hdc, hdc in each of the 12 back sts. Join. (24 sts)
Rnds 7–8: Repeat Rnd 5. On the next round after a cross, work FPdc around the FPtr. (24 sts)
Rnd 9 (cross): Repeat Rnd 6. (24 sts)
Rnds 10–11: Repeat Rnd 5. (24 sts)
Checkpoint: The piece is 3.67 in (9.3 cm) tall and 3 in (7.6 cm) wide flat. You should see two full cable twists.
Foot
From here on, the first 11 front sts follow the leg pattern: hdc, FPdc, hdc, 6 cable sts, hdc, FPdc. In the steps below, “pattern 11” means work those 11 sts as in Rnd 5. “Pattern 11 with cross” means work them as in Rnd 6. All increases are made at the toe-side fold, so the foot grows sideways toward the toe while the heel side stays straight.
Rnd 12 (cross + increase): Ch 1. Pattern 11 with cross, 2 hdc in the last front st. On the back, 2 hdc in the first st, then hdc in each of the next 11 sts. Join. (26 sts: 13 front, 13 back)
Rnd 13: Ch 1. Pattern 11, hdc in the next st, 2 hdc in the last front st. Back: 2 hdc in the first st, hdc to the end. Join. (28 sts: 14 front, 14 back)
Rnd 14: Ch 1. Pattern 11, hdc in each of the next 2 sts, 2 hdc in the last front st. Back: 2 hdc in the first st, hdc to the end. Join. (30 sts: 15 front, 15 back)
Rnd 15 (cross + increase): Ch 1. Pattern 11 with cross, hdc in each of the next 3 sts, 2 hdc in the last front st. Back: 2 hdc in the first st, hdc to the end. Join. (32 sts: 16 front, 16 back)
Rnd 16: Ch 1. Pattern 11, hdc in each of the next 5 sts. Back: hdc in each of the 16 sts. Join. (32 sts)
Checkpoint: The piece is 5.33 in (13.5 cm) tall. Laid flat, the foot is 4 in (10.2 cm) wide and reaches about 1 in (2.5 cm) past the leg on the toe side.
Sole and Closing
The tighter single crochet rounds the heel and toe and ends the cable.
Rnd 17: Ch 1. Front: sc2tog, sc in each of the next 12 sts, sc2tog. Back: sc2tog, sc in each of the next 12 sts, sc2tog. Join. (28 sts: 14 front, 14 back)
The four sc2tog fall at both folds on both layers, which rounds the heel and toe evenly.
Rnd 18: Ch 1. Front: sc2tog, sc in each of the next 10 sts, sc2tog. Back: sc2tog, sc in each of the next 10 sts, sc2tog. Join. (24 sts: 12 front, 12 back)
Closing row: Flatten the stocking so the front 12 sts line up with the back 12 sts. The heel-side marker should sit at the right edge and the toe-side marker at the left edge. Ch 1. Working through 1 front st and its matching back st together, sc in each pair across. (12 sc)
Fasten off and weave in the end. The two sole rounds and the closing row add about 0.75 in (1.9 cm), so the stocking now measures 6.1 in (15.5 cm) tall.
Border: Top Edge and Hanging Loop
Border gauge: 1 sl st per cuff st, worked loosely. It should match the cuff’s 16 sts per 4 in (10.2 cm), so the top neither flares nor gathers.
Edge round: With the stocking upside down and the RS facing, join yarn at the heel-side marker in the foundation ring. Sl st loosely in each foundation ch around. (24 sl sts: 12 across the front, 12 across the back)
Hanging loop: After the last sl st, ch 12. Sl st into the same st where the loop started, at the heel-side fold. Then work 14 sl sts back along the chain to firm it up (1 in each of the 12 ch, plus 1 at each end where it meets the cuff). Fasten off and weave the tail down through the cuff.
Why the math works: The cuff has 24 sts, so 24 sl sts (1 per st) keep the top at the same width. That is 12 per side, matching the 12 front and 12 back sts of the leg. The 12-chain loop folds in half to make a loop about 1.25 in (3.2 cm) tall. The 14 sl sts worked back along it firm the chain without changing the stitch count.
Final Blocking
- Weave in all ends inside the stocking.
- Lay the stocking flat with the toe pointing left and the cable centered on the front.
- Mist it until it is damp but not soaking.
- Pin the leg to 3 in (7.6 cm) wide and the foot to 4 in (10.2 cm) at its widest.
- Pin the total height to 6.1 in (15.5 cm) without stretching the cable.
- Ease the heel and toe into smooth curves with your fingers.
- Pin the loop straight up from the heel-side corner.
- Let it dry completely, then unpin.
Final Quality-Control Checklist
- The cuff shows clear vertical ribs all the way around.
- The cable has four crosses, at Rnds 6, 9, 12 and 15, all leaning the same way.
- Each side of the cable has one raised FPdc rib line.
- The toe points away from the loop side.
- The sole seam has exactly 12 sc, with no gaps at the heel or toe.
- The leg is 3 in (7.6 cm) wide, the foot is 4 in (10.2 cm) wide, and the stocking is 6.1 in (15.5 cm) tall.
- The loop is secure and about 1.25 in (3.2 cm) tall.
- No yarn ends show on the outside.
Troubleshooting
The stitch count drifts. You probably worked into the stitch behind a post stitch. Skip it every time.
The cable looks flat. Work the FPtr a little looser. Use a yarn with a firmer twist.
There are holes beside the cable cross. Pull the first FPtr of each group snug.
The toe points the wrong way. Your increases were made at the heel fold. Check the marker positions before Rnd 12.
The cuff flares. Work the edge sl sts with a smaller hook, or skip the edge round.
The heel is too pointed. Make sure the sc2tog on Rnds 17–18 fall exactly at the folds.
The loop is floppy. Add the second pass of sl sts back along the chain.
Care
Hand wash in cool water, press out the water gently, and dry flat. Store flat in tissue paper between holiday seasons so the loop and cuff keep their shape.
Final Notes
The measurements build step by step:
- The 24-st foundation and 3 cuff rounds give 3 in (7.6 cm) × 1 in (2.5 cm).
- Eight cabled leg rounds bring the height to 3.67 in (9.3 cm).
- Five foot rounds with toe-side increases widen the foot to 4 in (10.2 cm) and bring the height to 5.33 in (13.5 cm).
- Two sc rounds and a 12-st closing row finish the stocking at 6.1 in (15.5 cm), plus a 1.25 in (3.2 cm) loop.
If you check your gauge at Rnd 5, every later number will fall into place. Make one for a gift tag, or make a whole row for the tree.
Happy crocheting!