

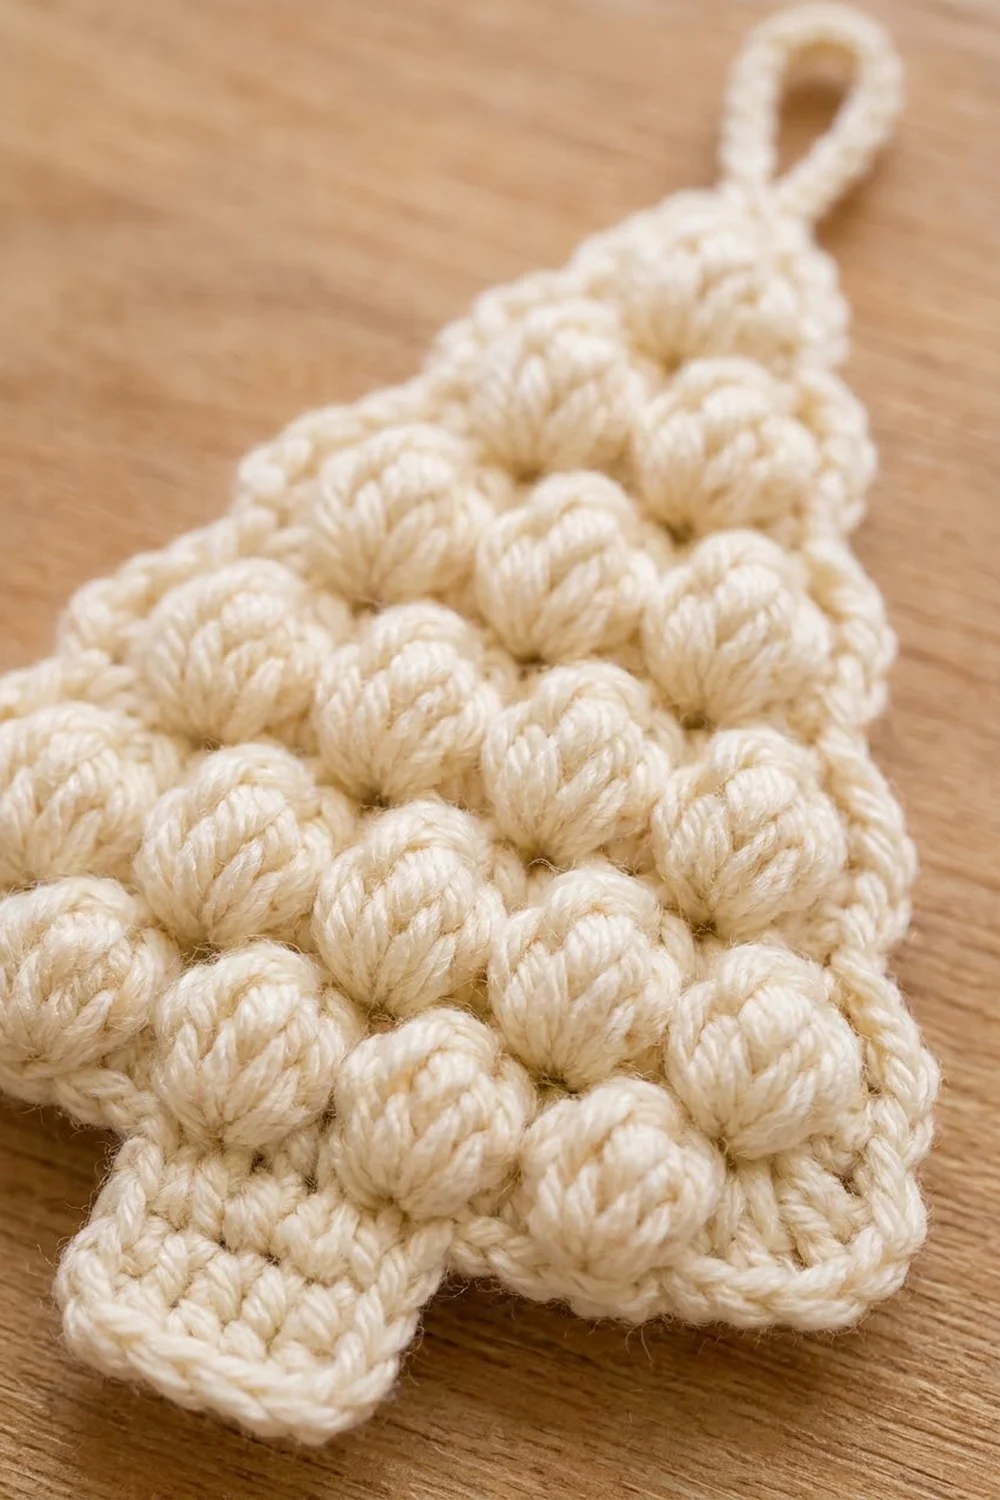
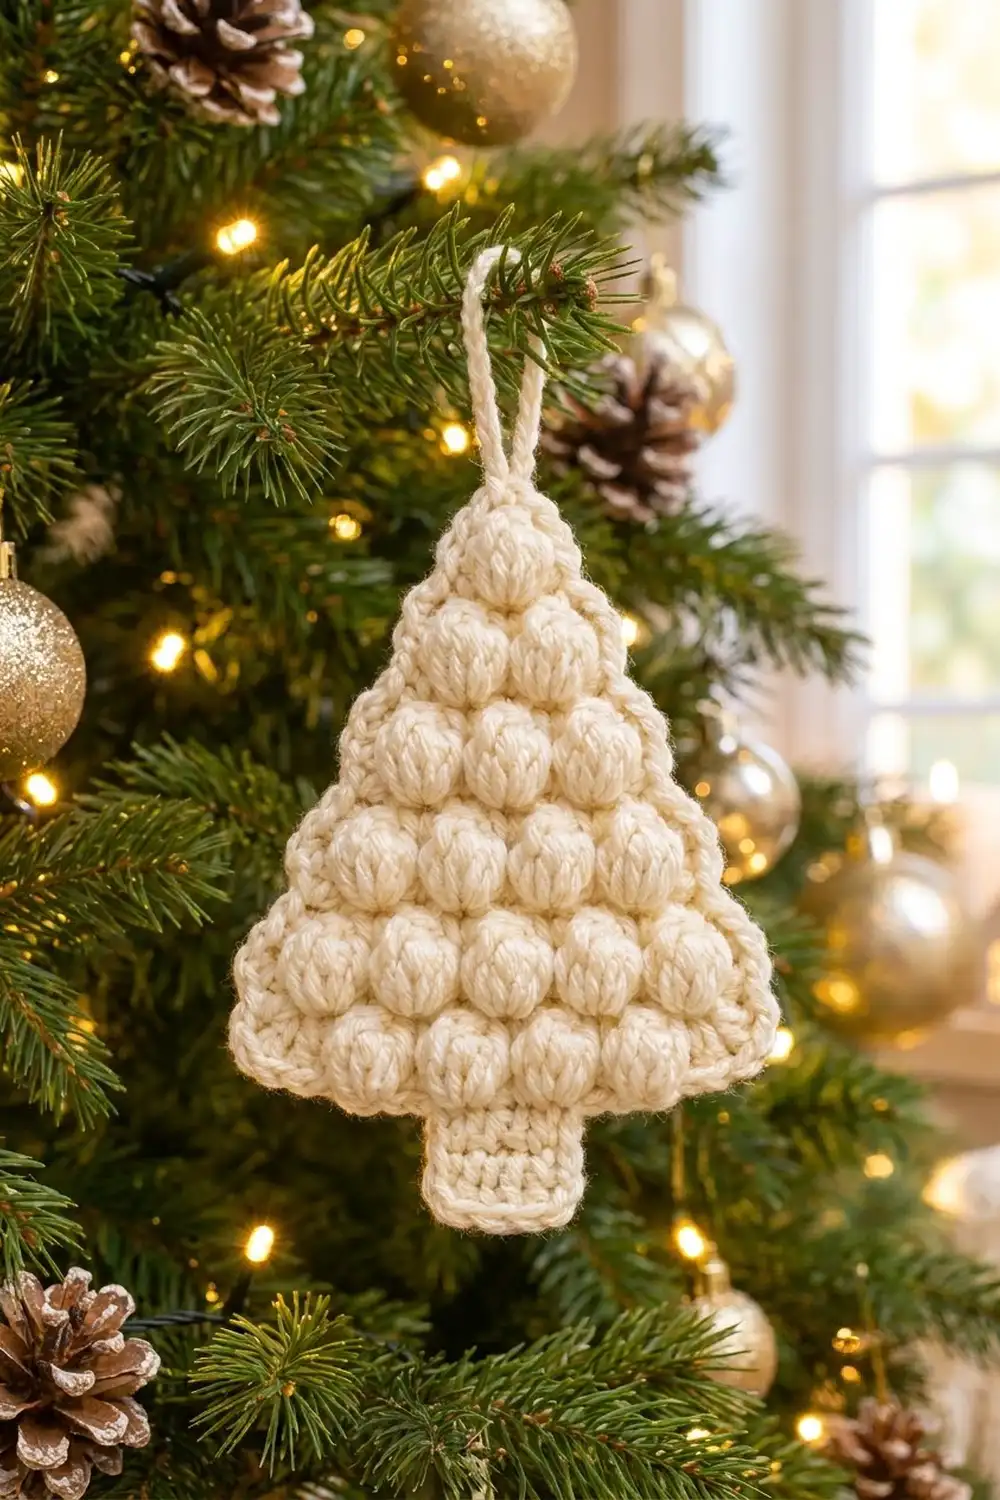
This little tree is all texture. Rows of plump puff stitches stack into a neat triangle, a solid single crochet trunk sits underneath, and one tidy round of single crochet frames the whole shape. A crocheted loop at the tip makes it ready to hang.
The ornament uses a single cream yarn, which keeps the look soft, Scandinavian, and a little bit snowy. Because there is only one color, the puffs do all the talking, and they catch the light beautifully on a lit tree.
This pattern uses US crochet terms. The finished ornament measures 3.75 in (9.5 cm) wide at the base and 4.5 in (11.4 cm) tall, not counting the hanging loop, which adds about 1.5 in (3.8 cm).
Construction is simple. You work the tree flat in rows from the base up, alternating puff rows with decreasing single crochet rows. Then you work the trunk into the free loops of the foundation chain, add one border round, and finish with the hanging loop.
Finished Size and Construction
- Finished size: 3.75 in (9.5 cm) wide x 4.5 in (11.4 cm) tall, plus a 1.5 in (3.8 cm) loop
- Skill level: Easy / advanced beginner
- Terminology: US crochet terms
- Yarn weight: Worsted (#4)
- Hook: 4.5 mm (US 7)
- Number of pieces: 1 (single flat motif)
- Layout: One tree with trunk and hanging loop; no joining
- Tree size before border: 3.25 in (8.3 cm) wide x 3.25 in (8.3 cm) tall
- Total size before border (tree + trunk): 3.25 in (8.3 cm) wide x 4 in (10.2 cm) tall
- Border depth: 0.25 in (0.6 cm) on every edge
Materials
Yarn: Choose a smooth worsted-weight cotton or cotton blend. Cotton gives crisp, well-defined puffs and holds its shape on the tree. Avoid fuzzy or very splitty yarns, which hide the puff texture.
- Cream: 15 g / 26 m (about 28 yd)
This quantity includes a comfortable margin over what one ornament actually uses (roughly 10 g / 17 m), so you will not run short if your puffs are a little looser.
Tools:
- 4.5 mm (US 7) crochet hook
- Tapestry needle
- Scissors
- Stitch marker (optional)
- Ruler or measuring tape
- Blocking mat and rust-proof pins
- Spray bottle with water
Abbreviations (US Terms)
- ch – chain
- sc – single crochet
- sc2tog – single crochet 2 together (decrease)
- sc3tog – single crochet 3 together (decrease)
- sl st – slip stitch
- st(s) – stitch(es)
- yo – yarn over
- RS / WS – right side / wrong side
Special stitch – Puff stitch (puff): (Yo, insert hook in st, yo and pull up a loop to about 0.5 in / 1.3 cm tall) 3 times in the same st (7 loops on hook), yo and pull through all 7 loops, ch 1 to close. The closing ch 1 does not count as a stitch. On the next row, work into the top of the puff itself, not into the closing chain.
Gauge and Checkpoints
Gauge: 4 sc = 1 in (2.5 cm). One tier (1 puff row + 1 sc row) = 0.5 in (1.3 cm) tall. Four rows of sc = 0.75 in (1.9 cm) tall.
The ornament is so small that it works as its own gauge swatch. Work Rows 1–4 and measure before going on.
Checkpoints:
- After Row 1: 13 sts measure 3.25 in (8.3 cm) wide.
- After Row 4: width at Row 4 is 2.75 in (7.0 cm); total height is 1.25 in (3.2 cm).
- After Row 8: width at Row 8 is 1.75 in (4.4 cm); total height is 2.25 in (5.7 cm).
- After Row 13: tree measures 3.25 in (8.3 cm) wide x 3.25 in (8.3 cm) tall.
- After trunk: total height 4 in (10.2 cm); trunk 1.25 in (3.2 cm) wide.
- After border: 3.75 in (9.5 cm) x 4.5 in (11.4 cm).
If your piece is too big: go down to a 4 mm hook, and pull your puff loops up a little shorter.
If your piece is too small: go up to a 5 mm hook. Do not add stitches; the stitch counts control the triangle shape.
Tree
You work the tree flat in rows from the base to the tip. Puffs always go on RS (even-numbered) rows. Every sc row after Row 1 decreases 1 st at each end, so the puffs shift half a step inward on each tier and sit staggered over the tier below.
Row 1 (WS): Ch 14, sc in 2nd ch from hook and in each ch across. Turn. (13 sts)
Leave the bottom of this chain alone for now. Its free loops become the base for the trunk and border.
Row 2 (RS, puff row): Ch 1, sc in first st, puff in next st, sc in next st; repeat from * 5 more times. Turn. (13 sts: 6 puffs + 7 sc)*
Row 3 (WS): Ch 1, sc2tog over first 2 sts, sc in next 9 sts, sc2tog over last 2 sts. Turn. (11 sts)
Row 4 (RS): Ch 1, sc in first st, puff in next st, sc in next st; repeat from * 4 more times. Turn. (11 sts: 5 puffs + 6 sc)*
Row 5: Ch 1, sc2tog, sc in next 7 sts, sc2tog. Turn. (9 sts)
Row 6: Ch 1, sc in first st, puff in next st, sc in next st; repeat from * 3 more times. Turn. (9 sts: 4 puffs + 5 sc)*
Row 7: Ch 1, sc2tog, sc in next 5 sts, sc2tog. Turn. (7 sts)
Row 8: Ch 1, sc in first st, puff in next st, sc in next st; repeat from * 2 more times. Turn. (7 sts: 3 puffs + 4 sc)*
Row 9: Ch 1, sc2tog, sc in next 3 sts, sc2tog. Turn. (5 sts)
Row 10: Ch 1, sc in first st, puff in next st, sc in next st; repeat from * once more. Turn. (5 sts: 2 puffs + 3 sc)*
Row 11: Ch 1, sc2tog, sc in next st, sc2tog. Turn. (3 sts)
Row 12: Ch 1, sc in first st, puff in next st, sc in last st. Turn. (3 sts: 1 puff + 2 sc)
Row 13: Ch 1, sc3tog. (1 st)
Fasten off, leaving a 6 in (15.2 cm) tail to weave in later.
You now have six tiers of puffs: 6, 5, 4, 3, 2, and 1 from base to tip, for 21 puffs in total. Check the tree against the 3.25 in (8.3 cm) x 3.25 in (8.3 cm) checkpoint.
Trunk
You work the trunk into the free loops on the underside of the foundation chain. Turn the tree upside down with the RS facing you, and number the 13 loops 1 to 13 from right to left. The trunk uses the middle 5 loops, numbers 5–9, which leaves 4 loops free on each side.
Row 1: With RS facing, join yarn in loop 5, ch 1, sc in same loop and in each of loops 6, 7, 8, and 9. Turn. (5 sts)
Rows 2–4: Ch 1, sc in each st across. Turn. (5 sts)
Do not turn at the end of Row 4. Fasten off, leaving a 6 in (15.2 cm) tail.
Checkpoint: the trunk is 1.25 in (3.2 cm) wide and 0.75 in (1.9 cm) tall. The whole piece now measures 3.25 in (8.3 cm) wide x 4 in (10.2 cm) tall.
Border
Border gauge: the border is worked at the same 4 sc = 1 in (2.5 cm) gauge, and one round adds 0.25 in (0.6 cm) to every edge.
In this pattern, each corner group (3 sc in one st) is counted separately from the side counts below, so no corner stitch is counted twice.
Round 1 (RS): With RS facing, join yarn in the single st of Row 13 (the tip).
- Tip: Work 3 sc in the tip st. (3 sc)
- Left slanted side: Work down the row ends. Put 1 sc in each sc-row end (Rows 11, 9, 7, 5, 3, 1 = 6 sc) and 1 sc in each puff-row end (Rows 12, 10, 8, 6, 4, 2 = 6 sc). Add 1 extra sc in the row ends of Rows 2 and 6 (2 sc). Row 13 is not counted here because it is the tip. (14 sc)
- Left base corner: 3 sc in foundation loop 13. (3 sc)
- Left base: 1 sc in each of loops 12, 11, and 10. (3 sc)
- Trunk left side: 1 sc in each of the 4 trunk row ends. (4 sc)
- Trunk bottom: 3 sc in first st of trunk Row 4, sc in next 3 sts, 3 sc in last st. (9 sc: 2 corner groups of 3 + 3)
- Trunk right side: 1 sc in each of the 4 trunk row ends. (4 sc)
- Right base: 1 sc in each of loops 4, 3, and 2. (3 sc)
- Right base corner: 3 sc in loop 1. (3 sc)
- Right slanted side: Work up the row ends to match the left side. (14 sc)
Join with sl st to first sc. (62 sc total)
Count check: 3 (tip) + 14 + 3 + 3 + 4 + 9 + 4 + 3 + 3 + 14 = 62.
Each slanted side gets 1 sc in the end of 12 of the 13 rows (Row 13 is the tip), plus 2 extras in the taller puff rows. That gives 14 sc per side.
Why the math works: Each slanted side runs about 3.6 in (9.1 cm) from the tip to the base corner. At 4 sc per inch it needs about 14 stitches, so the 14 sc lie flat without ruffling or cupping. Puff rows are taller than sc rows, so the 2 extra stitches go into puff-row ends.
The base is 13 foundation loops wide, and the border covers all of them: 3 (loops 2–4) + 3 (loops 10–12) + 2 corner loops + 5 trunk loops. Corner groups of 3 sc turn each point cleanly without pulling, and the tip gets the same 3-sc group so it stays pointed.
Checkpoint: 3.75 in (9.5 cm) wide x 4.5 in (11.4 cm) tall.
Hanging Loop
Step 1: Without fastening off, sl st into the center sc of the 3-sc tip group.
Step 2: Ch 15, sl st in the same center sc to form a loop.
Step 3: Work 16 sc into the ch-15 loop, covering the chain completely. Sl st in the same center sc. (16 sc)
Fasten off and weave in all ends. The covered loop stands about 1.5 in (3.8 cm) above the tip. It is firmer than a plain chain and will not stretch on a branch.
Final Blocking
- Weave in all ends along the border on the WS so nothing shows through the puffs.
- Pin the ornament RS up on a blocking mat.
- Pin the base corners 3.75 in (9.5 cm) apart.
- Pin the tip so the total height from tip to trunk bottom is 4.5 in (11.4 cm).
- Straighten both slanted sides with a ruler, pinning about every 0.75 in (1.9 cm).
- Pin the trunk square, 1.75 in (4.4 cm) wide including the border.
- Mist lightly with water. Don’t flatten the puffs; just dampen the fabric.
- Gently plump each puff with your fingertip so it stays round.
- Let it dry completely, then unpin.
- While the hanging loop is still slightly damp, pinch it flat so it stands upright.
Final Quality-Control Checklist
- [ ] Tree has 6 tiers of puffs: 6, 5, 4, 3, 2, 1 (21 puffs)
- [ ] Puffs are staggered, each sitting between two puffs below
- [ ] Trunk is centered, 5 sts wide and 4 rows tall
- [ ] Border has 62 sc with 3-sc groups at the tip and 4 corners
- [ ] Both slanted sides have 14 sc and lie flat
- [ ] Finished size is 3.75 in (9.5 cm) x 4.5 in (11.4 cm)
- [ ] Hanging loop is about 1.5 in (3.8 cm) and fully covered
- [ ] All ends are woven in securely and hidden
Troubleshooting
Puffs look flat or uneven. Pull each loop up to the same height before closing, and close tightly with the ch 1.
Puffs pop out on the wrong side. Make sure puffs are worked on even-numbered RS rows, with Row 1 as a WS row.
Tree leans to one side. Check that every decrease row has a sc2tog at both ends. Recount each puff row: 13, 11, 9, 7, 5, 3.
Sides ruffle after the border. Skip the 2 extra sc in the puff-row ends, or go down a hook size for the border only.
Sides cup or pull in. Add the extra sc as written, or work the border with a hook 0.5 mm larger.
Trunk is off-center. Recount the foundation loops. The trunk must start in loop 5 and end in loop 9, with 4 free loops on each side.
Hanging loop twists. Mist it and let it dry pinched flat, or redo it with 1–2 fewer sc.
Care
Hand wash in cool water with mild soap, press out the water in a towel, and dry flat, reshaping the puffs as it dries. Store flat between seasons so the loop and tip stay crisp.
Final Notes
The measurement chain is short and easy to follow. A gauge of 4 sc per inch makes the 13-st base 3.25 in (8.3 cm) wide. Row 1 plus six 0.5 in (1.3 cm) tiers make a tree 3.25 in (8.3 cm) tall. The 0.75 in (1.9 cm) trunk brings the piece to 4 in (10.2 cm). The 0.25 in (0.6 cm) border then brings it to 3.75 in (9.5 cm) x 4.5 in (11.4 cm). Check each stage and the ornament will come out right.
Once you have made one, the pattern is quick to repeat, so you can make as many as you want for your tree or as gift toppers.
Happy crocheting!