

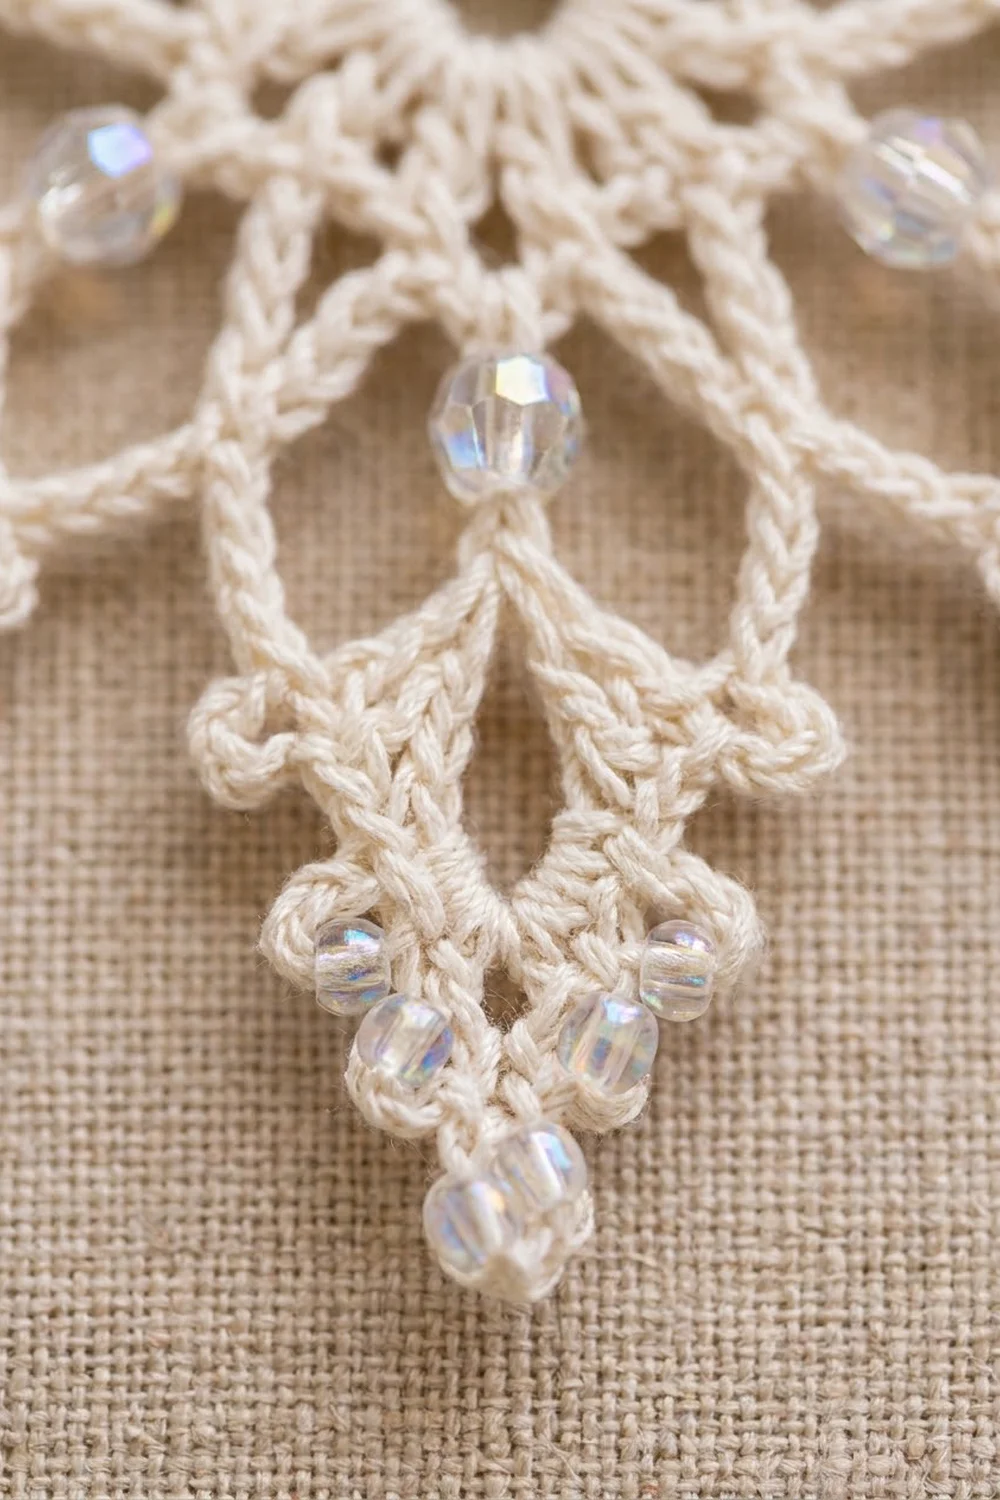
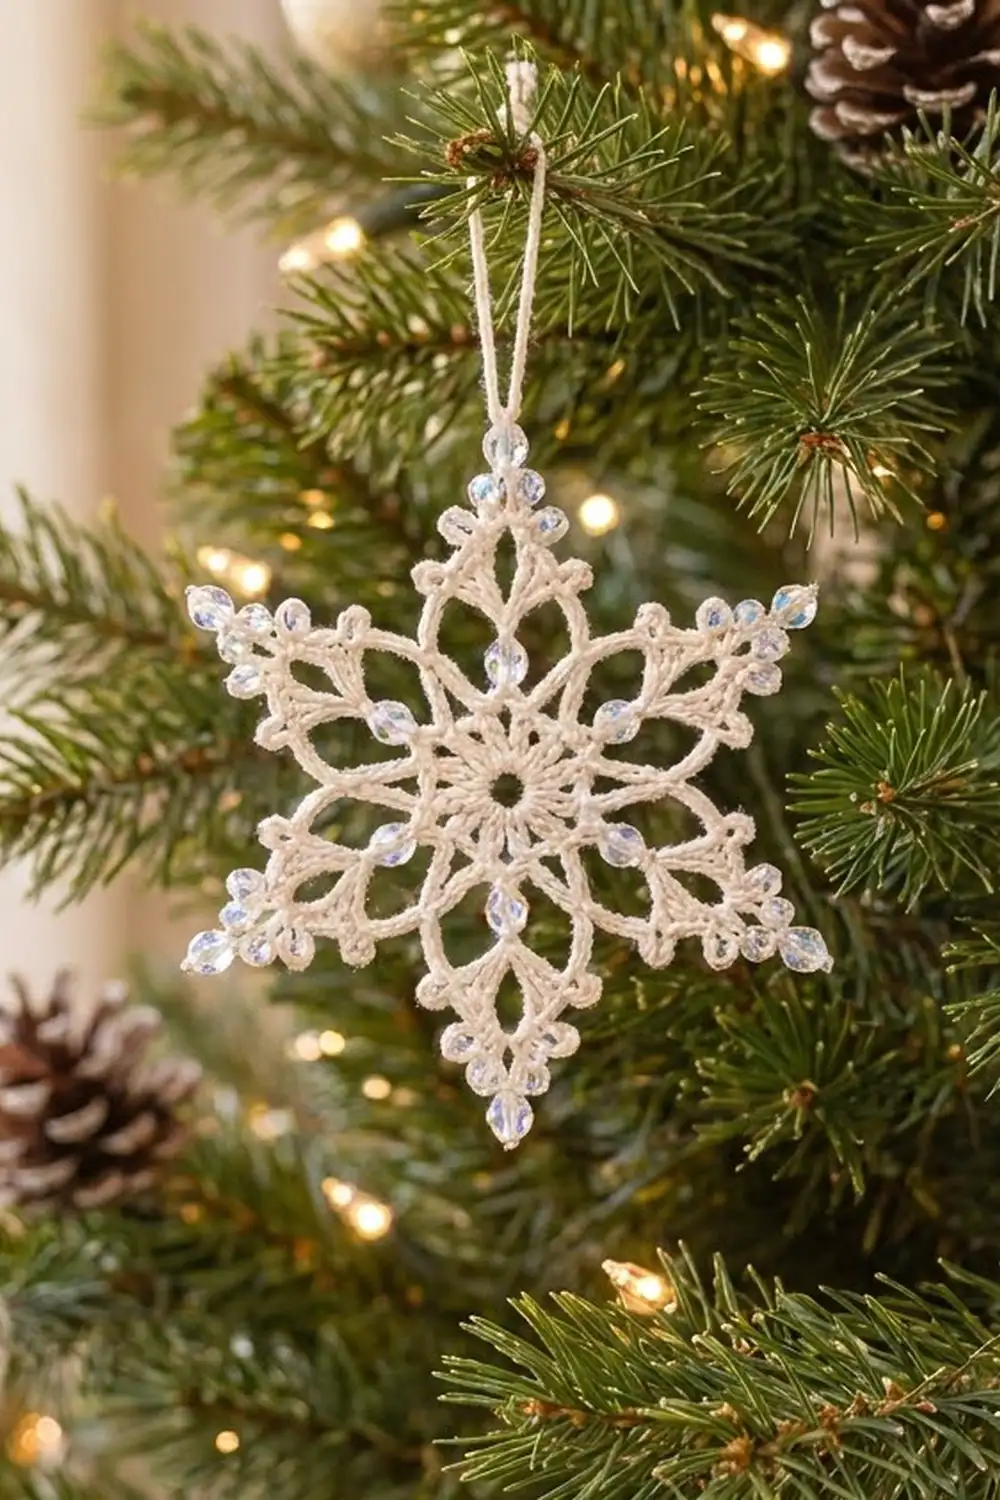
The Frostlight Beaded Snowflake is a six-pointed lace snowflake worked in cream cotton thread. Small clear iridescent beads are set into the picots. It has a solid round center with a tiny open eye, a ring of six open teardrop petals, and six long open spikes. Each spike ends in a three-bead trefoil.
The look is soft and wintry rather than bright. The cream thread keeps it cozy, and the clear AB beads catch candlelight and tree lights without adding a second color. It works as a tree ornament, a gift topper, or a small table accent.
This pattern uses US crochet terms. After blocking, the snowflake measures 5.5 in (14.0 cm) from one spike tip to the opposite spike tip.
The snowflake is made as one single piece in the round, in 5 rounds, with no joining. Before you begin, you string all the beads onto the thread, then slide them into place as you work the bead picots. Blocking with a firm starch gives it a crisp, flat shape.
Finished Size and Construction
- Finished size: 5.5 in (14.0 cm) tip to tip
- Skill level: Intermediate (beading plus chain-loop lace)
- Terminology: US crochet terms
- Yarn weight: Size 3 mercerized cotton crochet thread (lace / weight 0)
- Hook: 2.0 mm steel hook
- Number of pieces: 1
- Layout: Single motif, worked in the round
- Piece size: 5.5 in (14.0 cm) tip to tip
- Size before border (after Round 4): 3.5 in (8.9 cm) across
- Border depth: 1 in (2.5 cm) of spike beyond Round 4 on each side
Materials
Thread advice: Use a size 3 mercerized cotton. It holds starch well, shows the stitch definition clearly, and doesn’t fuzz around the beads. Acrylic won’t block crisply, so avoid it for this design. Choose a warm cream or ivory to match the photo. Bright optic white looks colder next to clear beads.
- Cream (Color A): 6 g, about 20 m (22 yd), size 3 cotton thread
Beads:
- 45 clear iridescent (AB finish) glass beads, 4 mm, with holes big enough to slide easily on size 3 thread. The pattern uses 42 beads.
Tools:
- 2.0 mm steel crochet hook
- Big-eye beading needle or fine dental-floss threader, for stringing beads
- Tapestry needle, for weaving in ends
- Rust-proof pins and a foam blocking board
- Fabric stiffener or starch solution
- Plastic wrap
- Scissors and a ruler
All quantities include a margin: about 25 percent extra thread, plus 3 spare beads for testing or to replace any chipped ones.
Abbreviations (US Terms)
- ch: chain
- sl st: slip stitch
- sc: single crochet
- hdc: half double crochet
- dc: double crochet
- sk: skip
- sp: space
- st(s): stitch(es)
- rep: repeat
Special Stitches
Bead chain (bch): Slide 1 pre-strung bead up against the hook, yarn over and pull through. The bead is now locked into the back of that chain.
Bead picot (bp): Ch 2, bch, ch 2, sl st in the first ch of this picot. This makes a small loop with the bead at its tip. Each bp uses 1 bead and counts as 1 bp, not as stitches.
Bead trefoil: Work 3 bp in a row. Each bp starts from the same base point, so the three fan out into a three-bead cluster.
Before You Start
Thread the beading needle and string all 42 beads (plus spares if you like) onto the thread. Push them about 3 yd (2.7 m) down the thread, toward the ball, and slide more forward as you need them. All the beads are the same color, so the order doesn’t matter.
Work with the right side facing you throughout. The beads settle on the side facing away from you as you make each bch. That back side becomes the display side, so mark it with a scrap of thread after Round 1.
Gauge and Checkpoints
Gauge isn’t critical for an ornament, but it controls the final size and how well the spikes hold their shape. Make one test snowflake before starting a batch.
Gauge: Round 1 = 1 in (2.5 cm) in diameter.
Checkpoints (pressed lightly flat, before blocking):
- After Round 1: 1 in (2.5 cm) across
- After Round 3: 3 in (7.6 cm) across, petal tip to opposite petal tip
- After Round 4: 3.5 in (8.9 cm) across
- After Round 5 and blocking: 5.5 in (14.0 cm) tip to tip
If too big: Go down to a 1.75 mm hook, or tighten your chains. Loose chains are the usual cause in this design.
If too small: Go up to a 2.25 mm hook. A tight Round 1 also makes the center cup, so check that first.
Pattern
Center Ring
Ch 6, sl st in first ch to form a ring.
Round 1 (Center Disk)
Ch 3 (counts as dc), 23 dc in ring, sl st in top of beginning ch-3.
Count: 24 dc.
This round forms the solid center with its small open eye. Gently pull the starting tail to close the ring until the hole is about 0.25 in (0.6 cm) across.
Round 2 (Petal Loops)
Ch 1, *sc in next dc, ch 9, sk 2 dc, sc in next dc, ch 2; rep from * 5 more times, sl st in first sc.
Count: 12 sc, 6 ch-9 loops, 6 ch-2 sps.
Each repeat uses 4 dc from Round 1 (sc, skip 2, sc), so 6 repeats use all 24 dc. The ch-9 loops stand up from the center and become the teardrop petals.
Round 3 (Petal Outline and Inner Beads)
Ch 1, *(2 sc, hdc, 2 dc, ch 3, 2 dc, hdc, 2 sc) in next ch-9 loop, (sc, bp, sc) in next ch-2 sp; rep from * 5 more times, sl st in first sc.
Count per repeat: 10 sts plus a ch-3 tip on the petal, then 2 sc and 1 bp between petals, for 12 sts per repeat.
Round total: 72 sts (60 petal sts + 12 sc between petals), plus 6 ch-3 tips and 6 bp.
Each petal is a conversion: (9 sts, 1 per chain) + (1 extra st) = 10 sts, with the ch-3 tip on top. The extra stitch lets the petal curve into a teardrop instead of pulling flat. The 6 bead picots sit in the valleys between the petals. This round uses 6 beads.
Round 4 (Frame Round)
Sl st in next 2 sc, next hdc, and next 2 dc, then sl st in next ch-3 tip sp. Ch 1, *(sc, ch 3, sc) in ch-3 tip sp, ch 11; rep from * 5 more times, sl st in first sc.
Count: 12 sc, 6 ch-3 tip sps, 6 ch-11 arcs.
Each ch-11 arc swings outward over one bead picot from Round 3 and frames it. Flatten the piece lightly now. It should measure 3.5 in (8.9 cm) across.
Border (Round 5: Spikes and Arcs)
The last round is the border. It builds the six long spikes over the petal tips and covers the six arcs between them.
Border gauge: 12 sc fill one ch-11 arc and measure about 1.5 in (3.8 cm) along the curve. Each finished spike is 1 in (2.5 cm) long, measured from the Round 4 tip.
Round 5
Sl st in first ch-3 tip sp.
*In ch-3 tip sp: sc, ch 4, bp, ch 4, work a bead trefoil (3 bp), ch 4, bp, ch 4, sc in same ch-3 tip sp; sc in next sc; (6 sc, bp, 6 sc) in next ch-11 arc; sc in next sc; rep from * 5 more times, sl st in first sc. Fasten off.
Count per point section:
- Spike: 2 sc in the tip sp, 16 ch, 5 bp (1 side bead, 3 trefoil beads, 1 side bead)
- Edges: 1 sc in each of the 2 sc from Round 4
- Arc: 12 sc + 1 bp
Section total: 16 sc, 16 ch, 6 bp.
Round total: 96 sc, 96 ch in the spikes, 36 bp.
Why the Math Works
Round 4 has 6 identical sections. Each has 2 sc, 1 ch-3 tip, and 1 ch-11 arc. Round 5 matches that exactly. The 2 sc in the tip sp, plus 1 sc in each of the 2 sc from Round 4, give 4 sc. The arc adds 12 sc. That makes 4 + 12 = 16 sc per section, and 6 × 16 = 96 sc.
The arc is a conversion: (11 sc, 1 per chain) + (1 extra sc) = 12 sc. The extra stitch keeps the arc rounded and stops it from pulling the spikes inward. The bead picot sits at the midpoint, with 6 sc on each side, so every arc is symmetrical.
The spike loop is 4 + 4 + 4 + 4 = 16 ch, with 8 ch on each side. Because it starts and ends in the same tip sp, it forms a closed teardrop spike with an open center. With its bead picots, each spike reaches about 1 in (2.5 cm) beyond Round 4. That gives 3.5 in + 1 in + 1 in = 5.5 in (14.0 cm) tip to tip.
Bead check: 6 beads in Round 3 + 36 beads in Round 5 = 42 beads.
Weave both ends in along the backs of the sc stitches, not through the chains, so they stay hidden after blocking.
Final Blocking
- Cover the blocking board with plastic wrap so the stiffener doesn’t soak into the foam.
- Mix the fabric stiffener as directed on the bottle, or use a strong starch solution.
- Soak the snowflake fully, then gently squeeze out the excess. Don’t wring it.
- Lay it beaded side up. Pin the center first, through the eye. Then pin each of the 6 spike tips through the middle bead of its trefoil, 2.75 in (7.0 cm) from the center, so the snowflake measures 5.5 in (14.0 cm) tip to tip.
- Check that the spikes are evenly spaced, 60 degrees apart. A paper template with 6 lines drawn out from a center point helps.
- Pin the bead picot at the middle of each arc so the arcs curve evenly.
- Open each spike loop and each petal loop with a pin so the centers show as clean teardrops.
- Blot up any stiffener pooling in the holes with a paper towel.
- Let it dry completely, about 24 hours, before you unpin it.
Final Quality-Control Checklist
- Center hole closed to about 0.25 in (0.6 cm), with no gaps in Round 1
- 6 petals of equal length, each with a pointed ch-3 tip
- 6 beads between the petals, all on the display side
- 6 spikes, each with 2 side beads and a full 3-bead trefoil
- 6 arcs, each with a centered bead
- 42 beads in total
- Finished size of 5.5 in (14.0 cm) tip to tip
- Piece lies flat, with no cupping or ruffling
- Ends hidden and trimmed
Troubleshooting
Center cups upward: Round 1 is too tight, or it’s short of 24 dc. Count the beginning ch-3 plus 23 dc.
Petals look flat, not teardrop-shaped: The ch-9 loops are too short or too tight. Loosen your chains a little and recount the 9 chains.
Beads end up on the wrong side: Push each bead firmly against the hook before the yarn over in every bch, and keep the same side facing you throughout.
Bead slips out of its chain: That chain was made too loosely. Redo it, holding the bead snug against the hook as you yarn over.
Spikes droop or twist: The chains are uneven, or the stiffener was too weak. Re-wet the piece with stiffener and pin each spike straight.
Arcs pull the spikes inward: The arc has fewer than 12 sc. Recount: 6 sc, bp, 6 sc.
Ran out of beads: You can’t add beads in the middle of a round. Cut the thread, string more beads, and rejoin at the start of the next section, hiding the new ends.
Care
Dust gently, or hand-wash in cool water and re-block with stiffener if the snowflake goes limp. Store it flat in a box between sheets of tissue paper so the spikes don’t bend.
Final Notes
The measurement chain is short. Round 1 sets the 1 in (2.5 cm) center. Round 3 grows it to 3 in (7.6 cm) with six teardrop petals. Round 4 frames it at 3.5 in (8.9 cm). The beaded border round adds a 1 in (2.5 cm) spike on each side, for a blocked size of 5.5 in (14.0 cm).
If your test snowflake hits every checkpoint, the rest of the batch will match it. String your beads first, keep your chains even, and let the starch do the shaping.
Happy crocheting!