
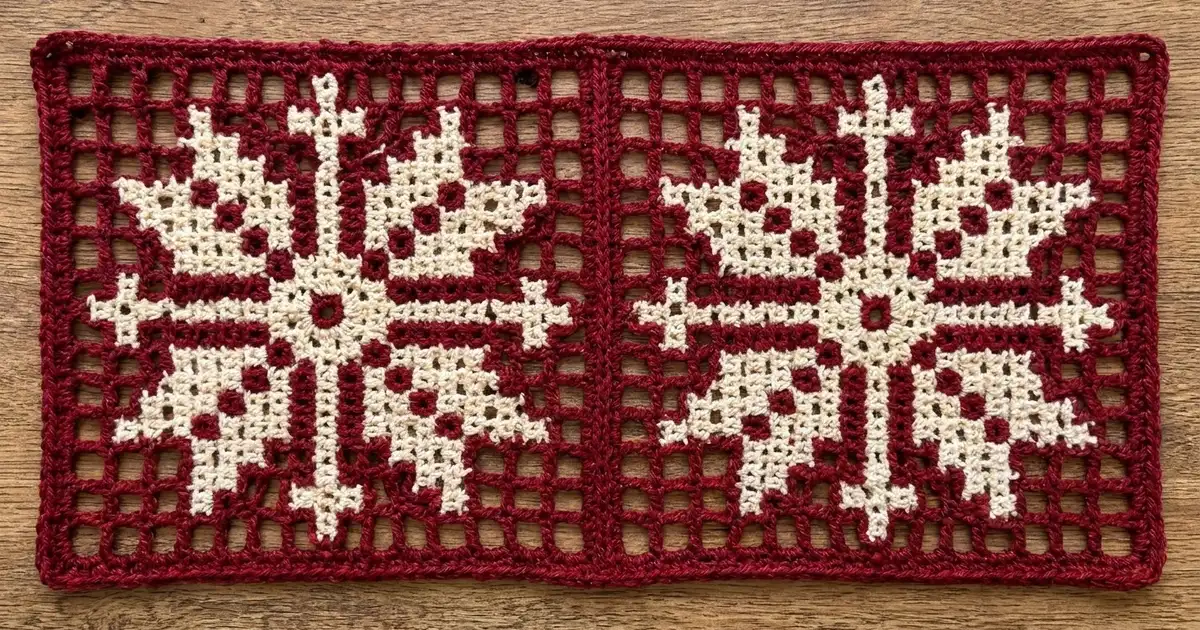
This panel pairs two classic filet-mesh squares, each holding one bold cream snowflake, and joins them into a single vertical strip. The deep cranberry mesh keeps the background light and airy, while the filled cream squares give the snowflakes a crisp, cross-stitch look.
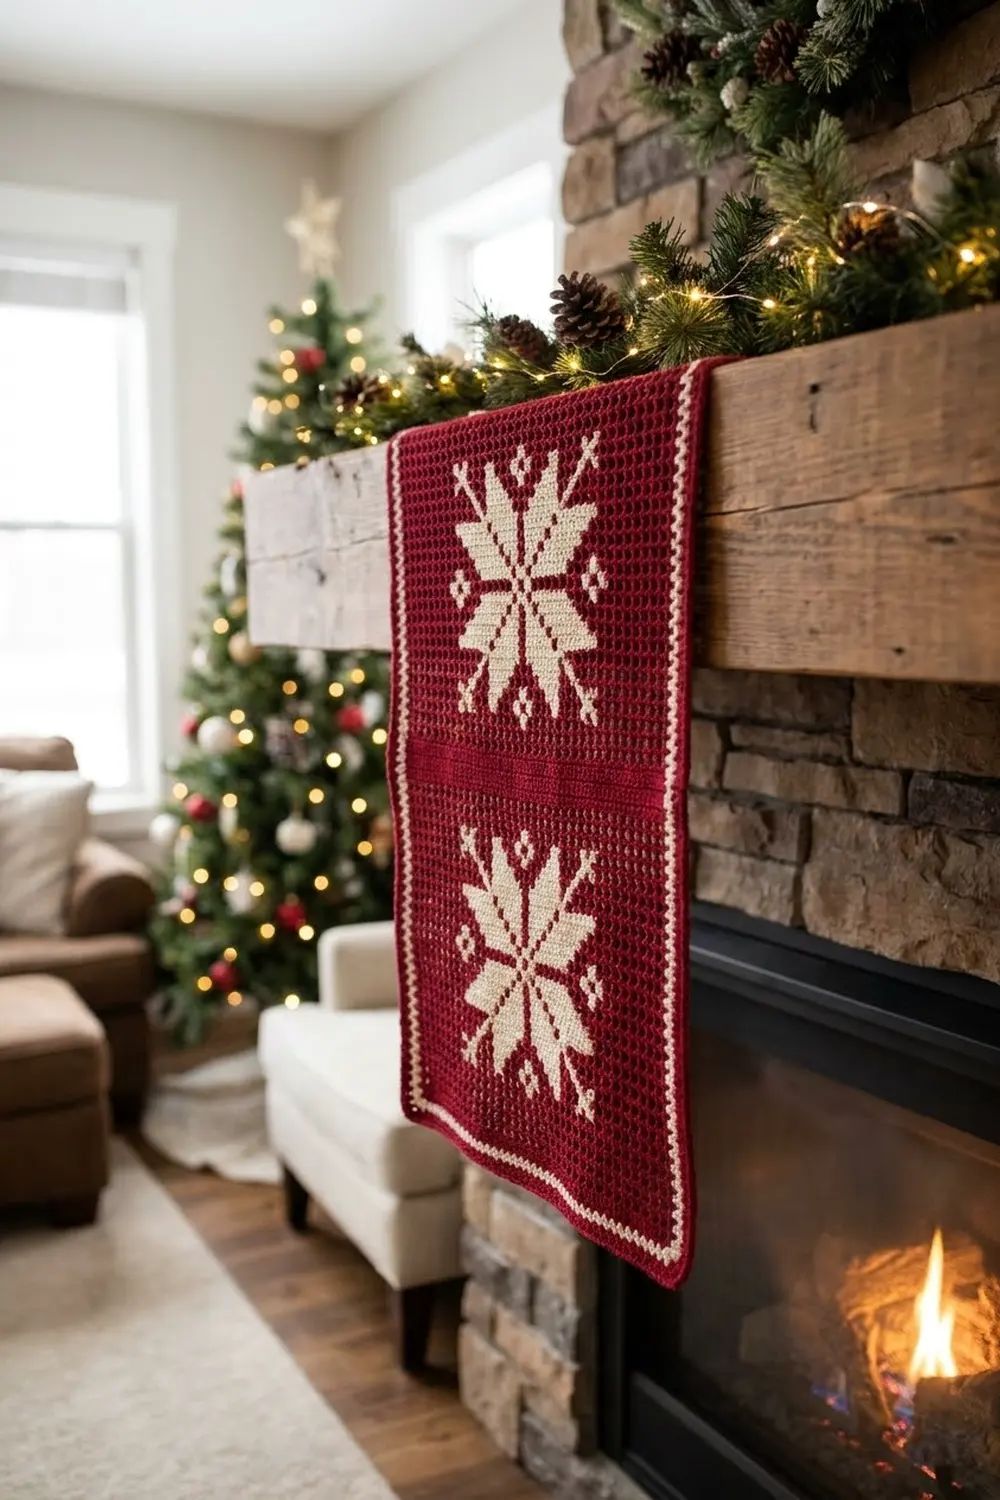
The palette is just two colors: cranberry red for the mesh, seam, and border, and cream for the snowflakes. The style is Nordic and cozy, ideal as a small wall hanging, door panel, or tabletop accent for the winter season.
This pattern uses US crochet terms. The finished panel measures 10.0 in x 18.8 in (25.4 cm x 47.8 cm) after blocking.
Construction is simple. You crochet two red mesh blocks of 21 x 21 squares, edge each with one round of single crochet, then fill the snowflake squares with cream yarn using a doubled cross-stitch. Then you join the blocks with a single crochet seam and add a three-round border.
Finished Size and Construction
- Finished size: 10.0 in x 18.8 in (25.4 cm x 47.8 cm)
- Skill level: Intermediate
- Terminology: US crochet terms
- Yarn weight: DK (light, category 3)
- Hook: 4.0 mm (G-6)
- Number of pieces: 2 identical blocks
- Layout: 1 block wide x 2 blocks tall
- Mesh size per block: 21 x 21 squares, 8.4 in x 8.4 in (21.3 cm x 21.3 cm)
- Block size after edging round: 8.8 in x 8.8 in (22.4 cm x 22.4 cm)
- Size before border: 8.8 in x 17.6 in (22.4 cm x 44.7 cm)
- Border depth: 0.6 in (1.5 cm) on each side
Materials
Choose a smooth, firmly plied DK yarn in cotton or a cotton blend. Crisp yarn shows filet mesh well and holds its shape when blocked. Avoid fuzzy or very splitty yarns, since they blur the open squares.
- Color A, Cranberry Red: 100 g, about 230 m (252 yd)
- Color B, Cream: 25 g, about 58 m (63 yd)
Tools:
- 4.0 mm (G-6) crochet hook
- Blunt tapestry needle with a large eye
- Scissors
- 4 locking stitch markers
- Tape measure
- Blocking mats and rust-proof pins
- Spray bottle
These quantities include a margin of about 15 percent for your gauge swatch and small tension differences.
Abbreviations (US Terms)
- ch = chain
- sl st = slip stitch
- sc = single crochet
- dc = double crochet
- sk = skip
- sp = space
- st(s) = stitch(es)
- rev sc = reverse single crochet
- RS / WS = right side / wrong side
Special stitch, reverse single crochet (rev sc): Working from left to right (right-handed), insert the hook into the next stitch to the right, yarn over, pull up a loop, yarn over, and pull through both loops. This creates the corded edge.
Mesh square: One open square is 1 dc post, ch 1, and the next dc post. Neighboring squares share posts.
Gauge and Checkpoints
Gauge: 5 mesh squares and 5 rows = 2 in (5.1 cm) in dc mesh. One square is 0.4 in (1.0 cm) wide and tall.
Make one full block before starting the second. Measure it at these checkpoints:
- After Row 5: 8.4 in (21.3 cm) wide and 2 in (5.1 cm) tall.
- After Row 21: 8.4 in x 8.4 in (21.3 cm x 21.3 cm).
- After the edging round: 8.8 in x 8.8 in (22.4 cm x 22.4 cm).
If your block is too big, change to a 3.75 mm hook. If it is too small, change to a 4.5 mm hook. If the width is right but the rows are too tall, wrap the yarn more snugly on the dc or pull the first loop up less. Don’t add or remove squares. The snowflake placement depends on a 21 x 21 grid.
Block (Make 2)
Use Color A.
Foundation: Ch 46.
Row 1 (RS): Dc in 6th ch from hook (the skipped 5 ch count as 1 dc, ch 1, and 1 skipped ch). Ch 1, sk next ch, dc in next ch. Repeat from * across, turn. You now have 22 dc posts and 21 ch-1 sps (21 squares, 43 sts).
Rows 2–21: Ch 4 (counts as dc and ch 1), sk first dc and ch-1 sp, dc in next dc. Ch 1, dc in next dc. Repeat from * across, working the last dc into the 3rd ch of the turning ch-4 (on Row 2, work it into the 4th of the skipped ch at the start of Row 1), turn. Each row has 22 posts and 21 squares (43 sts).
After Row 21, the block is 21 squares wide and 21 rows tall. Do not fasten off.
Edging round: Ch 1, do not turn.
- Top: Sc in each dc and each ch-1 sp across (43 sc). Ch 2 for the corner.
- Side: Work 2 sc around each row-end post, but work 3 sc around the Row 11 post (43 sc). Ch 2 for the corner.
- Bottom: Sc in the base of each dc and in each ch-1 sp of the foundation (43 sc). Ch 2 for the corner.
- Second side: Work as for the first side (43 sc). Ch 2, sl st to the first sc.
Count: 172 sc (43 per side) plus 4 ch-2 corner sps. In this pattern, corner spaces are not counted in a side’s total. Fasten off and weave in the ends.
Checkpoint: 8.8 in x 8.8 in (22.4 cm x 22.4 cm).
Snowflake Fill
Lay the block RS up with the foundation edge at the bottom. Number the squares 1–21 from left to right (columns) and 1–21 from bottom to top (rows). The center square is column 11, row 11. Offsets below are counted in squares from that center.
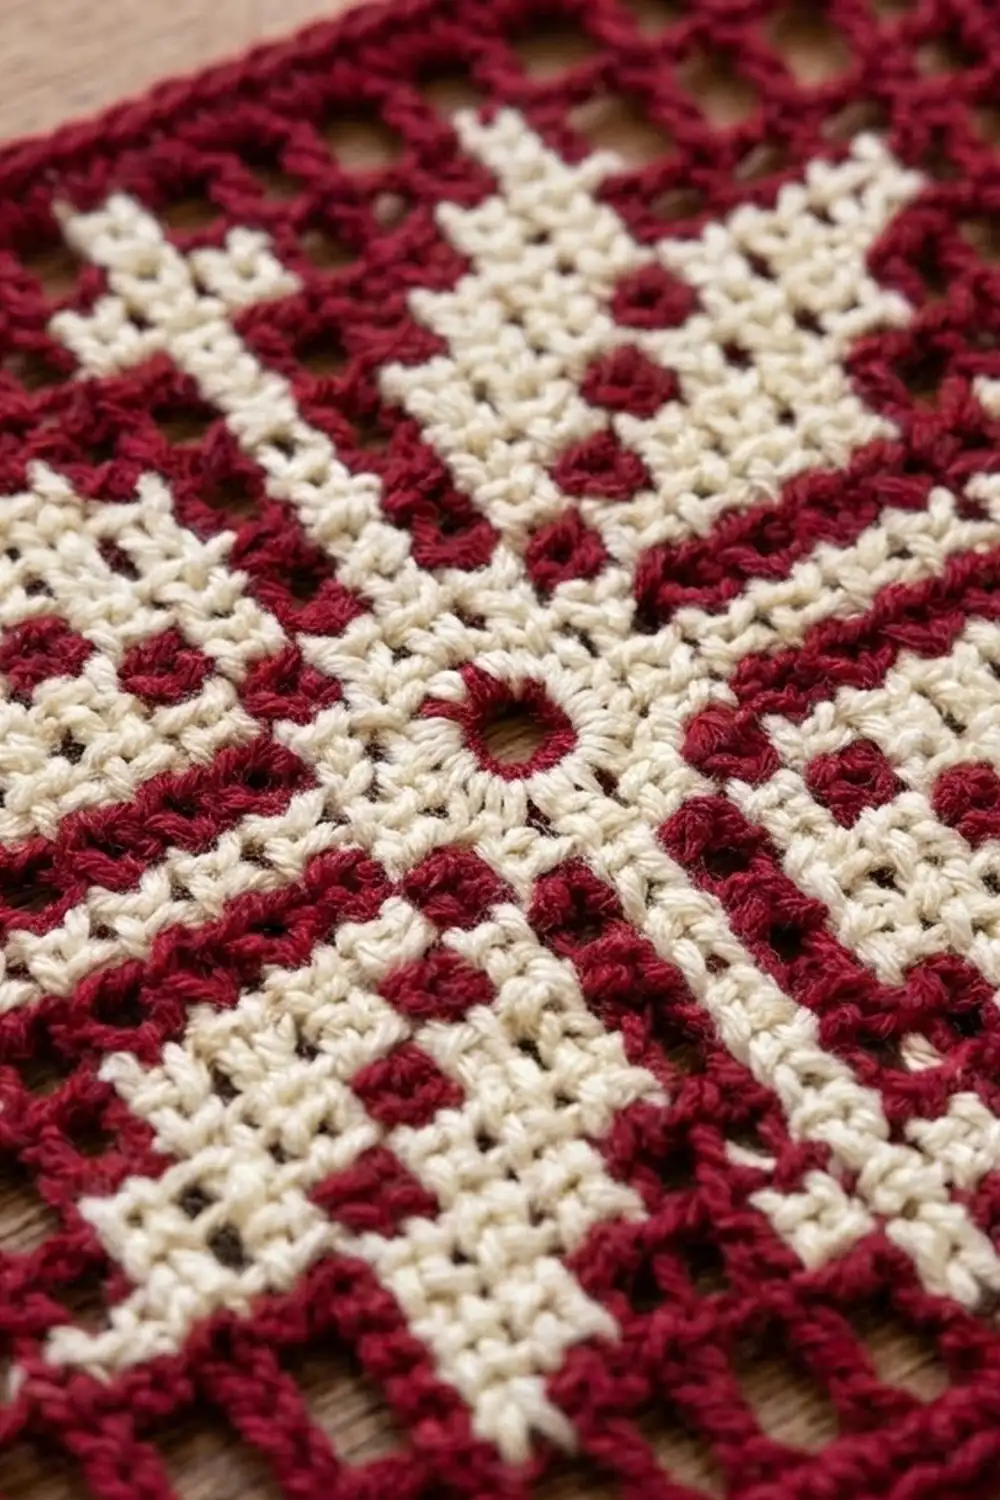
How to fill a square: Thread a 36 in (91.4 cm) length of Color B, used doubled. Bring the needle up through the lower-left corner of the open square, close to where the post meets the chain. Cross to the upper-right corner and go down. Come up at the lower-right corner and go down at the upper-left. Work a second full cross over the first so the square reads as solid cream. Carry yarn on the WS only between neighboring squares, and keep the tension relaxed so the mesh stays square.
Fill these squares:
- Center ring: The 8 squares surrounding the center. Leave the center square itself open (8 squares).
- Straight arms: In column 11, fill offsets 2 through 8 above and below the center. In row 11, fill offsets 2 through 8 left and right (4 arms x 7 = 28 squares).
- Crossbars: On each straight arm at offset 7, fill the square on each side of the arm (4 arms x 2 = 8 squares).
- Diagonal leaves: For each of the 4 diagonal directions, fill the diagonal squares at offsets (2,2) through (7,7). Then fill the 2 squares beside each diagonal square from (3,3) through (7,7), stepping one square back toward the center horizontally and vertically: (3,2) and (2,3), up to (7,6) and (6,7). That is 6 + 10 = 16 squares per leaf, or 64 squares in total.
Total per block: 8 + 28 + 8 + 64 = 108 filled squares. The arm tips end at offset 8, leaving 2 open red squares between the snowflake and the edge on all four sides.
Weave in the cream ends on the WS through the stitched crosses.
Make All Pieces
- Block A: 1 block, Color A mesh with Color B snowflake
- Block B: 1 block, Color A mesh with Color B snowflake
Layout (1 wide x 2 tall), both with the foundation edge at the bottom:
+-----------+
|  Block A  |
+-----------+
|  Block B  |
+-----------+
Joining
Place Block A and Block B wrong sides together, with the bottom edge of Block A matched to the top edge of Block B. Line up the corners and the edging stitches one-to-one. Clip the corners with stitch markers.
With Color A, working through both layers:
- Sl st in the matched ch-2 corner sps to anchor.
- Sc in each pair of matched sts across (43 sc).
- Sl st in the matched ch-2 corner sps at the far end.
Fasten off. The seam forms the solid red line between the two snowflakes on the RS.
Stitch logic: Each block edge has exactly 43 sc, so the seam is a clean 1-to-1 match. Nothing needs to be skipped or doubled.
Tension advice: Keep the seam stitches the same height as your edging sc. If the seam pulls tight, the panel will narrow at the middle. If it’s loose, the seam will ripple. Go up a hook size for the seam only if needed.
Size checkpoint: 8.8 in x 17.6 in (22.4 cm x 44.7 cm).
Border
Border gauge: about 5 sc = 1 in (2.5 cm).
Join Color A with a sl st in any outer corner ch-2 sp, RS facing.
Round 1: Ch 1. Work (sc, ch 2, sc) in each outer corner sp. Sc in each edging sc around. On the long sides, after the last sc of one block, go straight into the first sc of the next block. Do not work into the seam’s joined corner spaces. Sl st to the first sc.
- Short sides: 43 + 2 corner sc = 45 sc each
- Long sides: (2 blocks x 43) + 2 corner sc = 88 sc each
- Total: 266 sc plus 4 ch-2 corner sps
Round 2: Ch 1. Sc in each sc, and work (sc, ch 2, sc) in each corner sp. Sl st to the first sc.
- Short sides: 47 sc each
- Long sides: 90 sc each
- Total: 274 sc plus 4 ch-2 corner sps
Round 3: Ch 1. Work rev sc in each sc and 2 rev sc in each corner sp. Sl st to the first st.
- Total: 274 + 8 = 282 rev sc
Fasten off and weave in the ends.
Why the math works: Each round adds 2 sts per side, which covers the 0.2 in (0.5 cm) of extra edge length per side that each round creates. After Round 1, the edge is 9.2 in x 18.0 in (23.4 cm x 45.7 cm): 45 sc and 88 sc both work out to about 4.9 sc per inch. After Round 2, the edge is 9.6 in x 18.4 in (24.4 cm x 46.7 cm): 47 sc and 90 sc keep that same ratio. Matching ratios on all four sides keep the border flat with square corners. The rev sc round adds a corded finish without changing the size much.
Final Blocking
- Weave in all ends securely before blocking.
- Pin the panel RS up on blocking mats.
- Pin the four outer corners to 10.0 in x 18.8 in (25.4 cm x 47.8 cm).
- Pin the middle of each long side and both ends of the seam so the panel doesn’t waist in.
- Add pins every 1 in (2.5 cm) along the border, keeping the edges straight.
- Spray until evenly damp, not dripping.
- Gently square up the open mesh holes with your fingertips, especially around the cream fill.
- Let dry completely, at least 24 hours, before unpinning.
Final Quality-Control Checklist
- Each block has 21 x 21 squares and 43 sc per edging side.
- Each snowflake has exactly 108 filled squares, and both snowflakes match.
- The center square of each snowflake is open.
- The seam has 43 sc with no gaps at the ends.
- Border Round 2 shows 47 sc on the short sides and 90 sc on the long sides.
- The panel measures 10.0 in x 18.8 in (25.4 cm x 47.8 cm).
- All four corners are square, and the long sides are straight.
- There are no visible floats or tails on the RS.
Troubleshooting
- The mesh leans to one side: You are probably working the last dc into the wrong turning-ch stitch. Recount for 22 posts on every row.
- The squares are taller than they are wide: Shorten your dc by pulling the first loop up less, or switch to a smaller hook for the rows only.
- Cream squares look thin: Add a third cross, or use the yarn tripled for the fill.
- The mesh is distorted around the snowflake: Your cross-stitches are too tight. Loosen them and re-block.
- The border ruffles: You added extra sts. Recount against 45/88 and 47/90.
- The border cups: Your tension is too tight. Go up 0.5 mm for the border only.
- The panel narrows at the seam: Rework the seam more loosely.
Care
Hand wash in cool water with a mild detergent, then press out the water in a towel. Reshape and dry flat. Don’t tumble dry.
Final Notes
The measurement chain is simple. Each square is 0.4 in (1.0 cm), so 21 squares make an 8.4 in (21.3 cm) block. The edging round brings each block to 8.8 in (22.4 cm), and two joined blocks measure 8.8 in x 17.6 in (22.4 cm x 44.7 cm). The 0.6 in (1.5 cm) border finishes the panel at 10.0 in x 18.8 in (25.4 cm x 47.8 cm). If you check each step against these numbers, the finished panel will lie flat and square.
Happy crocheting!