
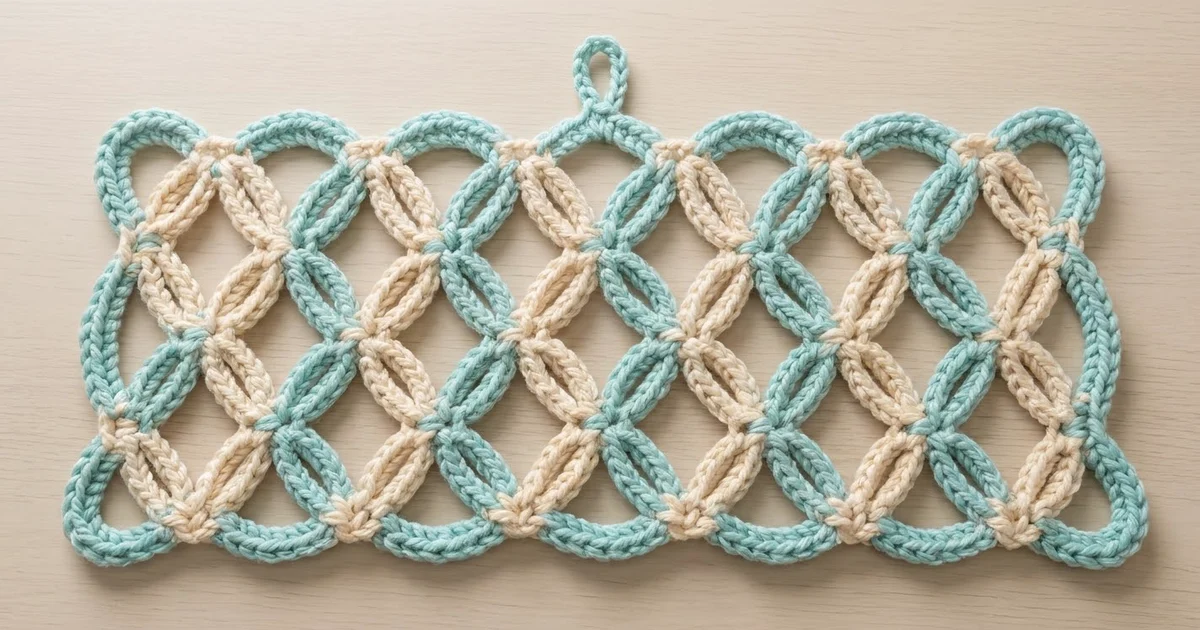
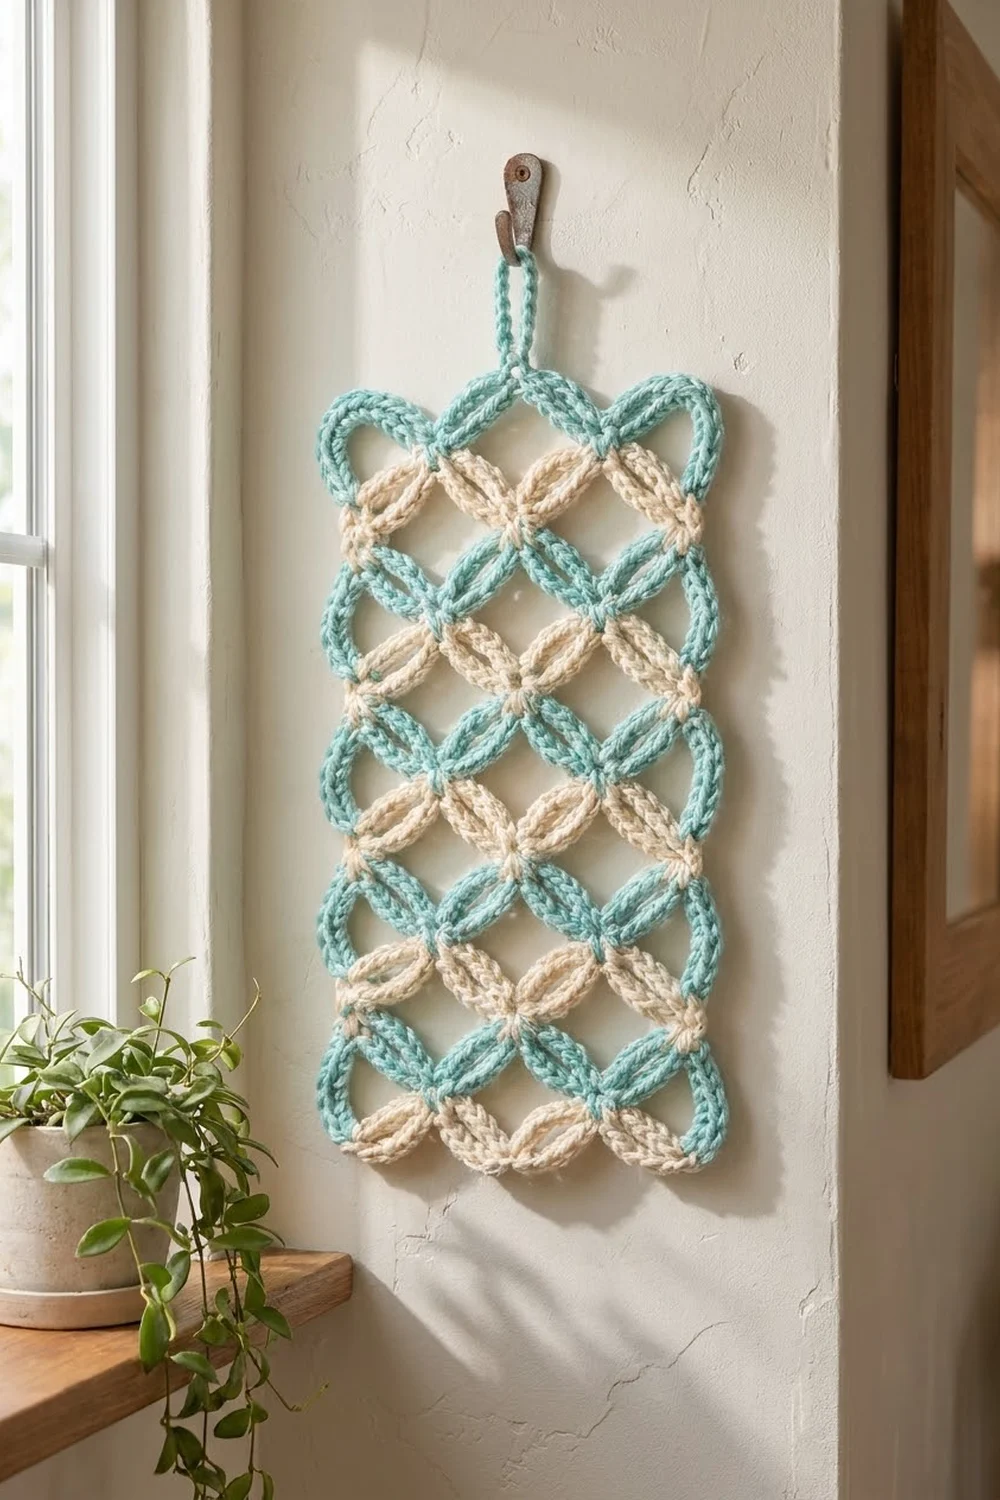
The Seaglass Lattice Wall Panel is one flat, open rectangle of chunky chain arches. The arches cross at small knots, so the surface looks like a grid of soft lens shapes, a bit like a woven garden trellis. A short loop at the top center lets it hang from a hook or nail.
Two colors share the work. Soft aqua starts the panel, and after that aqua and warm cream swap every two rows. This makes horizontal bands of lenses in one color each. An aqua border frames the panel and gives the edge its rounded, rope-like finish.
The pattern uses US crochet terms. The finished panel measures 9 in x 18 in (22.9 cm x 45.7 cm), not counting the hanging loop. Before the border it measures 8 in x 17 in (20.3 cm x 43.2 cm).
Construction is simple. You chain a foundation and work 17 rows of chain-arch mesh. Then you add a two-round border and the hanging loop. The panel is all one piece, so there’s no seaming and only a few ends to weave in.
Finished Size and Construction
- Finished size: 9 in x 18 in (22.9 cm x 45.7 cm)
- Skill level: Easy
- Terminology: US crochet terms
- Yarn weight: Bulky (#5)
- Hook: 6 mm (US J-10)
- Number of pieces: 1
- Layout: One rectangular panel, worked flat in rows
- Piece size: 9 in x 18 in (22.9 cm x 45.7 cm) after the border
- Size before border: 8 in x 17 in (20.3 cm x 43.2 cm)
- Border depth: 0.5 in (1.3 cm) on every side
Materials
Choose a smooth, round bulky yarn. Cotton or a cotton-acrylic blend works best. Fuzzy or loosely plied yarns blur the knots and the clean shape of the lenses. Pick an aqua and a cream with enough contrast that the bands stand out clearly.
- Color A, Aqua: 50 g, about 70 m. Used for Row 1, four stripe bands, the border and the hanging loop.
- Color B, Cream: 25 g, about 35 m. Used for four stripe bands.
These amounts include a margin of about 30 percent, so you should still have enough if you crochet tightly or loosely.
Tools:
- 6 mm (US J-10) crochet hook
- Tapestry needle
- Scissors
- 2 stitch markers
- Measuring tape
- Blocking mat and rust-proof pins
- Spray bottle with water
Abbreviations (US Terms)
- ch: chain
- sc: single crochet
- dc: double crochet
- sl st: slip stitch
- sk: skip
- st(s): stitch(es)
- rsc: reverse single crochet (crab stitch)
- arch: a ch-5 space
Special stitch: reverse single crochet (rsc). If you crochet right-handed, work from left to right. Insert the hook into the next stitch to the right, yarn over and pull up a loop. Yarn over again and draw through both loops on the hook. This makes a twisted, corded edge.
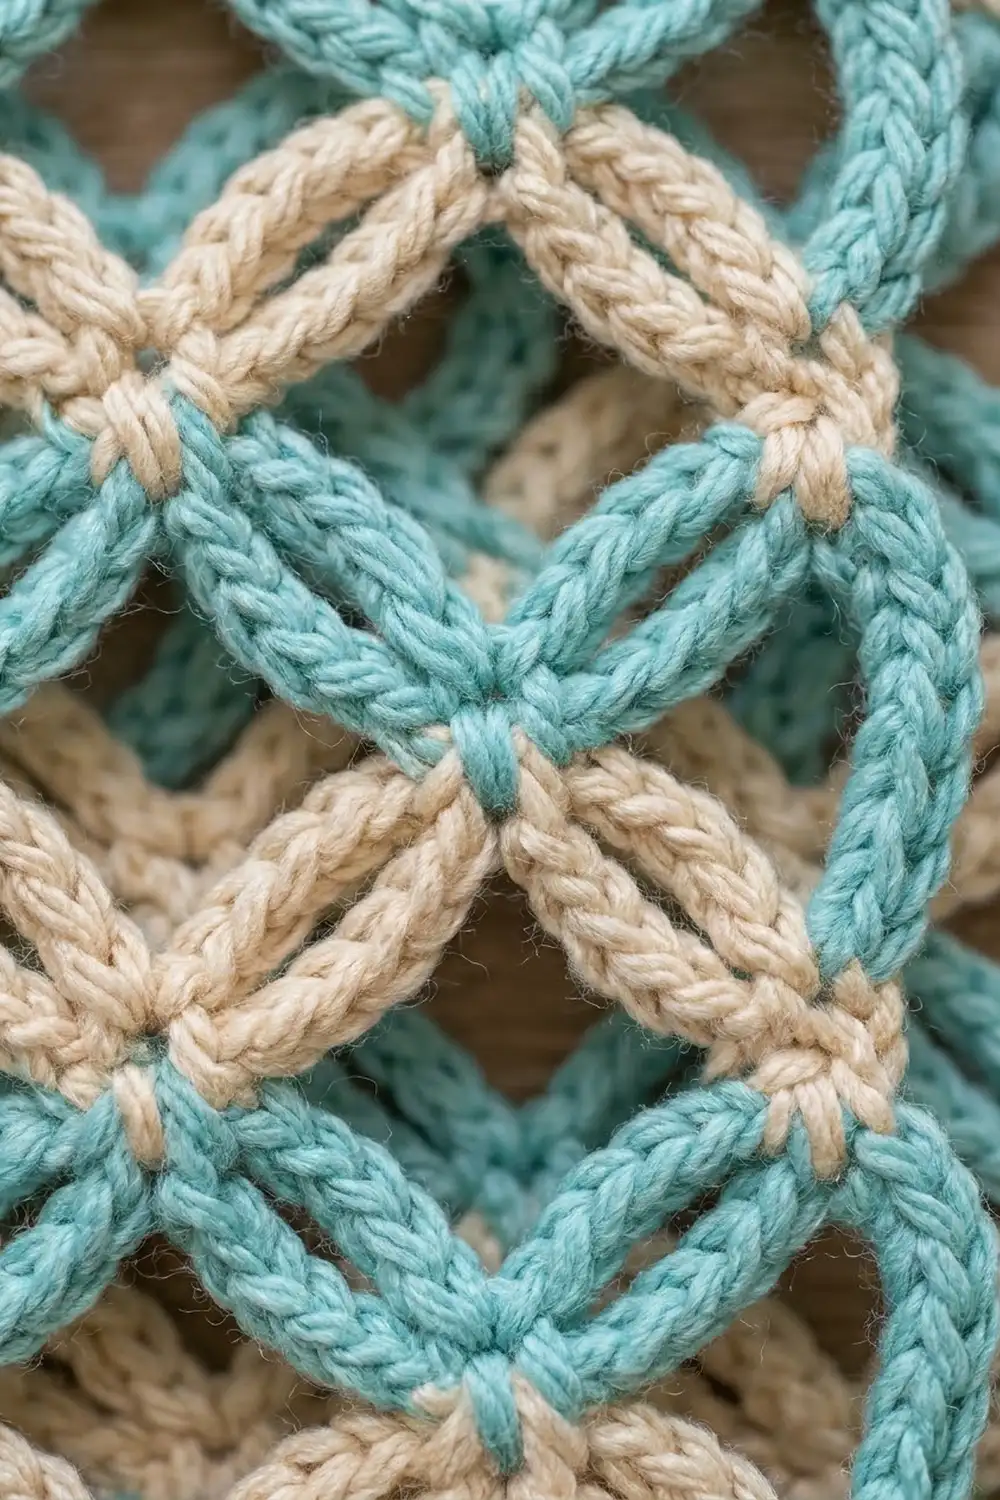
Center-chain anchor: Inside the mesh, every “sc in arch” goes into the 3rd ch of the ch-5 arch, not around the space. This locks the crossing in place and makes the small knot where the lenses meet.
Gauge and Checkpoints
Gauge: 3 arches and 4 rows = 4 in x 4 in (10.2 cm x 10.2 cm) in the mesh pattern, after light blocking.
Gauge swatch: Ch 13 and work Row 1 as written below. This gives 4 sc and 3 arches. Repeat Rows 2–3 until you have 5 rows, then measure the middle 4 rows. Because the panel is a single piece, this swatch is your test piece. It can save you from pulling out a whole panel.
Checkpoints:
- After Row 1: 8 in (20.3 cm) wide, with 6 arches across.
- After Row 9: About 9 in (22.9 cm) tall.
- After Row 17: 8 in x 17 in (20.3 cm x 43.2 cm).
- After the border: 9 in x 18 in (22.9 cm x 45.7 cm).
If your piece is too big: Go down one hook size to 5.5 mm (US I-9). Also check that your chains aren’t loose, because mesh shows chain tension more than solid fabric does.
If your piece is too small: Go up one hook size to 6.5 mm (US K-10.5). Don’t add extra chains to the arches, because that changes the lens shape and the border math.
Pattern Notes
- Every arch is ch 5. The sc that anchors each arch goes into the 3rd (center) ch of the arch below it.
- In even rows, the turning ch 5 counts as 1 dc plus ch 2. In odd rows, the ch 1 does not count as a stitch.
- Colors change every 2 rows, always at the same side edge. Carry the unused color loosely up that edge, where the border will hide it.
- To change color, work the last sc of the row until 2 loops remain, then finish it with the new color.
Panel
Foundation: With Color A, ch 25.
Row 1 (Color A): Sc in 2nd ch from hook. Ch 5, sk 3 ch, sc in next ch. Repeat from * 5 more times. (7 sc, 6 arches)
Finish the last sc with Color B. Drop Color A at this edge but don’t cut it.
Check: after the first sc, 24 chains remain. Each repeat uses 4 of them (3 skipped and 1 worked), and 6 x 4 = 24.
Row 2 (Color B): Ch 5 (counts as dc plus ch 2), turn. Sc in the center ch of the first arch. Ch 5, sc in the center ch of the next arch. Repeat from * 4 more times. Ch 2, dc in the last sc. (6 sc, 5 full arches, 2 ch-2 half-arches, 2 dc including the turning chain)
The half-arches keep the side edges straight. The offset anchors start the lens shapes.
Row 3 (Color B): Ch 1, turn. Sc in the first dc. Ch 5, sc in the center ch of the next full arch. Repeat from * 4 more times. Ch 5, sc in the 3rd ch of the turning ch-5. (7 sc, 6 arches, same as Row 1)
Finish the last sc with Color A. You are back at the edge where Color A is waiting.
Rows 4–5 (Color A): Work Row 2, then Row 3. Finish the last sc with Color B.
Rows 6–7 (Color B): Work Row 2, then Row 3. Finish the last sc with Color A.
Rows 8–17: Keep repeating Rows 2–3 and changing color every 2 rows, in this order:
- Rows 8–9: Color A
- Rows 10–11: Color B
- Rows 12–13: Color A
- Rows 14–15: Color B
- Rows 16–17: Color A
You now have 17 rows: Row 1 in aqua, then 8 two-row bands that alternate cream and aqua. Row 17 has 7 sc and 6 arches. Cut Color B, leaving a 6 in (15.2 cm) tail. Keep Color A attached for the border.
Checkpoint: Lay the panel flat without stretching it. It should measure 8 in x 17 in (20.3 cm x 43.2 cm). In each band, the arches should pair up into lenses of one color that meet at knots.
Border
Work the border in Color A, all the way around the panel.
Border gauge: About 3 sc = 1 in (2.5 cm) along the edges.
Corners: Each corner is 3 sc worked into one stitch. The middle sc of that group is the corner stitch. Each side count below includes both of its corner stitches.
Round 1: Don’t turn. You’re at the top-left corner, on the last sc of Row 17.
- Top-left corner: 3 sc in that last sc.
- Left side: 3 sc in the end of each row from Row 16 down to Row 2 (15 row-ends, 45 sc). Work over the carried yarn so it’s hidden inside these stitches.
- Bottom-left corner: 3 sc in the first foundation ch.
- Bottom edge: 1 sc in each of the next 23 foundation chains, working into the free loops.
- Bottom-right corner: 3 sc in the last foundation ch.
- Right side: 3 sc in the end of each row from Row 2 up to Row 16 (15 row-ends, 45 sc).
- Top-right corner: 3 sc in the first sc of Row 17.
- Top edge: 3 sc around the next arch, 1 sc in the next sc. Repeat from * 4 more times, then 3 sc around the last arch. (15 + 5 + 3 = 23 sc)
- Sl st to the first sc.
Per-side counts, corner stitches included:
- Top: 1 + 1 + 23 + 1 + 1 = 27 sc
- Bottom: 1 + 1 + 23 + 1 + 1 = 27 sc
- Left: 1 + 1 + 45 + 1 + 1 = 49 sc
- Right: 1 + 1 + 45 + 1 + 1 = 49 sc
Round total: There are 23 + 23 + 45 + 45 = 136 sc between the corner groups, plus 4 corner groups of 3 sc (12 sc), for 148 sc. To double-check: 27 + 27 + 49 + 49 = 152, and subtracting the 4 corner stitches that were counted twice gives 148.
Round 2: Ch 1, don’t turn. Work 1 rsc in each st around, including 1 rsc in each corner stitch. (148 rsc) Sl st to the first rsc and fasten off, leaving a 6 in (15.2 cm) tail.
Why the math works:
- Top and bottom: 25 sc between the corner stitches across an 8 in (20.3 cm) edge is very close to the border gauge of 3 sc per inch, so the edge stays flat.
- Sides: Each mesh row is 1 in (2.5 cm) tall, so 3 sc per row-end matches the gauge. Rows 2–16 give 15 in (38.1 cm) of edge, which takes 15 x 3 = 45 sc. The 3-sc corner groups cover the ends of Rows 1 and 17.
- Total size: The two rounds add 0.5 in (1.3 cm) on every side. That gives 8 + 0.5 + 0.5 = 9 in (22.9 cm) across and 17 + 0.5 + 0.5 = 18 in (45.7 cm) tall.
Hanging Loop
- Find the center of the top edge. The top side has 27 sts including the corners, so the center is the 14th st. Mark it.
- With Color A, join with a sl st in the marked st. Ch 8, then sl st into the same st to form a ring.
- Work 12 sc into the ring, then sl st into the marked st.
- Fasten off. The loop stands about 1 in (2.5 cm) above the border.
- Weave in all ends through the border stitches, not through the open mesh, where they would show.
Final Blocking
- Weave in all ends, but don’t trim them until the panel is dry.
- Spray the panel with water until it is damp all the way through but not dripping.
- Lay it face up on the blocking mat.
- Pin the 4 corners first, to a 9 in x 18 in (22.9 cm x 45.7 cm) rectangle.
- Pin the center of each side, then add pins about every 2 in (5.1 cm) along the border to keep the edges straight.
- Gently open each lens with your fingers so every knot sits in the center.
- Let the panel dry completely, usually 12–24 hours. Unpin it and trim the tails.
Final Quality-Control Checklist
- The panel measures 9 in x 18 in (22.9 cm x 45.7 cm) and the corners are square.
- There are 17 mesh rows: Row 1 in aqua, then 8 two-row bands.
- Every lens within a band is a single color.
- Every knot sits in the center ch of the arch below it.
- In Round 1, each long side has 49 sc and each short side has 27 sc, corners included.
- The rsc border lies flat, without ruffling or cupping.
- No carried yarn shows along the side edge.
- The hanging loop is centered and firmly attached.
- All ends are hidden inside the border.
Troubleshooting
The sides slant. You probably missed a half-arch or a dc in an even row. Even rows need 6 sc and 5 full arches between the two ch-2 half-arches.
The lenses look like flat diamonds. You’re working around the arch instead of into its center ch. Insert the hook into the 3rd ch so the knot pinches the arch.
The border ruffles along the sides. Your rows are shorter than 1 in (2.5 cm). Work 2 sc instead of 3 in every 3rd row-end.
The border pulls the sides in. Your rows are taller than 1 in (2.5 cm). Work 4 sc in every 3rd row-end.
The carried yarn shows. Pull out the side border and work over the strand again, keeping the tension relaxed.
The panel is wider at the top than the bottom. Your foundation chain was too tight. Make the foundation with a hook one size larger.
Care
Hand wash in cool water with mild soap. Press the water out in a towel and dry flat, reshaping the panel to 9 in x 18 in (22.9 cm x 45.7 cm); don’t tumble dry.
Final Notes
The measurement chain is short and easy to check:
- Gauge: 3 arches and 4 rows = 4 in (10.2 cm).
- Row 1: 6 arches = 8 in (20.3 cm) wide.
- After 17 rows: 8 in x 17 in (20.3 cm x 43.2 cm).
- Border: Two rounds of 148 sts add 0.5 in (1.3 cm) per side.
- Finished panel: 9 in x 18 in (22.9 cm x 45.7 cm).
If every checkpoint matches, the panel will hang straight with even, crisp lenses.
Happy crocheting!