

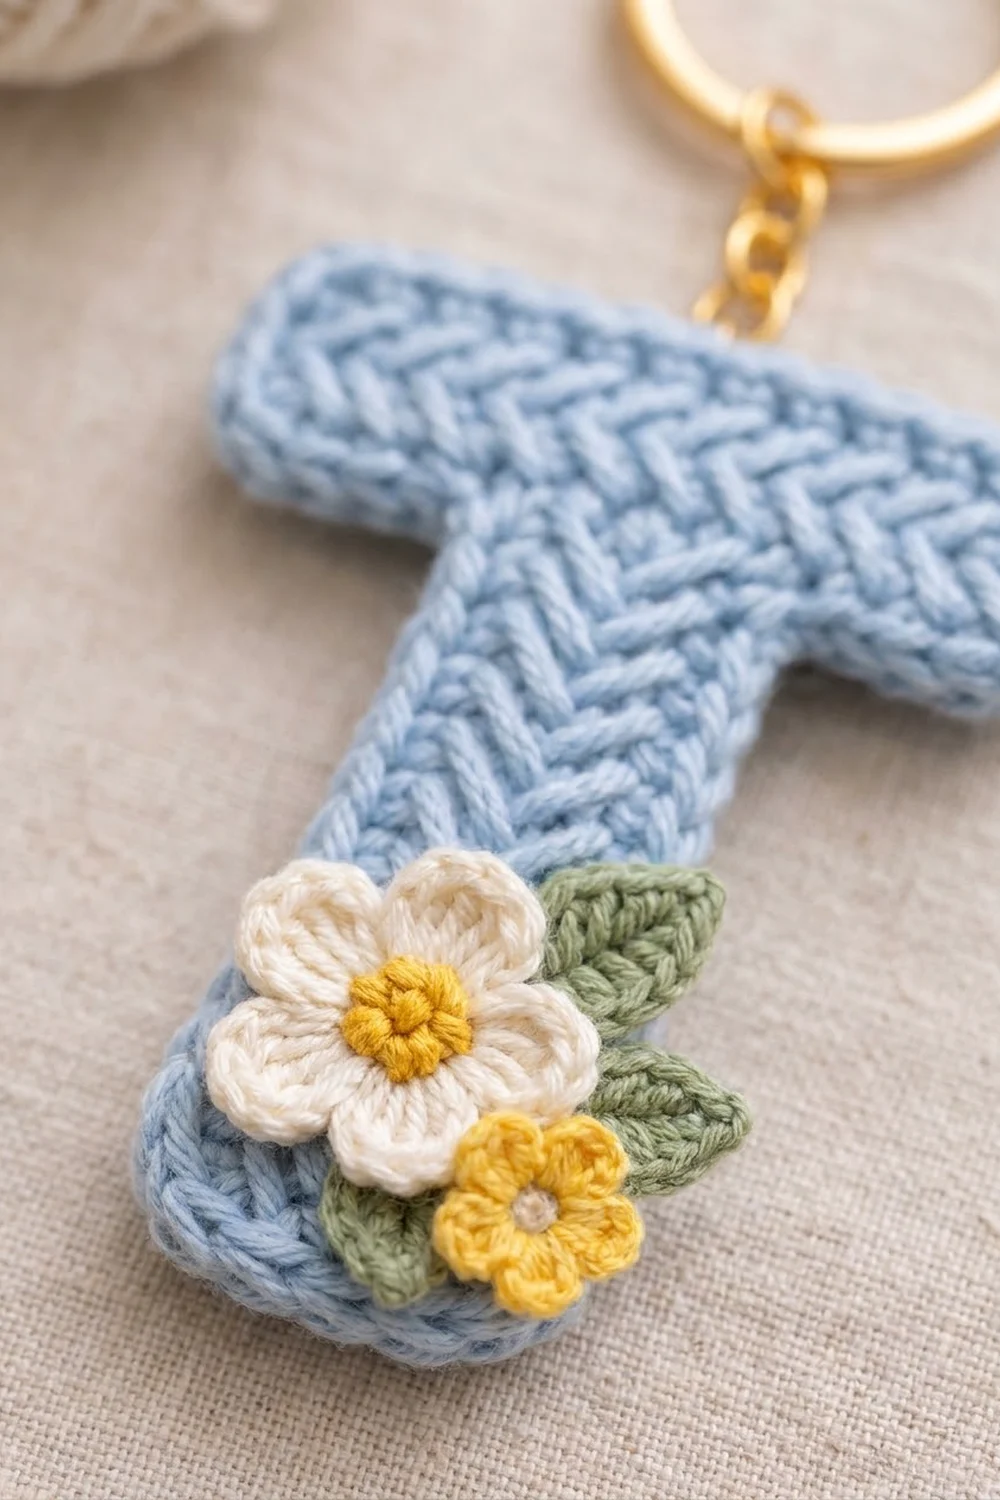
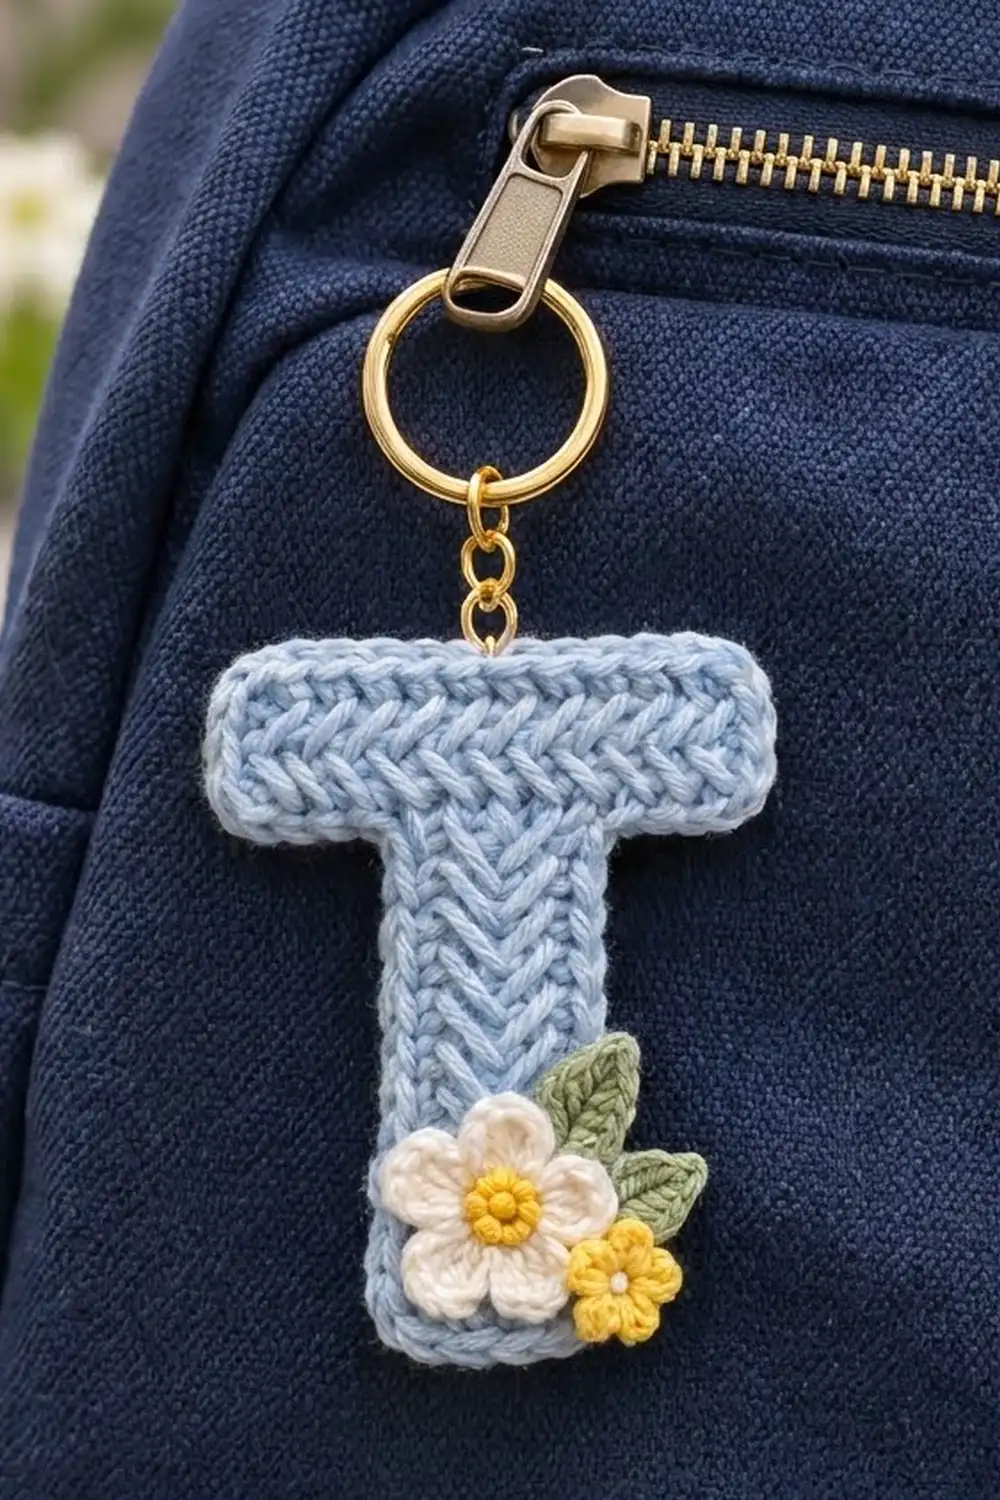
This little letter T is a quick, personal gift that looks far more polished than its size suggests. The body is worked in herringbone half double crochet, which creates neat chevron columns that look almost knitted. On the stem the chevrons run up and down, and on the crossbar they run side to side, so the texture follows the shape of the letter.
The colors are soft and fresh: light powder blue for the letter, a cream flower with a golden-yellow center, a tiny yellow flower, and two sage-green leaves. The flowers and leaves sit at the lower right of the stem, and a gold key ring with a short chain completes the charm. It works on a backpack zipper, a set of keys, or a gift bag.
The pattern uses US crochet terms. The finished charm measures 3.2 in (8.1 cm) wide and 4.2 in (10.7 cm) tall, not counting the hardware.
Construction is simple, and the letter itself needs no sewing. You work the crossbar in rows. Then you build the stem with join-as-you-go rows that hang from the crossbar’s foundation edge. A two-round border wraps the whole outline in one go. Finally, you make the flowers and leaves, layer them, and stitch them in place.
Finished Size and Construction
- Finished size: 3.2 in (8.1 cm) wide x 4.2 in (10.7 cm) tall
- Skill level: Easy to intermediate
- Terminology: US crochet terms
- Yarn weight: Sport weight (2), cotton or cotton blend
- Hook: 3.0 mm for the letter; 2.5 mm for the appliqués
- Number of pieces: 1 letter (single piece) + 4 small appliqués
- Layout: Crossbar worked first; stem joined to its lower edge as you go
- Crossbar size: 2.8 in (7.1 cm) x 0.8 in (2.0 cm)
- Stem size: 1.2 in (3.0 cm) x 3.0 in (7.6 cm)
- Size before border: 2.8 in (7.1 cm) wide x 3.8 in (9.7 cm) tall
- Border depth: 0.2 in (0.5 cm) on every side
Materials
Choose a smooth, mercerized or combed cotton in sport weight. Cotton shows the herringbone texture clearly and holds its shape on a keychain that gets handled every day. Avoid fuzzy or very splitty yarns, which blur the chevrons.
- Light blue (letter and border): 10 g, about 30 m
- Cream (large flower petals): 2 g, about 6 m
- Golden yellow (flower centers and small flower): 2 g, about 6 m
- Sage green (leaves): 2 g, about 6 m
All quantities include a comfortable margin for gauge testing and weaving in ends.
Tools:
- 3.0 mm crochet hook
- 2.5 mm crochet hook
- Tapestry needle
- Sharp sewing needle and cream or blue sewing thread (optional, for appliqués)
- Gold split key ring, about 1.0 in (2.5 cm) across, with a short chain
- 1 gold jump ring and two pairs of flat-nose pliers
- Stitch markers
- Blocking board, rust-proof pins, and a spray bottle
- Ruler or tape measure
Abbreviations (US Terms)
- ch: chain
- sl st: slip stitch
- sc: single crochet
- sc2tog: single crochet 2 together
- hdc: half double crochet
- dc: double crochet
- MR: magic ring
- st(s): stitch(es)
- RS: right side
- yo: yarn over
Special stitch: Herringbone half double crochet (HBhdc). Yo, insert hook in the st, yo and pull up a loop, pulling it straight through the first loop on the hook as well (2 loops remain), then yo and pull through both loops. The turning chain of 2 never counts as a stitch in this pattern.
Gauge and Checkpoints
Gauge: 20 sts and 20 rows = 4 in (10.2 cm) in HBhdc with a 3.0 mm hook. That is 5 sts and 5 rows per inch, so each stitch and each row measures 0.2 in (0.5 cm). Because the gauge is square, the stem rows line up one-to-one with the crossbar stitches.
Instead of making a separate swatch, make the crossbar first and use it as your test piece.
Checkpoints:
- Crossbar after Row 4: 2.8 in (7.1 cm) x 0.8 in (2.0 cm).
- Stem after Row 6: 1.2 in (3.0 cm) wide x 3.0 in (7.6 cm) long.
- Letter before border: 2.8 in (7.1 cm) x 3.8 in (9.7 cm).
- After border: 3.2 in (8.1 cm) x 4.2 in (10.7 cm).
If the crossbar is longer than 2.8 in (7.1 cm), use a hook 0.25 mm smaller. If it is shorter, use a hook 0.25 mm larger. If the length is right but the rows are too tall, pull the first loop of each HBhdc a little snugger. HBhdc height depends heavily on how high you lift that loop.
Crossbar
With light blue and the 3.0 mm hook, ch 16.
Row 1 (RS): HBhdc in 3rd ch from hook and in each ch across. (14 sts)
Rows 2–4: Ch 2, turn. HBhdc in each st across. (14 sts)
Fasten off and weave in the starting tail only. The crossbar now measures 2.8 in (7.1 cm) x 0.8 in (2.0 cm).
Hold the crossbar with the RS facing and the foundation chain at the bottom. Counting from the left, number the bottom loops 1 to 14. Place markers in loops 5 and 10. The stem will cover loops 5–10, leaving 4 loops free on each side.
Stem (Join-As-You-Go)
The stem is worked in rows that run the full length of the stem. Each row hangs from the crossbar, and every row that ends at the top is slip-stitched into the next foundation loops. This builds the vertical chevron columns.
Set-up: With RS facing, join light blue with a sl st in bottom loop 5. Ch 17.
Row 1 (working up): HBhdc in 3rd ch from hook and in each ch up to the crossbar. (15 sts) Sl st in loop 6. Turn.
Row 2 (working down): Do not chain; the sl st gives enough height. Skip the sl st, then HBhdc in each st down to the bottom. (15 sts)
Row 3 (working up): Ch 2, turn. HBhdc in each st. (15 sts) Sl st in loops 7 and 8. Turn.
Row 4 (working down): Skip the sl sts, HBhdc in each st. (15 sts)
Row 5 (working up): Ch 2, turn. HBhdc in each st. (15 sts) Sl st in loops 9 and 10. Turn.
Row 6 (working down): Skip the sl sts, HBhdc in each st. (15 sts) Fasten off.
Check where each row attaches: Row 1 at loop 5, Row 2 at loop 6, Row 3 at loop 7, Row 4 at loop 8, Row 5 at loop 9, and Row 6 at loop 10. That is six rows on six loops, which matches the 1:1 gauge.
The stem measures 1.2 in (3.0 cm) wide (6 rows x 0.2 in) by 3.0 in (7.6 cm) long (15 sts x 0.2 in). The whole letter now measures 2.8 in (7.1 cm) x 3.8 in (9.7 cm).
Border
Border gauge: Work 1 sc into every stitch and every row-end. Because the body gauge is square, one sc per row-end matches one sc per stitch, and the edge stays flat on every side.
The outline has 66 edge positions:
- top: 14 sts
- right crossbar end: 4 row-ends
- right underside: 4 loops (11–14)
- stem right side: 15 sts (tops of Row 6)
- stem bottom: 6 row-ends
- stem left side: 15 loops (underside of the Row 1 chain)
- left underside: 4 loops (1–4)
- left crossbar end: 4 row-ends
14 + 4 + 4 + 15 + 6 + 15 + 4 + 4 = 66.
The T has 6 outer (convex) corners. It also has 2 inner (concave) corners where the stem meets the crossbar.
Round 1: With RS facing and the 3.0 mm hook, join light blue in the top left corner st.
- Top: 3 sc in the corner st, sc in next 12 sts, 3 sc in last st. (18 sc over 14 sts)
- Right crossbar end: sc in each of 4 row-ends. (4 sc)
- Right underside: 3 sc in loop 14, sc in loops 13 and 12. (5 sc over 3 loops)
- Right inner corner: sc2tog over loop 11 and the first st of Row 6. (1 sc)
- Stem right side: sc in the next 13 sts of Row 6, 3 sc in the last st. (16 sc over 14 sts)
- Stem bottom: sc in each of 6 row-ends. (6 sc)
- Stem left side: 3 sc in the first chain loop at the bottom, sc in the next 13 loops. (16 sc over 14 loops)
- Left inner corner: sc2tog over the last chain loop and loop 4. (1 sc)
- Left underside: sc in loops 3 and 2, 3 sc in loop 1. (5 sc over 3 loops)
- Left crossbar end: sc in each of 4 row-ends. (4 sc)
Join with a sl st to the first sc.
Total: 76 sc. That is the 66 edge positions worked one-for-one (66), plus 12 extra sc at the 6 outer corners, minus 2 sc from the two sc2tog (each turns 2 positions into 1 stitch).
Round 2: Ch 1, sl st loosely in each sc around. (76 sl sts) Join and fasten off.
Why the math works: Each outer corner gets 2 extra stitches so it can turn 90 degrees without cupping. Each inner corner loses 1 stitch so the angle does not ruffle. The slip-stitch round adds a smooth, rounded rim without adding width. Together, the two rounds add 0.2 in (0.5 cm) per side.
- Finished width: 2.8 + 0.4 = 3.2 in (8.1 cm)
- Finished height: 3.8 + 0.4 = 4.2 in (10.7 cm)
- Finished stem width: 1.6 in (4.1 cm)
Appliqués
Use the 2.5 mm hook for all appliqués so they are firm and crisp. Leave a 6 in (15.2 cm) tail on each one for sewing.
Large Cream Flower (make 1)
Round 1: With golden yellow, make a MR. Ch 1, 10 sc in ring. Pull the ring closed and join with a sl st to the first sc. (10 sts) Fasten off.
Round 2: Join cream in any st. (Hdc, 3 dc, hdc) in the next st, sl st in the next st; repeat from * 4 more times, ending with a sl st in the joining st. (5 petals; 25 petal sts + 5 sl sts = 30 sts)
The flower measures about 1.0 in (2.5 cm) across. For the bumpy center seen on the finished piece, add 3 small French knots in golden yellow.
Small Yellow Flower (make 1)
With golden yellow, make a MR. (Ch 2, dc, ch 2, sl st) in ring; repeat from * 4 more times. (5 petals) Pull the ring closed tightly and join. Add 1 French knot in the center. The flower measures about 0.6 in (1.5 cm) across.
Leaves (make 2)
With sage green, ch 7. Working in the back bumps:
- Sl st in 2nd ch from hook.
- Sc in next ch, hdc in next ch, dc in next ch, hdc in next ch.
- (Sc, ch 2, sc) in the last ch.
- Rotate and work along the other side of the chain: hdc, dc, hdc, sc, sl st.
Fasten off. Each leaf has 12 sts plus the ch-2 tip. Each leaf measures about 0.9 in (2.3 cm) long, with a pointed tip and a faint center line formed by the chain.
Layering and Sewing
- Place the letter RS up. Lay the two leaves at the lower right of the stem, tips pointing up and to the right, so they extend about 0.25 in (0.6 cm) past the stem’s right edge.
- Set the cream flower over the base of the leaves. Center it about 0.5 in (1.3 cm) above the bottom border, overlapping the stem’s right edge slightly.
- Place the small yellow flower on top, overlapping the lower right petals of the cream flower.
- Pin, then sew each piece down with small, hidden stitches through the back loops only, starting with the bottom layer. Keep the stitches from showing on the back of the charm.
Hardware
Open the jump ring with two pliers by twisting the ends sideways. Pass it through the border at the top center of the crossbar, between sts 7 and 8 of the top edge, catching both border rounds. Add the end link of the chain and close the ring fully. Attach the split key ring to the other end of the chain.
Final Blocking
- Weave in all remaining ends along the border and through the backs of the appliqués.
- Pin the letter RS up on a blocking board, without the key ring attached if possible.
- Pin each of the 6 outer corners first, then the 2 inner corners.
- Check the size: 3.2 in (8.1 cm) wide and 4.2 in (10.7 cm) tall.
- Add pins halfway along each long edge of the stem to keep it straight.
- Mist lightly with water. Do not soak the appliqués.
- Let it dry completely, at least 2 hours, before unpinning.
Final Quality-Control Checklist
- Crossbar has 4 rows of 14 sts.
- Stem has 6 rows of 15 sts, attached to loops 5–10 with 4 free loops on each side.
- Chevrons run vertically on the stem and horizontally on the crossbar.
- Border Round 1 has 76 sc; Round 2 has 76 sl sts.
- Corners are rounded, not pointed or cupped.
- Finished size is 3.2 in (8.1 cm) x 4.2 in (10.7 cm).
- Appliqués are layered in this order: leaves, cream flower, then yellow flower, at the lower right.
- Jump ring is closed with no gap.
Troubleshooting
The stem pulls the crossbar out of shape. Your stem rows are taller than your stitches are wide. Pull the first loop of each HBhdc snugger, or use a hook 0.25 mm smaller for the stem only.
The border ruffles. Your sc are too loose. Use a hook 0.25 mm smaller for the border, or skip one row-end per side.
The border cups or the corners curl. Make sure each outer corner has 3 sc, and work Round 2 loosely.
Gaps at the stem joins. Pull the joining sl sts firmly, and work them through both bottom loops of the foundation chain.
The flower petals curl up. Steam them lightly and press them flat with a finger before sewing.
Care
Hand wash in cool water with mild soap, press out the water in a towel, and dry flat. Remove the key ring before washing if possible.
Final Notes
Here is the measurement chain:
- Crossbar: 2.8 in (7.1 cm) x 0.8 in (2.0 cm)
- Stem: 1.2 in (3.0 cm) x 3.0 in (7.6 cm)
- Letter before the border: 2.8 in (7.1 cm) x 3.8 in (9.7 cm)
- Border: 0.2 in (0.5 cm) per side, bringing the charm to 3.2 in (8.1 cm) x 4.2 in (10.7 cm)
Check each stage, and your T will come out square, flat, and ready to clip onto a bag.
Happy crocheting!