

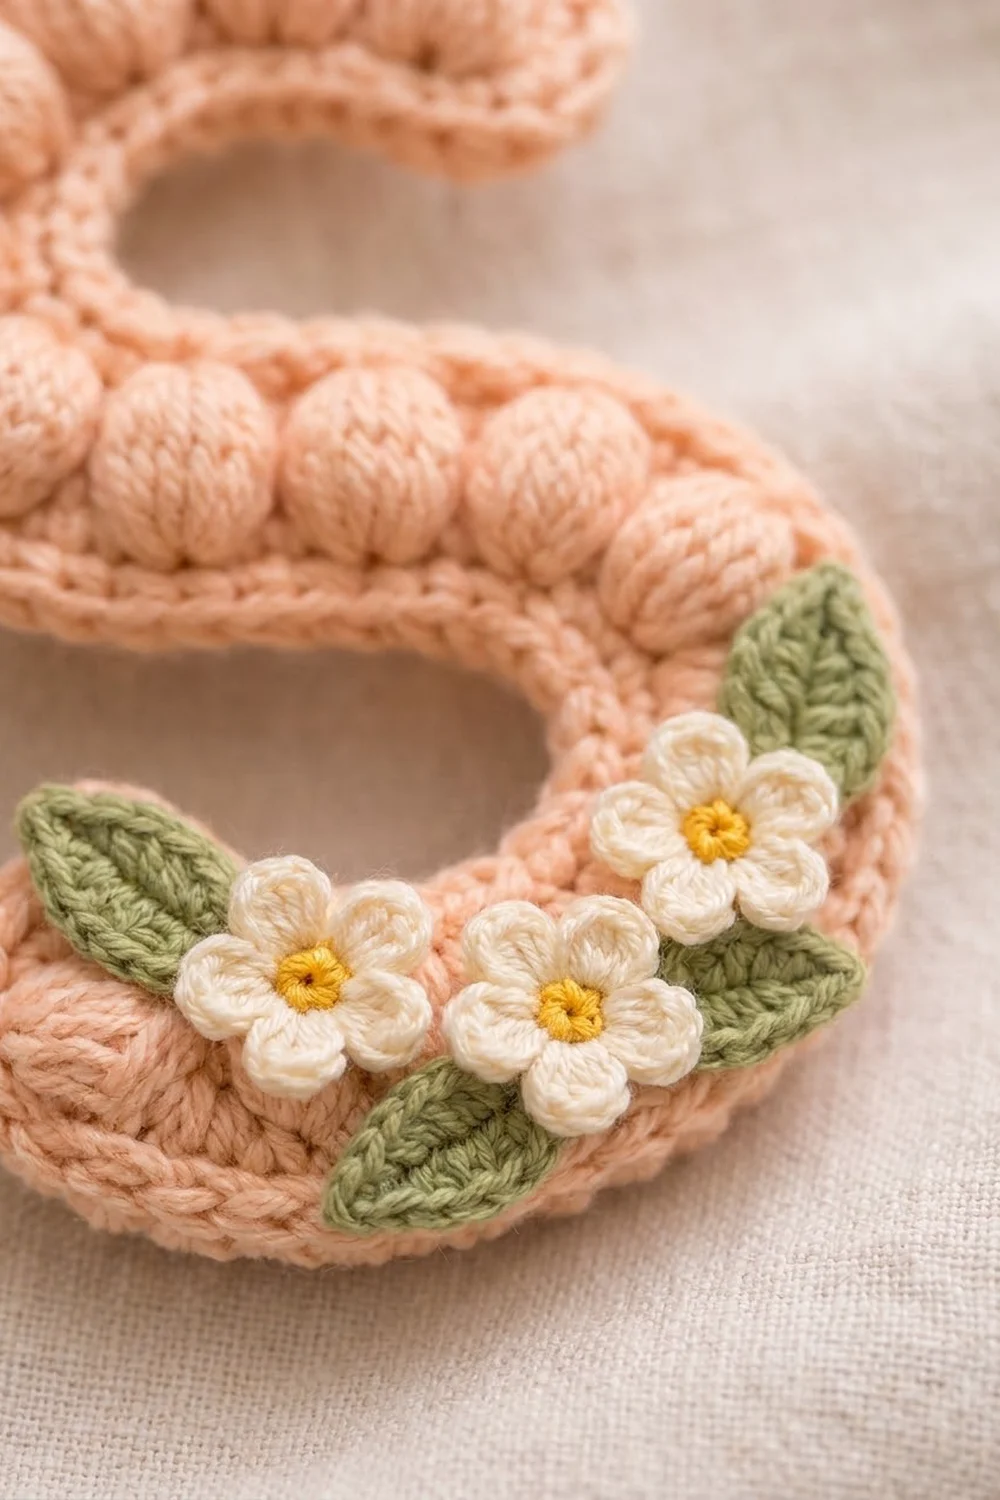
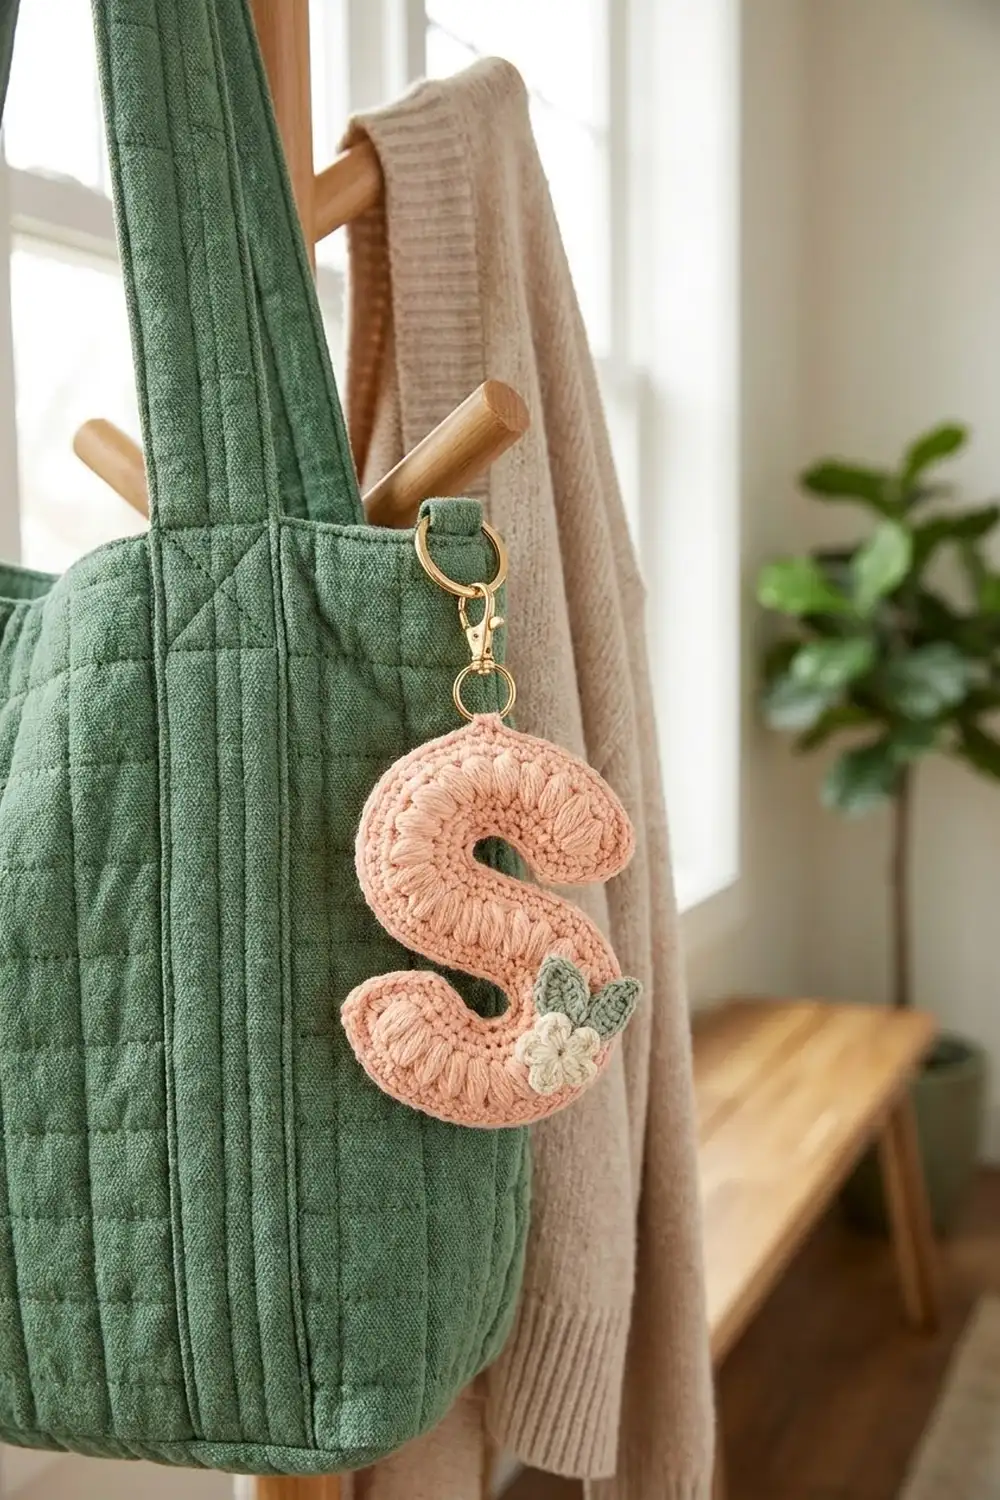
This little letter S keychain is soft and chunky, and it’s easy to spot at the bottom of a bag. A single line of peach puff stitches runs down the center of the letter. A neat single crochet rim frames it and follows every curve.
A small cluster of cream flowers with yellow centers and sage-green leaves sits on the lower curve. The colors are gentle and warm, and the overall look is sweet without being fussy.
The pattern uses US crochet terms. The finished letter measures about 3.5 in (8.9 cm) tall and 2.5 in (6.4 cm) wide, and the strip is 1 in (2.5 cm) wide. With the key ring attached, the full keychain is about 4.75 in (12.1 cm) long.
Construction is simple. You crochet one straight strip of puff stitches on a foundation chain, then work two rounds of single crochet all the way around it. Planned increases on the outer curves and decreases on the inner curves bend the strip into an S. Finally, you sew on the flowers and leaves and add the hardware.
Finished Size and Construction
- Finished size: 3.5 in (8.9 cm) tall x 2.5 in (6.4 cm) wide
- Skill level: Easy (advanced beginner)
- Terminology: US crochet terms
- Yarn weight: DK (light worsted, #3)
- Hook: 3.5 mm (E-4)
- Number of pieces: 1 letter, plus 3 flowers and 3 leaves sewn on as appliqués
- Layout: one continuous strip shaped into an S
- Strip size before border: 6 in (15.2 cm) long x 0.4 in (1.0 cm) wide, straight
- Border depth: 0.3 in (0.8 cm) on each side, 2 rounds
- Strip width after border: 0.4 + 0.3 + 0.3 = 1 in (2.5 cm)
Materials
Choose a smooth cotton or cotton-blend DK yarn. Cotton gives crisp puffs and clear stitches, and it holds the S shape well after blocking. Avoid fuzzy yarns or yarns that split easily, because puff stitches are hard to work cleanly in them.
Yarn (DK weight):
- Peach (main color): 10 g, about 25 m
- Cream (petals): 2 g, about 5 m
- Yellow (flower centers): 1 g, about 2 m
- Sage green (leaves): 2 g, about 5 m
All quantities include a small extra margin for gauge swatches and sewing tails.
Tools:
- 3.5 mm (E-4) crochet hook
- Tapestry needle
- Stitch markers (at least 4)
- Gold split key ring, 1 in (2.5 cm) across
- Gold jump ring, 0.25 in (0.6 cm) across
- 2 pairs of jewelry pliers, or 1 pair plus your fingers
- Scissors
- Blocking mat and rust-proof pins
- Spray bottle with water
Abbreviations (US Terms)
- ch – chain
- sl st – slip stitch
- sc – single crochet
- hdc – half double crochet
- dc – double crochet
- sc2tog – single crochet 2 together
- sp – space
- st(s) – stitch(es)
- sk – skip
- yo – yarn over
- RS – right side
Special stitch – Puff stitch (puff): [Yo, insert hook in indicated st, yo and pull up a loop to about 0.5 in (1.3 cm) tall] 4 times (9 loops on hook), yo and pull through all 9 loops, ch 1 to close. The closing ch 1 is part of the puff and is not counted as a separate stitch.
Gauge and Checkpoints
Gauge matters here because the shaping depends on it. Make the strip first and measure it before you start the border.
- Puff strip gauge: 14 puffs with 13 ch-1 sps between them = 6 in (15.2 cm) long and 0.4 in (1.0 cm) tall. That is 27 sts over 6 in, or 4.5 sts per inch.
- Border gauge: 18 sc = 4 in (10.2 cm). 2 rounds of sc = 0.3 in (0.8 cm) deep.
Checkpoints:
- After Row 1: straight strip, 6 in (15.2 cm) x 0.4 in (1.0 cm).
- After Round 2: strip about 0.7 in (1.8 cm) wide and already curving into a loose S.
- After Round 3: strip 1 in (2.5 cm) wide. Once pinned, the letter is about 3.5 in (8.9 cm) x 2.5 in (6.4 cm).
If your strip is longer than 6.25 in (15.9 cm), go down to a 3.25 mm hook. If it is shorter than 5.75 in (14.6 cm), go up to a 3.75 mm hook. Small differences are fine. The letter will simply be a little larger or smaller overall.
Main Pattern
Flowers (make 3)
Round 1: With yellow, make a magic ring, ch 1, 5 sc in ring, sl st to first sc to join. Pull the ring closed. Fasten off yellow. (5 sc)
Round 2: Join cream in any sc. *(Ch 2, dc, ch 2, sl st) in same st, sl st in next sc; repeat from * 4 more times. The last sl st goes into the joining st. (5 petals)
Fasten off, leaving a 6 in (15.2 cm) cream tail for sewing. Each flower measures about 0.75 in (1.9 cm) across.
Leaves (make 3)
With sage green, ch 6.
Sc in 2nd ch from hook, hdc in next ch, dc in next ch, hdc in next ch, (sc, ch 2, sc) in last ch for the tip. Turn the piece and work along the other side of the foundation chain: hdc in next ch, dc in next ch, hdc in next ch, sc in next ch, sl st in first sc to join. (10 sts plus the ch-2 tip)
Fasten off, leaving a 6 in (15.2 cm) tail. Each leaf is about 0.9 in (2.3 cm) long and 0.4 in (1.0 cm) wide.
Letter: Row 1 (Puff Strip)
With peach, ch 29.
Row 1 (RS): Puff in 3rd ch from hook, *ch 1, sk next ch, puff in next ch; repeat from * 12 more times. The last puff lands in the very first chain you made. Do not turn. (14 puffs and 13 ch-1 sps = 27 sts. The 2 skipped chains at the start form a ch-2 end loop.)
Number the puffs 1 to 14 in the order you made them. Puffs 1 to 7 become the lower curve of the S, and puffs 8 to 14 become the upper curve. Place a marker in the ch-1 sp between puffs 7 and 8. This is the center of the letter.
Check: the strip should be 6 in (15.2 cm) long and 0.4 in (1.0 cm) tall. Keep the RS (the smoother, rounder side of the puffs) facing you for the rest of the letter.
Do not fasten off. Go straight on to the border rounds.
Border
The two border rounds turn the straight puff strip into the S. Work each round all the way around the strip: around End 1, along Side A, around End 2, then along Side B.
- End 1: the rounded end at puff 14.
- Side A: the foundation chain edge. Work under puffs 14 to 8 first, then under puffs 7 to 1.
- End 2: the ch-2 end loop at puff 1.
- Side B: the top edge of the puffs, worked from puff 1 to puff 14.
On the upper curve (puffs 8 to 14), Side A is the outer edge. On the lower curve (puffs 1 to 7), Side B is the outer edge. Outer edges get increases, and inner edges get decreases.
Round 2
Ch 1, then turn the strip so you can work around the end of puff 14.
- End 1: Work 5 sc evenly around the end of puff 14. (5 sc)
- Side A, upper outer section (13 foundation loops under puffs 14 to 8): [sc in next 2 loops, 2 sc in next loop] 4 times, sc in next loop. (13 + 4 = 17 sc)
- Side A, center: sc in next loop. (1 sc)
- Side A, lower inner section (13 loops under puffs 7 to 1): [sc in next loop, sc2tog over next 2 loops] 4 times, sc in next loop. (13 − 4 = 9 sc)
- End 2: 5 sc in the ch-2 end loop. (5 sc)
- Side B, lower outer section (puffs 1 to 7 and the 6 ch-1 sps between them = 13 sts): [sc in next 2 sts, 2 sc in next st] 4 times, sc in next st. (13 + 4 = 17 sc)
- Side B, center: sc in the marked ch-1 sp. Move the marker to this sc. (1 sc)
- Side B, upper inner section (puffs 8 to 14 and 6 ch-1 sps = 13 sts): [sc in next st, sc2tog] 4 times, sc in next st. (13 − 4 = 9 sc)
Sl st to first sc to join.
Round 2 total: each side has 17 + 1 + 9 = 27 sc, and each end has 5 sc. 27 + 27 + 5 + 5 = 64 sc.
Check: the strip is about 0.7 in (1.8 cm) wide and is clearly curling into an S.
Round 3
Ch 1.
- End 1: sc in first st, 2 sc in each of next 3 sts, sc in next st. (5 + 3 = 8 sc)
- Side A, upper outer (17 sts): [sc in next 4 sts, 2 sc in next st] 3 times, sc in next 2 sts. (17 + 3 = 20 sc)
- Side A, center: sc in next st. (1 sc)
- Side A, lower inner (9 sts): [sc in next 2 sts, sc2tog] 2 times, sc in next st. (9 − 2 = 7 sc)
- End 2: sc in next st, 2 sc in each of next 3 sts, sc in next st. (5 + 3 = 8 sc)
- Side B, lower outer (17 sts): [sc in next 4 sts, 2 sc in next st] 3 times, sc in next 2 sts. (17 + 3 = 20 sc)
- Side B, center: sc in marked st. (1 sc)
- Side B, upper inner (9 sts): [sc in next 2 sts, sc2tog] 2 times, sc in next st. (9 − 2 = 7 sc)
Sl st to first sc to join. Fasten off, leaving a short tail to weave in.
Round 3 total: all 64 sts worked once each, + 6 at the ends (3 per end), + 6 on the outer sections (3 per side), − 4 on the inner sections (2 per side). 64 + 6 + 6 − 4 = 72 sc. Each side has 20 + 1 + 7 = 28 sc, and each end has 8 sc: 28 + 28 + 8 + 8 = 72.
Why the Math Works
At 4.5 sts per inch, working one sc per puff and one per ch-1 sp matches the strip length exactly, so a straight section would lie flat. Over the two rounds, each outer edge gains 7 sts and each inner edge loses 6 sts. That leaves a 13-stitch difference between the two edges of each curve. At border gauge this is about 2.9 in (7.4 cm), and that difference pulls each half of the strip into a tight curve. The shaping switches sides at the center stitch, so the two curves bend in opposite directions and form the S.
Assembly
- Weave in all peach tails on the back.
- Arrange the 3 flowers in a slightly curved row across the front of the lower curve. Start near the lower left end and run toward the bottom right.
- Tuck one leaf behind the left flower, one below the middle flower and one at the right end of the cluster, with the tips pointing outward.
- Sew on the leaves first, then the flowers, using each piece’s own tail and small stitches through the base only. Do not sew through to the back.
- Open the jump ring sideways with pliers. Slip it through 2 strands of Round 3 at the top of the upper curve, roughly in the middle of Side A’s upper outer section. Add the split ring and close the jump ring fully.
Final Blocking
- Lightly spray the letter with water until it is damp, not soaked.
- Lay it RS up on the blocking mat.
- Gently shape the curves with your fingers until the letter is 3.5 in (8.9 cm) tall and 2.5 in (6.4 cm) wide.
- Pin the outer edges every 0.75 in (1.9 cm). Pin through the border, never through the puffs.
- Round out the puffs with a fingertip so they sit evenly.
- Leave it to dry completely, at least 6 hours.
- Unpin it and check that the flowers lie flat. If a petal curls, mist it lightly with water and press it flat with your fingers until dry.
Final Quality-Control Checklist
- 14 puffs, evenly sized and facing the same way
- Round 2 counts 64 sc and Round 3 counts 72 sc
- Strip is 1 in (2.5 cm) wide all the way around
- Letter is 3.5 in (8.9 cm) x 2.5 in (6.4 cm)
- Both ends are smoothly rounded, with no corners or gaps
- 3 flowers and 3 leaves sewn on securely, with no stitches showing on the back
- Jump ring fully closed, with no gap the yarn can slip through
- All tails woven in and trimmed
Troubleshooting
The letter curls into a backward S. You worked Round 2 with the wrong side facing. Pull back to Row 1, flip the strip so the smoother side of the puffs faces you, and work Round 2 again. Or keep it as a mirrored design.
The curves are too loose. Your border is looser than your strip. Rework Rounds 2 and 3 with a hook one size smaller.
The letter cups or ruffles. The increases and decreases are not balanced. Check the stitch count for each section, then block firmly.
Puffs look uneven. Pull every loop to the same height, about 0.5 in (1.3 cm), and always close each puff with the ch 1.
Gaps at the ends. Work the 5 end sc around the whole end of the strip, not into a single loop, and space them evenly.
Flowers flop. Add an extra small stitch at the center of each flower and one at each leaf tip.
Care
Spot clean with mild soap and cool water, then reshape and dry flat. Remove the key ring before any deeper washing.
Final Notes
The measurement chain is short and easy to follow. A 6 in (15.2 cm) strip of 14 puffs becomes a 64-stitch Round 2 and a 72-stitch Round 3. Those two rounds add 0.3 in (0.8 cm) on each side, so the strip ends up 1 in (2.5 cm) wide. The shaped strip blocks to a letter 3.5 in (8.9 cm) tall and 2.5 in (6.4 cm) wide. With the rings added, the keychain is about 4.75 in (12.1 cm) long.
Once you are comfortable with this S, you can use the same strip-and-shaping method for other curved letters. Happy crocheting!