

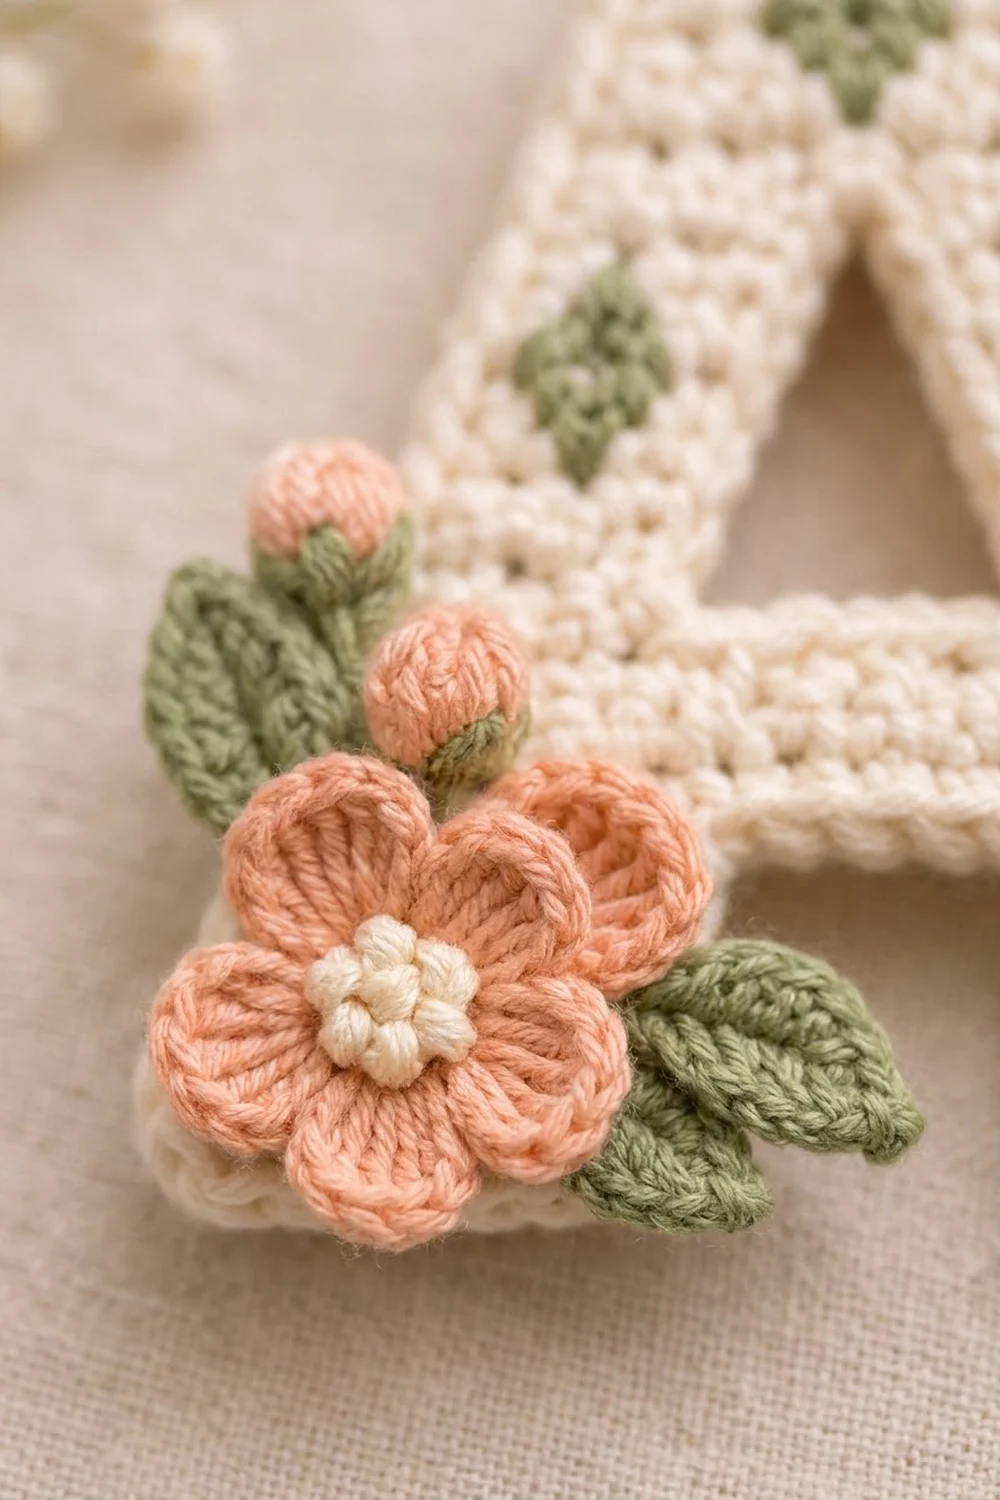
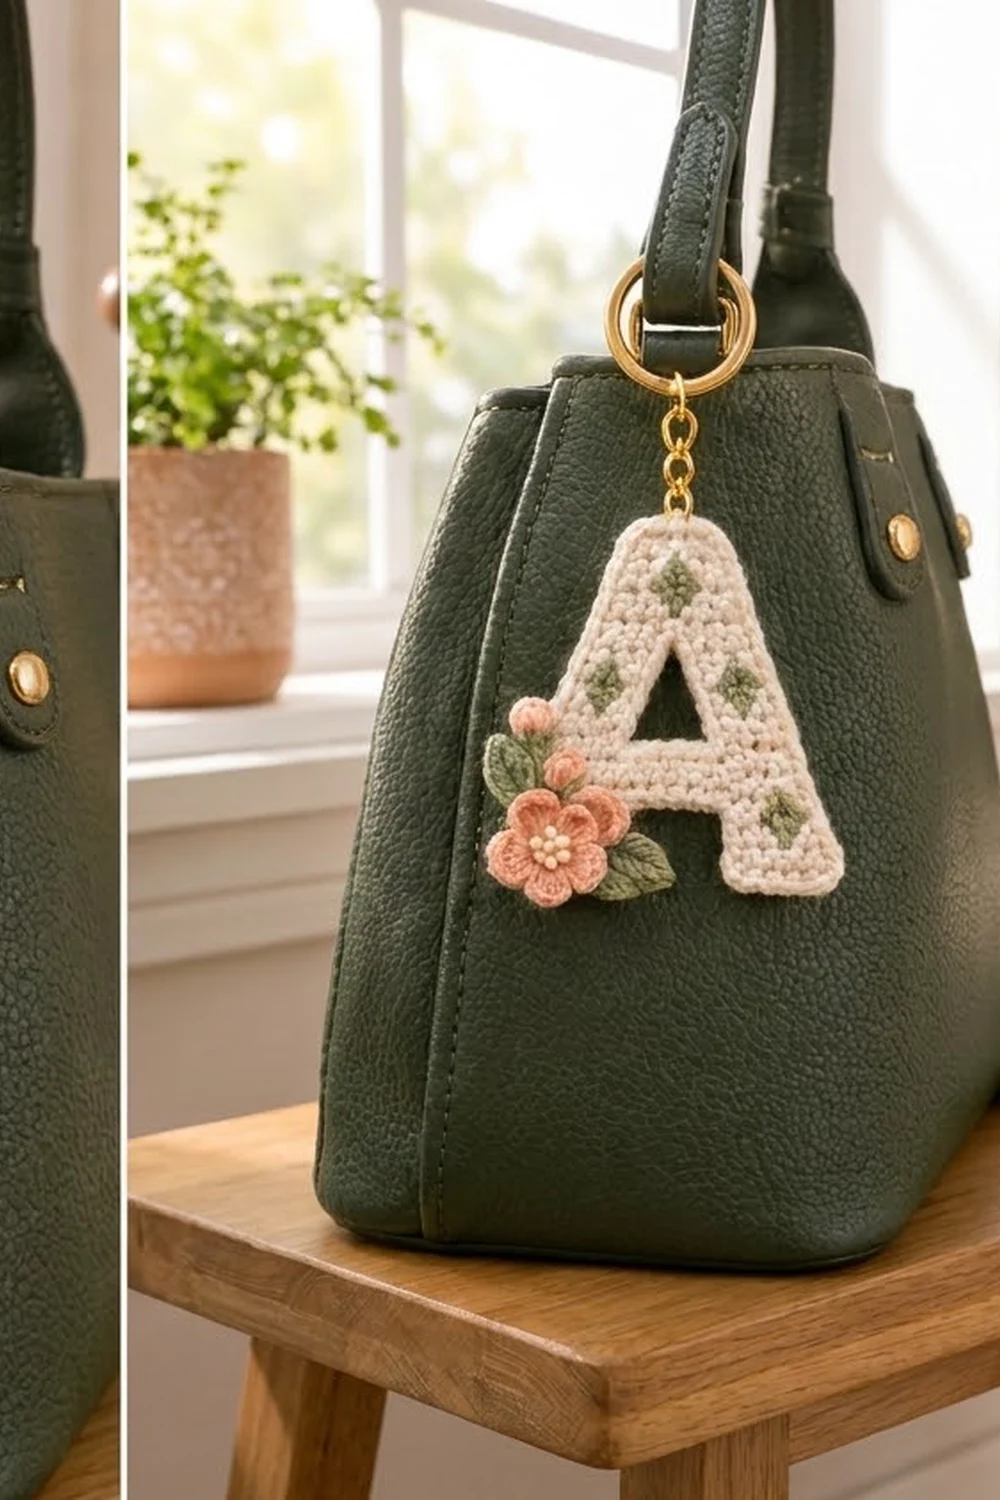
This Blossom Monogram keychain is a small capital letter “A” in creamy cotton. Four little sage-green diamonds are embroidered on the front, and a peach flower with a bud and leaves sits over the lower left leg. A gold split ring and short chain finish the top, so you can clip it to a handbag, tote or set of keys.
The look is soft and vintage: cream, sage green and peach, with a neat raised outline around every edge. The stitches are tight single crochet, so the letter keeps its shape and the embroidery sits clearly on the surface.
This pattern uses US crochet terms. The finished letter measures about 3.6 in (9.1 cm) wide and 3.7 in (9.4 cm) tall, not counting the hardware.
Construction overview: You work the letter in rows from the bottom up. Make two legs separately, join them with a chain crossbar, split again around a small triangular opening, then rejoin and decrease to a flat top. A two-round border outlines the letter, and a slip-stitch round neatens the small opening. Last, embroider the diamonds, sew on the flower, bud and leaves, and attach the hardware.
Finished Size and Construction
- Finished size: 3.6 in (9.1 cm) wide × 3.7 in (9.4 cm) tall
- Skill level: Intermediate (shaping in rows, working separate sections)
- Terminology: US crochet terms
- Yarn weight: Sport weight (#2) cotton
- Hook: 2.75 mm (C-2)
- Number of pieces: 1 letter, plus small sewn-on appliqués (1 flower, 1 bud, 3 leaves)
- Layout: Single letter, worn as a keychain or bag charm
- Piece size before border: 3.3 in (8.4 cm) wide × 3.4 in (8.6 cm) tall
- Border depth: about 0.15 in (0.4 cm) on each side
Materials
Use a smooth, mercerized sport-weight cotton. It shows the stitches crisply, holds the letter shape well and stands up to daily handling on a bag. Avoid fuzzy or very stretchy yarns, because they blur the outline and the embroidery.
Yarn:
– Cream (main color): 10 g / 30 m, for the letter, border and flower center knots
– Sage green: 3 g / 9 m, for the diamonds and leaves
– Peach: 3 g / 9 m, for the flower and bud
These quantities include a small safety margin.
Tools:
– 2.75 mm (C-2) crochet hook
– Blunt tapestry needle
– 2 stitch markers
– Rust-proof pins and a blocking mat
– Spray bottle
– Gold split ring, 1 in (2.5 cm)
– Gold jump ring and a 0.75 in (1.9 cm) length of small gold chain
– Small pliers
– Scissors
Abbreviations (US Terms)
- ch – chain
- sc – single crochet
- sc2tog – single crochet 2 together
- hdc – half double crochet
- dc – double crochet
- sl st – slip stitch
- st(s) – stitch(es)
- RS – right side
Special stitch: Shift row. A shift row keeps the stitch count the same while moving the section 1 st toward the center of the letter. Work sc2tog at the outer edge and 2 sc in the inner-edge st, and sc in each st between them. On a 6-st section, that is sc2tog, sc 3, 2 sc in last st (or the reverse, depending on direction), for 6 sts.
Gauge and Checkpoints
Gauge: 6 sc and 7 rows = 1 in (2.5 cm).
Before you start the letter, make a test swatch. Chain 13 and work 12 sc per row for 14 rows. It should measure 2 in (5.1 cm) square. Gauge controls every measurement in this pattern, so check it.
Checkpoints:
– Each leg after Row 10: 1 in (2.5 cm) wide × 1.4 in (3.6 cm) tall
– After Row 13 (crossbar): 1.9 in (4.8 cm) tall from the bottom
– After Row 18: 2.6 in (6.6 cm) tall
– After Row 24: 3.4 in (8.6 cm) tall; 3.3 in (8.4 cm) wide at the bottom; top 1 in (2.5 cm) wide
– After the border: 3.6 in (9.1 cm) × 3.7 in (9.4 cm)
If your piece is too big, go down to a 2.5 mm hook. If it is too small, go up to a 3 mm hook. Don’t add or remove stitches, because the shaping and the border counts depend on them.
Letter A Pattern
Leave a 6 in (15.2 cm) tail at every start and fasten-off for weaving in.
Right Leg (make first)
With cream, ch 7.
Row 1: Sc in 2nd ch from hook and in each ch across, turn. (6 sc)
Place a marker in the last st of Row 1. For the right leg, this marked edge is the outer edge.
Rows 2–3: Ch 1, sc in each st across, turn. (6 sc)
Row 4 (shift row): This row begins at the outer edge. Ch 1, sc2tog, sc 3, 2 sc in last st, turn. (6 sts)
Rows 5–7: Ch 1, sc in each st across, turn. (6 sc)
Row 8 (shift row): Ch 1, sc2tog, sc 3, 2 sc in last st, turn. (6 sts)
Rows 9–10: Ch 1, sc in each st across, turn. (6 sc)
Fasten off. Row 10 ends at the inner edge.
Left Leg (make second)
With cream, ch 7.
Row 1: Sc in 2nd ch from hook and in each ch across, turn. (6 sc)
Place a marker in the last st of Row 1. For the left leg, this marked edge is the inner edge.
Rows 2–3: Ch 1, sc in each st across, turn. (6 sc)
Row 4 (shift row): This row begins at the inner edge. Ch 1, 2 sc in first st, sc 3, sc2tog, turn. (6 sts)
Rows 5–7: Ch 1, sc in each st across, turn. (6 sc)
Row 8 (shift row): Ch 1, 2 sc in first st, sc 3, sc2tog, turn. (6 sts)
Rows 9–10: Ch 1, sc in each st across, turn. (6 sc)
Do not fasten off. Row 10 ends at the outer edge of the left leg.
Each leg has now moved 2 sts toward the center. This creates the slanted outer sides and a lower opening that is 8 sts wide at the bottom and 4 sts wide at the top.
Crossbar
Lay the legs side by side with their tops level and their inner edges facing each other.
Row 11: Ch 1, sc 6 across the left leg (ending at its inner edge), ch 4, then sc 6 across Row 10 of the right leg, starting at its inner edge, turn. (12 sc + 4 ch = 16 sts)
Row 12: Ch 1, sc in each sc and each ch across, turn. (16 sc)
Row 13: Ch 1, sc2tog, sc 12, sc2tog, turn. (14 sts)
Checkpoint: the crossbar is 2.7 in (6.9 cm) wide at Row 12.
Upper Arms and Triangle Opening
Arm 1, Row 14: Ch 1, sc 6, turn. Leave the remaining 8 sts unworked. (6 sc)
Row 15: Ch 1, sc in each st across, turn. (6 sc)
Row 16 (shift row): This row begins at the outer edge. Ch 1, sc2tog, sc 3, 2 sc in last st, turn. (6 sts)
Row 17: Ch 1, sc in each st across. (6 sc)
Don’t fasten off. Pull up a long loop and hold it with a stitch marker.
Arm 2: Skip the 2 sts of Row 13 next to Arm 1. These 2 skipped sts form the base of the triangle opening.
Row 14: Join cream with a sc in the next st, sc in the next 5 sts, turn. (6 sc)
Row 15: Ch 1, sc in each st across, turn. (6 sc)
Row 16 (shift row): This row begins at the inner edge. Ch 1, 2 sc in first st, sc 3, sc2tog, turn. (6 sts)
Row 17: Ch 1, sc in each st across. (6 sc)
Fasten off.
Both arms have now moved 1 st inward, so the 2-st gap closes into a point at the top. That is the small triangle opening.
Apex
Put the Arm 1 loop back on your hook.
Row 18: Ch 1, sc 6 across Arm 1, then sc 6 across Arm 2, turn. (12 sc)
Row 19: Ch 1, sc across, turn. (12 sc)
Row 20: Ch 1, sc2tog, sc 8, sc2tog, turn. (10 sts)
Row 21: Ch 1, sc across, turn. (10 sc)
Row 22: Ch 1, sc2tog, sc 6, sc2tog, turn. (8 sts)
Row 23: Ch 1, sc across, turn. (8 sc)
Row 24: Ch 1, sc2tog, sc 4, sc2tog. (6 sts)
Don’t fasten off. Continue straight into the border.
Checkpoint: the letter measures 3.4 in (8.6 cm) tall and 3.3 in (8.4 cm) wide at the bottom.
Flower
Rnd 1: With cream, make a magic ring and work 5 sc in the ring. Change to peach as you join with a sl st to the first sc. (5 sc)
Rnd 2: With peach, ch 1, 2 sc in each st around, sl st to the first sc. (10 sc)
Rnd 3: *Sl st in the next st, (hdc, 3 dc, hdc) all in the next st; repeat from * 4 more times, then sl st in the first sl st. (5 petals)
Fasten off, leaving a 10 in (25.4 cm) tail for sewing. The flower measures about 1 in (2.5 cm) across.
With cream, work 6 French knots over the center so it looks like a small cluster of pearls.
Bud
With peach, make a magic ring.
Rnd 1: Ch 2, work 5 dc in the ring, pull the ring tight and sl st to the top of the first dc. (5 dc)
Pinch the dc into a rounded cup and sew the edge closed to make a small ball. Fasten off, leaving a sewing tail. The bud is about 0.4 in (1.0 cm).
Leaves (make 3)
With sage green, ch 7.
Side 1: Sc in 2nd ch from hook, hdc, dc, dc, hdc, sc in last ch.
Ch 1 for the tip, then rotate to work along the free loops of the chain.
Side 2: Sc, hdc, dc, dc, hdc, sc. Sl st to the first sc. (12 sts + tip ch)
Fasten off, leaving a sewing tail. Each leaf is about 0.9 in (2.3 cm) long.
Border
Border gauge is 1 sc per row end along the shaped edges, and 1 sc per st along the top and the leg bottoms. These rules keep the outline flat.
Rnd 1 (sc outline): Continue from Row 24 and work around the outer edge in this order:
- Top: 3 sc in the first st, sc 4, 3 sc in the last st. (10 sc)
- Right outer edge, Rows 24 to 1: 1 sc in each row end. (24 sc)
- Right leg bottom, in the free loops of the foundation chain: 3 sc in the first st, sc 4, 3 sc in the last st. (10 sc)
- Right leg inner edge, Rows 1 to 10: 1 sc in each row end. (10 sc)
- Underside of the crossbar chain: 1 sc in each free ch loop. (4 sc)
- Left leg inner edge, Rows 10 to 1: 1 sc in each row end. (10 sc)
- Left leg bottom: 3 sc in the first st, sc 4, 3 sc in the last st. (10 sc)
- Left outer edge, Rows 1 to 24: 1 sc in each row end. (24 sc)
Sl st to the first sc. Total: 102 sc.
Rnd 2 (raised rim): Ch 1, sl st in each sc around, then join. (102 sl st)
Fasten off.
Triangle opening: Join cream at the base of the opening. Work 1 sl st into each of the 2 skipped Row 13 sts, then 1 sl st into each of the 4 row ends on each arm (Rows 14–17). Join. Total: 10 sl st.
Why the math works: Each edge of the letter uses 1 border stitch per row end or per stitch, so the edge is neither stretched nor gathered. The 3-sc corners add the 2 extra stitches each convex corner needs to lie flat:
- Top: 6 sts + 4 corner extras = 10
- Each leg bottom: 6 sts + 4 corner extras = 10 (30 sc for the top and both bottoms)
- Outer edges: 24 + 24 = 48
- Lower opening: 10 + 4 + 10 = 24
That gives 30 + 48 + 24 = 102. One sc round plus one sl st round adds about 0.15 in (0.4 cm) to each side. So the width goes from 3.3 in to 3.6 in (8.4 cm to 9.1 cm), and the height goes from 3.4 in to 3.7 in (8.6 cm to 9.4 cm).
Final Blocking
- Weave in all tails on the letter, but leave the appliqué sewing tails.
- Lay the letter RS up on the blocking mat.
- Pin each of the 6 outer corners: the 2 top corners and the 2 corners on each leg bottom.
- Pin the 2 inner corners of the lower opening so it sits as a clean trapezoid.
- Check the size: 3.6 in (9.1 cm) wide × 3.7 in (9.4 cm) tall.
- Mist lightly and let it dry completely.
- Embroider the diamonds with sage green. Each diamond is 3 sts wide × 3 rows tall: work one long vertical straight stitch through the center, then two shorter stitches on each side. Place them like this:
- one centered on Rows 20–22
- one on the left side of Rows 13–15
- one on the right side of Rows 12–14
- one on the right leg, Rows 3–5
- Sew the leaves to the lower left leg so they extend past the edge: one pointing up and to the left, one down and to the left, one down and to the right.
- Sew the flower on top of the leaves, centered about 0.6 in (1.5 cm) above the bottom of the left leg.
- Sew the bud above the flower, slightly overlapping its upper petal.
- Use the pliers to fit the jump ring through the top center of the border, between the 5th and 6th stitches of the top’s 10 sc. Then attach the chain and the split ring.
Final Quality-Control Checklist
- Each leg has 6 sts per row, and the shift rows fall on Rows 4 and 8.
- Row 12 has 16 sc, Row 13 has 14 sts, and Row 24 has 6 sts.
- The triangle opening is visible and closes to a point.
- The border has 102 sc, and the triangle opening has 10 sl st.
- The finished size is 3.6 in × 3.7 in (9.1 cm × 9.4 cm).
- There are 4 diamonds, all the same size.
- The flower, bud and leaves are firmly stitched on, with no loose petals.
- The hardware is secure and the jump ring is fully closed.
Troubleshooting
- The legs lean the wrong way: The shift row was worked in reverse. Make sure sc2tog always falls at the outer edge.
- There’s a gap or pucker at the crossbar: The ch 4 was too loose or too tight. Rework Row 11 with chains at the same tension as your sc.
- The border ruffles: Your hook is too large for the border. Go down a size for Rnd 1 only.
- The border cups: The corners are missing their extra stitches. Recheck the 3-sc corners.
- The flower petals curl: Pin the flower flat, mist it and let it dry before sewing.
- The triangle opening disappears: Make sure you skipped the 2 center sts on Row 13.
Care
Spot clean with mild soap and cool water, then reshape and let it dry flat. Avoid tumble drying, because heat can loosen the embroidery and dull the gold hardware.
Final Notes
The measurement chain is simple:
- Gauge of 6 sc and 7 rows per 1 in (2.5 cm)
- 6-st legs at 1 in (2.5 cm) wide
- 16-st crossbar at 2.7 in (6.9 cm)
- 24 rows for a letter 3.4 in (8.6 cm) tall and 3.3 in (8.4 cm) wide
- 102-st border for a finished 3.6 in × 3.7 in (9.1 cm × 9.4 cm)
Check each checkpoint as you go, and your letter will come out flat, even and ready for its flower.
Happy crocheting!