

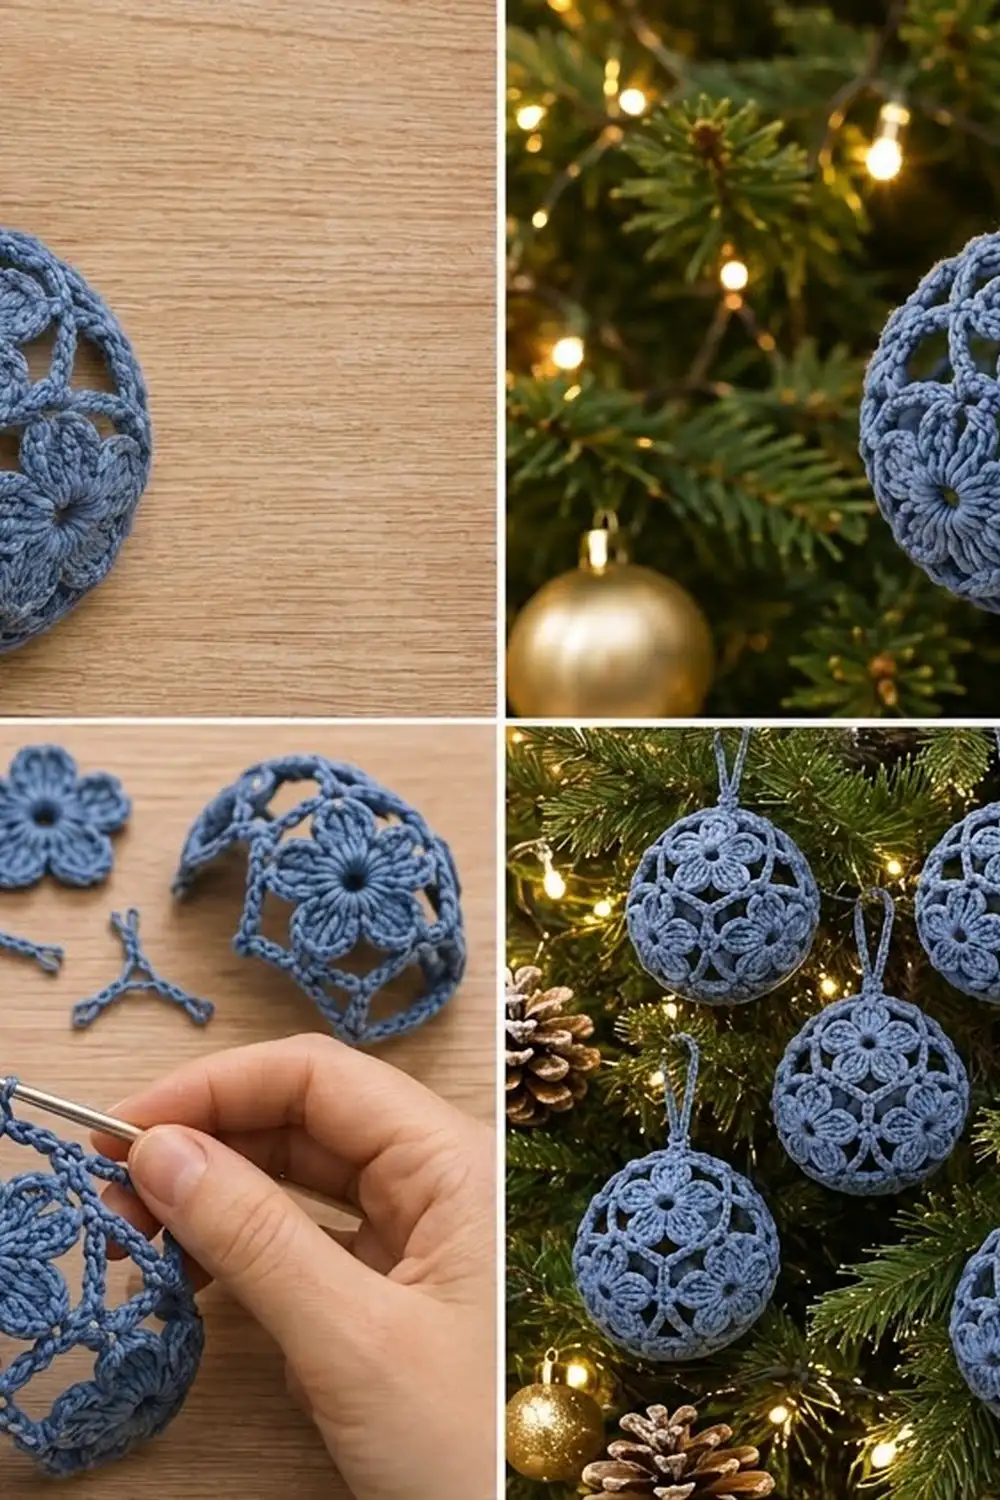
This openwork ball ornament is made of small five-petal flowers set inside a lace-like chain lattice. Light passes through the gaps, so on a lit tree you see the flowers on the front and the lattice on the back at the same time.
The sample is worked in one dusty denim-blue DK cotton. It looks calm and a little vintage, and it suits both rustic and modern trees. It also works well in white, cream, sage, or soft gold. This pattern uses US crochet terms.
The finished ornament is 3.25 in (8.3 cm) in diameter after blocking. It stands 5.25 in (13.3 cm) tall including the hanging loop.
You make twelve flower motifs. Each one gets a pentagonal frame round, and you join the motifs to each other during that frame round (join-as-you-go). The twelve pentagons form a closed ball. Then you stiffen it over a balloon and add a small collar with a slip-stitched hanging loop.
Finished Size and Construction
- Finished size: 3.25 in (8.3 cm) diameter, blocked; 5.25 in (13.3 cm) tall with loop
- Skill level: Intermediate
- Terminology: US crochet terms
- Yarn weight: DK / light (#3), cotton or cotton blend
- Hook: 3.5 mm (E-4)
- Number of pieces: 12 flower motifs, joined into one ornament
- Layout: 1–5–5–1 (top flower, upper ring of 5, lower ring of 5, bottom flower)
- Piece size: flower 1.75 in (4.4 cm) across; framed motif 1.1 in (2.8 cm) per side
- Size before border: 3 in (7.6 cm) unblocked; 3.25 in (8.3 cm) blocked
- Border depth: collar 0.25 in (0.6 cm), plus a hanging loop 1.75 in (4.4 cm) tall
Materials
Yarn: Use a smooth, mercerized or matte DK cotton, or a cotton-acrylic blend. Cotton holds stiffener well and shows the petal texture clearly. Avoid fuzzy yarns, because they fill in the open lattice.
- Dusty denim blue: 20 g, about 46 m (50 yd)
That amount covers one ornament: twelve motifs, collar, loop, and tails. It includes a safety margin of roughly 20%.
Tools:
– 3.5 mm (E-4) crochet hook
– Tapestry needle
– Scissors
– Small round balloon (5 in / 12.7 cm party size)
– Fabric stiffener or a 1:1 mix of white craft glue and water
– Small bowl, paper towels, and a cup to rest the ball on while it dries
– Flexible tape measure
Abbreviations (US Terms)
- ch – chain
- sl st – slip stitch
- sc – single crochet
- hdc – half double crochet
- dc – double crochet
- tr – treble crochet
- sc2tog – single crochet 2 together
- sp – space
- st(s) – stitch(es)
- rnd – round
Special stitches
- Petal: (hdc, dc, 3 tr, dc, hdc) all in the same stitch. Each Petal is 7 sts. The 2nd of the 3 tr is the petal tip.
- Corner join: (sc, ch 1, sl st in the neighbor’s corner ch-3 sp, ch 1, sc) all in the petal tip. The ch 1 + sl st + ch 1 replaces the ch 3 of a free corner.
- Side join: ch 3, sl st around the middle of the neighbor’s ch-7 sp, ch 3. The ch 3 + sl st + ch 3 replaces the ch 7 of a free side.
Gauge and Checkpoints
Make one complete motif before you start the ornament, and measure it after each round:
- After Rnd 1: 0.6 in (1.5 cm) across.
- After Rnd 2: 1.75 in (4.4 cm) from one petal tip across to the opposite gap.
- After Rnd 3: each frame side measures 1.1 in (2.8 cm) from corner loop to corner loop.
- Chain gauge: 11 ch = 2 in (5.1 cm).
If your motif is too big: go down to a 3.25 mm hook, or chain more firmly. Even an extra 0.1 in (0.3 cm) per side adds about 0.3 in (0.8 cm) to the ball.
If your motif is too small: go up to a 3.75 mm hook. Tight frames make a lumpy ball that resists blocking.
You can use the gauge motif as Motif 1.
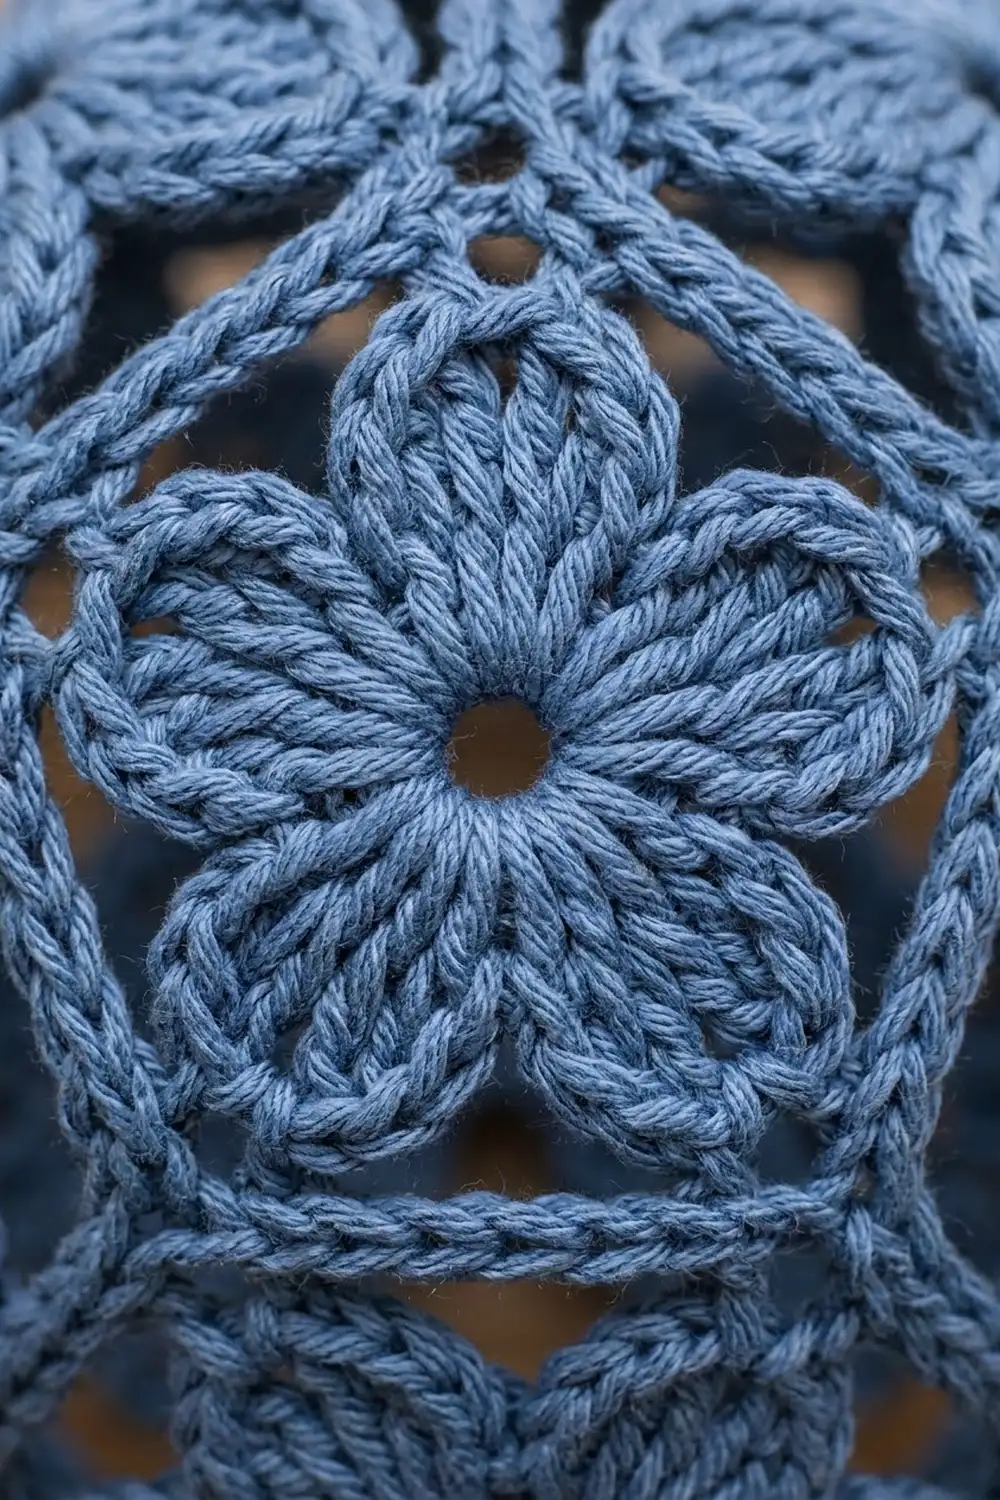
Flower Motif (Rounds 1–2, all 12 motifs)
Rnd 1: Make a magic ring. Ch 3 (counts as dc), 9 dc in ring. Pull the ring closed but leave a center hole about 0.2 in (0.5 cm) across. Sl st in the top of beginning ch-3. (10 dc)
Rnd 2: [Sl st in next dc, Petal in next dc] 4 times, sl st in next dc, Petal in top of beginning ch-3. Sl st in first sl st to join. (5 Petals of 7 sts + 5 sl sts = 40 sts)
The petals should cup slightly and sit side by side with a small V-shaped gap between each pair. If they ruffle, your tr are too loose. If they curl inward, they are too tight.
Frame Round (Round 3)
Motif 1 (no joins)
Rnd 3: Sl st in next hdc, next dc, and next tr (3 sl sts). You are now at the first tr of the petal.
Ch 1, (sc, ch 3, sc) in next tr (the petal tip). *Ch 7, skip the remaining 3 sts of this petal, the sl st, and the first 3 sts of the next petal (7 sts skipped), then (sc, ch 3, sc) in the next tr (the petal tip). Repeat from * 3 more times. Ch 7, sl st in first sc.
Count: 10 sc, 5 ch-3 corner sps, 5 ch-7 side sps.
Per side: 9 sts (sc + 7 ch + sc). The ch-3 corner loops sit between the sides.
Each ch-7 spans exactly 7 skipped stitches, so the frame lies flat without pulling the petals. The frame turns the round flower into a pentagon with straight sides, and those sides are the edges of the ball.
Fasten off, leaving a 4 in (10.2 cm) tail. Weave in all tails before you join the next motif.
Motifs 2–12 (join-as-you-go)
Work Rnds 1–2 as for Motif 1. Work Rnd 3 the same way, except on each side that touches an earlier motif:
- Work every corner of that side as a Corner join.
- Work the side itself as a Side join.
Always do the joining sides in a row, one after another, and finish the rest of the round free.
Vertex rule: Each corner of the ball is shared by three motifs. When you reach a corner that already has a join, sl st into that same ch-3 sp of the lowest-numbered motif there. All three motifs then meet in one knot, which forms the Y junction.
Make All Pieces
Make all 12 motifs in dusty denim blue, joining as you go: 12 flowers, 1 color.
The arrangement follows a dodecahedron, a ball made of twelve pentagons:
              [ 1 ]                  top
   [ 2 ]  [ 3 ]  [ 4 ]  [ 5 ]  [ 6 ]  upper ring
      [ 7 ]  [ 8 ]  [ 9 ]  [10 ]  [11 ] lower ring (offset)
              [12 ]                  bottom
Each upper-ring motif sits along one side of Motif 1. Each lower-ring motif sits in the V between two upper motifs. Motif 11 sits under Motifs 6 and 2, so the lower ring wraps back to 7.
Joining
Sides joined during each motif’s Rnd 3:
- Motif 2: 1 side, to Motif 1
- Motifs 3, 4, 5: 2 sides each, to Motif 1 and the previous motif
- Motif 6: 3 sides, to Motifs 5, 1, and 2
- Motif 7: 2 sides, to Motifs 2 and 3
- Motif 8: 3 sides, to Motifs 7, 3, and 4
- Motif 9: 3 sides, to Motifs 8, 4, and 5
- Motif 10: 3 sides, to Motifs 9, 5, and 6
- Motif 11: 4 sides, to Motifs 10, 6, 2, and 7
- Motif 12: 5 sides, to Motifs 7, 8, 9, 10, and 11
Total: 1 + 6 + 3 + 2 + 9 + 4 + 5 = 30 joined sides, which is exactly the 30 edges of a dodecahedron. Every corner ends up as one of the 20 Y junctions.
Stitch-to-stitch logic: A Side join uses 3 + 1 + 3 = 7 units, the same as a free ch-7. A Corner join uses 1 + 1 + 1 = 3 units, the same as a free ch-3. Joined edges are therefore exactly as long as free ones. No stitches are added at the seams, and each doubled line stays 1.1 in (2.8 cm) long.
Tension: Work the joining sl sts at your normal tension. A tight sl st pulls the two chain lines into a pinched V, and a loose one lets them gap apart. The two chains should lie parallel and touch only at the middle.
Before Motif 12: Push a deflated balloon into the ball through the open bottom pentagon, and leave its neck sticking out through one of the lattice gaps. Then join Motif 12.
Size checkpoint:
– After Motif 6: the top cup holds a dome shape on its own, about 4.5 in (11.4 cm) across measured over the curve.
– After Motif 12: the closed, unblocked ball measures about 3 in (7.6 cm) across.
Border: Collar and Hanging Loop
A closed ball has no outer edge, so the “border” here is a small collar worked around one Y junction. It reinforces the spot where the loop attaches and gives the ornament a neat cap. Choose any junction on Motif 1.
Border gauge: 3 sc around one doubled chain arm cover 0.25 in (0.6 cm) of the arm next to the junction.
Rnd 1: Join yarn with a sl st into the junction knot, ch 1. Work 3 sc around the first doubled arm, catching both chain lines, right beside the knot. Work 3 sc around each of the next 2 arms the same way. Sl st in first sc. (9 sc: 3 per arm × 3 arms)
Rnd 2: Ch 1, [sc in next sc, sc2tog] 3 times. Sl st in first sc. (6 sc: 2 per arm × 3 arms)
Hanging loop: Ch 22, then sl st in the 4th sc of Rnd 2 so the loop is anchored directly opposite its starting point. Turn, and sl st in each of the 22 ch back to the start (22 sl sts). Sl st in first sc. Fasten off and weave in the tail through the collar.
Why the math works:
– The collar works into the three arms only. It never uses motif stitches, so the motif counts stay the same and no seam stitches are added.
– 9 sc divide evenly into 3 arms (3 each). Decreasing one stitch per arm leaves 6, so the collar narrows evenly into a small cap.
– Anchoring the loop at sts 1 and 4 splits the 6 sts into 3 + 3, so the loop sits centered.
– At 11 ch per 2 in, the 22-ch loop is 4 in (10.2 cm) long. Folded into a loop, it stands about 1.75 in (4.4 cm) tall.
Final Blocking
- Inflate the balloon inside the ball until the ball’s circumference measures 10.2 in (25.9 cm), which equals a 3.25 in (8.3 cm) diameter. Knot the balloon neck.
- With your fingers, roll each flower so its center hole sits in the middle of its pentagon and all five petals lie evenly.
- Straighten every doubled edge so the two chain lines run parallel. Turn each Y junction so its three arms are evenly spaced.
- Brush or dab stiffener over the whole ball. Keep it off the hanging loop so the loop stays soft. Blot any extra liquid out of the gaps with paper towel.
- Rest the ball, loop side up, on a cup. Let it dry for 24 hours and turn it once halfway through.
- Pop the balloon and pull it out through a lattice gap with the hook.
- Measure: the ball should be 3.25 in (8.3 cm) across and 5.25 in (13.3 cm) tall including the loop.
Final Quality-Control Checklist
- Each flower has 10 dc in Rnd 1 and 5 even Petals in Rnd 2.
- Each frame round has 10 sc, 5 corner sps, and 5 side sps.
- All 30 edges are joined, with no loose single chains.
- All 20 junctions are tight three-way knots.
- Center holes are open and about 0.2 in (0.5 cm) across.
- The collar has 6 sc and the loop is centered.
- Diameter is 3.25 in (8.3 cm). No flat spots or dents.
- All tails are woven in and hidden behind petals.
Troubleshooting
- The ball has a flat or pointed area: One frame round is tighter or looser than the others. Rework that motif’s Rnd 3 to gauge.
- Doubled edges gap open: The side-join sl st is too loose. Redo it snugly into the middle ch of the neighbor’s ch-7.
- A junction shows a small hole: The third motif joined into the wrong corner sp. Sl st into the same sp as the earlier join.
- Motif 12 won’t reach its last side: A side was skipped or joined to the wrong motif. Check the joining list above.
- Petals flop after stiffening: Not enough stiffener reached them. Apply a second, thinner coat while the balloon is back inside.
- The loop twists: It was anchored off-center. Move the anchor to the 4th sc.
Care
Dust the ornament gently with a soft, dry brush. Store it in a box with tissue paper so the ball isn’t crushed. If it softens over time, reshape it over a balloon and apply fresh stiffener.
Final Notes
Every size depends on the one before it:
- Rnd 1 is 0.6 in (1.5 cm).
- Rnd 2 is 1.75 in (4.4 cm).
- Each Rnd 3 side is 1.1 in (2.8 cm).
- Thirty joined edges make a 3 in (7.6 cm) ball, which blocks to 3.25 in (8.3 cm).
- The 0.25 in (0.6 cm) collar and the 1.75 in (4.4 cm) loop bring the total height to 5.25 in (13.3 cm).
If your first motif matches gauge, the rest will follow. Happy crocheting!