

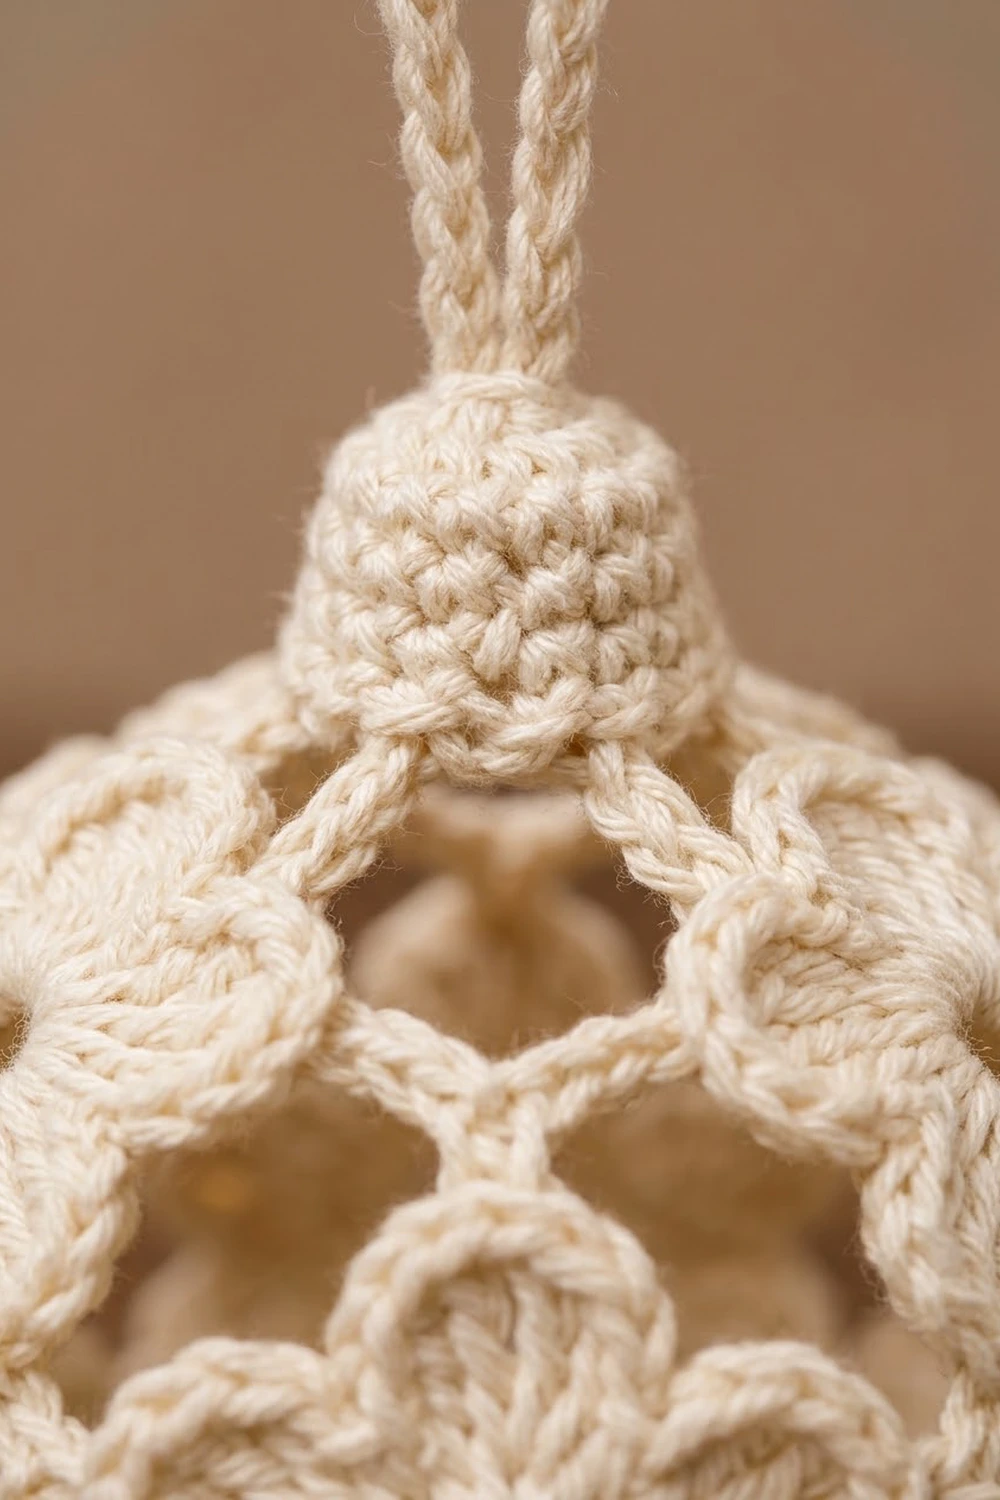
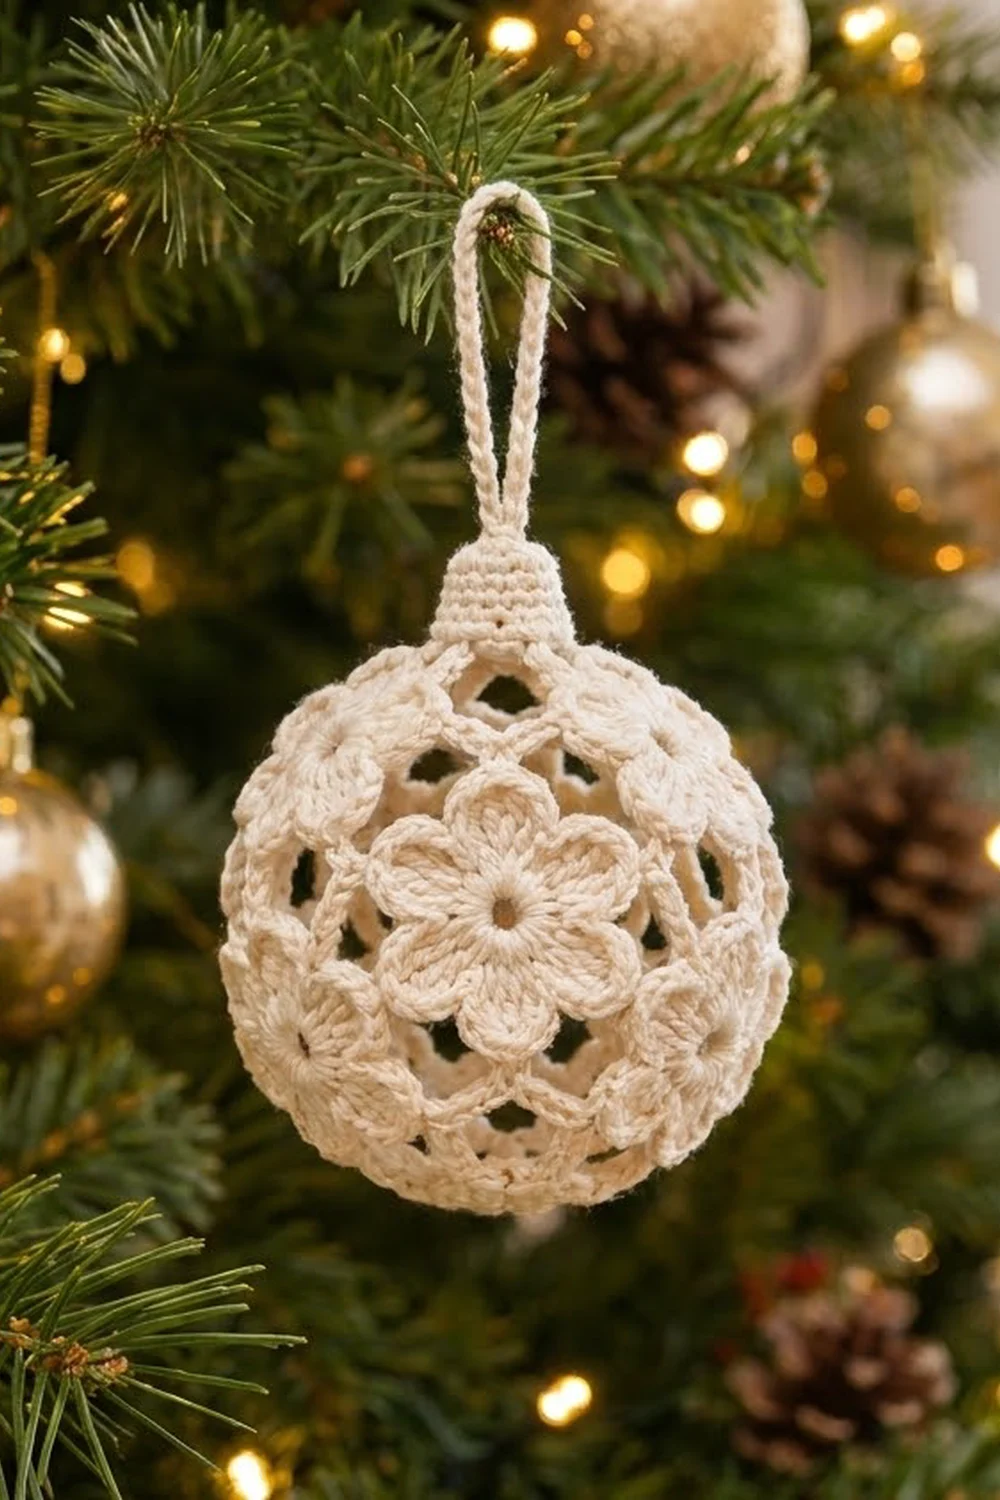
This lacy ball ornament is made of soft cream flowers joined into a hollow sphere. Six blossoms make a band around the middle. Above and below the band, open chain mesh gathers toward a neat, firm cap at the top and a small closed ring at the bottom.
The look is classic heirloom Christmas: one ivory cotton, raised petals and plenty of open space so tree lights show through. It looks right on a natural tree, in a bowl, or tied to a gift.
The pattern uses US crochet terms. The finished ball is about 3 in (7.6 cm) in diameter. With the cap it stands about 3.5 in (8.9 cm) tall, and the loop adds 2 in (5.1 cm), for a total hanging length of about 5.5 in (14.0 cm).
Construction is simple. You make six flower motifs, joining each one to the last as you go and closing them into a ring. Then you work a chain-mesh closure into the free petal tips at the top, finishing with the cap and loop. Finally, you work a matching closure at the bottom. The piece is blocked over a ball form so it holds its shape.
Finished Size and Construction
- Finished ball diameter: 3 in (7.6 cm)
- Height with cap: 3.5 in (8.9 cm); with loop, 5.5 in (14.0 cm)
- Skill level: Intermediate (join-as-you-go, working in the round)
- Terminology: US
- Yarn weight: Sport / light (#2) mercerized or matte cotton
- Hook: 2.75 mm (C-2)
- Number of pieces: 6 flower motifs, joined into one sphere
- Layout: one closed ring of 6 flowers around the middle
- Piece size: each flower is 1.5 in (3.8 cm) from petal tip to opposite petal tip
- Size before closures: the flower band is 9 in (22.9 cm) around and 1.5 in (3.8 cm) tall
- Closure depth: each mesh closure adds about 0.75 in (1.9 cm). The cap adds 0.5 in (1.3 cm).
Materials
Yarn: Use a smooth sport-weight cotton with good stitch definition. Mercerized cotton gives crisp petals and a slight sheen. Matte cotton gives the soft, chalky look shown. Avoid acrylic, which won’t hold the sphere shape after blocking.
- Cream / ivory: 15 g, about 50 m (55 yd)
One ornament uses roughly 12 g (40 m). The quantity above includes a margin for your gauge swatch and weaving in ends.
Tools:
– 2.75 mm (C-2) crochet hook
– Tapestry needle
– Scissors
– Stitch marker
– A 2.75–3 in (7.0–7.6 cm) ball form for blocking: a plastic ornament, a foam ball wrapped in plastic, or a small balloon
– Fabric stiffener or starch, which is optional but recommended
– Rust-proof pins
Abbreviations (US Terms)
- ch – chain
- sl st – slip stitch
- sc – single crochet
- hdc – half double crochet
- dc – double crochet
- sc2tog – single crochet 2 together
- st(s) – stitch(es)
- sp – space
- MR – magic ring
Special stitch – Joining tip: Replace the ch-2 at a petal tip with: ch 1, sl st into the ch-2 tip of the neighboring flower, ch 1. The finished tip is still the same size as a ch-2 sp.
Gauge and Checkpoints
Make one complete flower before you start the ornament, and measure it after each round:
- After Round 1: center ring is 0.5 in (1.3 cm) across
- After Round 2: 1 in (2.5 cm) across
- After Round 3: 1.5 in (3.8 cm) from petal tip to opposite petal tip, lightly pressed flat
Everything else depends on this flower measurement. Six flowers at 1.5 in (3.8 cm) make a 9 in (22.9 cm) band. That band is the circumference of a 3 in (7.6 cm) ball.
If your flower is too big (over 1.6 in / 4.1 cm), go down one hook size. If it’s still too big, try a slightly finer cotton.
If your flower is too small (under 1.4 in / 3.6 cm), go up to a 3 mm hook.
A small difference is fine. The ornament will just be a little larger or smaller. Choose your blocking form to match: its diameter should be the band circumference divided by 3.14.
Flower Motif
Make 6. Work in joined rounds. Do not turn.
Round 1: MR, ch 1, 12 sc into ring, sl st to first sc. Pull the ring tight, leaving a small open center. (12 sts)
Round 2: Ch 3 (counts as dc), dc in same st, 2 dc in each st around, sl st to top of ch-3. (24 dc)
Round 3 (petals): Each petal is worked over 4 stitches.
Sc in next st, (hdc, 2 dc) in next st, ch 2, (2 dc, hdc) in next st, sc in next st; repeat from * 5 more times. Sl st to first sc. Fasten off.
(6 petals; 8 sts per petal = 48 sts, plus 6 ch-2 tips)*
Each petal has 2 sc at its base, so neighboring petals are separated by 2 sc in a clear valley. The hdc and dc build a rounded petal, and the ch-2 makes a small pointed tip that you’ll use for joining.
Petal numbering: Petals are numbered 1–6 in the order you work them. Petal 1 and petal 4 sit directly opposite each other. Hold the flower with petal 1 on the left and petal 4 on the right. Petals 2 and 3 then point up, and petals 5 and 6 point down.
Make All Pieces
You need 6 flowers in cream.
- Flower 1: work in full as written.
- Flowers 2–5: use a joining tip at petal 1 to join to petal 4 of the previous flower.
- Flower 6: use a joining tip at petal 1 to join to petal 4 of Flower 5, and another at petal 4 to join to petal 1 of Flower 1. This closes the ring.
Layout (one closed ring, viewed from the side):
[F1]–[F2]–[F3]–[F4]–[F5]–[F6]–(back to F1)
Each “–” is one petal-tip join. There are 6 joins in total.
Joining
Method: Join as you go during Round 3, using the joining tip defined above.
Stitch-to-stitch logic: Each join replaces a ch-2 tip with ch 1, sl st, ch 1. The stitch count doesn’t change: each flower still has 48 sts and 6 tips. Only petals 1 and 4 are used for joining. Petals 2, 3, 5 and 6 stay free, which gives:
- 12 free tips along the top edge: petals 2 and 3 of each flower
- 12 free tips along the bottom edge: petals 5 and 6 of each flower
Tension advice: Keep the joining sl st snug but not tight. If it’s tight, the tips pucker and the band ripples. Before you join Flower 6, check that the band isn’t twisted: all right sides should face out and every petal 2 should point up.
Size checkpoint: The closed ring measures 9 in (22.9 cm) around. Laid flat and folded, it measures 4.5 in (11.4 cm) from fold to fold.
Border: Top and Bottom Closures
On this ornament, the closures act as the border. They turn the open band into a sphere.
Closure gauge: In the mesh, each ch-5 loop spans 0.75 in (1.9 cm). In the cap, 6 sc rows measure about 1 in (2.5 cm).
Why the math works: The flower tips sit 60° apart. Two neighboring tips on the same flower are one radius apart: 0.75 in (1.9 cm). Across a join, petal 3 of one flower and petal 2 of the next are also 0.75 in (1.9 cm) apart, because the centers are 1.5 in (3.8 cm) apart and each tip sits 0.375 in (1.0 cm) toward the join. That means all 12 gaps are equal, and one identical ch-5 loop fits each one. Every following round has the same number of repeats as the one before, and the loops get shorter, so the opening shrinks evenly.
Top Closure
Round 1: Join yarn with sc in petal 2 tip of any flower. Ch 5, sc in next free top tip; repeat from * around, ending with ch 5, sl st to first sc.
(12 sc + 60 ch = 72 sts; 12 ch-5 loops)*
Round 2: Sl st into the first 2 ch, sc in same loop. Ch 4, sc in next ch-5 loop; repeat from * around, ending ch 4, sl st to first sc.
(12 sc + 48 ch = 60 sts; 12 ch-4 loops)*
These rounds form the diamond-shaped windows.
Round 3: Sl st into the first 2 ch, sc in same loop. Ch 3, sc in next loop; repeat from * around, ending ch 3, sl st to first sc.
(12 sc + 36 ch = 48 sts; 12 ch-3 loops)*
Checkpoint: the opening is about 1.25 in (3.2 cm) across.
Round 4 (conversion round): Work 2 sc in each ch-3 loop around. Do not work into the sc between loops. Sl st to first sc.
(12 loops × 2 sc = 24 sc)
Round 5: Sc in next 2 sts, sc2tog; repeat from * 5 more times. (18 sts)*
Round 6: Sc in next st, sc2tog; repeat from * 5 more times. (12 sts)*
Rounds 7–9: Sc in each st around. (12 sts each round)
This makes the firm, tapered cylinder cap. It is about 0.75 in (1.9 cm) across and 0.5 in (1.3 cm) tall.
Round 10: Sc2tog 6 times. (6 sts)
Hanging loop: Ch 26, skip 2 sts, sl st into the 3rd st (the opposite side of the cap). Sl st into each of the 26 ch back toward the start, then sl st into the first st of Round 10. (26 sl st)
Working back along the chain doubles the cord so it’s thick and doesn’t stretch. Fasten off, thread the tail through the remaining stitches, cinch them closed and weave in the end.
Bottom Closure
Turn the ornament upside down.
Rounds 1–4: Work the same as Top Closure Rounds 1–4, starting in petal 5 tip of any flower. Round 1 has 72 sts, Round 2 has 60, Round 3 has 48, and Round 4 has 24 sc.
Round 5: Sc2tog 12 times. (12 sts)
Round 6: Sc2tog 6 times. (6 sts)
Fasten off, cinch the ring closed and weave in the end.
Checkpoint: The unblocked ornament is about 3 in (7.6 cm) across at the band. From the bottom ring to the top of the cap it should measure about 3.5 in (8.9 cm).
Final Blocking
- Weave in all the ends along the back of the stitches, not through the open mesh.
- Wet the ornament in cool water and gently press it in a towel.
- Inflate a balloon to 3 in (7.6 cm), or use a 2.75–3 in (7.0–7.6 cm) ball form. Insert it through a mesh window, or ease the ornament over a plastic ball.
- Center the flower band on the widest part of the ball. Nudge each flower so its center ring is round and its petals lie flat.
- Straighten the mesh so every diamond window is the same size.
- If you’re using stiffener, brush it on lightly. Dab off any excess so the windows don’t fill with film.
- Hang the ornament by its loop, or set it on a cup, and let it dry completely. This takes 12–24 hours.
- Pop the balloon and draw it out, or slide out the form. If you used a plastic ornament, you can leave it inside.
Final Quality-Control Checklist
- Each flower measures 1.5 in (3.8 cm) from tip to tip.
- Each flower has 6 petals and an open center.
- There are 6 joins around the band, with no twist.
- The top and bottom each have 12 even mesh loops.
- The windows are matching diamonds.
- The cap is 12 sts around, firm and centered.
- The loop is doubled, straight and sits upright.
- The ball measures 3 in (7.6 cm) across and 3.5 in (8.9 cm) tall with the cap.
- No ends are visible through the windows.
Troubleshooting
Petals look flat or ruffled: Re-count Round 2. You should have exactly 24 dc, and each petal should use 4 stitches.
Band won’t close neatly: One flower may be joined at the wrong petal. Check that petals 1 and 4 are opposite each other, with 2 petals between them on each side.
Mesh loops are uneven: You skipped a tip or worked into a joined tip. There should be exactly 12 free tips, all from petals 2 and 3 (or 5 and 6).
Cap is floppy: Go down a hook size for Rounds 4–10 only.
Ornament is lopsided: Block it again over a ball of the correct size, centering the band first.
Loop twists: Make sure you worked the slip stitches back into the chain along one side only.
Care
Hand wash in cool water and reshape it over a ball form to dry. Store the ornament in a box with tissue so it isn’t crushed.
Final Notes
The size of the ornament depends on a short chain of measurements. A 1.5 in (3.8 cm) flower makes a 9 in (22.9 cm) band. The band shapes a 3 in (7.6 cm) ball. Matching 12-loop closures carry the shape to a 0.75 in (1.9 cm) cap, and the doubled loop finishes the ornament at 5.5 in (14.0 cm). If you check the flower first, the rest will fit together. Make one, then make a whole set for the tree.
Happy crocheting!