

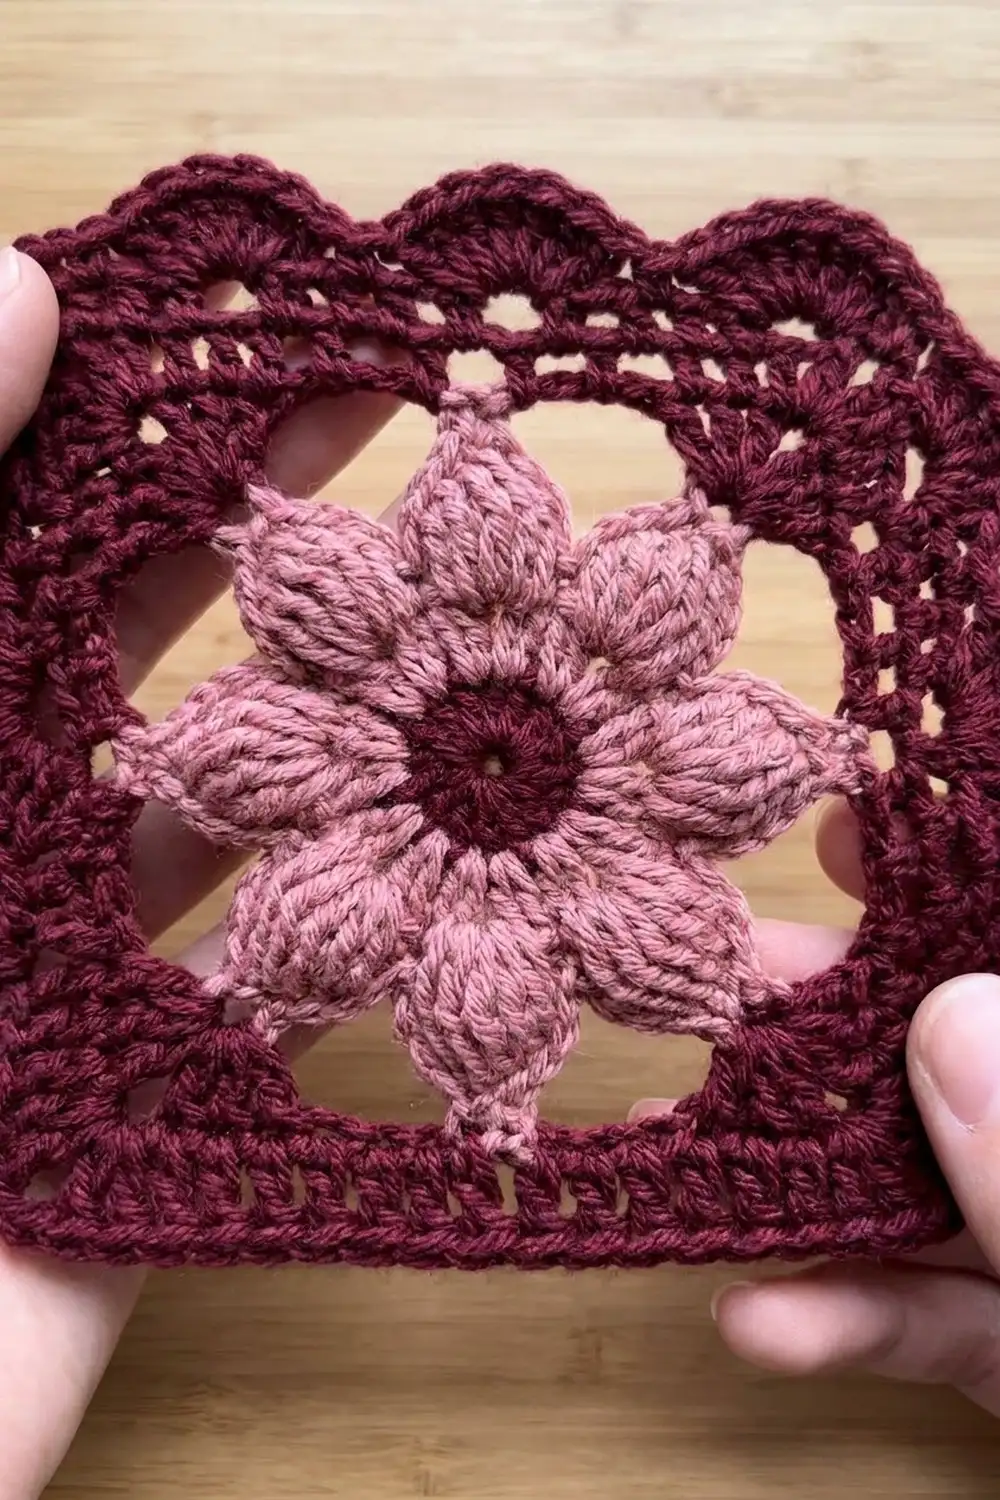
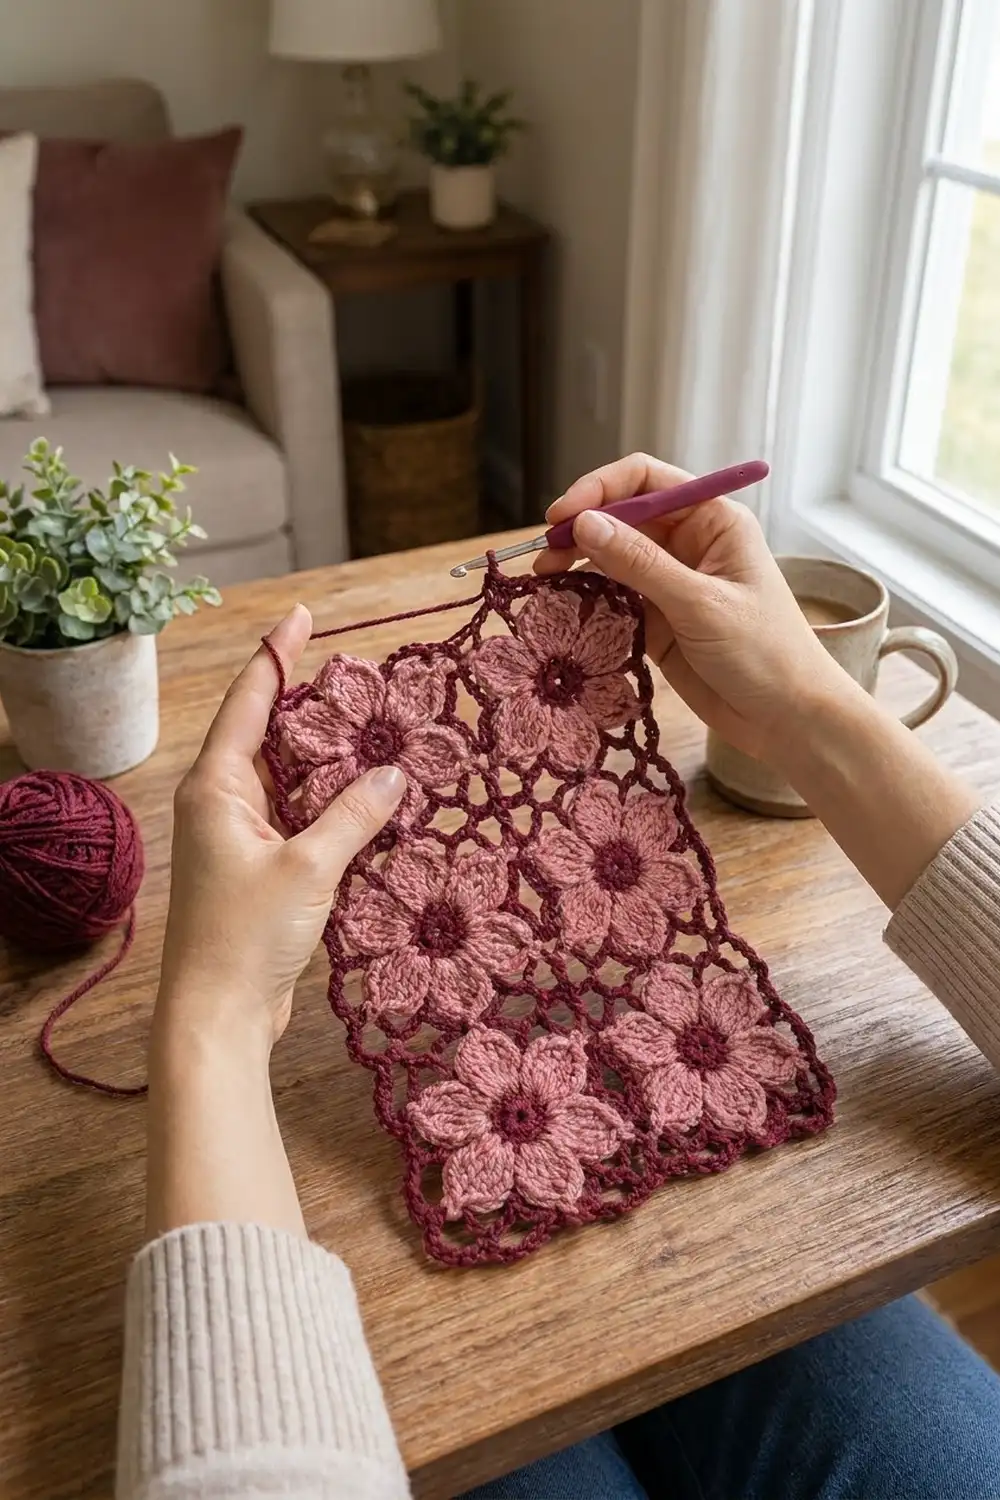
The Rosy Lattice Flower Panel is a small rectangle made from six flower motifs joined in a 2 x 3 grid. Each motif has a plump six-petal flower in dusty rose with a deep burgundy center. A burgundy chain-loop frame surrounds each flower and squares it off. The panel is finished with a loopy scalloped border.
The look is soft and slightly vintage. The rose petals stand out against the open burgundy mesh. The mesh continues from the joins out to the edge, so the whole panel reads as one lattice.
This pattern uses US crochet terms. The finished panel measures 10.5 x 15 in (26.7 x 38.1 cm) after blocking. Use it as a doily or a small table mat.
Construction is simple. You crochet one full motif. For each later motif, you work the last round and join it to its neighbors as you go. When all six are joined, you add a two-round border around the outside.
Finished Size and Construction
- Finished size: 10.5 x 15 in (26.7 x 38.1 cm)
- Skill level: Intermediate (easy for confident beginners)
- Terminology: US crochet terms
- Yarn weight: Worsted (#4)
- Hook: 5.0 mm (H-8)
- Number of pieces: 6 motifs, joined into one panel
- Layout: 2 motifs across x 3 motifs tall
- Single motif size: 4.5 x 4.5 in (11.4 x 11.4 cm)
- Size before border: 9 x 13.5 in (22.9 x 34.3 cm)
- Border depth: 0.75 in (1.9 cm) on each side
Materials
Pick a smooth worsted yarn with good stitch definition. Acrylic, cotton and cotton blends all work. Cotton gives crisper petals and lies flatter on a table. Acrylic gives a softer, puffier flower.
- Color A, burgundy (centers, frames, border): 70 g, about 140 m
- Color B, dusty rose (petals): 40 g, about 80 m
Both quantities include about a 20% margin for your gauge motif and yarn tails.
Tools:
- 5.0 mm (H-8) crochet hook
- Tapestry needle
- Scissors
- 4 stitch markers
- Measuring tape
- Rust-proof pins and a blocking mat or folded towel
- Spray bottle with water
Abbreviations (US Terms)
- ch: chain
- sl st: slip stitch
- sc: single crochet
- hdc: half double crochet
- dc: double crochet
- tr: treble crochet
- sk: skip
- sp(s): space(s)
- st(s): stitch(es)
- rnd(s): round(s)
Special stitch: Petal. In the ch-4 sp named in the pattern, work (sc, hdc, 2 dc, tr, ch 2, tr, 2 dc, hdc, sc). Each petal has 10 stitches plus 1 ch-2 tip. The two tr with a ch-2 between them form the pointed tip.
Gauge and Checkpoints
Make one complete motif first and measure it before you go further. Gauge matters here because any small error is multiplied across six motifs.
Checkpoints for one motif:
- After Rnd 1: the center disk is 1.25 in (3.2 cm) across.
- After Rnd 3: the flower is 3.5 in (8.9 cm) from one petal tip to the opposite tip.
- After Rnd 5 (lightly blocked): the square is 4.5 x 4.5 in (11.4 x 11.4 cm), measured straight across the middle of the sides.
Border gauge: 14 sc = 3 in (7.6 cm) along the panel edge.
If your motif is too big: go down to a 4.5 mm (US 7) hook, or chain more snugly on Rnds 4 and 5.
If your motif is too small: go up to a 5.5 mm (I-9) hook.
Loose chains in Rnd 5 are the most common reason a square comes out too large, so check those first. An error of 0.25 in (0.6 cm) per motif adds up to 0.5 in (1.3 cm) across the panel and 0.75 in (1.9 cm) along its length.
Motif Pattern
Work in joined rounds with the right side facing. Do not turn.
Rnd 1 (Color A): Make a magic ring. Ch 3 (counts as dc) and work 11 dc in the ring. Sl st in the top of the beginning ch-3. Pull the ring closed. (12 dc) Fasten off.
Rnd 2 (Color B): Join Color B with a sc in any dc. Ch 4, sk next dc. Sc in next dc, ch 4, sk next dc. Repeat from * to * 4 more times. Sl st in the first sc. (6 sc, 6 ch-4 sps)
Rnd 3 (Color B): Sl st into the first ch-4 sp. Work 1 Petal in each ch-4 sp around. Sl st in the first sc. (6 petals: 60 sts and 6 ch-2 tips) Fasten off.
The ch-4 spaces give the petals room to cup slightly. Don’t pull the Rnd 3 sc tight, or the flower will dish.
Rnd 4 (Color A): Join Color A with a sc in any ch-2 petal tip. Ch 5, then sc in the free top of the Rnd 2 sc between the next two petals, working behind the petals. Ch 5, sc in the next ch-2 tip. Repeat from * to * around. On the last repeat, replace the final sc with a sl st in the first sc. (12 sc, 12 ch-5 loops)
This round anchors the frame at each petal tip and in each valley between petals. That keeps the flower flat inside the mesh.
Rnd 5 (Color A): Sl st in the next 3 ch to reach the center of the first ch-5 loop. Ch 1. For the first corner, work (sc, ch 7, sc) in the same loop.
(Ch 5, sc in next loop) 2 times. Ch 5, then work (sc, ch 7, sc) in the next loop for the corner. Repeat from * to * 2 more times.
(Ch 5, sc in next loop) 2 times. Ch 5, sl st in the first sc. (16 sc, 4 ch-7 corner loops, 12 ch-5 loops)
Each side now has 3 ch-5 loops between its two corner loops. Put a marker in each ch-7 corner loop. Fasten off and weave in the ends.
Measure the motif. Pinned flat, it should be 4.5 x 4.5 in (11.4 x 11.4 cm).
Make All Pieces
Make Motif 1 complete through Rnd 5. Make Motifs 2 to 6 through Rnd 4, then work their Rnd 5 with the join-as-you-go method below.
Per motif: Color A for Rnds 1, 4 and 5; Color B for Rnds 2 and 3.
Total: 6 burgundy centers, 6 rose flowers and 6 burgundy frames.
Layout (2 across x 3 tall):
[ 1 ][ 2 ]
[ 3 ][ 4 ]
[ 5 ][ 6 ]
Joining
Join as you go on Rnd 5. Hold the finished motif and the new motif side by side, both with the right side up.
To join a ch-5 loop: In place of ch 5, work ch 2, sl st into the matching ch-5 loop of the finished motif, ch 2.
To join a ch-7 corner: In place of the corner ch 7, work ch 3, sl st into the matching ch-7 corner loop of the finished motif, ch 3.
One shared side is a corner join, 3 loop joins and a corner join. Every motif has the same 3 ch-5 loops per side, so each loop meets exactly one partner and nothing is left over.
Joining order:
- Motif 2: join one side to the right side of Motif 1.
- Motif 3: join one side to the bottom of Motif 1.
- Motif 4: join two sides: to Motif 3 on the left and to Motif 2 on top.
- Motif 5: join one side to the bottom of Motif 3.
- Motif 6: join two sides: to Motif 5 on the left and to Motif 4 on top.
Center junctions: In two places, four corners meet: where Motifs 1, 2, 3 and 4 meet, and where Motifs 3, 4, 5 and 6 meet. At these points, work the new corner’s sl st around the existing joining sl st. This stacks all four corners at one point so no hole forms.
Tension: Work the ch-2 and ch-3 joining chains at the same tension as your regular chains. Tight joins make the seam pucker, and loose joins make the mesh sag.
Size checkpoint: The joined panel should measure 9 x 13.5 in (22.9 x 34.3 cm). That is 2 x 4.5 in across and 3 x 4.5 in down.
Border
Border gauge: 14 sc = 3 in (7.6 cm), which is 21 sc for each 4.5 in (11.4 cm) motif side.
Edge counting rule: Each motif side along the edge gets exactly 21 sc:
- 3 sc at its first corner
- 5 sc in each of its 3 ch-5 loops
- 3 sc at its second corner
Where two motifs meet at the edge (an edge seam), each motif’s corner loop has a ch-3 segment facing outward. Work 3 sc in each of those segments. Don’t add extra stitches at seams. The corner ch-2 spaces are separate and aren’t counted in the side totals.
Rnd 1 (Color A): With the right side facing, join Color A with a sc in any ch-7 loop at a panel corner. Work 2 more sc in the same loop, ch 2, then 3 sc in the same loop.
Continue along the edge using the edge counting rule. At each of the other 3 panel corners, work (3 sc, ch 2, 3 sc) in the ch-7 loop. Sl st in the first sc.
- Long sides: 3 motifs x 21 sc = 63 sc each
- Short sides: 2 motifs x 21 sc = 42 sc each
- Total: 210 sc and 4 corner ch-2 sps
Rnd 2 (Color A): Sl st in the next 2 sc and into the corner ch-2 sp. Ch 1, then work (sc, ch 5, sc) in the corner sp.
Long side: Ch 4, sk 1 sc, sc in next sc. Ch 4, sk 2 sc, sc in next sc. Repeat from * to * 19 more times. Ch 4, sk the last sc. Work (sc, ch 5, sc) in the corner sp.
Short side: Ch 4, sk 1 sc, sc in next sc. Ch 4, sk 2 sc, sc in next sc. Repeat from * to * 12 more times. Ch 4, sk the last sc. Work (sc, ch 5, sc) in the corner sp.
Work one more long side and one more short side. On the final short side, replace the last corner group with a sl st in the first sc. Fasten off.
- Long sides: 22 ch-4 loops each
- Short sides: 15 ch-4 loops each
- Total: 74 ch-4 loops and 4 ch-5 corner loops
Why the math works: On a long side, the sc land on sts 2, 5, 8 and so on up to st 62, out of 63 sts. That breaks down as:
- 1 skipped st at the start
- 1 sc in st 2
- 20 groups of 3 sts (sk 2, sc 1)
- 1 skipped st at the end
1 + 1 + (20 x 3) + 1 = 63.
On a short side it’s 1 + 1 + (13 x 3) + 1 = 42. Both ends of each side are worked the same way, so the scallops are symmetrical and the corners match.
Size checkpoint: Rnd 1 adds about 0.25 in (0.6 cm) per side and Rnd 2 adds about 0.5 in (1.3 cm). Together the border adds 0.75 in (1.9 cm) per side. The panel grows from 9 x 13.5 in (22.9 x 34.3 cm) to 10.5 x 15 in (26.7 x 38.1 cm).
Final Blocking
- Weave in all ends through stitches of the same color, so no rose yarn shows on the burgundy mesh.
- Lay the panel right side up on a blocking mat or folded towel.
- Pin the four ch-5 corner loops first, forming a 10.5 x 15 in (26.7 x 38.1 cm) rectangle.
- Pin the middle of each side, then pin the rest of each side.
- Pin each ch-4 border loop open into a rounded scallop.
- Press each flower flat and spread the petals so each tip points toward its Rnd 4 anchor.
- Mist evenly until the panel is damp, not soaked.
- Let it dry completely before removing the pins.
Final Quality-Control Checklist
- Each motif has 6 petals and a burgundy center.
- Each motif side has 3 ch-5 loops between its corners.
- Every shared side has 3 loop joins and 2 corner joins.
- Both center junctions are closed.
- Border Rnd 1 has 63 sc on each long side and 42 sc on each short side.
- Border Rnd 2 has 22 loops on each long side and 15 loops on each short side.
- The panel measures 10.5 x 15 in (26.7 x 38.1 cm).
- All ends are woven in and trimmed.
Troubleshooting
The flower cups or ruffles: The petals are too tight or too loose for the ch-4 sps. Check that you chained 4 in Rnd 2, and relax your tension on Rnd 3.
The motif isn’t square: Corner loops should be ch 7 and side loops ch 5. If they’re mixed up, one side pulls in.
There are holes at the four-way junctions: Work the sl st around the existing joining sl st, not into a separate loop.
A seam puckers: Your joining chains are tighter than your regular chains. Loosen the ch-2 and ch-3 segments.
The border ripples: Rnd 1 has too many sc. Recount to 21 per motif side.
The border pulls in or curls: Rnd 1 has too few sc, or your Rnd 2 chains are tight. Recount, or use a hook one size larger for the border only.
The border count is off: Usually 3 sc were missed at an edge seam. Check that each seam has 3 sc in each motif’s ch-3 segment.
Care
Hand wash in cool water with a mild soap. Press the water out in a towel and dry flat, reshaping the petals and scallops.
Final Notes
The measurements build on each other in a short chain that is easy to check:
- One motif is 4.5 in (11.4 cm) square, with 3 ch-5 loops per side.
- Six motifs joined 2 x 3 make 9 x 13.5 in (22.9 x 34.3 cm).
- The border starts with 21 sc per motif side, which gives 42 sc on each short side and 63 sc on each long side.
- The border adds 0.75 in (1.9 cm) per side, for a finished panel of 10.5 x 15 in (26.7 x 38.1 cm).
Measure your first motif carefully. If it’s the right size, the rest of the panel will be too.
Happy crocheting!