

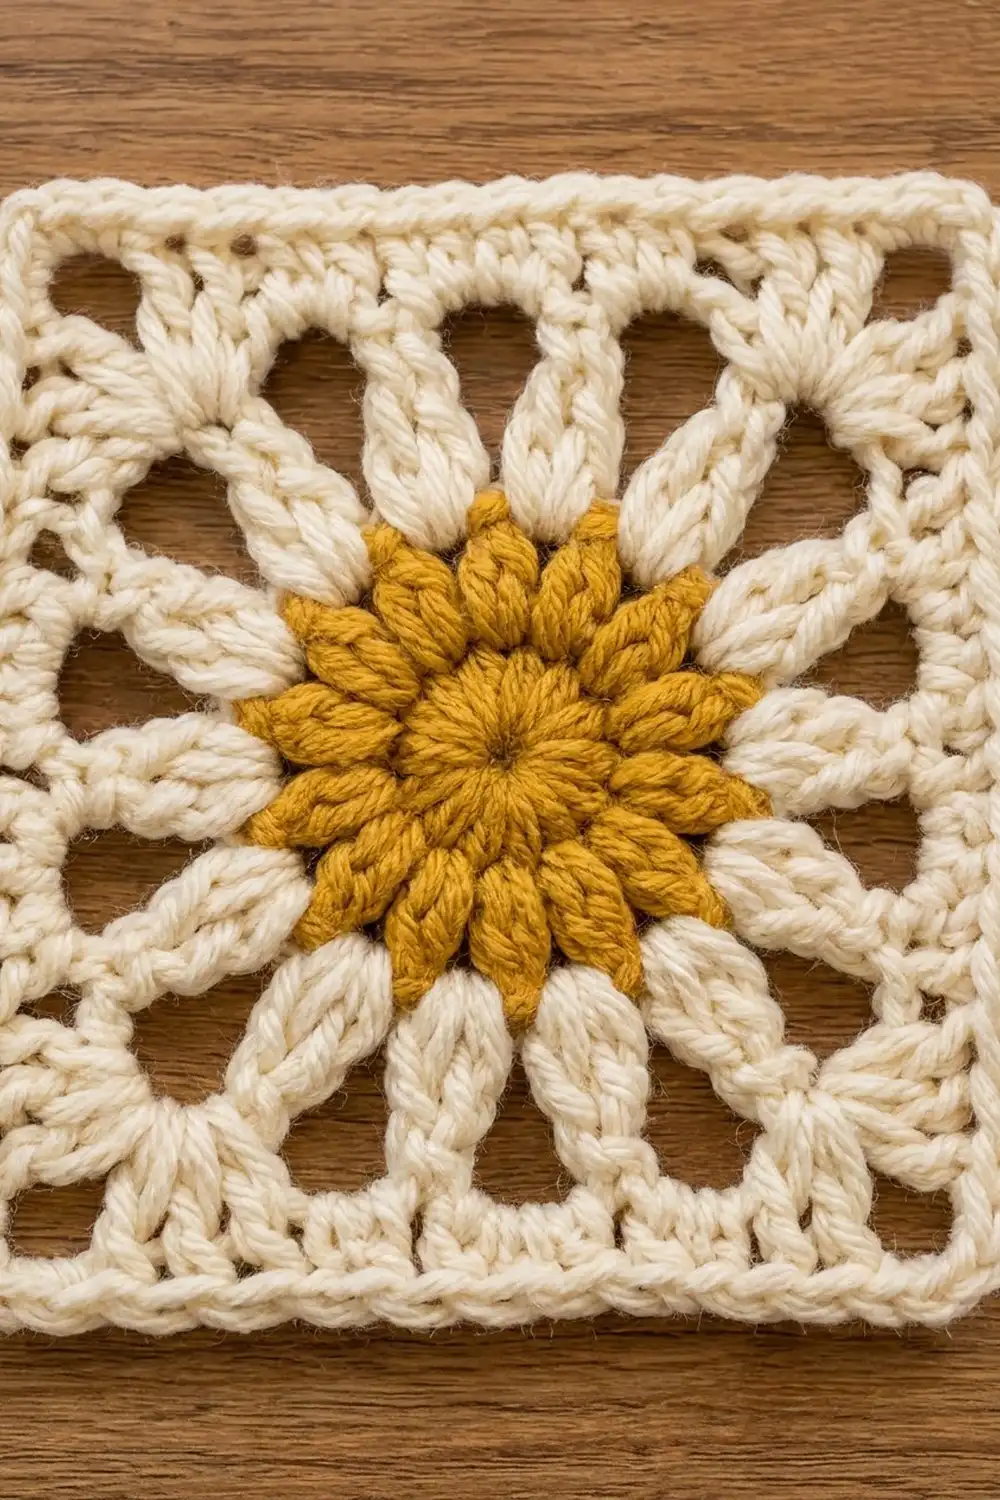
The Golden Sunburst Granny Square is a bright sunflower motif. It has a rich mustard-gold center, a ring of 16 long cream petals, and an open lattice that turns the flower into a crisp square. A raised, corded edge frames it so it looks finished on its own.
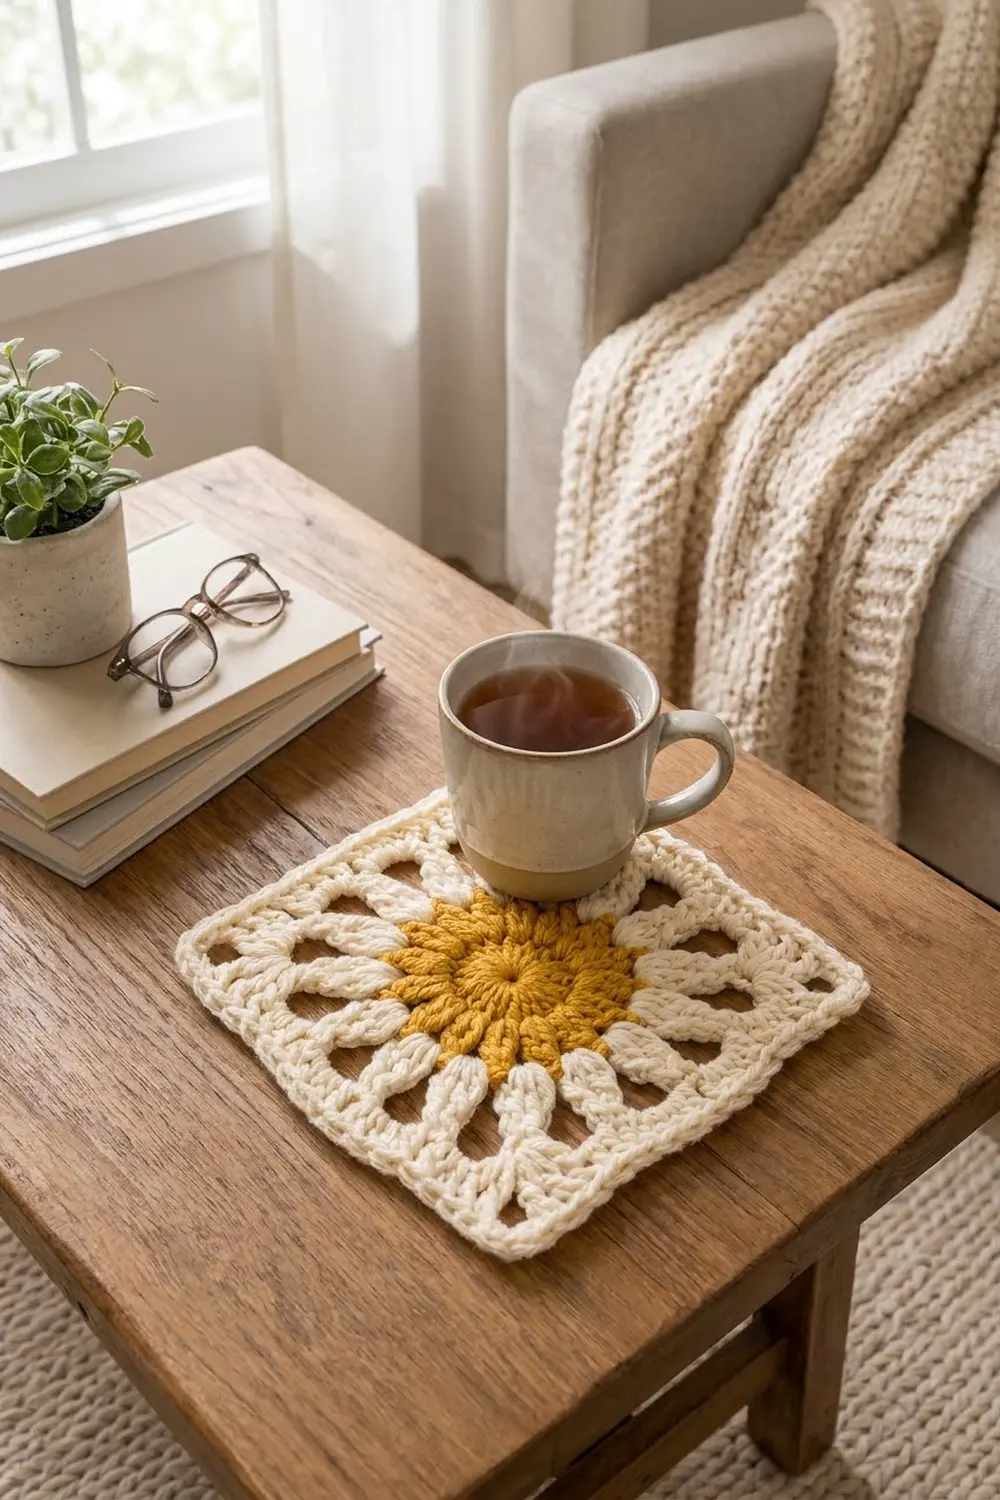
The palette is only two colors, warm gold and soft cream. The style is classic granny square with a modern, clean finish. It works as a coaster, a trivet topper, or a sample square, or you can use it as the building block for a later project of your own.
This pattern uses US crochet terms. The finished square measures 6 in x 6 in (15.2 cm x 15.2 cm) after blocking.
You’ll work in the round from a magic ring. Two gold rounds make the center, one cream round makes the petal clusters, and two cream rounds square the shape off. Two final rounds make the corded border.
Finished Size and Construction
- Finished size: 6 in x 6 in (15.2 cm x 15.2 cm)
- Skill level: Easy-Intermediate
- Terminology: US crochet terms
- Yarn weight: Worsted (#4)
- Hook: 5.0 mm (H-8)
- Number of pieces: 1 single square
- Layout: One standalone motif, no joining
- Piece size before border: 5.25 in x 5.25 in (13.3 cm x 13.3 cm)
- Border depth: 0.375 in (1.0 cm) on each side
- Finished piece size: 5.25 in + 0.375 in + 0.375 in = 6 in (15.2 cm)
Materials
Yarn: Use a smooth worsted-weight yarn. Cotton or a cotton blend gives the crispest petals and the cleanest corded edge. Acrylic is softer and slightly fuzzier, but it works well. Choose a yarn of about 200 m per 100 g (219 yd per 3.5 oz) for results closest to the stated gauge.
- Color A, Mustard Gold: 6 g, about 12 m (13 yd)
- Color B, Cream: 20 g, about 40 m (44 yd)
These quantities include a margin of about 20% for your gauge swatch, joins, and weaving in ends.
Tools:
- 5.0 mm (H-8) crochet hook
- Tapestry needle
- Scissors
- Stitch markers (2-4)
- Measuring tape or ruler
- Blocking mat and rust-proof pins
- Spray bottle with cool water
Abbreviations (US Terms)
- ch: chain
- sl st: slip stitch
- sc: single crochet
- hdc: half double crochet
- dc: double crochet
- tr: treble crochet
- sp(s): space(s)
- st(s): stitch(es)
- rep: repeat
- rsc: reverse single crochet (crab stitch)
- CL: cluster (see below)
Special stitches:
Cluster (CL): All three parts of this stitch go into the same stitch. [Yo twice, insert hook in the stitch, yo and pull up a loop, (yo, pull through 2 loops) twice] 3 times. You now have 4 loops on the hook. Yo and pull through all 4 loops.
Beginning Cluster (beg CL): Ch 4. Then work [yo twice, insert hook in the same stitch, yo and pull up a loop, (yo, pull through 2 loops) twice] 2 times. Yo and pull through all 3 loops on the hook. The ch-4 plus the 2 partial trebles count as one CL.
Reverse single crochet (rsc): Work single crochet from left to right (right to left if you crochet left-handed). Insert the hook into the next stitch to the right, yo, pull up a loop, yo, and pull through both loops.
Gauge and Checkpoints
Gauge: 14 dc and 7 rows = 4 in (10.2 cm), on a 5.0 mm hook.
Gauge matters less for a single square than for a garment, but it controls the final size and how much yarn you use. If you plan to make more than one square later, finish this first one completely and measure it before committing.
Checkpoints:
- After Round 2 (gold center): The disc measures 2.25 in (5.7 cm) across.
- After Round 3 (petals): The petal ring measures 3.75 in (9.5 cm) across, tip to tip.
- After Round 4 (square-up): The square measures 4.5 in (11.4 cm) on each side.
- After Round 5 (solid round): The square measures 5.25 in (13.3 cm) on each side.
- After Round 7 (border): The square measures 6 in (15.2 cm) on each side.
If your square is too big: Go down one hook size, to 4.5 mm (US 7).
If your square is too small: Go up one hook size, to 5.5 mm (I-9).
If you’re off by only 0.125 in (0.3 cm) or less, blocking will correct it.
Pattern Instructions
Round 1 (Color A, Mustard Gold)
Make a magic ring.
Ch 3 (counts as dc), then work 15 dc into the ring. Pull the ring closed tightly. Join with sl st to the top of the beginning ch-3.
Stitch count: 16 dc.
Round 2 (Color A)
Ch 3 (counts as dc). Work 1 dc in the same st as the join. Work 2 dc in each remaining st around. Join with sl st to the top of the beginning ch-3.
Stitch count: 32 dc (16 sts x 2).
Fasten off Color A and weave in the tail. Check that the disc measures 2.25 in (5.7 cm) across.
Round 3 (Color B, Cream): Petals
Join Color B with sl st in any dc of Round 2.
Beg CL in the same st, then ch 3 and skip the next st.
*CL in the next st, ch 3, skip the next st. Rep from * 14 more times.
Join with sl st to the top of the beg CL.
Stitch count: 16 CL and 16 ch-3 sps.
Each cluster stands up as a long, slim petal, and the ch-3 spaces between them make the open windows around the gold center. The 16 clusters are spread evenly over the 32 stitches, so every petal sits over every second stitch.
Round 4 (Color B): Square-Up
This round turns the circle into a square. The stitches are tallest at the corners and shortest in the middle of each side, because the corners sit farther from the center than the mid-side points do.
Sl st in each of the next 3 ch, then sl st in the top of the next CL. This CL is your first corner.
Ch 4 (counts as tr), ch 3, then work 1 tr in the same CL top. This makes the first corner.
Ch 2, dc in the top of the next CL. Ch 2, hdc in the top of the next CL. Ch 2, dc in the top of the next CL. Ch 2.
*(Tr, ch 3, tr) in the top of the next CL to make a corner. Ch 2, dc in the next CL, ch 2, hdc in the next CL, ch 2, dc in the next CL, ch 2. Rep from * 2 more times.
Join with sl st to the top of the beginning ch-4.
Stitch count: 20 sts in total (8 tr, 8 dc, 4 hdc), plus 16 ch-2 sps and 4 corner ch-3 sps.
Per side, between corner ch-3 sps: tr, ch 2, dc, ch 2, hdc, ch 2, dc, ch 2, tr. That’s 5 sts and 4 ch-2 sps.
Each side uses 1 corner CL plus 3 side CLs, and 4 sides x 4 CLs = 16 CLs. The ch-2 spaces on this round make the second ring of open windows, between the petal tips. Check that each side measures 4.5 in (11.4 cm).
Round 5 (Color B): Solid Round
Sl st into the first corner ch-3 sp. Ch 3 (counts as dc), then work (1 dc, ch 2, 2 dc) in the same sp.
Along the side, work 1 dc in each st and 2 dc in each ch-2 sp, up to the next corner:
- 1 dc in the tr
- 2 dc in the ch-2 sp
- 1 dc in the dc
- 2 dc in the ch-2 sp
- 1 dc in the hdc
- 2 dc in the ch-2 sp
- 1 dc in the dc
- 2 dc in the ch-2 sp
- 1 dc in the tr
That’s 13 dc along the side.
*Work (2 dc, ch 2, 2 dc) in the corner ch-3 sp, then 13 dc across the side as above. Rep from * 2 more times. Join with sl st to the top of the beginning ch-3.
Stitch count: 68 dc and 4 corner ch-2 sps.
Per side, between corner ch-2 sps: 2 + 13 + 2 = 17 dc. Check: 4 x 17 = 68.
The square now measures 5.25 in (13.3 cm) on each side. This is your size before the border.
Border
Border gauge: 14 sc and 16 rows = 4 in (10.2 cm). That matches the dc gauge stitch for stitch across the width, so the border lies flat without ruffling or cupping.
Round 6 (Color B): Single Crochet Foundation
This is a conversion round.
Ch 1. Work 1 sc in the same st as the join and 1 sc in each dc around. Work 3 sc in each corner ch-2 sp. Join with sl st to the first sc.
Stitch count: 68 sc worked 1 per existing dc, plus 12 sc added at the corners (4 corners x 3), for 80 sc.
Per side: 21 sts, counting both corner center stitches. That’s 17 sc along the side, plus the 2 outer sc of the corner groups on that side, plus the 2 corner center sts. Check: 4 sides x 21 = 84, minus the 4 shared corner sts = 80.
Place a marker in the center sc of each 3-sc corner group.
Round 7 (Color B): Corded Crab Stitch Edge
This is a trim round.
Ch 1. Without turning, work rsc in each sc around, and work 2 rsc in each marked corner sc. Join with sl st to the first rsc. Fasten off.
Stitch count: 80 rsc worked 1 per existing sc, plus 4 extra corner rsc (1 per corner), for 84 rsc.
Per side: 19 rsc between the corners, plus 2 rsc in each corner st. Check: (4 x 19) + (4 x 2) = 76 + 8 = 84.
Why the math works: The 17 dc of each side get exactly 17 sc, so the border never pulls in or flares along the straight edges. Each corner gets 3 sc, the standard amount for a 90° turn, and then 2 rsc in its center stitch so the crab stitch can wrap the point without pulling it round. Round 6 adds about 0.25 in (0.6 cm) of depth and Round 7 adds about 0.125 in (0.3 cm). Together that’s 0.375 in (1.0 cm) on each side, which takes the square from 5.25 in (13.3 cm) to 6 in (15.2 cm).
Weave in all ends through stitches of the same color.
Final Blocking
- Weave in all tails before blocking, and leave a short tail of about 0.5 in (1.3 cm) uncut until you’ve finished.
- Lay the square right side up on the blocking mat.
- Pin each corner first so the square measures 6 in x 6 in (15.2 cm x 15.2 cm).
- Pin the middle of each side, then add pins about 1 in (2.5 cm) apart along each edge.
- Gently nudge each of the 16 petals outward so they radiate evenly from the center.
- Spray with cool water until the square is damp but not soaked.
- Let it dry completely, usually 4-8 hours.
- Unpin it and trim the remaining tails close to the fabric.
Final Quality-Control Checklist
- The center has 16 dc in Round 1 and 32 dc in Round 2.
- There are exactly 16 petal clusters, spaced evenly.
- Each side has 4 ch-2 spaces in Round 4 and 17 dc in Round 5.
- The border has 80 sc in Round 6 and 84 rsc in Round 7.
- All 4 corners are sharp and the same shape.
- The square measures 6 in (15.2 cm) on each side, and both diagonals are equal.
- No tails show on the right side.
- The center ring is pulled fully closed.
Troubleshooting
The center ring has a hole. Pull the magic ring tail tighter before you weave it in. Secure it with two passes in different directions.
The petals lean or twist. Make sure each cluster goes into one stitch only, and skip exactly one stitch between clusters.
The square is round at the corners. Check that you worked tr at the corners and hdc in the middle of each side in Round 4. Swapping those heights flattens the corners.
The edges wave. You probably added extra stitches along the sides. Recount to 17 dc per side in Round 5.
The edges pull in. Your sc tension is tighter than your dc tension. Loosen up, or work Round 6 with a hook 0.5 mm larger.
The crab stitch looks uneven. Pull each loop up to the same height before finishing the stitch, and keep the work from twisting.
There’s a gap at the color change. Join Color B in the middle of a dc, not between stitches, and weave the tails across the join.
Care
Hand wash in cool water with a mild detergent, and press out the water gently without wringing. Dry flat in shape. If the square loses its shape, re-block it.
Final Notes
Here’s the full measurement chain. The gold center measures 2.25 in (5.7 cm) after Round 2. The petals reach 3.75 in (9.5 cm) after Round 3. The square-up gives 4.5 in (11.4 cm) after Round 4, and the solid round brings the square to 5.25 in (13.3 cm). The border adds 0.375 in (1.0 cm) on each side, for a finished square of 6 in x 6 in (15.2 cm x 15.2 cm).
The stitch counts are 16, 32, 16 clusters, 20 sts with 16 ch-2 spaces, 68, 80, and 84. If each round matches its count and each checkpoint matches its size, your square will come out flat, square, and sunny every time.
Happy crocheting!