

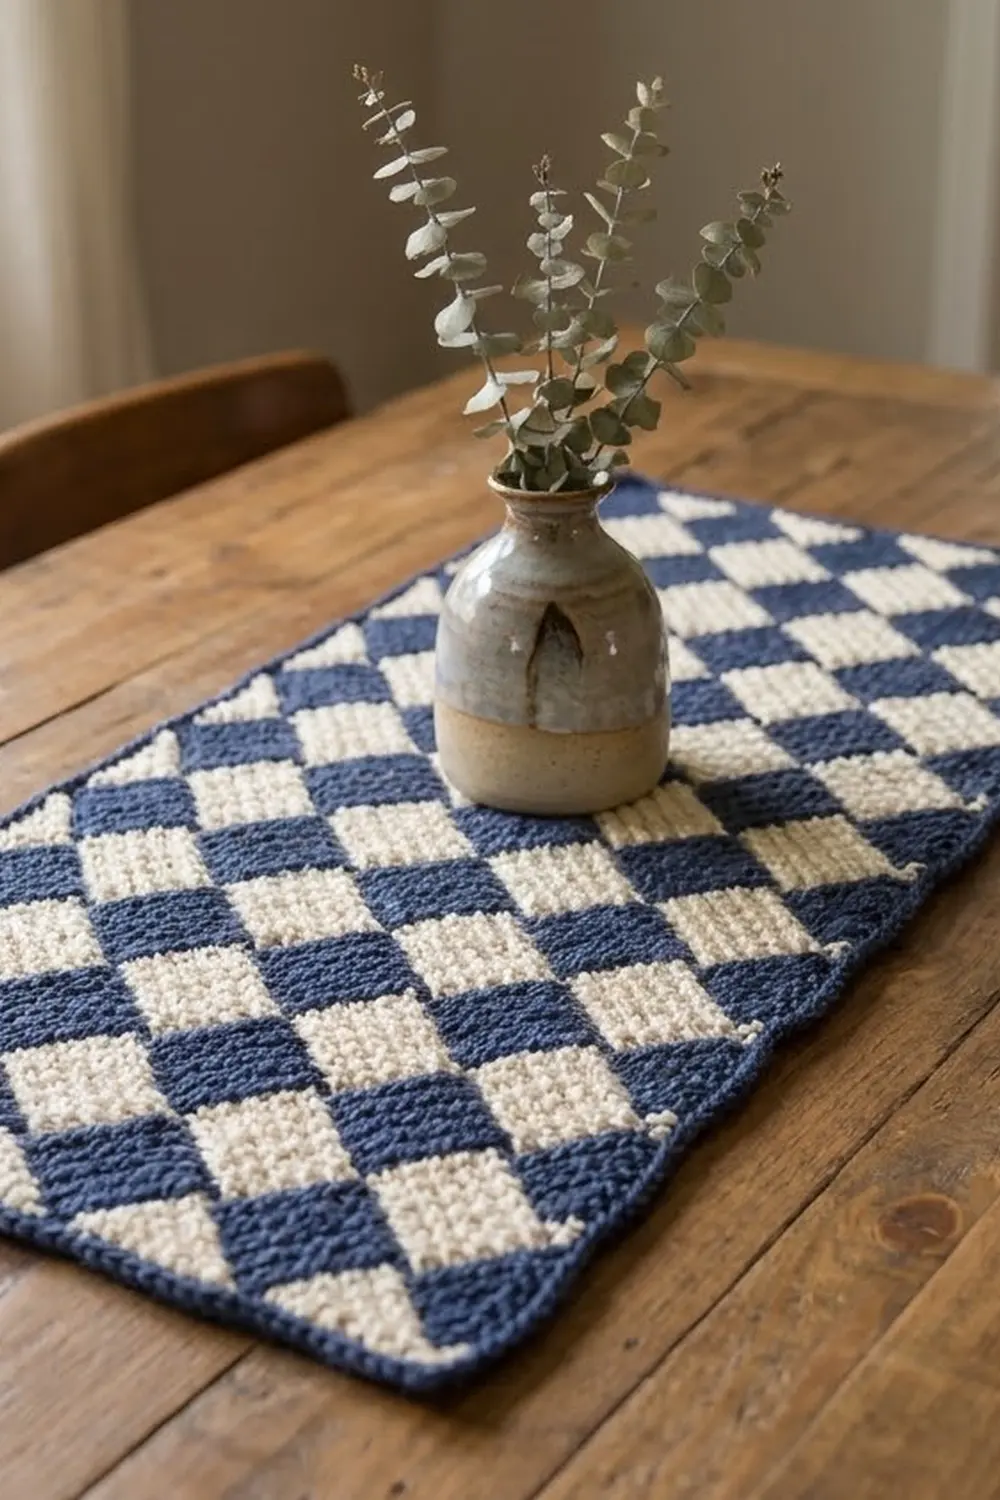
The Harbor Harlequin Panel is a small, graphic piece of Tunisian entrelac in navy and cream. The blocks sit on point, so the surface reads as a crisp diamond checkerboard. Both ends finish in three navy points, and a thin navy edging frames the panel.
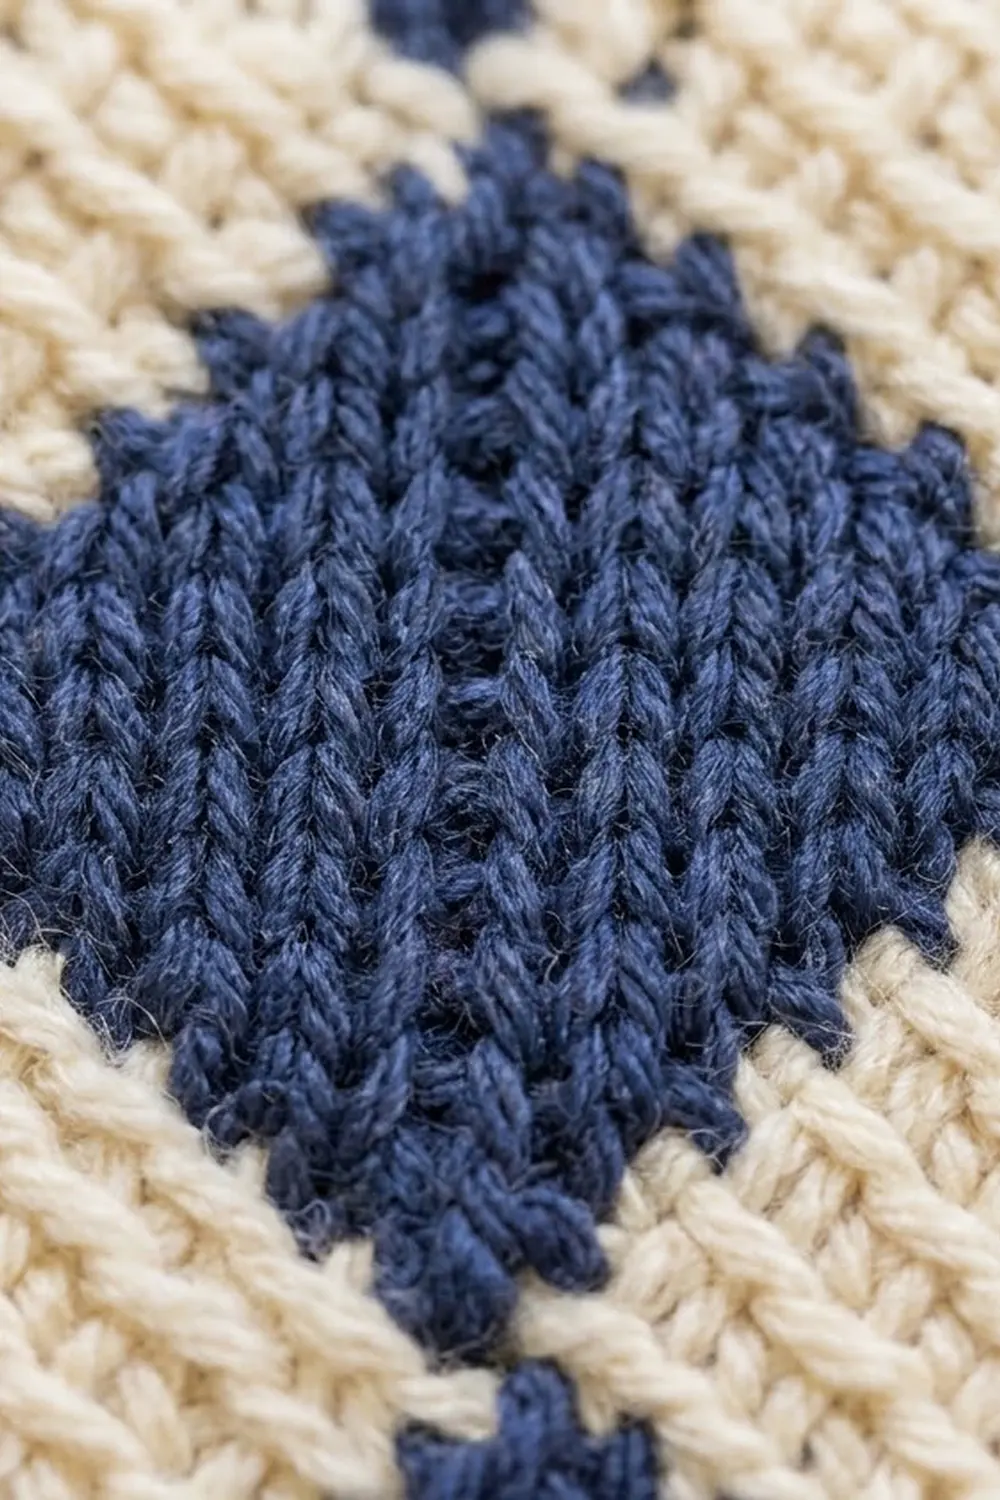
The style is classic and a little nautical. You can use it as a table mat, a dresser runner, a wall hanging or a sampler of the entrelac technique. Tunisian simple stitch gives a firm, woven-looking fabric that lies flat and holds its shape.
This pattern uses US crochet terms. The finished size is about 6.9 in (17.5 cm) wide by 13.2 in (33.5 cm) long, measured point to point, including the border.
The panel is made in one piece, worked in 11 tiers from the bottom up. Tier 1 is three navy base blocks. Each cream tier adds a right side triangle, two blocks and a left side triangle. Each navy tier adds three blocks. Every block is attached to the previous tier as you go, so there is no sewing. A two-round navy border finishes the edges.
Finished Size and Construction
- Finished size: 6.9 in x 13.2 in (17.5 cm x 33.5 cm)
- Skill level: Intermediate (you should know basic Tunisian simple stitch)
- Terminology: US crochet terms
- Yarn weight: Worsted (#4)
- Hook: 6.0 mm (J-10) for the entrelac; 5.0 mm (H-8) for the border
- Number of pieces: 1 (worked continuously)
- Layout: 11 tiers; 18 navy blocks, 10 cream blocks, 10 cream side triangles
- Block size: 1.5 in x 1.5 in (3.8 cm x 3.8 cm); 2.1 in (5.3 cm) corner to corner
- Size before border: 6.4 in x 12.7 in (16.3 cm x 32.3 cm)
- Border depth: 0.25 in (0.6 cm) on each edge
Materials
Choose a smooth worsted yarn in cotton, a cotton blend or soft acrylic. Avoid fuzzy or splitty yarn, because the vertical bars of Tunisian simple stitch need to stay clear. These amounts assume about 200 m per 100 g.
- Navy (Color A): 25 g / 50 m (55 yd)
- Cream (Color B): 15 g / 30 m (33 yd)
Both quantities include a safety margin of about 25% for tails, gauge swatches and differences between brands.
Tools:
- 6.0 mm (J-10) hook. A regular hook with a long, even shaft works, because you never hold more than 7 loops.
- 5.0 mm (H-8) hook for the border
- Tapestry needle
- Scissors
- Stitch marker
- Rust-proof pins and a blocking mat
- Measuring tape
Abbreviations (US Terms)
- ch – chain
- sl st – slip stitch
- sc – single crochet
- sc2tog – single crochet 2 together
- st(s) – stitch(es)
- Tss – Tunisian simple stitch: insert hook from right to left under the next vertical bar, yo, pull up a loop and leave it on the hook.
- Tss2tog – insert hook under the next 2 vertical bars together, yo, pull up a loop.
- Tss inc – insert hook under the horizontal strand between the edge loop and the next vertical bar, yo, pull up a loop.
- RetP (standard return pass) – yo, pull through 1 loop; *yo, pull through 2 loops; repeat from * until 1 loop remains.
- J-RetP (joining return pass) – yo, pull through 2 loops (this works the join loop together with the last stitch); *yo, pull through 2 loops; repeat from * until 1 loop remains.
- Join loop – at the end of a forward pass, insert hook into the next row-end of the neighboring piece on the left, yo, pull up a loop.
- Bind off – sl st under each vertical bar across.
How stitches are counted: the loop already on your hook counts as the first stitch. A join loop is never counted, because it is used up on the J-RetP.
Gauge and Checkpoints
Gauge: 16 Tss and 16 rows = 4 in (10.2 cm) on a 6.0 mm hook. One full block (6 sts x 6 rows) measures 1.5 in x 1.5 in (3.8 cm x 3.8 cm).
Make one base block (Tier 1 instructions) as a test before you start the panel. Measure it lightly flattened, not stretched.
- Block too big: go down 0.5 mm in hook size.
- Block too small: go up 0.5 mm.
- Block taller than it is wide: tighten your return pass a little; a loose return pass is the usual cause.
Checkpoints (before border):
- After Tier 2: width 6.4 in (16.3 cm)
- After Tier 3: height 4.2 in (10.7 cm), bottom point to top point
- After Tier 5: 6.4 in (16.3 cm)
- After Tier 7: 8.5 in (21.6 cm)
- After Tier 9: 10.6 in (26.9 cm)
- After Tier 11: 12.7 in (32.3 cm)
Each completed tier adds half a block diagonal, which is about 1.06 in (2.7 cm).
Pattern
Tier 1 – Base Blocks (Navy, make 3)
You make 3 separate blocks. Tier 2 will link them together.
Ch 6.
- Row 1: Working the forward pass, insert hook in the 2nd ch from the hook and pull up a loop, then pull up a loop in each remaining ch (6 loops). RetP. (6 sts)
- Rows 2–5: Tss in each of the next 5 vertical bars (6 loops). RetP. (6 sts)
- Row 6: Bind off by working sl st under each of the next 5 bars.
Fasten off and leave a 4 in (10.2 cm) tail.
Each block has 6 rows and 6 sts on every edge. Lay the blocks in a row, right side up, each turned so its foundation chain runs down to the lower right and its first stitch column runs up to the upper right. Name them A1 (right), A2 (middle) and A3 (left). Their bottom corners become the three navy points at the bottom of the panel.
Tier 2 – Cream (Right Triangle, 2 Blocks, Left Triangle)
Work Tier 2 from right to left without fastening off between pieces.
Right side triangle
Join cream with a sl st at the right corner of A1 (the base of its first stitch column).
- Row 1: Ch 2. Pull up a loop in the 2nd ch from the hook (2 loops), then make a join loop in the first row-end of A1’s right edge. J-RetP. (2 sts)
- Row 2: Tss inc, Tss in the last bar, join loop. J-RetP. (3 sts)
- Row 3: Tss inc, Tss across, join loop. J-RetP. (4 sts)
- Row 4: Repeat Row 3. (5 sts)
- Row 5: Repeat Row 3. (6 sts)
- Row 6: Sl st under each of the 5 bars, then sl st into the last row-end of A1.
The triangle uses all 6 of A1’s row-ends. Its top edge has 6 sts, which matches a block. The increases build the straight right edge of the panel. Your hook now sits at the top corner of A1.
Block B1
- Row 1: With the loop on your hook, pick up 5 loops evenly along A1’s bound-off top edge, one in each sl st (6 loops). Make a join loop in the first row-end of A2’s right edge. J-RetP. (6 sts)
- Rows 2–5: Tss in the next 5 bars, join loop. J-RetP. (6 sts)
- Row 6: Sl st under each of the 5 bars, then sl st into the last row-end of A2.
Block B2
Work as for B1, picking up from A2’s top edge and joining to A3’s right edge.
Left side triangle
- Row 1: Pick up 5 loops along A3’s top edge (6 loops). RetP. Do not make a join loop. (6 sts)
- Row 2: Tss in the next 3 bars, Tss2tog. RetP. (5 sts)
- Row 3: Tss in the next 2 bars, Tss2tog. RetP. (4 sts)
- Row 4: Tss in the next bar, Tss2tog. RetP. (3 sts)
- Row 5: Tss2tog. RetP. (2 sts)
- Row 6: Insert hook under the last bar, yo, pull through all loops. (1 st)
Fasten off. The decreases build the straight left edge. The triangle’s right edge has 6 row-ends for Tier 3 to join into.
Tier 2 total: 2 triangles and 2 blocks.
Tier 3 – Navy (3 Blocks)
Join navy with a sl st at the top-right corner of the right side triangle, on the panel’s right edge.
- Block C1: Pick up from the top edge of the right triangle and join to the right edge of B1. Work Rows 1–6 as for B1.
- Block C2: Pick up from B1’s top edge and join to B2’s right edge.
- Block C3: Pick up from B2’s top edge and join to the left triangle’s right edge.
Fasten off.
Tier 3 total: 3 blocks, 6 sts each. The outer corners of C1 and C3 touch the side edges, and their tops form the first full row of navy points.
Tiers 4–11
- Tiers 4, 6, 8 and 10 (cream): Work as Tier 2. Join the right triangle to the rightmost navy block, make 2 blocks off the navy tops, then work the left triangle off the leftmost navy top.
- Tiers 5, 7, 9 and 11 (navy): Work as Tier 3.
After Tier 11, leave the three navy tops as they are. They are the three points at the top of the panel.
Running totals:
- Navy: 3 + (5 tiers x 3) = 18 blocks
- Cream: 5 tiers x 2 = 10 blocks, plus 10 side triangles
Weave in all ends along same-color block edges.
Border
Border gauge: 17 sc = 4 in (10.2 cm) on a 5.0 mm hook.
Each straight side is 5 triangle edges of 2.1 in (5.3 cm), so 10.6 in (26.9 cm) long. 10.6 in x 4.25 sc per inch = 45 sc, which is 9 sc per triangle edge.
Round 1 (navy, sc)
Join navy at the bottom-right outer corner, at the right corner of A1.
Bottom edge:
- Work 2 sc in the corner.
- Along A1’s lower edge, work 1 sc in each of the next 4 sts.
- Work 3 sc in the bottom point.
- Work 1 sc in each of the next 4 row-ends.
- Work sc2tog across the valley, using the last st of this block and the first st of the next block.
- Repeat steps 2–5 for A2.
- For A3, repeat steps 2–4, then work 2 sc in the bottom-left corner.
Bottom edge count: 2 corner + 3 points x (4 + 3 + 4) + 2 valleys + 2 corner = 39 sts.
Left side: Work 9 sc along each triangle edge: 2 sc in row-ends 1, 3 and 5, and 1 sc in row-ends 2, 4 and 6. Where a navy block’s corner touches the edge between two triangles, don’t add an extra stitch. 5 triangles x 9 = 45 sts.
Top edge: Work as the bottom edge across the three Tier 11 points. 39 sts, including both corners.
Right side: 45 sts, as for the left side.
Sl st to the first sc. Round 1 total: 39 + 45 + 39 + 45 = 168 sts.
The 2 sc at each outer corner are counted once only, in the top or bottom edge count. They are never added again to the sides.
Why the math works
Every block edge has 6 positions: one shared tip, four middle stitches and one valley corner. The 3 sc in each tip and the sc2tog in each valley use up those shared corner positions exactly once. On the sides, 9 sc for each 2.1 in (5.3 cm) edge matches the border gauge, so the edges stay flat without ruffling or cupping.
Round 2 (navy, sl st)
Sl st in each st around, keeping your tension loose. (168 sl st)
Fasten off and weave in the end. The border adds 0.25 in (0.6 cm) on each edge.
Final size: 6.9 in x 13.2 in (17.5 cm x 33.5 cm).
Final Blocking
- Wet the panel in cool water, gently squeeze out the water, and roll it in a towel.
- Lay it right side up on a blocking mat.
- Pin the four outer corners first, to a width of 6.9 in (17.5 cm).
- Pin the 3 bottom points and the 3 top points so the length is 13.2 in (33.5 cm) from point to point. Space the points 2.1 in (5.3 cm) apart.
- Straighten each side edge with a pin at every triangle.
- Smooth the blocks into true diamonds with your fingertips.
- Leave it to dry completely before unpinning.
Acrylic can be steam-blocked lightly instead. Hold the iron above the fabric and never press it down.
Final Quality-Control Checklist
- 11 tiers, with navy on all odd tiers and cream on all even tiers
- 18 navy blocks, 10 cream blocks and 10 cream triangles
- Every block has 6 sts and 6 rows
- Side edges are straight, with no gaps where blocks join
- Three navy points at each end
- Border Round 1 has exactly 168 sts
- Panel measures 6.9 in x 13.2 in (17.5 cm x 33.5 cm)
- All ends are woven into same-color areas
Troubleshooting
- The panel curls toward the front: this is natural for Tunisian simple stitch. Use a bigger hook for the forward pass only, then block firmly.
- Gaps at the joins: make every join loop in a single row-end and don’t skip any. Tug each join snug on the J-RetP.
- Side edges bow inward: you probably skipped a Tss inc in the right triangle or a Tss2tog in the left triangle. Count to 6 sts on the last row.
- Blocks lean or look like rhombuses: your return pass is uneven. Keep each return pass the same tension.
- The border ruffles at the points: work 2 sc in the tips instead of 3.
- The border pulls in at the valleys: replace the sc2tog with 1 sc in each corner stitch.
Care
Hand wash in cool water, or use a gentle machine cycle inside a laundry bag. Lay flat to dry and reshape the points while the panel is still damp.
Final Notes
The measurements build like this:
- One block of 6 sts by 6 rows measures 1.5 in (3.8 cm), or 2.1 in (5.3 cm) corner to corner.
- Three diagonals across make 6.4 in (16.3 cm) of width.
- Eleven tiers make 12.7 in (32.3 cm) from point to point.
- A 168-stitch border adds 0.25 in (0.6 cm) on each edge, for a finished panel of 6.9 in x 13.2 in (17.5 cm x 33.5 cm).
Check your block size first, and the rest will follow.
Happy crocheting!