

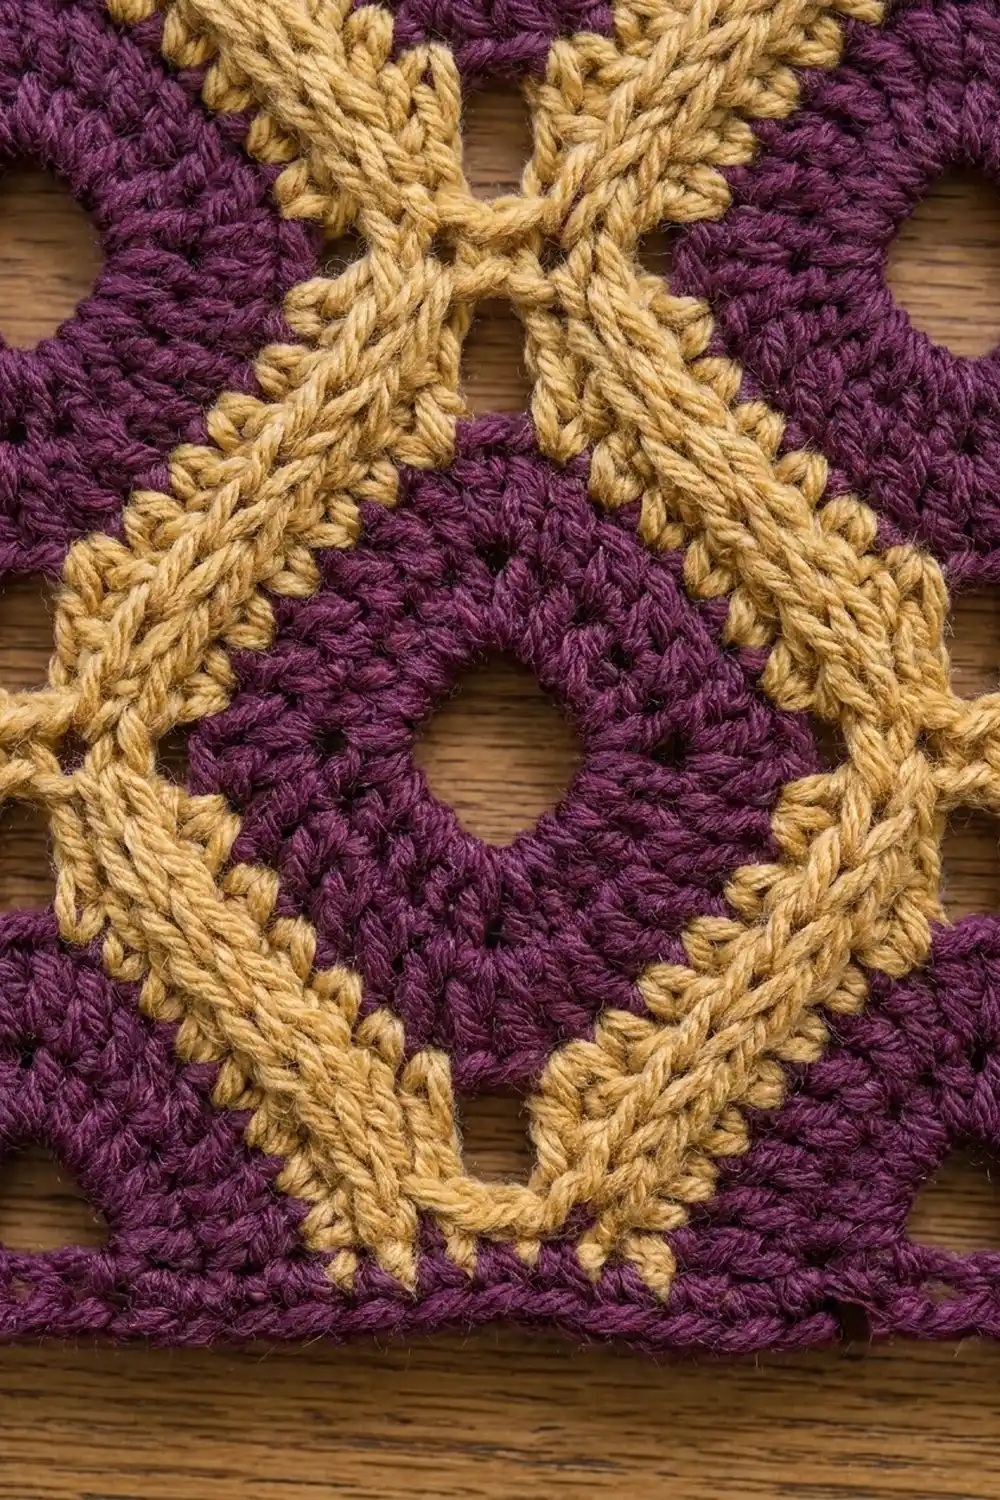
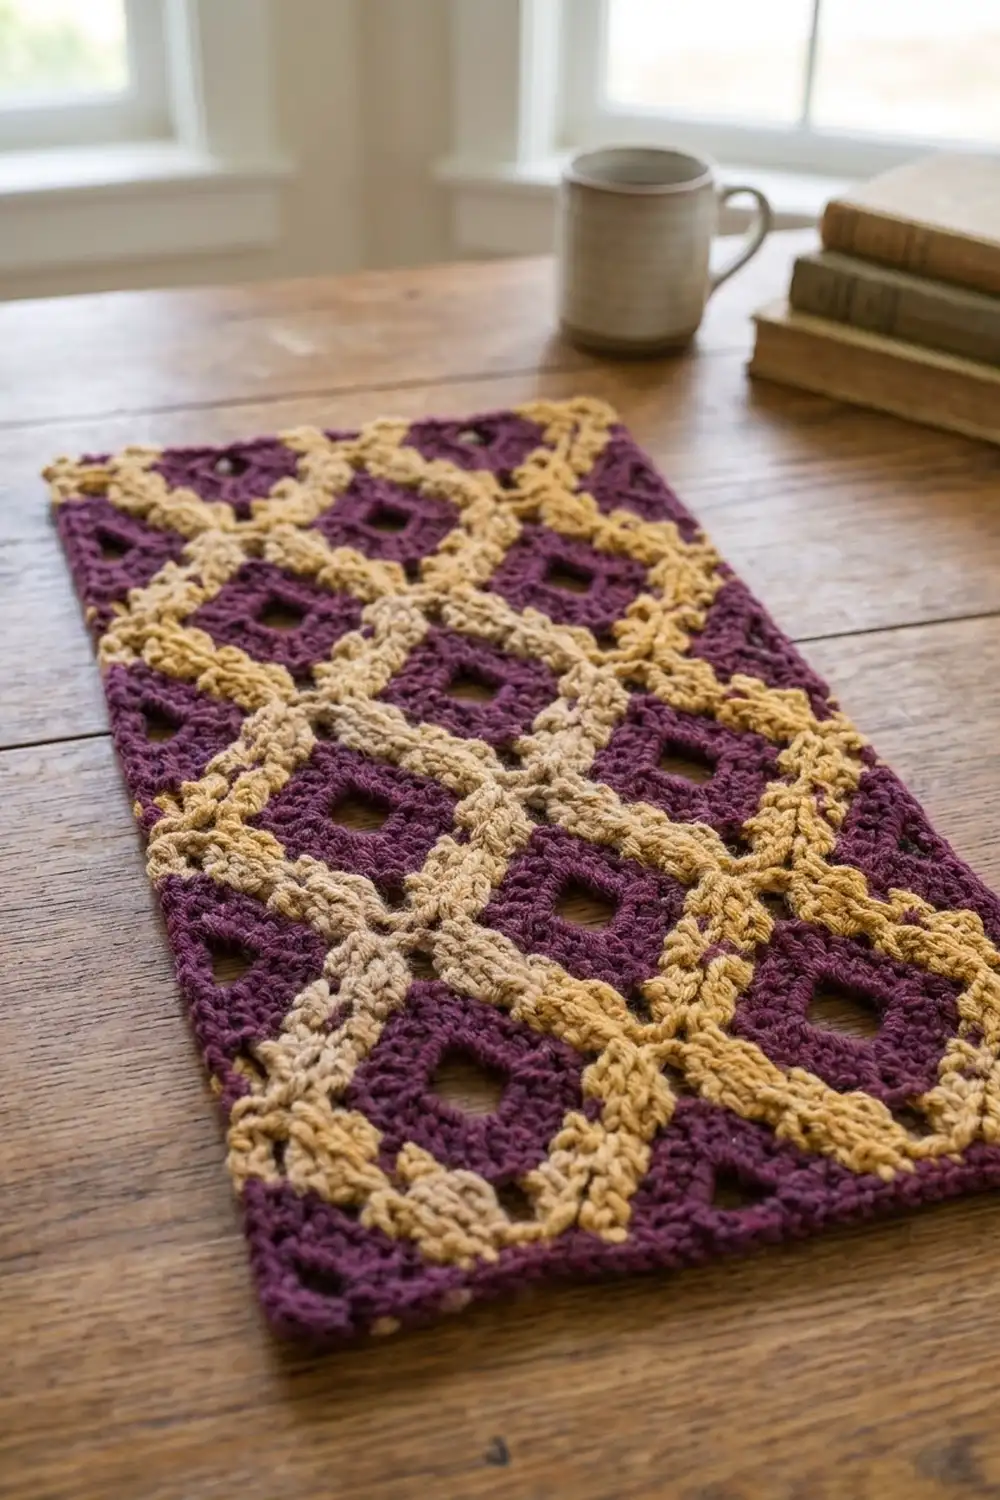
This panel has a bold, old-world look. Gold diagonal lines cross over a deep plum background to make a tidy diamond lattice, and each plum diamond has a small open eyelet in the middle. Up close the fabric looks woven, and from across the room it reads like a jewel-toned tile.
You make it in two colors, plum and mustard gold, with tapestry single crochet. You carry the unused color inside the stitches, so there are no floats on the back and the fabric stays firm. The pattern uses US crochet terms throughout.
The finished panel measures 10.5 x 19.75 in (26.7 x 50.2 cm) including the border. Use it as a wall hanging, a table mat or a sampler, or as a test piece before a bigger project.
Construction is simple. You work one rectangle flat in rows, following a 12-stitch, 12-row diamond repeat. Then you add three rounds of plum single crochet around the edge.
Finished Size and Construction
- Finished size: 10.5 x 19.75 in (26.7 x 50.2 cm)
- Skill level: Intermediate (tapestry color changes)
- Terminology: US crochet terms
- Yarn weight: Worsted (#4)
- Hook: 5.0 mm (H-8)
- Number of pieces: 1
- Layout: Single rectangle, 3 diamond repeats wide and about 6 repeats tall
- Panel size before border: 9 x 18.25 in (22.9 x 46.4 cm), 36 stitches x 73 rows
- Border depth: 0.75 in (1.9 cm) per side, 3 rounds
Materials
Choose a smooth worsted-weight cotton or cotton blend at about 180 m per 100 g. Cotton shows the stitch texture clearly and blocks flat. Avoid fuzzy yarns, which blur the lattice lines.
- Color A, plum: 100 g (about 180 m)
- Color B, mustard gold: 60 g (about 108 m)
Both quantities include a margin of roughly 15%. Plum is carried through every row and is also used for the border, so you need more of it.
Tools:
– 5.0 mm (H-8) crochet hook
– Tapestry needle
– Scissors
– Stitch markers (2–4)
– Rust-proof pins and a blocking mat
– Tape measure
Abbreviations (US Terms)
- ch – chain
- sc – single crochet
- sl st – slip stitch
- sk – skip
- st(s) – stitch(es)
- RS / WS – right side / wrong side
- P / G – plum / gold
- P5 – 5 sc in plum (any number works the same way)
Special technique – tapestry sc: Hold the unused color along the top of the row and work each sc over it, so it is enclosed inside the stitch. To change color, work the last sc of the old color until 2 loops remain, then yarn over with the new color and pull through. Keep the carried strand slightly relaxed.
Eyelet: ch 2, sk 2 sts. Work both chains around the carried strand so that it stays hidden. On the next row, work 2 sc into the ch-2 space.
Gauge and Checkpoints
Gauge: 16 sts and 16 rows = 4 in (10.2 cm) in tapestry sc.
Make a gauge swatch first. Ch 25 and work 24 sts (two 12-stitch repeats, using the repeat table below) for Rows 1–12. Do not add any eyelets on this swatch. It should measure 6 x 3 in (15.2 x 7.6 cm).
- Too big: go down to a 4.5 mm hook.
- Too small: go up to a 5.5 mm hook.
- Rows too tall: tighten the carried strand slightly. Loose carrying adds height.
Checkpoints:
– After Row 12: 9 in wide x 3 in tall (22.9 x 7.6 cm)
– After Row 36: 9 in tall (22.9 cm)
– After Row 73: 9 x 18.25 in (22.9 x 46.4 cm)
– After the border: 10.5 x 19.75 in (26.7 x 50.2 cm)
If you are off by more than 0.25 in (0.6 cm) at the first checkpoint, restart with a different hook. Small errors grow over 73 rows.
Pattern: The Diamond Panel
The 12-Stitch Repeat
These are the gold positions within each 12-stitch repeat. Every other stitch is plum.
| Row | Gold sts | Row | Gold sts |
|---|---|---|---|
| 1 | 6–7 | 7 | 1, 12 |
| 2 | 5–8 | 8 | 1–2, 11–12 |
| 3 | 4–5, 8–9 | 9 | 2–3, 10–11 |
| 4 | 3–4, 9–10 | 10 | 3–4, 9–10 |
| 5 | 2–3, 10–11 | 11 | 4–5, 8–9 |
| 6 | 1–2, 11–12 | 12 | 5–8 |
Each row reads the same in both directions, so you never need to reverse the chart on WS rows.
Foundation
With plum, ch 37. Lay the gold strand along the top of the chain and work over it from the first stitch onward. Leave a 6 in (15.2 cm) tail of each color.
Rows 1–12 (first repeat)
At the end of every row, ch 1 and turn. The ch 1 does not count as a stitch. Every row has 36 sc.
Row 1 (RS): Starting in the 2nd ch from the hook, work P5, G2, P10, G2, P10, G2, P5. (36 sts) This is the bottom edge, so it has no eyelets. The plum blocks here form the lower half-diamonds.
Row 2: P4, G4, P8, G4, P8, G4, P4. (36 sts)
Row 3: P3, G2, P2, G2, P6, G2, P2, G2, P6, G2, P2, G2, P3. (36 sts)
Row 4: P2, [G2, P4] 5 times, G2, P2. (36 sts)
Row 5: P1, G2, P6, G2, P2, G2, P6, G2, P2, G2, P6, G2, P1. (36 sts)
Row 6: G2, P8, G4, P8, G4, P8, G2. (36 sts)
Row 7 (eyelet row): G1, [P4, eyelet, P4, G2] 2 times, P4, eyelet, P4, G1. (30 sc + 3 ch-2 spaces = 36 sts) Each eyelet sits at the widest point of a full plum diamond.
Row 8: G2, P3, 2 P sc in ch-2 space, P3, G4, P3, 2 P sc in ch-2 space, P3, G4, P3, 2 P sc in ch-2 space, P3, G2. (36 sts) The color sequence is the same as Row 6.
Row 9: Work as Row 5. (36 sts)
Row 10: Work as Row 4. (36 sts)
Row 11: Work as Row 3. (36 sts)
Row 12: Work as Row 2. (36 sts)
Checkpoint: the panel measures 9 x 3 in (22.9 x 7.6 cm).
Rows 13–72 (five more repeats)
Work Rows 1–12 five more times, with one change. Every time you repeat Row 1 (Rows 13, 25, 37, 49 and 61), work it as an eyelet row:
Row 1, eyelet version: P5, G2, P4, eyelet, P4, G2, P4, eyelet, P4, G2, P5. (34 sc + 2 ch-2 spaces = 36 sts)
On the Row 2 that follows, work 2 plum sc into each ch-2 space. Those 2 stitches fall inside the P8 blocks: P4, G4, P3, 2 P sc in space, P3, G4, P3, 2 P sc in space, P3, G4, P4. (36 sts)
These two eyelets mark the centers of the diamonds that straddle the repeat boundaries. The P5 blocks at the side edges are half-diamonds, so they have no eyelets.
Checkpoint after Row 36: 9 in (22.9 cm) tall.
Row 73 (closing row)
Row 73: Work Row 1 (P5, G2, P10, G2, P10, G2, P5) with no eyelets. (36 sts) This row closes the top half-diamonds so the panel matches the bottom edge.
Cut gold and leave a 6 in (15.2 cm) tail. Keep plum attached and do not turn.
Checkpoint: 9 x 18.25 in (22.9 x 46.4 cm), with 36 sts across and 73 rows.
Border
Border gauge: 4 sc = 1 in (2.5 cm) along stitch edges, and 1 sc per row-end = 4 sc per 1 in (2.5 cm) along the sides. The fabric has the same number of stitches and rows per inch, so 1 sc per row-end lies flat.
Work in rounds with the RS facing. Do not turn. Join each round with a sl st to the first sc and ch 1. The ch 1 does not count as a stitch.
Round 1 (plum):
– Top edge: 3 sc in the first st (corner), sc in the next 34 sts, 3 sc in the last st (corner).
– Left side: 1 sc in each row-end of Rows 72 down to 2 (71 sc).
– Bottom edge: 3 sc in the first foundation ch (corner), sc in the next 34 ch, 3 sc in the last ch (corner).
– Right side: 1 sc in each row-end of Rows 2 up to 72 (71 sc).
Join. (222 sts)
Per side, counting both corner center stitches: top and bottom have 38 sts each (1 + 1 + 34 + 1 + 1), and the long sides have 75 sts each (1 + 1 + 71 + 1 + 1). Check: 38 + 38 + 75 + 75 − 4 shared corners = 222. Place a marker in each corner center stitch.
Round 2: Sc in each st around, working 3 sc in each corner center st. Move the markers up. (222 sts + 8 increases = 230 sts) Per side: 40 and 77.
Round 3: Repeat Round 2. (230 sts + 8 increases = 238 sts) Per side: 42 and 79. Fasten off.
Why the math works: Each round adds 2 stitches per side (1 at each corner), which is 1 extra stitch at each edge of every side. Three rounds add 3 stitches at each edge, so 36 sts across becomes 42 and 73 rows becomes 79.
At 4 sts per inch, 42 sts = 10.5 in (26.7 cm) and 79 sts = 19.75 in (50.2 cm). Each round adds 0.25 in (0.6 cm) of depth, so the full border is 0.75 in (1.9 cm) deep.
Final Blocking
- Weave in all tails along same-color stitches on the WS. Run each tail at least 1.5 in (3.8 cm), then back-weave it.
- Soak the panel in cool water for 15 minutes, then press out the water. Do not wring it.
- Roll it in a towel to remove more moisture.
- Lay it flat with the RS up and pin it to 10.5 x 19.75 in (26.7 x 50.2 cm). Pin the corners first, then the midpoints of each side.
- Use your fingertips to straighten the gold lattice lines so the diamonds look even.
- Gently open each eyelet into a neat square, about 0.5 in (1.3 cm) across.
- Leave the panel to dry completely before unpinning.
Final Quality-Control Checklist
- Every row has exactly 36 sts.
- Gold lines are 2 sts wide and move 1 st per row.
- The 3 full diamonds in each eyelet row have eyelets at their centers.
- There are no eyelets in the edge half-diamonds or in Rows 1 and 73.
- No carried strand shows through the plum.
- Border corners are square, and the sides are not ruffled or cupped.
- Final size is 10.5 x 19.75 in (26.7 x 50.2 cm), within 0.25 in (0.6 cm).
Troubleshooting
- Gold peeks through plum: Hold the carried strand lower, behind the hook, and keep it snug.
- Diamonds lean to one side: Tapestry sc naturally slants. Work every sc as yarn under (insert the hook, yarn under, pull through), or block firmly to straighten it.
- Eyelets close up: Chain more loosely, and check that you worked exactly 2 sc into each space on the next row.
- Edges pull in: Count your stitches. A missed last stitch shrinks the row, so mark the first and last stitch of each row.
- Border ruffles: Use a hook 0.5 mm smaller for the border.
- Border cups: Make sure you are working exactly 1 sc per row-end and not skipping any.
Care
Hand wash in cool water with a mild detergent and dry flat. Reshape the panel while it is damp. Avoid the dryer, which can distort the eyelets and lattice lines.
Final Notes
The measurement chain is:
– A 3 in (7.6 cm) square repeat at 16 sts and 16 rows per 4 in (10.2 cm)
– 3 repeats wide = 36 sts = 9 in (22.9 cm)
– 73 rows = 18.25 in (46.4 cm)
– 3 border rounds adding 0.75 in (1.9 cm) per side
– A finished panel of 10.5 x 19.75 in (26.7 x 50.2 cm)
Check your gauge first and count stitches every row, and the lattice will line up.
Happy crocheting!