

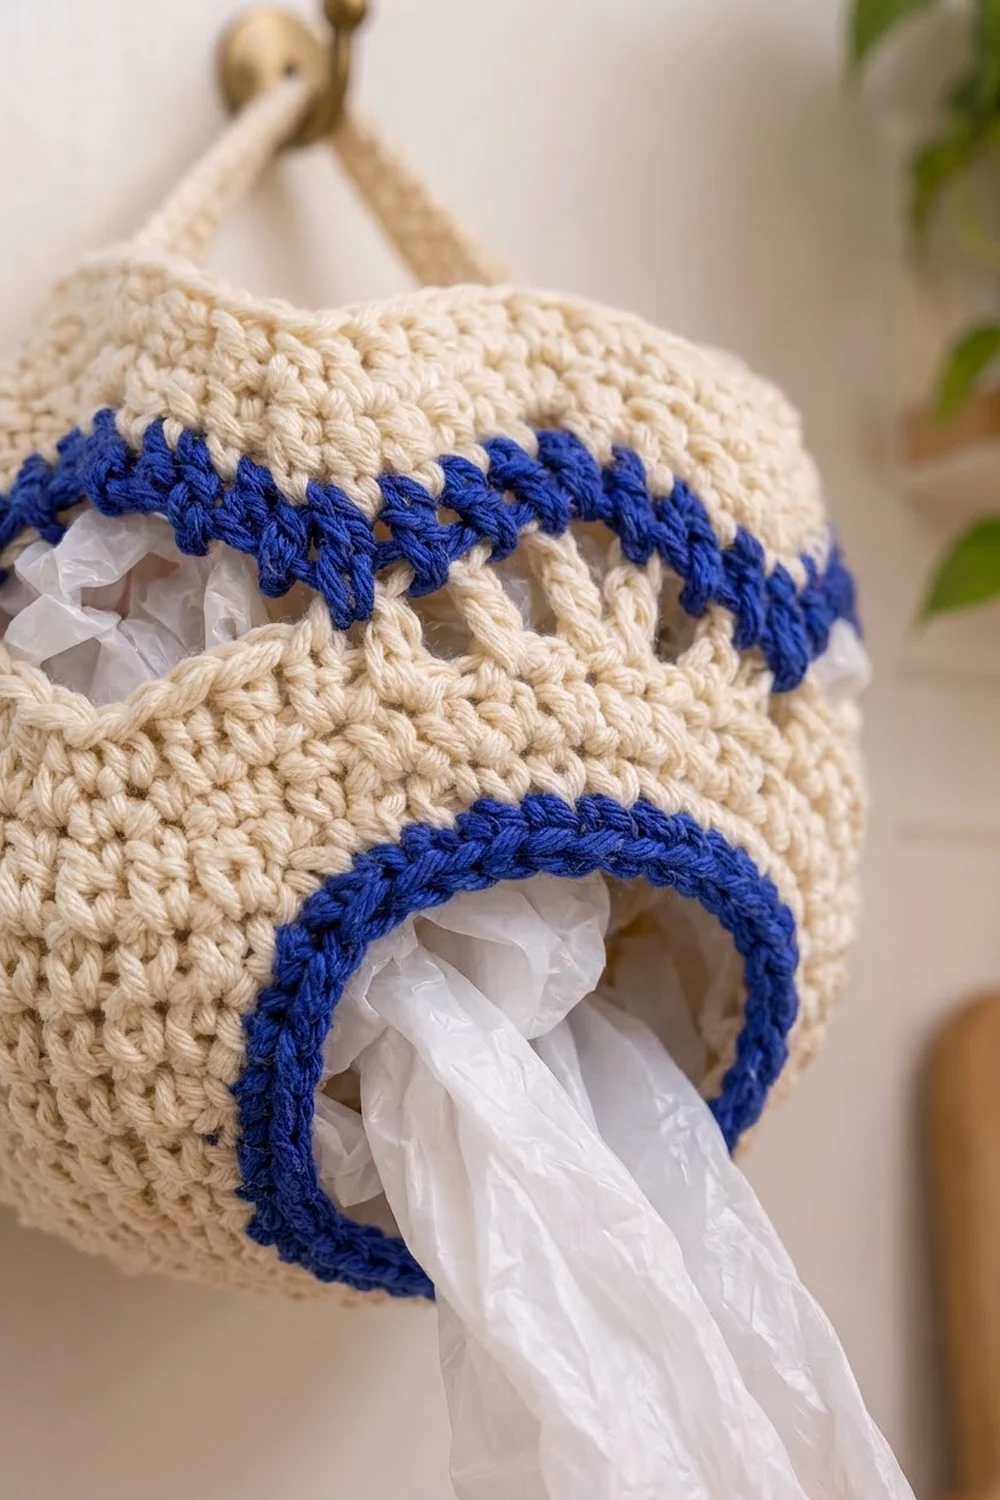
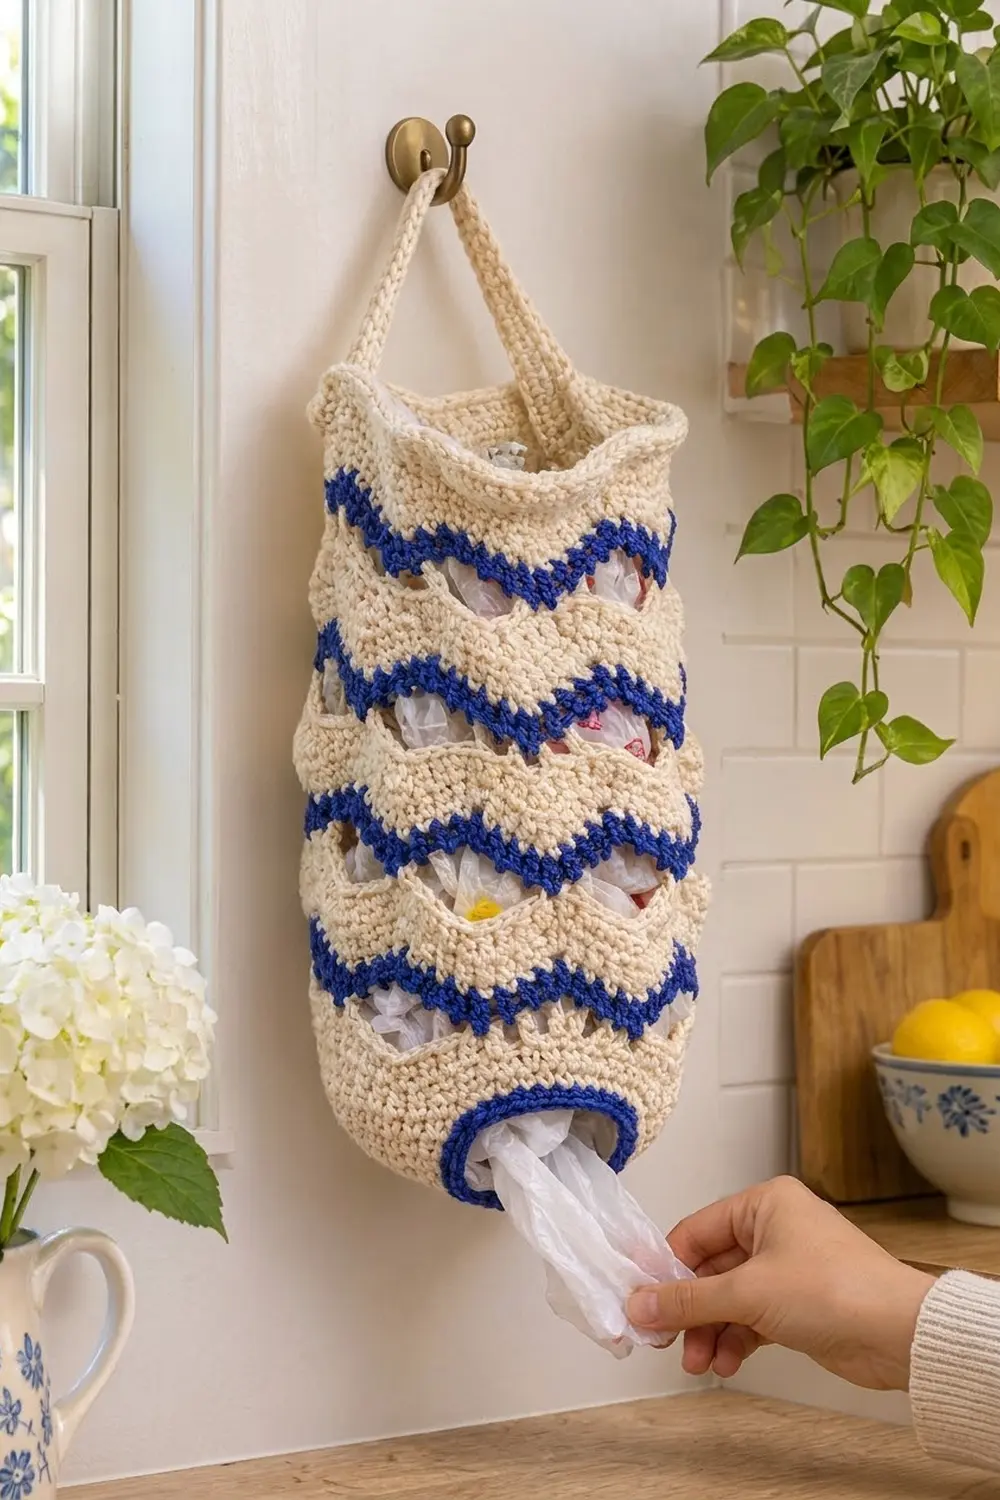
The Cobalt Wave Bag Keeper keeps all your plastic grocery bags in one tidy, washable holder that hangs on a hook or door handle. You push bags in at the top and pull them out one at a time through the small opening at the bottom.
The design pairs warm cream cotton with five crisp cobalt-blue zigzag stripes. Above each blue stripe is a band of open mesh, so the bags show through and the holder looks light rather than bulky. The look is relaxed and coastal, and it suits a farmhouse or blue-and-white kitchen.
This pattern uses US crochet terms. The finished holder is about 8.5 in (21.6 cm) wide when laid flat and about 14 in (35.6 cm) tall in the body. With the strap, it’s about 17 in (43.2 cm) tall.
The holder is a single piece worked from the bottom up in joined rounds. You start at the dispensing opening and increase to form a tapered base, then work the striped ripple body without any further shaping. After that you add a firm top rim and work a strap off the rim. To finish, you add a cobalt edging around the bottom opening.
Finished Size and Construction
- Finished size: 8.5 in (21.6 cm) wide when flat x 14 in (35.6 cm) tall in the body; 17 in (43.2 cm) tall with the handle
- Skill level: Intermediate (ripple rounds and stitch-togethers)
- Terminology: US
- Yarn weight: Worsted (#4) cotton
- Hook: 5.0 mm (H-8)
- Number of pieces: 1 (the strap is worked from the rim)
- Layout: Seamless tube, worked bottom-up in joined rounds
- Body circumference: 60 stitches
- Size before border: 13.7 in (34.8 cm) tall after Round 36
- Border depth: Top rim 0.5 in (1.3 cm); bottom edging 0.5 in (1.3 cm)
Materials
Use a smooth mercerized or soft cotton in worsted weight. Cotton holds its shape when the bag is stuffed full, and it washes well. Avoid acrylic: it stretches lengthwise under the weight of the bags.
- Color A (cream): 140 g, 218 m (238 yd)
- Color B (cobalt blue): 35 g, 55 m (60 yd)
These amounts are based on cotton with about 78 m (85 yd) per 50 g, and they include a margin of about 15% for your gauge swatch and weaving in ends.
Tools:
– 5.0 mm (H-8) crochet hook
– 4 stitch markers
– Tapestry needle
– Scissors
– Measuring tape
– Rust-proof pins and a towel for blocking
Abbreviations (US Terms)
- ch – chain
- sl st – slip stitch
- sc – single crochet
- hdc – half double crochet
- dc – double crochet
- sp – space
- st(s) – stitch(es)
- sk – skip
Special stitches:
– sc3tog: (Insert hook in next st, yarn over, pull up a loop) 3 times, yarn over, pull through all 4 loops on the hook.
– hdc3tog: (Yarn over, insert hook in next st, yarn over, pull up a loop) 3 times, yarn over, pull through all 7 loops on the hook.
– dc3tog: (Yarn over, insert hook in next st, yarn over, pull up a loop, yarn over, pull through 2 loops) 3 times, yarn over, pull through all 4 loops on the hook.
Counting rule: In the mesh rounds, each ch-2 space counts as 1 stitch. On the round after a mesh round, work 1 stitch into each dc and 1 into each ch-2 space.
Gauge and Checkpoints
Gauge:
– hdc: 14 sts and 10 rounds = 4 in (10.2 cm)
– sc: 16 sts and 16 rounds = 4 in (10.2 cm)
– Mesh round: each dc mesh round adds about 0.6 in (1.5 cm) of height
Test piece first: Use the base (Rounds 1–7) as your gauge test. If it doesn’t measure correctly, pull it out and change hooks before going on.
Checkpoints:
– After Round 1: the ring lies about 3.75 in (9.5 cm) across when flat.
– After Round 7: the base is about 8.5 in (21.6 cm) across when flat and about 2.6 in (6.6 cm) tall.
– After Round 33: the piece is about 12.5 in (31.8 cm) tall.
– After Round 38: the piece is about 14 in (35.6 cm) tall.
If your piece is too big, go down to a 4.5 mm (US 7) hook. If it’s too small, go up to a 5.5 mm (I-9) hook. Don’t change the stitch counts: the ripple needs a multiple of 12.
Base (Color A)
Foundation: With A, ch 30. Join with a sl st to the first ch to form a ring, taking care not to twist the chain.
Round 1: Ch 1. Work 1 sc in each ch around. Join with a sl st to the first sc. (30 sts)
From Round 2 on, start each round with ch 2. This ch 2 does not count as a stitch.
Round 2: Ch 2. Hdc in next 4 sts, 2 hdc in next st; repeat from * 6 times total. Join. (36 sts)
Round 3: Ch 2. Hdc in next 5 sts, 2 hdc in next st; repeat 6 times. Join. (42 sts)
Round 4: Ch 2. Hdc in next 6 sts, 2 hdc in next st; repeat 6 times. Join. (48 sts)
Round 5: Ch 2. Hdc in next 7 sts, 2 hdc in next st; repeat 6 times. Join. (54 sts)
Round 6: Ch 2. Hdc in next 8 sts, 2 hdc in next st; repeat 6 times. Join. (60 sts)
Adding only 6 stitches per round makes the base rise into a shallow cone instead of lying flat. That cone is the tapered bottom of the holder.
Round 7: Ch 2. Hdc in each st around. Join. (60 sts)
Round 8 (ripple set-up): Ch 2. Hdc in next 4 sts, 3 hdc in next st (peak), hdc in next 4 sts, hdc3tog over next 3 sts (valley); repeat from * 5 times total. Join. (60 sts)
Each repeat uses 12 stitches and makes 12 stitches (4 + 3 + 4 + 1). That’s why the count stays at 60. Place a marker in the center stitch of each 3-hdc peak.
Body Ripple Rounds
From here on, every round starts 1 stitch later than the round before. This keeps the peaks and valleys lined up.
Ripple Round in hdc (HR): Sl st in next st, ch 2. Hdc in next 4 sts (the first one is the st holding the sl st), 3 hdc in next st (peak), hdc in next 4 sts, hdc3tog over next 3 sts (valley); repeat 5 times. Join with a sl st to the first hdc. (60 sts)
On the last repeat, the final hdc3tog uses the last 2 stitches of the round plus the first stitch you slipped past. If your peaks land on the center stitch of the peaks below, your alignment is right.
Ripple Round in sc (SR): Work the same as HR, but start with ch 1 instead of ch 2, use sc in place of hdc, and use sc3tog for the valley. (60 sts)
Mesh Round (MR): Sl st in next st, ch 2 (does not count as a stitch). Dc in next st, ch 2, sk next st, dc in next st, ch 2, sk next st, (dc, ch 2, dc) in next st (peak), ch 2, sk next st, dc in next st, ch 2, sk next st, dc in next st, dc3tog over next 3 sts; repeat 5 times. Join. (60 sts: 35 dc-type sts + 25 ch-2 sps)
Each mesh repeat makes 7 dc-type stitches and 5 spaces, for a total of 12. The peak’s ch-2 space sits right over the peak below, so the next round’s 3-stitch peak goes into that space.
Color changes: Finish the last join of a round with the new color. Carry the unused color loosely up the inside of the tube.
Stripe Repeat (5 rounds)
- 2 rounds HR in A.
- 1 round MR in A.
- 2 rounds SR in B.
Work the Stripe Repeat 5 times:
– Repeat 1: Rounds 9–13
– Repeat 2: Rounds 14–18
– Repeat 3: Rounds 19–23
– Repeat 4: Rounds 24–28
– Repeat 5: Rounds 29–33
Each Stripe Repeat adds about 1.9 in (4.8 cm): 0.8 in (2.0 cm) of hdc, 0.6 in (1.5 cm) of mesh, and 0.5 in (1.3 cm) of sc. Check that the piece is 12.5 in (31.8 cm) tall after Round 33.
Rounds 34–36: With A, work 3 rounds HR. (60 sts each)
The piece now measures about 13.7 in (34.8 cm) tall.
Border: Top Rim, Strap, and Dispensing Opening
Border gauge: 16 sc = 4 in (10.2 cm). Each border round adds about 0.25 in (0.6 cm).
Top Rim (Color A)
Round 37: Ch 1. Sc in each st around. Join. (60 sts)
Round 38: Ch 1. Sc in each st around. Join. (60 sts)
Don’t add any increases or decreases here. The rim keeps the soft wave of the last ripple round, just like the finished piece. It also adds about 0.5 in (1.3 cm), bringing the body to 14 in (35.6 cm).
Strap (Color A)
- Fold the tube flat so the joins of the rounds sit at one side fold.
- Mark 6 rim stitches centered on that fold: sts 58, 59, 60, 1, 2, and 3.
- Mark sts 28–33 on the opposite fold. You’ll sew the strap end here.
Row 1: Join A in st 58. Ch 1, sc in the 6 marked sts. (6 sts)
Rows 2–28: Ch 1, turn, sc in each st across. (6 sts)
The strap is 1.5 in (3.8 cm) wide and 7 in (17.8 cm) long, based on 28 rows at 4 rows per inch.
Without twisting the strap, whipstitch Row 28 to sts 28–33. Then edge each long side of the strap with 28 sc (1 sc per row end). The finished strap stands about 3 in (7.6 cm) above the rim.
Dispensing Opening (Color B)
Turn the holder upside down.
Edging Round 1: Join B in any free loop of the foundation chain. Ch 1, sc in each free loop around. Join. (30 sts)
Edging Round 2: Ch 1. Sc in each st around. Join. (30 sts) Fasten off.
Why the math works: The foundation chain has 30 free loops. With 1 sc in each loop and no increases, the opening stays at the starting size of 3.75 in (9.5 cm) across when flat. That’s small enough to hold the bags in but loose enough to pull them out. The two snug rounds roll slightly outward, which gives the cobalt ring its rounded look.
Final Blocking
- Weave in all ends on the inside, following the color they belong to.
- Wet the holder in cool water, then press it gently in a towel. Don’t wring it.
- Stuff the holder loosely with a rolled towel so it forms a tube 8.5 in (21.6 cm) wide when flat.
- Smooth the peaks upward and the valleys downward with your fingers, so each blue stripe forms a clean zigzag.
- Pin the strap flat at 7 in (17.8 cm) long.
- Let it dry completely, then remove the towel.
Final Quality-Control Checklist
- [ ] Every ripple round has 60 stitches and 5 peaks.
- [ ] The peaks stack directly above each other from Round 8 to Round 36.
- [ ] All 5 mesh bands show even open spaces.
- [ ] Each blue stripe is exactly 2 sc rounds.
- [ ] The body measures 14 in (35.6 cm); the total with the strap is 17 in (43.2 cm).
- [ ] The bottom opening has 30 sc and measures 3.75 in (9.5 cm) across when flat.
- [ ] The strap is untwisted and sewn securely across all 6 stitches.
- [ ] All ends are secured on the inside.
Troubleshooting
The peaks drift sideways from round to round. You probably forgot the “sl st in next st” at the start of a round. Pull back to the last correct round.
The base ruffles instead of forming a cone. Your increases are too loose. Use a smaller hook for Rounds 2–6 only.
The bags fall out of the bottom. Your Edging Rounds are too loose. Rework them with a 4.5 mm (US 7) hook.
The mesh band puckers. Your ch-2 spaces are too tight. Make each chain loosely, the same height as the dc.
The holder stretches long when it’s full. This is common with fiber blends. Switch to 100% cotton or work one size smaller.
Care
Hand wash or machine wash on a gentle cycle in cool water. Reshape the holder and lay it flat or hang it to dry.
Final Notes
Each stage depends on the one before it:
– 30 foundation chains grow to 60 stitches over Rounds 2–6.
– Those 60 stitches split into 5 ripple repeats of 12.
– 5 Stripe Repeats bring the piece to 12.5 in (31.8 cm).
– 3 more ripple rounds and 2 rim rounds finish the 14 in (35.6 cm) body.
– The 7 in (17.8 cm) strap and the 30-stitch cobalt opening complete the holder.
If you check your measurements at each stage, the finished holder will match. Happy crocheting!