
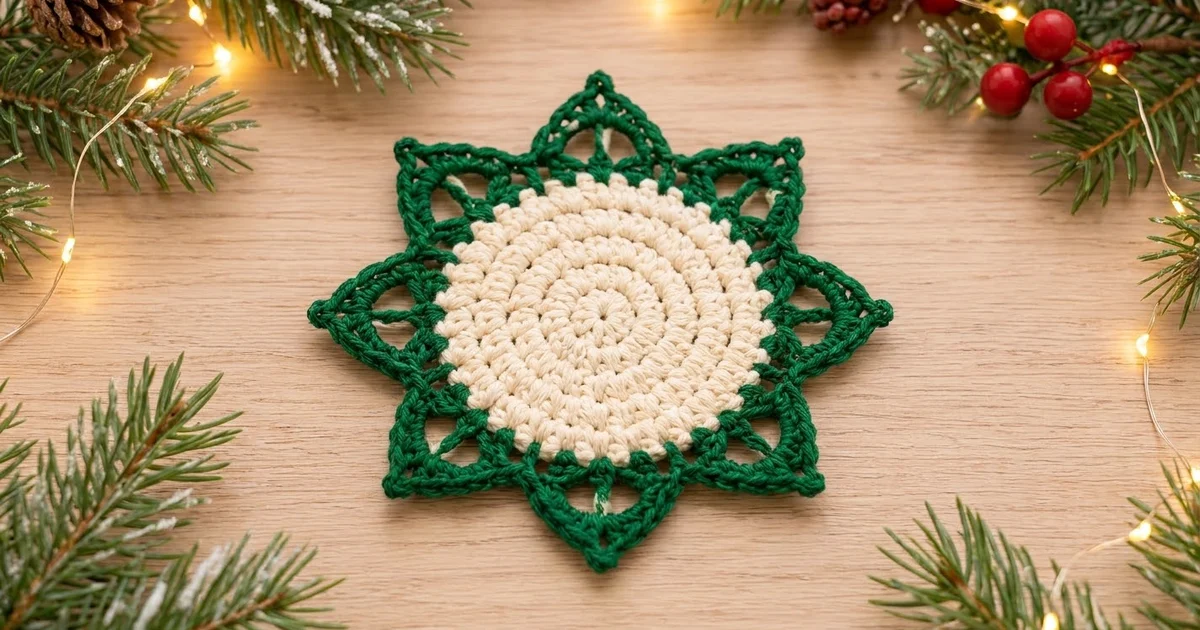
The Evergreen Star Coaster is a small, sturdy holiday coaster. A solid cream center sits inside a bright green eight-pointed star. Each point has a little triangular window, so the edge looks lacy while the center stays dense and flat enough to hold a hot mug.
The colors are simple: warm cream for the center and deep evergreen for the star. Together they look like snow and pine, which suits a Christmas table, a cocoa bar, or a hostess gift tied with twine.
This pattern uses US crochet terms. After blocking, the coaster measures 5.75 in (14.6 cm) from point to point and 4.5 in (11.4 cm) from valley to valley.
It is quick to make. You crochet a cream circle of single crochet in joined rounds, then switch to green for four rounds: the band, the arches, the points and the outline. There is no sewing or joining, only ends to weave in.
Finished Size and Construction
- Finished size: 5.75 in (14.6 cm) point to point; 4.5 in (11.4 cm) valley to valley
- Skill level: Easy / advanced beginner
- Terminology: US crochet terms
- Yarn weight: Light worsted / DK (#3) cotton
- Hook: 3.5 mm (E-4)
- Number of pieces: 1 (single motif)
- Layout: One flat, round, eight-pointed star
- Piece size (cream center): 3.5 in (8.9 cm) diameter after Rnd 9
- Size before border: 3.5 in (8.9 cm)
- Border (star edge) depth: about 1.125 in (2.9 cm) at the points; about 0.5 in (1.3 cm) at the valleys
Materials
Use a smooth mercerized or combed cotton in light worsted / DK weight. Cotton handles heat, soaks up drips and keeps the star points crisp. Acrylic also works, but its points curl more and need firmer blocking.
- Color A – Cream: about 10 g, about 25 m
- Color B – Evergreen green: about 10 g, about 25 m
These amounts include a safety margin of about 20 percent. For a set of four, multiply each color by four and round up to the next full ball.
Tools:
- 3.5 mm (E-4) crochet hook
- Tapestry needle
- Scissors
- Locking stitch marker
- Ruler or tape measure
- Blocking mat and rust-proof pins
- Spray bottle with water
Abbreviations (US Terms)
- ch – chain
- sl st – slip stitch
- sc – single crochet
- hdc – half double crochet
- dc – double crochet
- sk – skip
- sp – space
- st(s) – stitch(es)
- Rnd – round
- MR – magic ring
- ( ) – work everything inside the parentheses into the same stitch or space
- [ ] x8 – repeat the bracketed sequence 8 times
Special stitch – Point shell: (3 dc, ch 3, 3 dc) worked into one ch-5 space. The ch-3 in the middle becomes the star tip.
Standing sc: With a slip knot already on your hook, insert the hook into the stitch and work a sc as normal. Use it to join a new color without a sl st and chain.
Note: The ch 1 at the start of a round does not count as a stitch. Join every round with a sl st to the first sc.
Gauge and Checkpoints
Gauge matters because the coaster has to fit under a mug. Work Rnds 1–4 first and measure before you continue.
- Gauge: Rnds 1–4 = 1.5 in (3.8 cm) diameter
- Checkpoint 1: After Rnd 6, diameter = 2.25 in (5.7 cm)
- Checkpoint 2: After Rnd 9, diameter = 3.5 in (8.9 cm)
- Checkpoint 3: After Rnd 10, diameter = about 4 in (10.2 cm)
- Checkpoint 4: After Rnd 12, point to point = about 5.5 in (14.0 cm)
- Checkpoint 5: After Rnd 13 and blocking, point to point = 5.75 in (14.6 cm)
If your circle is too big: Go down to a 3.25 mm hook, or work with tighter loops.
If your circle is too small: Go up to a 3.75 mm hook.
If the circle ripples: Your stitches are too loose for the number of increases. Go down a hook size.
If the circle cups: Your stitches are too tight. Go up a hook size.
Make one complete coaster before you start a set. It is the best test of both your yarn and your tension. Lay it flat and measure it before you buy more yarn.
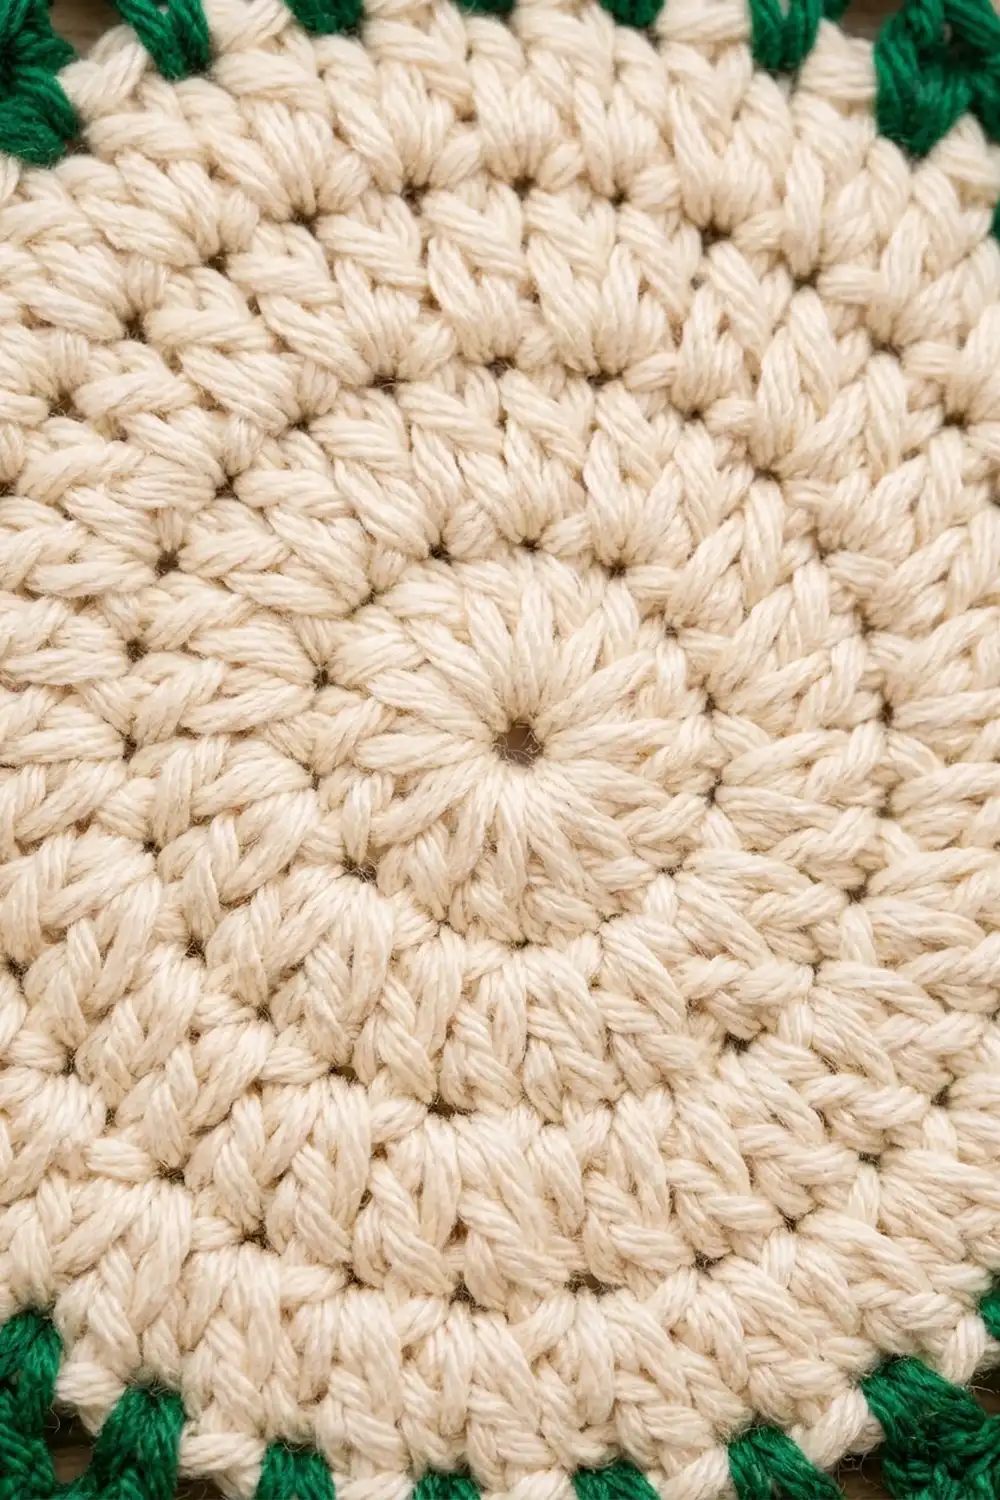
Cream Center (Color A)
Work in joined rounds with the right side facing the whole time. Put a marker in the first sc of each round.
Rnd 1: Make an MR. Ch 1, work 8 sc in the ring. Pull the ring closed tightly. Sl st to first sc. (8 sts)
Rnd 2: Ch 1, 2 sc in each st around. Sl st to first sc. (16 sts)
Rnd 3: Ch 1, [sc in next st, 2 sc in next st] x8. Sl st to first sc. (24 sts)
Rnd 4: Ch 1, [sc in next 2 sts, 2 sc in next st] x8. Sl st to first sc. (32 sts)
Measure now: 1.5 in (3.8 cm).
Rnd 5: Ch 1, [sc in next 3 sts, 2 sc in next st] x8. Sl st to first sc. (40 sts)
Rnd 6: Ch 1, [sc in next 4 sts, 2 sc in next st] x8. Sl st to first sc. (48 sts)
Measure: 2.25 in (5.7 cm).
Rnd 7: Ch 1, [sc in next 5 sts, 2 sc in next st] x8. Sl st to first sc. (56 sts)
Rnd 8: Ch 1, [sc in next 6 sts, 2 sc in next st] x8. Sl st to first sc. (64 sts)
Rnd 9: Ch 1, [sc in next 7 sts, 2 sc in next st] x8. Sl st to first sc. (72 sts)
Fasten off Color A. The circle should lie flat and measure 3.5 in (8.9 cm). Every round adds 8 sts, so the circle grows evenly and stays flat.
Tip: For a rounder outline, move the increases around. On odd rounds, work half the plain sts, then the increase, then the rest of the plain sts. The stitch counts do not change.
Star Edge (Color B)
This green edge is the coaster’s border. It turns the circle into an eight-pointed star in four rounds.
Border gauge: Each star section uses 10 sts of Rnd 10, and each section makes one point. All eight sections are worked the same way.
Rnd 10 (green band): Join Color B with a standing sc in any st of Rnd 9. Sc in next 7 sts, 2 sc in next st, then [sc in next 8 sts, 2 sc in next st] x7. Sl st to first sc. (80 sts)
This round grows the piece: 72 sts plus 8 increases makes 80 sts, or 8 sections of 10 sts. Measure: about 4 in (10.2 cm). This solid round makes the narrow green ring around the cream.
Rnd 11 (window arches): Ch 1, [sc in next 3 sts, ch 5, sk next 4 sts, sc in next 3 sts] x8. Sl st to first sc. (48 sc + 8 ch-5 sps)
This round converts the stitches. Each 10-st section becomes 6 sc and 1 ch-5 arch (3 worked + 4 skipped + 3 worked = 10). The arch sits over the 4 skipped sts of Rnd 10, and the gap underneath stays open to form the triangular window at the base of each point. Keep the chains even and not tight, so every arch is the same height.
For the next round, name the sts of each section: the first three sc are A1, A2 and A3, then comes the ch-5 sp, then B1, B2 and B3.
Rnd 12 (points): Ch 1, [sc in A1, sc in A2, hdc in A3, point shell (3 dc, ch 3, 3 dc) in ch-5 sp, hdc in B1, sc in B2, sc in B3] x8. Sl st to first sc. (96 sts + 8 ch-3 tip sps)
Each section has 4 sc + 2 hdc + 6 dc = 12 sts, plus 1 ch-3 tip, so the round has 8 × 12 = 96 sts. The short sc at each end of a section and the tall dc in the middle make the triangle. The valleys form where B3 of one section meets A1 of the next.
Work the dc into the ch-5 sp, not into the chains themselves. This keeps the window under the arch open. Measure: about 5.5 in (14.0 cm) point to point.
Rnd 13 (outline): Ch 1, [sc in next 6 sts, (sc, ch 3, sc) in ch-3 tip sp, sc in next 6 sts] x8. Sl st to first sc. (112 sc + 8 ch-3 tips)
This is a trim round: 96 sc worked one in each existing st, plus 16 sc added in the tip spaces (2 per tip), for 112 sc. Each section has 6 + 2 + 6 = 14 sc, and 8 × 14 = 112.
Fasten off and weave in all ends on the wrong side. Run each tail through the back of the green stitches, not the cream ones, so nothing shows through the light center.
Why the math works: The cream circle ends at 72 sts, which divides evenly by 8. Rnd 10 adds one st per section, making 80 sts, or 10 per section. Rnd 11 uses all 10 (3 + 4 + 3). Rnd 12 puts 12 sts on each section and Rnd 13 puts 14 on each. No section ever takes stitches from its neighbor, so all eight points come out the same size.
Final Blocking
- Soak the coaster in cool water for 10 minutes, or spray it until it is damp all the way through.
- Press the water out gently in a towel. Do not wring it.
- Lay it right side up on the blocking mat.
- Pin the center first and check that the cream circle is round and 3.5 in (8.9 cm) across.
- Pin each ch-3 tip outward so that opposite tips are 5.75 in (14.6 cm) apart.
- Check the valleys. Opposite valleys should be 4.5 in (11.4 cm) apart.
- Use a pin or your fingertip to open each window into a neat triangle.
- Let the coaster dry completely, at least 12 hours, before you remove the pins.
For extra-crisp points, spray lightly with fabric stiffener before it dries. Keep the coat light, because a coaster needs to handle wet mugs.
Final Quality-Control Checklist
- The cream center is 3.5 in (8.9 cm) across and lies flat
- The green band (Rnd 10) shows evenly all the way around the cream
- There are eight points, all the same height
- There are eight open triangular windows, one at the base of each point
- Each tip has a clean ch-3 picot
- Point to point is 5.75 in (14.6 cm)
- Valley to valley is 4.5 in (11.4 cm)
- Rnd 13 has 112 sc + 8 ch-3 tips
- All ends are woven in on the green back side
- The coaster sits flat, with no cupping or ruffling
Troubleshooting
The center cups like a bowl. Your tension is too tight, or you missed some increases. Count each round, and if the counts are right, go up a hook size.
The center ruffles. Your tension is too loose, or you added extra stitches. Recount and go down a hook size.
The join line leans to one side. This is normal with joined rounds. Move the increases around, as in the tip after Rnd 9.
You have 7 or 9 points. Rnd 10 does not have 80 sts. Undo it and recount; it must be 8 sections of 10.
The windows closed up. The dc in Rnd 12 went into the chains instead of the space. Work them into the ch-5 sp, and pin the windows open when you block.
The points are floppy. Use a firmer cotton, go down half a hook size for the green rounds, or use a light stiffener.
The points are uneven. Check that every section of Rnd 12 reads sc, sc, hdc, shell, hdc, sc, sc. One missing hdc makes a lopsided point.
Cream shows through the green. Weave each tail only through stitches of its own color.
Care
Hand wash in cool water with mild soap, press out the water in a towel, and dry flat while you reshape the points. Keep it out of the dryer, which can soften the points and shrink the cotton.

Final Notes
Every measurement in this pattern follows from the one before it. Rnds 1–4 measure 1.5 in (3.8 cm). The cream center ends at 72 sts and 3.5 in (8.9 cm). The green band brings it to 80 sts and about 4 in (10.2 cm). The arches and points grow it to about 5.5 in (14.0 cm), and the outline plus blocking finish it at 5.75 in (14.6 cm) point to point and 4.5 in (11.4 cm) valley to valley.
If each checkpoint matches, the finished coaster will match too. After the first one, the rest go quickly if you want a matching holiday set.
Happy crocheting!