

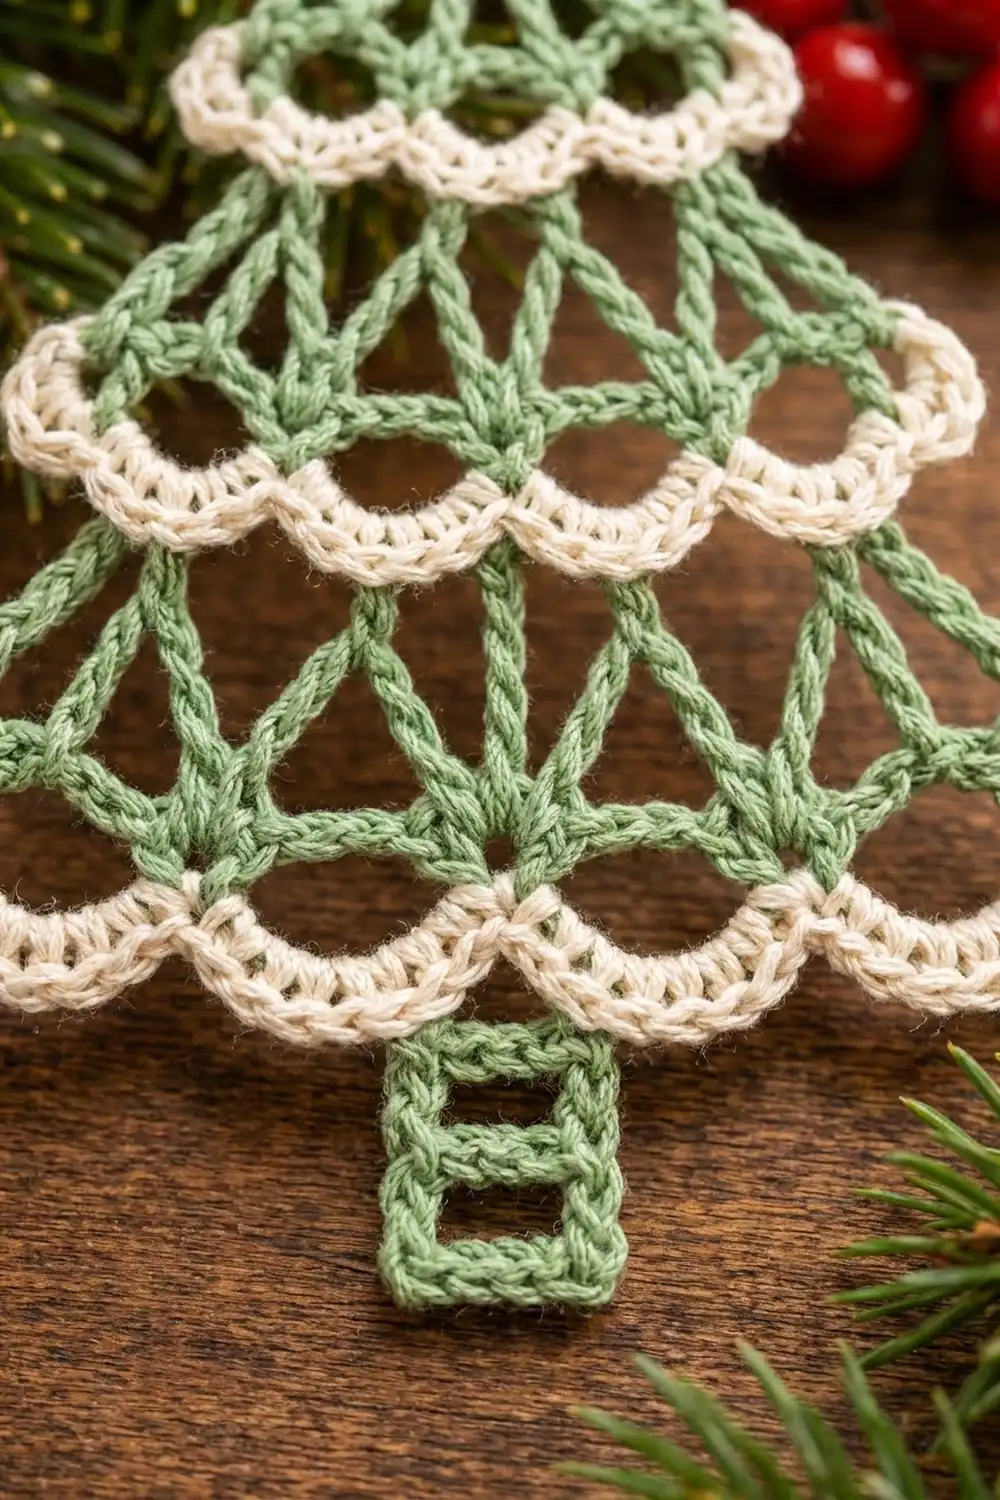
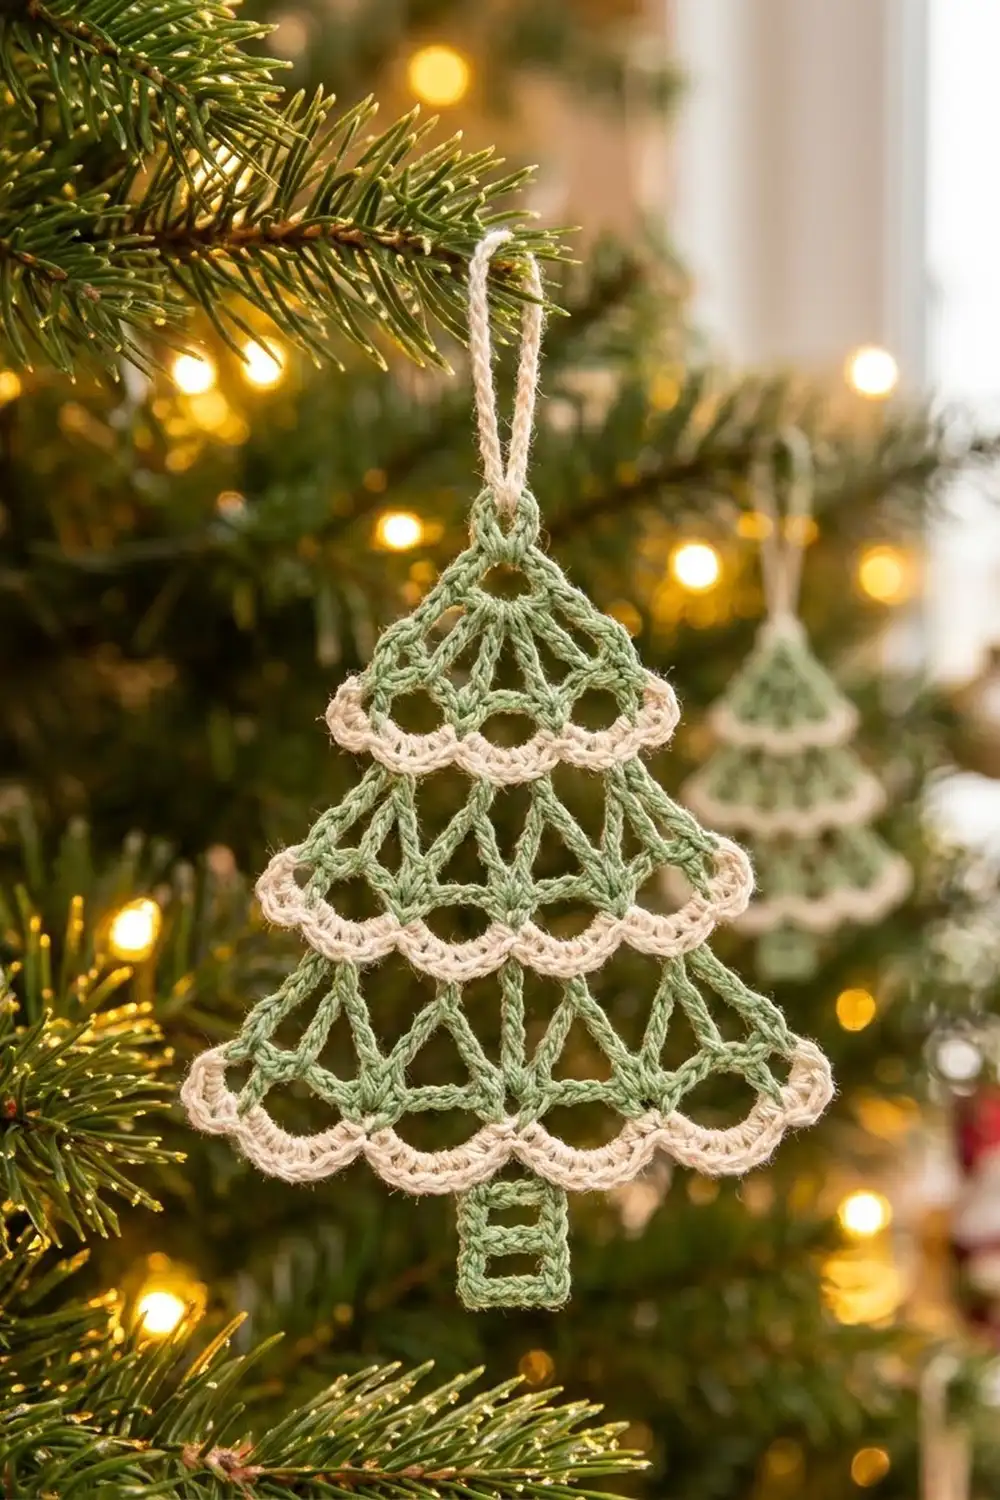
This little lace tree is a soft, vintage-style Christmas ornament with three stacked tiers of open fans, a tiny ladder trunk, and a cream scallop edge that reads like snow on the branches. It is light and airy, and it looks good from both sides, so it works spinning on a branch or tied to a gift.
The body is worked in a muted sage green, and the scallop edging and hanging loop are worked in cream. The style is classic thread-lace: radiating spokes, round chain arches, and crisp blocked points. All instructions use US crochet terms.
The finished ornament measures 3.5 in (8.9 cm) wide and 4.5 in (11.4 cm) tall, not counting the hanging loop, which adds about 1.5 in (3.8 cm).
You start at a small ring at the treetop and work the first tier in turned rows. Each tier has three rows: dc spokes, then tr spokes, then ch-5 arches. The next tier starts on the inner arch-row stitches only, so the outer arches of the tier above flare past it. A short trunk is worked from the center of the bottom tier. Last, the cream scallops go along the bottom edge of each tier and the loop goes through the top ring.
Finished Size and Construction
- Finished size: 3.5 in (8.9 cm) wide x 4.5 in (11.4 cm) tall, plus a 1.5 in (3.8 cm) loop
- Skill level: Easy-intermediate (you need to be comfortable with turned rows and working into chain spaces)
- Terminology: US
- Yarn weight: Sport weight (2) cotton or cotton blend
- Hook: 2.75 mm (US C/2)
- Number of pieces: 1 (worked as a single piece)
- Layout: Three tiers stacked from the top down, with the trunk centered below
- Piece size: Tier 1 is 1.75 in (4.4 cm) wide, Tier 2 is 2.5 in (6.4 cm) wide, and Tier 3 is 3.25 in (8.3 cm) wide, all measured before the edging
- Size before border: 3.25 in (8.3 cm) wide x 4.5 in (11.4 cm) tall
- Border depth: 1/8 in (0.3 cm) beyond the green arches at each side
Materials
Use a smooth mercerized or combed cotton. Cotton holds its shape after blocking and shows the open spokes clearly. Fuzzy acrylic blurs the lace and gives you softer points.
- Sage green (body and trunk): 6 g / 18 m
- Cream (scallop edging and hanging loop): 3 g / 9 m
These amounts include a margin of about 20% for a gauge test and for weaving in ends. One standard ball of each color will make many ornaments.
Tools:
- 2.75 mm (US C/2) crochet hook
- Tapestry needle
- Scissors
- Blocking mat or folded towel
- Rust-proof pins
- Spray bottle, plus spray starch or diluted fabric stiffener (optional)
- Ruler or tape measure
Abbreviations (US Terms)
- ch – chain
- sl st – slip stitch
- sc – single crochet
- hdc – half double crochet
- dc – double crochet
- tr – treble crochet
- sp(s) – space(s)
- st(s) – stitch(es)
- beg – beginning
- RS – right side
Special stitch:
- V-st – (dc, ch 2, dc) in the same stitch. A V-st gives you 2 dc and 1 ch-2 sp.
Notes: The beginning ch-3 counts as a dc. The beginning ch-4 counts as a tr. The beginning ch-1 does not count as a stitch.
Gauge and Checkpoints
Gauge matters less here than it would for a garment, but it controls whether the tiers step out evenly. Make Tier 1 first (Rows 1–3) and measure it before you go on. Treat it as your test piece.
Gauge: Tier 1 (Rows 1–3) = 1.75 in (4.4 cm) wide across the arches x 1.5 in (3.8 cm) tall from the top of the ring. One tr row is about 0.4 in (1.0 cm) tall.
Checkpoints (measure lightly flattened, not stretched):
- After Tier 1: 1.75 in (4.4 cm) wide, 1.5 in (3.8 cm) tall
- After Tier 2: 2.5 in (6.4 cm) wide, 2.5 in (6.4 cm) tall in total
- After Tier 3: 3.25 in (8.3 cm) wide, 3.75 in (9.5 cm) tall in total
- After the trunk: 4.5 in (11.4 cm) tall in total
- After the edging: 3.5 in (8.9 cm) wide
If Tier 1 is too big: Go down to a 2.5 mm hook, or keep the tr loops snug as you pull through.
If Tier 1 is too small: Go up to a 3.0 mm hook. Lace that is too tight also tends to curl, which is another sign that you need a bigger hook.
You can block out a difference of 1/8 in (0.3 cm). A bigger difference will show up as an uneven step between tiers, so fix your hook size before you continue.
Tier 1 (Treetop)
With sage green, ch 6 and sl st in the first ch to form a ring.
Row 1 (RS): Ch 3 (counts as dc). Then [ch 2, dc in ring] 5 times. Turn. (6 dc, 5 ch-2 sps)
Work all the stitches into the lower part of the ring, so the top of the ring stays open for the hanging loop. The six dc fan out downward from the ring like the spokes of a half wheel.
Row 2: Ch 4 (counts as tr), skip the first ch-2 sp. Then [ch 3, tr in next dc] 5 times, working the last tr in the 3rd ch of the beg ch-3. Turn. (6 tr, 5 ch-3 sps)
Each tr sits directly under a dc from Row 1, so the spokes keep running in straight lines.
Row 3 (arch row): Ch 1, sc in the first tr. Then [ch 5, sc in next tr] 5 times, working the last sc in the top of the beg ch-4. (6 sc, 5 ch-5 arches)
The ch-5 arches are longer than the ch-3 gaps beneath them, so they bow into the round open loops along the bottom of the tier. Fasten off.
Checkpoint: 1.75 in (4.4 cm) wide, 1.5 in (3.8 cm) tall.
Tier 2
Number the 6 sc of Row 3 from 1 to 6, starting at either edge. The row is symmetrical, so either edge works. You work Tier 2 into sc 2 through sc 5 only. That leaves the outer arches free so they flare past the top of the new tier.
Row 4: Join sage green with a sl st in sc 2. Ch 3 (counts as dc), ch 2, dc in the same sc (first V-st made). Then [ch 2, V-st in next sc] 3 times. Turn. (4 V-sts = 8 dc; 7 ch-2 sps: 4 inside the V-sts + 3 between them)
Row 5: Ch 4 (counts as tr), skip the first ch-2 sp. Then [ch 3, tr in next dc] 7 times, working the last tr in the 3rd ch of the beg ch-3. Turn. (8 tr, 7 ch-3 sps)
Row 6 (arch row): Ch 1, sc in the first tr. Then [ch 5, sc in next tr] 7 times. (8 sc, 7 ch-5 arches) Fasten off.
Checkpoint: 2.5 in (6.4 cm) wide, 2.5 in (6.4 cm) tall in total. Tier 2 should be 0.75 in (1.9 cm) wider than Tier 1, which means each side steps out by 3/8 in (1.0 cm).
Tier 3
Number the 8 sc of Row 6 from 1 to 8. You work Tier 3 into sc 2 through sc 7 only. The two center sc each get a single dc instead of a V-st. That keeps the bottom tier from growing faster than the two tiers above it.
Row 7: Join sage green with a sl st in sc 2. Ch 3 (counts as dc), ch 2, dc in the same sc (V-st made). Ch 2, V-st in sc 3. Ch 2, dc in sc 4. Ch 2, dc in sc 5. Ch 2, V-st in sc 6. Ch 2, V-st in sc 7. Turn. (4 V-sts + 2 single dc = 10 dc; 9 ch-2 sps: 4 inside the V-sts + 5 between the worked sc)
Row 8: Ch 4 (counts as tr), skip the first ch-2 sp. Then [ch 3, tr in next dc] 9 times, working the last tr in the 3rd ch of the beg ch-3. Turn. (10 tr, 9 ch-3 sps)
Row 9 (arch row): Ch 1, sc in the first tr. Then [ch 5, sc in next tr] 9 times. (10 sc, 9 ch-5 arches) Fasten off.
Checkpoint: 3.25 in (8.3 cm) wide, 3.75 in (9.5 cm) tall in total.
Tier logic: The arch counts are 5, 7, and 9, and the widths are 1.75 in, 2.5 in, and 3.25 in (4.4 cm, 6.4 cm, 8.3 cm). Each tier adds 2 arches and 0.75 in (1.9 cm), which gives you the even triangular outline.
Trunk
Number the 10 sc of Row 9 from 1 to 10. Sc 5 and sc 6 are the center pair, with the middle (5th) arch between them.
Row T1: Join sage green with a sl st in sc 5. Ch 4 (counts as tr), ch 2, tr in sc 6. Leave the middle arch free. Turn. (2 tr, 1 ch-2 sp)
This row makes the first open window of the trunk.
Row T2: Ch 4 (counts as tr), ch 2, tr in the top of the beg ch-4. Turn. (2 tr, 1 ch-2 sp)
This row makes the second window.
Row T3: Ch 1, sc in the first tr, 2 sc in the ch-2 sp, sc in the top of the beg ch-4. (4 sc)
This row closes the bottom of the trunk. Fasten off.
Checkpoint: The trunk is 0.5 in (1.3 cm) wide and adds 0.75 in (1.9 cm) below Tier 3, for a total height of 4.5 in (11.4 cm). Weave in the green ends now, running them along the spokes so they disappear into the lace.
Border: Cream Scallop Edging
You work the edging separately along the arch row of each tier (Rows 3, 6, and 9). Every arch was left free by the tier below it, so each one is open to work into.
Border gauge: One scallop over one ch-5 arch sits about 1/8 in (0.3 cm) beyond the green arch. Seven stitches is the right fill for a ch-5 arch. Five stitches would pull the arch flat, and nine would make it ruffle.
Scallop: (2 sc, hdc, dc, hdc, 2 sc) in the ch-5 arch. (7 sts per scallop)
Tier 1 edging (Row 3): With the RS facing, join cream with a sl st in sc 1. Then [scallop in next arch, sl st in next sc] 5 times. Fasten off. (5 scallops = 35 sts, plus 6 sl sts)
Tier 2 edging (Row 6): With the RS facing, join cream with a sl st in sc 1. Then [scallop in next arch, sl st in next sc] 7 times. Fasten off. (7 scallops = 49 sts, plus 8 sl sts)
Tier 3 edging (Row 9): With the RS facing, join cream with a sl st in sc 1. Then [scallop in next arch, sl st in next sc] 9 times. Fasten off. (9 scallops = 63 sts, plus 10 sl sts)
Where the next tier or the trunk is already attached to an sc, work the sl st through that same sc. On Tier 3, the middle scallop goes into the 5th arch, between the two trunk legs.
Why the math works: Each tier gets exactly one scallop per arch and one sl st per sc. The sc count is always the arch count plus 1, so the edging starts and ends neatly at the outer tips. The outermost scallops add 1/8 in (0.3 cm) at each side, so Tier 3 grows from 3.25 in (8.3 cm) to 3.5 in (8.9 cm). The height stays at 4.5 in (11.4 cm) because the trunk is still the lowest point.
Hanging loop: Join cream with a sl st through the open top of the ring. Ch 30, then sl st in the ring again. Fasten off and knot the two cream ends together on the back. The loop hangs about 1.5 in (3.8 cm) above the treetop.
Tip: Leave cream tails of about 4 in (10.2 cm) so you can weave them back through the scallops without the ends showing on the green spokes.
Final Blocking
- Weave in all remaining ends, but leave them uncut for now.
- Lightly spritz the ornament with water until it is damp, not soaked.
- Lay it RS up on the mat and pin the top ring first.
- Pin the bottom center of the trunk so the total height is 4.5 in (11.4 cm).
- Pin the outer scallop tips of Tier 3 to 3.5 in (8.9 cm) wide, 1.75 in (4.4 cm) from the center line on each side.
- With the edging included, pin the outer tips of Tier 2 to 2.75 in (7.0 cm) wide and Tier 1 to 2.0 in (5.1 cm) wide.
- Pin each arch and scallop into a round curve, and straighten the spokes so they run in clean lines.
- For a crisp ornament, spray with starch or brush on diluted stiffener. Let it dry completely.
- Unpin the ornament and trim the ends close.
Final Quality-Control Checklist
- Measures 4.5 in (11.4 cm) tall and 3.5 in (8.9 cm) wide, not counting the loop
- Tiers have 5, 7, and 9 arches
- Each tier steps out evenly on both sides
- All spokes run in straight lines from row to row
- Every arch has a full cream scallop of 7 sts
- The trunk is centered, with two open windows and a closed bottom
- The hanging loop is secure and centered on the ring
- No ends are visible from either side
Troubleshooting
The tiers lean to one side: You probably joined in the wrong sc. Recount from the edge. Tiers 2 and 3 always start in sc 2.
The arches look flat, not round: Your chains are too tight, or one ch is missing. Recount the ch-5s and loosen your chain tension.
The scallops ruffle: Your hdc or dc are too tall. Use a smaller hook for the edging only, or replace the dc with an hdc.
The tree curls: Your tension is tight. Block with starch, and go up a hook size on the next ornament.
The trunk is off-center: Check that you used sc 5 and sc 6 of Row 9, with the 5th arch between them.
The spokes zigzag: You probably worked a tr into a ch-sp instead of into the dc. Every tr goes into a dc, never into a space.
Care
Hand wash in cool water, press out the excess water in a towel, and re-block flat to dry. Store the ornament flat or hanging, away from heavy decorations that could crush the arches.
Final Notes
The measurement chain is simple. Tier 1 sets your gauge at 1.75 in (4.4 cm). Each tier after it adds 2 arches and 0.75 in (1.9 cm) of width. The trunk brings the height to 4.5 in (11.4 cm), and the cream scallops add 1/8 in (0.3 cm) at each side for a finished width of 3.5 in (8.9 cm). Measure at every checkpoint as you go, and your tree will come out even and ready to hang.
Happy crocheting!