

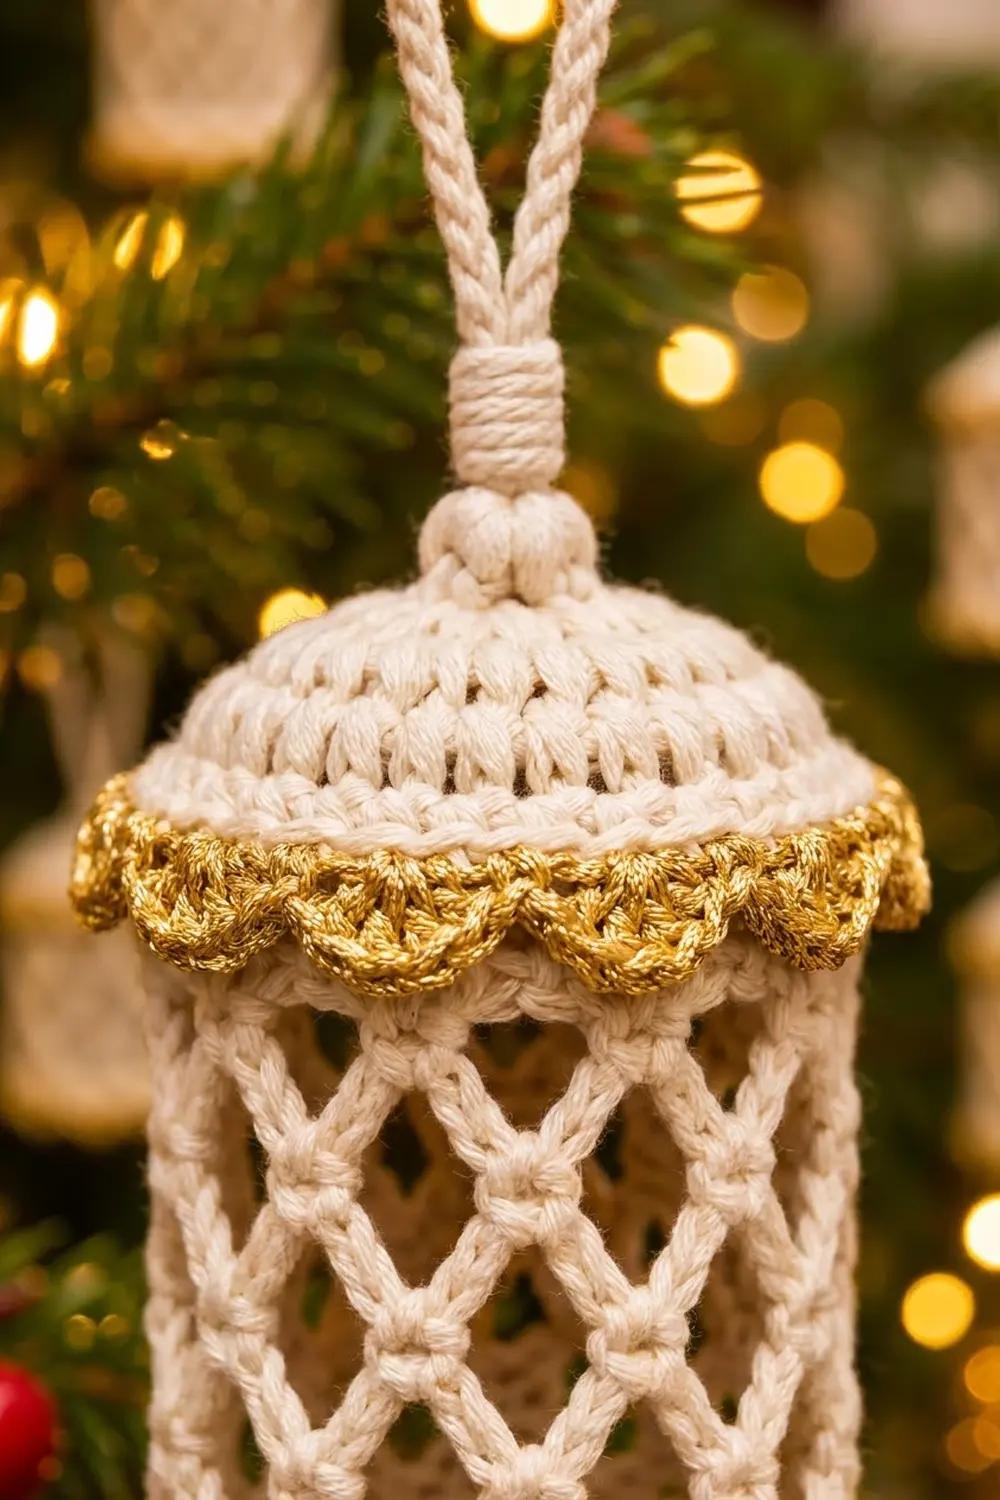
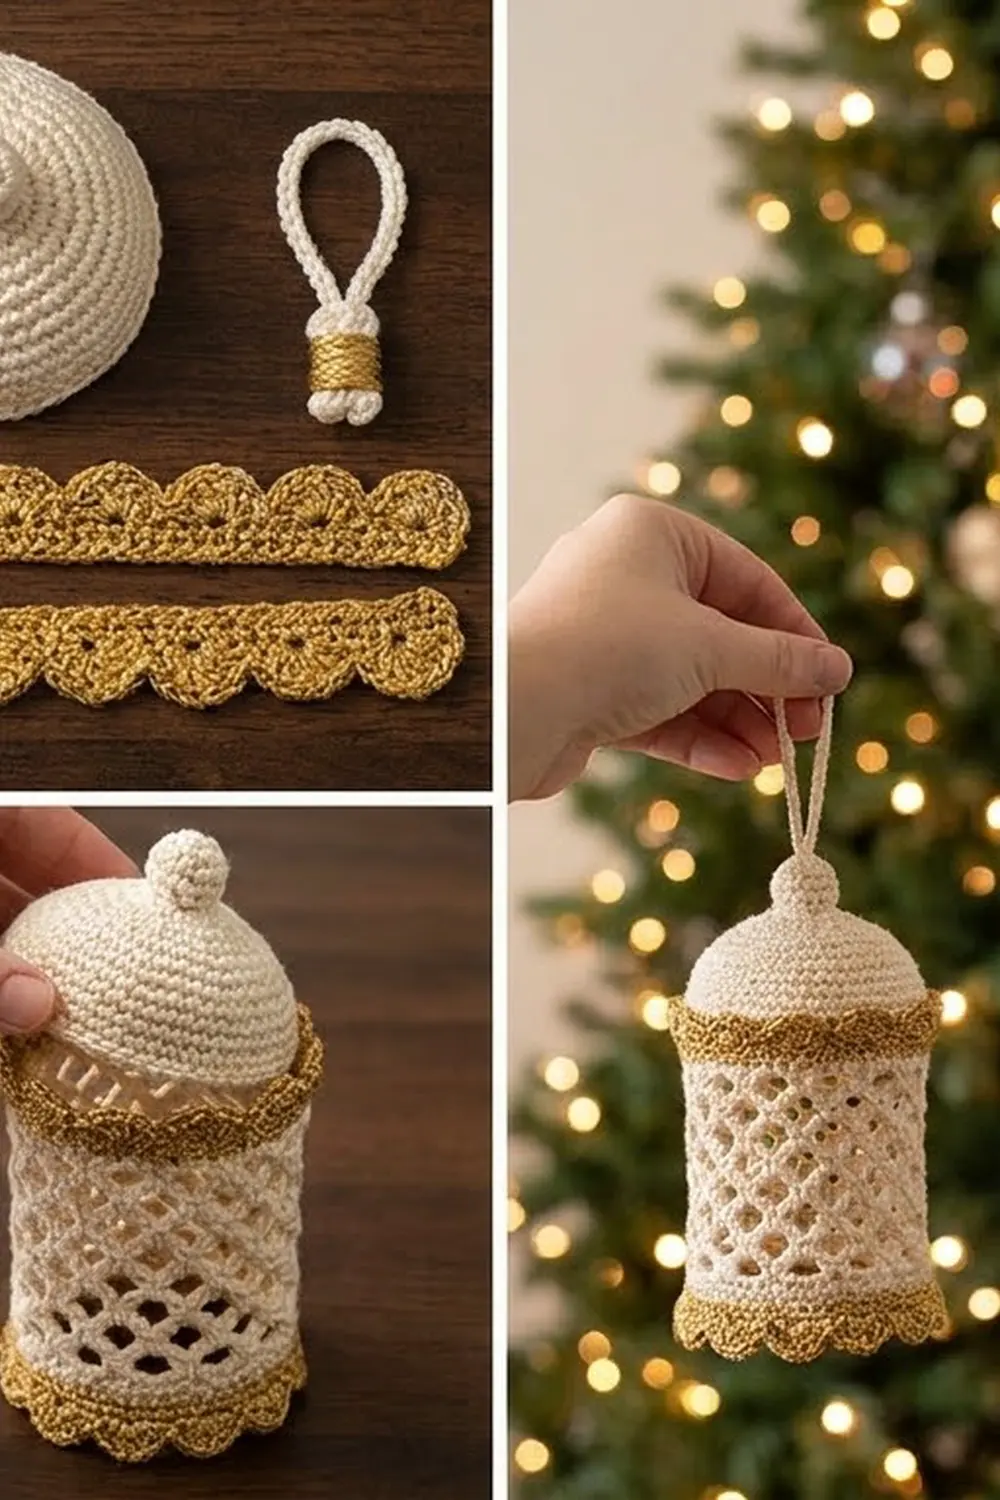
This little lantern ornament has an airy diamond lattice body, a soft domed cap with a round knob on top, and two bands of shiny gold scallops. On the tree, the lights glow through the open net, so it looks like a tiny lit lantern.
The design uses two colors: warm cream cotton for the body, cap, and hanging loop, and metallic gold for the scalloped trims. The style is classic and a little vintage, and it suits a natural, gold-and-red holiday theme. All instructions use US crochet terms.
The finished lantern is about 4.5 in (11.4 cm) tall without the loop and about 6.5 in (16.5 cm) tall with it. The body is about 1.7 in (4.3 cm) across, and about 2.25 in (5.7 cm) across the gold scallops.
Here is how it comes together. You crochet a flat lattice panel and seam it into a tube. Then you crochet a dome cap in the round, two gold scalloped strips, and a slip-stitch cord. A cream edging round on each open end of the tube sets the count at 32 stitches, and every other piece is sized to match that number.
Finished Size and Construction
- Finished size: 4.5 in (11.4 cm) tall without the loop; 6.5 in (16.5 cm) with the loop
- Body diameter: about 1.7 in (4.3 cm); about 2.25 in (5.7 cm) across the scallops
- Skill level: Intermediate (simple stitches, careful assembly)
- Terminology: US
- Yarn weight: Fine (#2) sport-weight cotton and sport-weight metallic
- Hook: 2.75 mm (C-2)
- Number of pieces: 5 (1 lattice panel, 1 cap, 2 gold trims, 1 hanging loop)
- Layout: pieces stacked vertically around one tube
- Lattice panel, flat: 5.5 in (14.0 cm) wide x 2.5 in (6.4 cm) tall
- Tube before trims: 5.3 in (13.5 cm) around x 2.75 in (7.0 cm) tall
- Border (gold trim) depth: about 0.5 in (1.3 cm); the scallops hang about 0.25 in (0.6 cm) below the base
Materials
Use a smooth, mercerized sport-weight cotton for the cream pieces. It shows the lattice clearly and holds its shape after blocking. For the gold, choose a metallic yarn that also gives 6 sc per inch with your hook. A thin metallic thread used on its own will make the trims too short.
- Cream (main color): 15 g, about 50 m (55 yd)
- Gold metallic (trim): 5 g, about 20 m (22 yd)
Tools:
– 2.75 mm (C-2) crochet hook
– Tapestry needle
– 4 stitch markers
– Scissors
– Blocking mat and rustproof pins
– Spray starch or fabric stiffener (optional, but helpful)
– A round object about 1.7 in (4.3 cm) across, such as a spice jar, to block the tube over
All quantities include a margin of about 20% for your gauge check and sewing tails.
Abbreviations (US Terms)
- ch – chain
- sl st – slip stitch
- sc – single crochet
- dc – double crochet
- sc2tog – single crochet 2 together
- inc – 2 sc in the same stitch
- BLO / FLO – back loop only / front loop only
- MR – magic ring
- sk – skip
- st(s) – stitch(es)
- rnd – round
Special stitch – Shell: 5 dc in the same stitch.
Gauge and Checkpoints
Gauge: 24 sc and 24 sc rows = 4 in (10.2 cm), which is 6 sc per inch.
The lattice panel is your test piece. Make it first and check it before you start anything else.
- After Row 1: 33 sc measure 5.5 in (14.0 cm).
- After Row 8: the panel is about 2.3 in (5.8 cm) tall when gently stretched to full height.
- After Row 9: the panel is 5.5 in (14.0 cm) x 2.5 in (6.4 cm). Anything from 2.4 to 2.6 in (6.1–6.6 cm) tall is fine.
- After cap Rnd 9: the flat disc is about 1.75 in (4.4 cm) across.
- After each trim’s Row 1: 33 sc measure 5.5 in (14.0 cm).
If Row 1 is wider than 5.75 in (14.6 cm), your gauge is loose: switch to a 2.5 mm hook. If it is narrower than 5.25 in (13.3 cm), switch to a 3.0 mm hook. Never change the stitch counts, because the whole pattern depends on 32 stitches around.
Lattice Panel (Cream, Make 1)
The panel is a ch-5 diamond net worked flat, with a solid sc row at each end.
Foundation: Ch 34.
Row 1: Sc in 2nd ch from hook and in each ch across. (33 sc)
Row 2 (net set-up): Ch 1, turn. Sc in first sc, *ch 5, sk 3 sc, sc in next sc; repeat from * 7 more times. (8 ch-5 loops, 9 sc)
Row 3 (half row): Ch 5 (counts as dc + ch 2), turn. Sc in first ch-5 loop, *ch 5, sc in next ch-5 loop; repeat from * 6 more times, ch 2, dc in last sc. (7 ch-5 loops, 2 half loops, 8 sc)
Row 4 (full row): Ch 1, turn. Sc in first dc, *ch 5, sc in next ch-5 loop; repeat from * 6 more times, ch 5, sc in 3rd ch of turning ch. (8 ch-5 loops, 9 sc)
Rows 5–8: Repeat Rows 3 and 4 two more times. Row 8 is a full row. (8 ch-5 loops, 9 sc)
Each sc worked into the middle of a loop pinches it and forms the small “knot” where the diamonds cross.
Row 9 (closing row): Ch 1, turn. Sc in first sc, *3 sc in next ch-5 loop, sc in next sc; repeat from * 7 more times. (9 sc worked into sc + 24 sc worked into loops = 33 sc)
Fasten off and leave a 12 in (30.5 cm) tail for the seam.
Checkpoint: 5.5 in (14.0 cm) x 2.5 in (6.4 cm), with 4 rows of diamonds between the solid rows.
Cap (Cream, Make 1)
Work in joined rounds: at the end of each round, sl st to the first st, then ch 1. The ch 1 does not count as a stitch.
Knob:
Rnd 1: 6 sc in MR. (6)
Rnd 2: Inc in each st around. (12)
Rnd 3: Sc in each st around. (12)
Rnd 4: Sc2tog 6 times. (6) Before the opening closes, push a pinch of cream scrap yarn into the knob.
Dome:
Rnd 5: Inc in each st around. (12)
Rnd 6: *Sc in next st, inc; repeat from * 5 more times. (18)
Rnd 7: *Sc in next 2 sts, inc; repeat from * 5 more times. (24)
Rnd 8: Sc in each st around. (24)
Rnd 9: *Sc in next 2 sts, inc; repeat from * 7 more times. (32)
Rnds 10–12: Working in BLO, sc in each st around. (32) These rounds make the horizontal ridges and turn the dome downward.
Rnd 13 (rim): Sc in each st around, through both loops. (32)
Fasten off and leave a 14 in (35.6 cm) tail. Checkpoint: the cap is about 1.5 in (3.8 cm) tall including the knob, and the rim is 5.3 in (13.5 cm) around.
Gold Scalloped Trim (Gold, Make 2)
Foundation: Ch 34.
Row 1: Sc in 2nd ch from hook and in each ch across. (33 sc)
Row 2: Ch 1, turn. Sc in first sc, *sk 1 sc, shell in next sc, sk 1 sc, sc in next sc; repeat from * 7 more times. (8 shells, 9 sc = 49 sts)
Fasten off and leave a 10 in (25.4 cm) tail. Each scallop uses 4 base stitches, which is about 0.67 in (1.7 cm).
Hanging Loop (Cream, Make 1)
Foundation: Ch 31.
Row 1: Sl st in the back bump of the 2nd ch from hook and in each back bump across. (30 sl st)
Fasten off. The cord is about 4.5 in (11.4 cm) long. Fold it in half. Take a 12 in (30.5 cm) strand of cream and wrap it tightly around both ends 6 times, close to the cut ends, to make a 0.25 in (0.6 cm) collar. Knot it and keep the tails for sewing.
Make All Pieces
Before you assemble, check that you have:
- Cream: 1 lattice panel, 1 cap, 1 hanging loop
- Gold: 2 scalloped trims
Stacking layout, top to bottom:
        [ Hanging loop ]
        [ Cap knob     ]
        [ Cap dome     ]  Rnd 13 = 32 sts
        [ Gold trim 1  ]  scallops point down
        [ Lattice tube ]  32 sts top / 32 sts bottom
        [ Gold trim 2  ]  scallops point down
Joining
1. Seam the tube. Fold the panel right side out so the two short edges meet. Using the tail, whipstitch the row ends together in matching pairs: Row 1 to Row 1, Row 2 to Row 2, and so on through Row 9 (9 pairs). Keep each stitch snug, but not so tight that the seam puckers.
2. Top edging round. Join cream in the last sc of Row 9, next to the seam. Ch 1, sc2tog over that sc and the first sc of Row 9 on the other side of the seam, then sc in each of the next 31 sts. Sl st to the first st. (31 sc + 1 sc2tog = 32 sts) Fasten off.
3. Bottom edging round. Work the same way into the free loops of the foundation chain under Row 1: sc2tog across the seam, then sc in each of the next 31. (32 sts) Fasten off.
Size checkpoint: each edging round measures 5.3 in (13.5 cm) around, and the tube is about 2.75 in (7.0 cm) tall.
4. Close the trims into rings. For each gold strip, lay the first and last sc of Row 1 on top of each other and sew them together so they act as one stitch. That leaves 32 base positions per ring, matching the 32 stitches of the tube edging.
5. Attach the cap. Match each of the 32 stitches of cap Rnd 13 to one of the 32 stitches of the top edging round. Whipstitch through the back loops of the edging round only, so the front loops stay free for the trim.
6. Attach the hanging loop. Use the strand tails to sew the loop’s collar to the top of the knob, going through Rnd 1 several times. Hide the ends inside the knob.
Border (Gold Scalloped Trims)
The two gold rings are the border. Their gauge matches the body at 6 sc per inch, so 32 positions measure 5.3 in (13.5 cm).
Top trim: Slide one ring over the cap so the scallops point down over the lattice. Line up the trim’s foundation chain with the free front loops of the top edging round, with the trim’s join at the tube’s seam. Whipstitch 1 foundation stitch to 1 front loop all the way around (32 to 32). The cap rim sits just over the trim’s straight edge.
Bottom trim: Place the second ring so its Row 1 lies over the bottom edging round, with the scallops pointing down. Whipstitch 1 trim stitch to 1 edging stitch (32 to 32). The shells hang about 0.25 in (0.6 cm) below the base.
Why the math works: Each trim has 1 + 8 × 4 = 33 base stitches. When the two end stitches overlap, 32 positions are left, and the 8 shells sit exactly 4 stitches apart, including across the join. The tube edging also has 32 stitches, so the trim lies flat without ruffling or pulling. Each side of the flattened lantern shows 4 scallops over 16 stitches.
Final Blocking
- Lightly mist the whole ornament, or dip it in water and press out the excess in a towel.
- Slide the tube over your round blocking form, about 1.7 in (4.3 cm) across.
- Ease the lattice upward until the tube is 2.75 in (7.0 cm) tall, and center each diamond.
- Shape the cap into a smooth dome, and roll the knob round between your fingertips.
- Pin each gold scallop so it curves evenly downward.
- For a firmer lantern, spray it with starch or brush on fabric stiffener.
- Let it dry completely, at least 12 hours, before you take it off the form.
Final Quality-Control Checklist
- The tube measures 5.3 in (13.5 cm) around and 2.75 in (7.0 cm) tall.
- All 4 rows of diamonds are open and even.
- The side seam is straight and turned to the back.
- The cap is centered, and all 32 stitches are attached.
- Each trim has 8 scallops, evenly spaced and pointing down.
- The loop stands upright, and the collar is sewn tight to the knob.
- All ends are woven in and trimmed.
- The total height is 4.5 in (11.4 cm) without the loop.
Troubleshooting
- The lattice looks squashed: Block it taller. If that doesn’t fix it, remake the panel with ch-6 loops. Row 9 still uses 3 sc per loop, so the count stays at 33.
- The diamonds lean: Make sure you work the turning ch-5 and the final dc in every half row.
- The trim ruffles: Your gold yarn is thicker than your cotton. Use a smaller hook for the trims only.
- The trim is too short: Your metallic is too thin. Hold it double, or use a larger hook.
- The cap is too flat: Your BLO rounds are loose. Tighten your tension, or add one more plain round of 32.
- The knob is floppy: Add a little more stuffing before Rnd 4 closes.
- The ornament tilts when it hangs: Re-sew the loop directly over Rnd 1.
Care
Hand wash in cool water with mild soap, roll it in a towel to remove water, and reshape it over a form to dry. Store it in a box so the scallops and loop don’t get crushed.
Final Notes
The whole lantern is built around one number. At 6 sc per inch, 33 sc make a 5.5 in (14.0 cm) panel. The decrease at the seam turns that into 32 stitches, or 5.3 in (13.5 cm), around each open edge. The cap ends at 32 stitches and each gold ring overlaps to 32 positions, so every piece lines up stitch for stitch.
Check your gauge on the panel, keep your counts exact, and block over a form. You’ll end up with a 4.5 in (11.4 cm) lantern that hangs straight and catches the tree lights. After the first one, a matching set goes quickly.
Happy crocheting!