

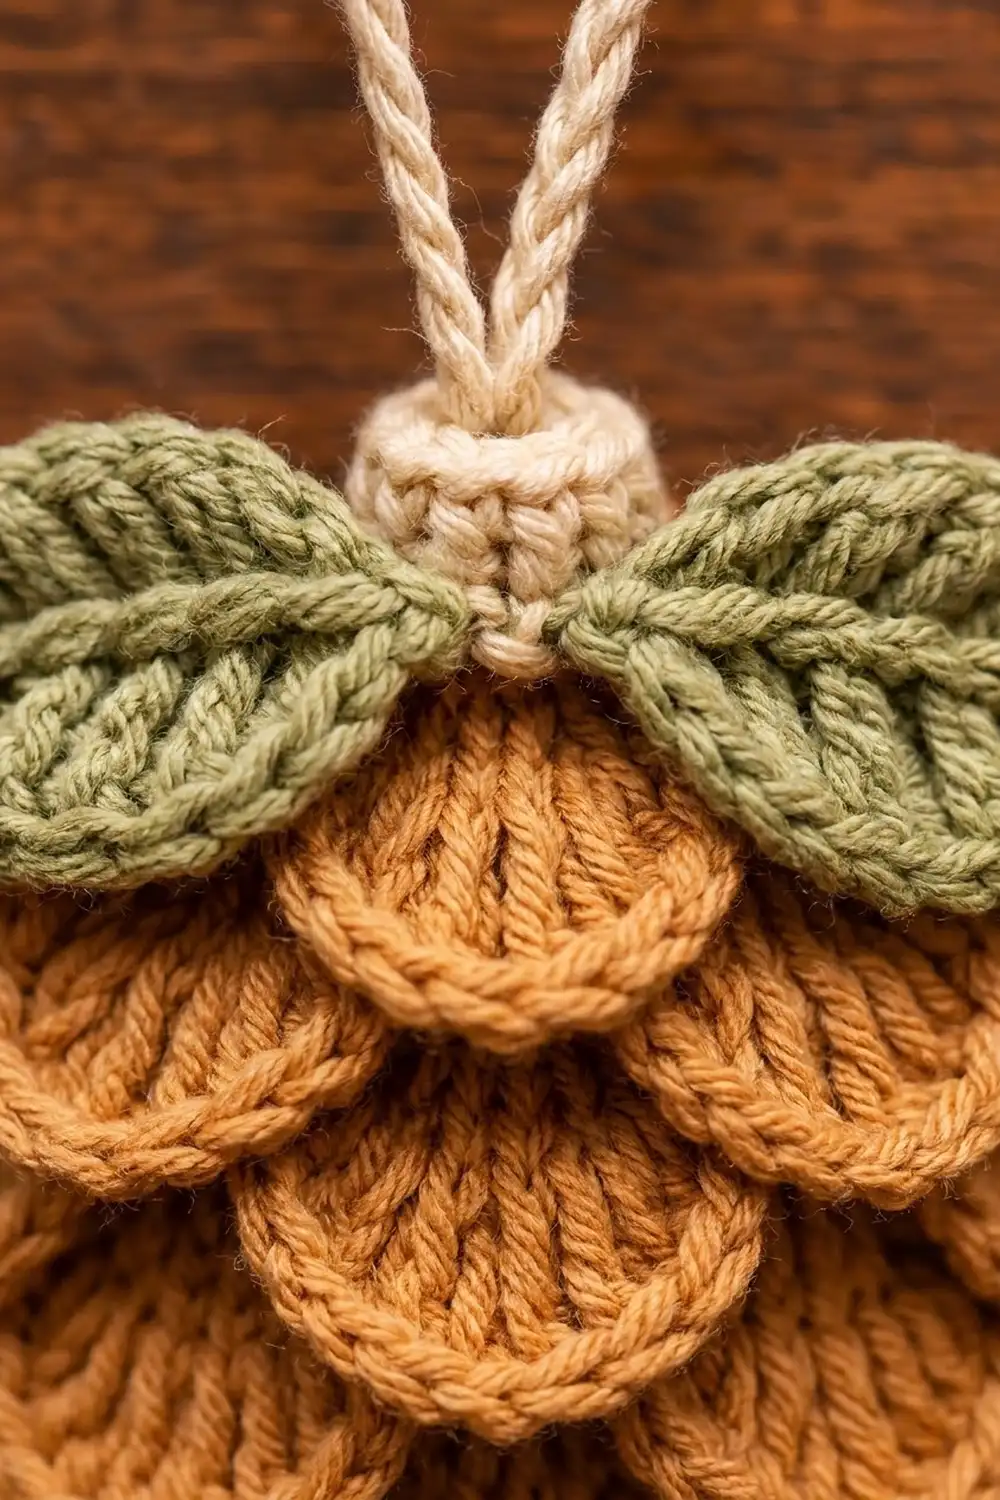
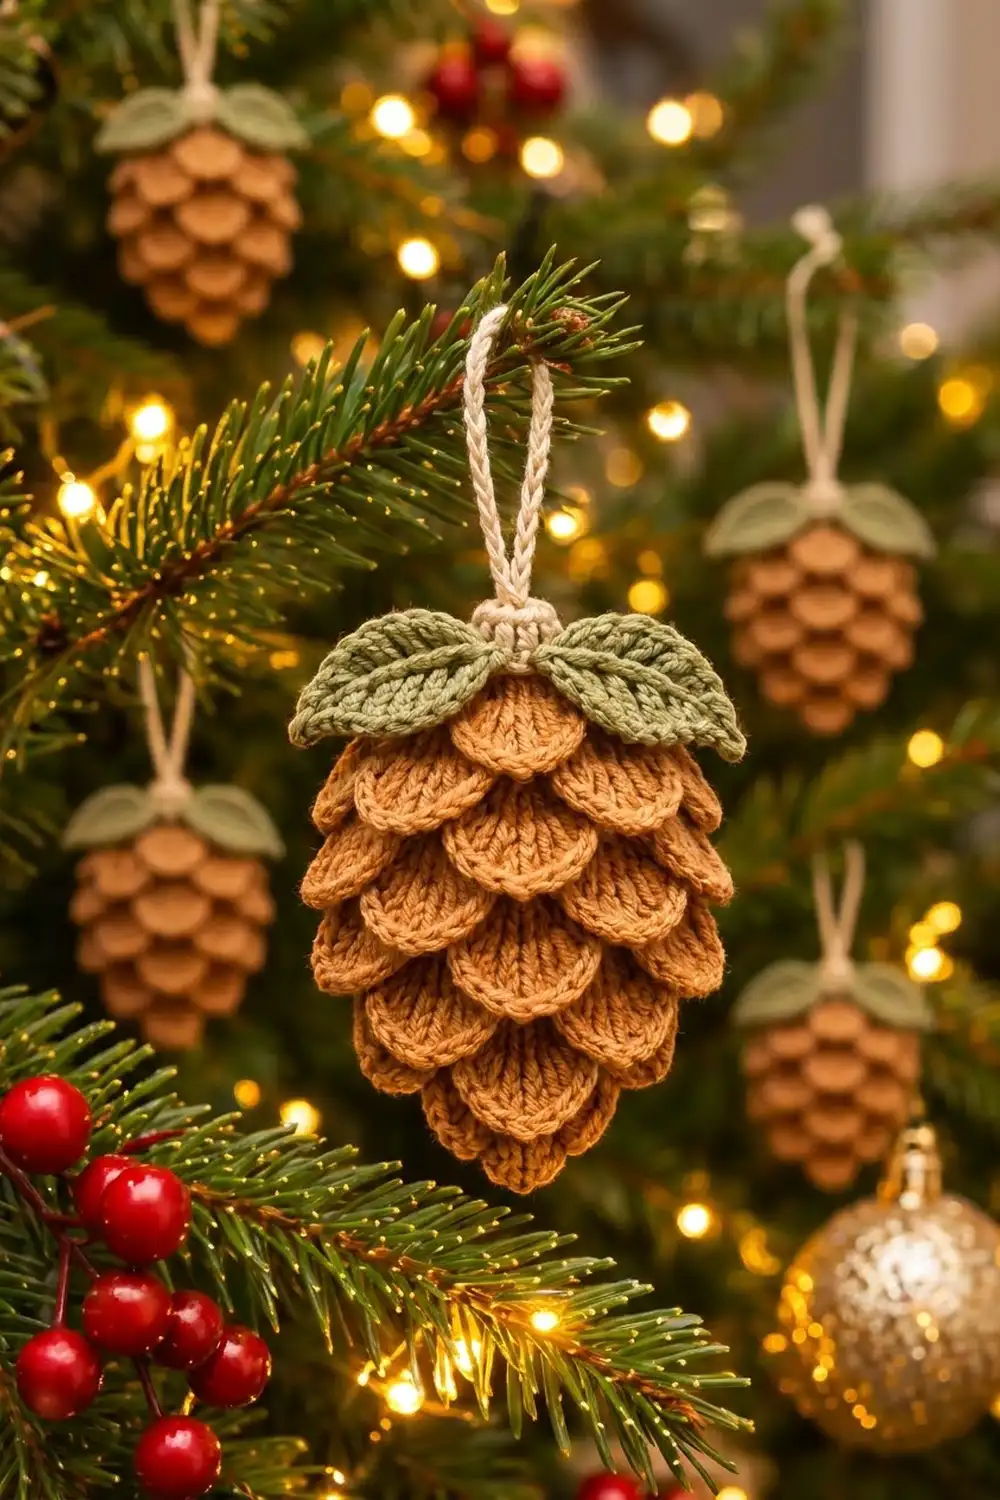
This flat pinecone ornament is covered in rows of overlapping, fan-shaped scales in warm caramel tan. Two sage-green leaves and a small cream cap sit at the top, with a cream cord loop for hanging.
It uses three colors: caramel tan for the back panel and scales, sage green for the leaves, and cream for the cap and loop. The style is rustic woodland Christmas. Each scale has double crochet ribs that fan out and a rolled single crochet rim, so it casts a soft shadow on the row below.
All instructions use US crochet terms. The finished ornament is about 4.25 in (10.8 cm) wide across the leaves and 5 in (12.7 cm) tall, not counting the loop. The loop adds 2.5 in (6.4 cm).
Construction overview: you crochet a flat oval back panel and give it a two-round border. Next you make seven short scale strips and sew them onto the panel from the bottom up, so each row overlaps the one below. The leaves, cap and loop go on last.
Finished Size and Construction
- Finished size: 4.25 in (10.8 cm) wide × 5 in (12.7 cm) tall, excluding loop
- Skill level: Intermediate
- Terminology: US
- Yarn weight: DK (#3)
- Hook: 3.5 mm (E-4)
- Number of pieces: one single ornament, made from 1 back panel, 7 scale strips, 2 leaves, 1 cap and 1 loop
- Layout: 7 staggered scale rows with 1-2-3-4-5-4-3 scales, from bottom to top (22 scales total)
- Panel before border: 2.5 in (6.4 cm) × 3.75 in (9.5 cm)
- Panel after border: 3 in (7.6 cm) × 4.25 in (10.8 cm)
- Border depth: 0.25 in (0.6 cm) per edge
Materials
Use a smooth DK cotton or cotton blend. Cotton gives crisp scale rims and blocks well. Fuzzy yarns hide the rib texture, so avoid them.
- Caramel tan: 18 g (41 m), for the panel and scales
- Sage green: 4 g (9 m), for the leaves
- Cream: 3 g (7 m), for the cap and loop
The quantities include a margin of about 20 percent for swatching and sewing tails.
Tools:
– 3.5 mm (E-4) hook
– Tapestry needle
– Stitch markers (2)
– Scissors
– Ruler
– Rust-proof pins and a blocking mat
– Pinch of scrap yarn for the cap
Abbreviations (US Terms)
- ch: chain
- sl st: slip stitch
- sc: single crochet
- hdc: half double crochet
- dc: double crochet
- sk: skip
- BLO: back loop only
- inc: 2 sc in the same stitch
- sp: space
- rev sc: reverse single crochet (crab stitch). Work sc from left to right (right-handed): insert the hook into the next stitch to the right, yarn over, pull up a loop, then yarn over and pull through both loops.
Special stitch – Scale fan: 7 dc in the same stitch, with 1 stitch skipped on each side. This makes a half-circle fan about 0.8 in (2.0 cm) wide.
Gauge and Checkpoints
Gauge: 20 sc and 22 rows = 4 in (10.2 cm).
First, make one test piece: Strip A (1 scale, see below). It should be 1 in (2.5 cm) wide across Row 1 and 0.75 in (1.9 cm) deep from the top edge to the scale tip. If it matches, keep it. It becomes the bottom row of the pinecone.
Checkpoints:
– Panel after Round 4: 1.5 in (3.8 cm) × 2.6 in (6.6 cm)
– Panel after Round 7: 2.5 in (6.4 cm) × 3.75 in (9.5 cm)
– Panel after the border: 3 in (7.6 cm) × 4.25 in (10.8 cm)
– Strip E (5 scales): 4.2 in (10.7 cm) wide
Too big? Use a 3.25 mm (D-3) hook. Too small? Use a 3.75 mm (F-5) hook. If the scale is the right width but too long, your dc are too tall. Pull up a shorter first loop on each dc.
Back Panel
Use caramel tan. The panel is an oval worked in joined rounds around a starting chain, which runs vertically. Each round adds 3 stitches at each curved end, and the 6 stitches on each straight side never change.
Ch 9.
Round 1: 3 sc in 2nd ch from hook (end A), sc in next 6 ch, 3 sc in last ch (end B). Working along the opposite side of the chain, sc in next 6 ch. Join with sl st to first sc. (18 sc: 3 per end, 6 per side)
Place a marker in the center stitch of each end, and move the markers up as you work.
Round 2: Ch 1, inc in each of next 3 sts, sc in next 6, inc in each of next 3 sts, sc in next 6. Join. (24 sc: 6 per end, 6 per side)
Round 3: Ch 1, [sc in next st, inc] 3 times, sc in next 6, [sc in next st, inc] 3 times, sc in next 6. Join. (30 sc: 9 per end, 6 per side)
Round 4: Ch 1, [sc in next 2, inc] 3 times, sc in next 6, [sc in next 2, inc] 3 times, sc in next 6. Join. (36 sc: 12 per end, 6 per side)
Checkpoint: 1.5 in (3.8 cm) × 2.6 in (6.6 cm).
Round 5: Ch 1, [sc in next 3, inc] 3 times, sc in next 6, [sc in next 3, inc] 3 times, sc in next 6. Join. (42 sc: 15 per end, 6 per side)
Round 6: Ch 1, [sc in next 4, inc] 3 times, sc in next 6, [sc in next 4, inc] 3 times, sc in next 6. Join. (48 sc: 18 per end, 6 per side)
Round 7: Ch 1, [sc in next 5, inc] 3 times, sc in next 6, [sc in next 5, inc] 3 times, sc in next 6. Join. (54 sc: 21 per end, 6 per side)
Checkpoint: 2.5 in (6.4 cm) × 3.75 in (9.5 cm). Don’t fasten off. Work the Border (see below) now, then come back to make the strips.
Scale Strips
Use caramel tan. Each strip has 3 rows. Row 1 is the flat top edge that gets sewn down. Row 2 makes the fans. Row 3 adds the rolled rim. For a strip with n scales:
Ch (4n + 2).
Row 1: Sc in 2nd ch from hook and in each ch across. Turn. (4n + 1 sc)
Row 2: Ch 1, sc in first sc, sk 1 sc, 7 dc in next sc, sk 1 sc, sc in next sc; repeat from * for a total of n times. Turn. (8n + 1 sts: n fans of 7 dc, plus n + 1 sc)*
Row 3 (rim): Ch 1, sl st in first sc, sc in next 2 dc, inc in each of next 3 dc, sc in next 2 dc, sl st in next sc; repeat from * for a total of n times. (11n + 1 sts: 10 sc per scale, plus n + 1 sl st)*
Fasten off, leaving an 8 in (20.3 cm) tail.
Each fan uses all 7 of its dc (2 + 3 + 2) and gets 10 rim sc (2 + 6 + 2). The 3 extra rim stitches around the curve make the edge roll forward, which creates the raised scale lip.
| Strip | n | Chain | Row 1 | Row 2 | Row 3 | Width | Make |
|---|---|---|---|---|---|---|---|
| A | 1 | 6 | 5 | 9 | 12 | 1 in (2.5 cm) | 1 |
| B | 2 | 10 | 9 | 17 | 23 | 1.8 in (4.6 cm) | 1 |
| C | 3 | 14 | 13 | 25 | 34 | 2.6 in (6.6 cm) | 2 |
| D | 4 | 18 | 17 | 33 | 45 | 3.4 in (8.6 cm) | 2 |
| E | 5 | 22 | 21 | 41 | 56 | 4.2 in (10.7 cm) | 1 |
That gives 7 strips with 22 scales in total. Every strip is 0.75 in (1.9 cm) deep.
Leaves (Make 2)
Use sage green.
Ch 10.
Round 1: Sl st in 2nd ch from hook, sc in next ch, hdc in next ch, dc in next 3 ch, hdc in next ch, sc in next ch, (sc, ch 2, sc) in last ch. Working along the opposite side of the chain: sc in next ch, hdc in next ch, dc in next 3 ch, hdc in next ch, sc in next ch, sl st in next ch. Ch 2, sl st in first sl st. (18 sts plus 2 ch-2 tips)
The far ch-2 tip is the leaf point, and the starting tip is the stem end.
Vein: Work surface sl sts along the center chain line toward the point, then fasten off. Each leaf measures about 1.8 in (4.6 cm) × 0.9 in (2.3 cm).
Cap
Use cream.
Round 1: 6 sc in a magic ring. Join. (6 sc)
Round 2: Ch 1, inc in each st. Join. (12 sc)
Round 3: Ch 1, sc BLO in each st. Join. (12 sc) This makes the top ridge.
Round 4: Ch 1, sc in each st. Join. (12 sc)
Round 5: Ch 1, [sc in next st, inc] 6 times. Join. (18 sc) This makes the flared rim.
Fasten off, leaving a 12 in (30.5 cm) tail. The cap is 0.75 in (1.9 cm) across and 0.5 in (1.3 cm) tall.
Hanging Loop
Use cream. Ch 31. Sl st in the back bump of the 2nd ch from hook and in each ch across. (30 sl st) The cord is about 5 in (12.7 cm) long. Fold it in half to make a 2.5 in (6.4 cm) loop.
Assembly
Lay the bordered panel right side up. Measure every height from the bottom border edge, and center each strip side to side. Whipstitch along Row 1 of each strip, through the foundation chain and into the panel, and leave the fans free.
| Row | Strip | Top edge height |
|---|---|---|
| 1 | A | 0.5 in (1.3 cm) |
| 2 | B | 1.05 in (2.7 cm) |
| 3 | C | 1.6 in (4.1 cm) |
| 4 | D | 2.15 in (5.5 cm) |
| 5 | E | 2.7 in (6.9 cm) |
| 6 | D | 3.25 in (8.3 cm) |
| 7 | C | 3.8 in (9.7 cm) |
The strips are spaced 0.55 in (1.4 cm) apart and each is 0.75 in (1.9 cm) deep, so each one covers the top 0.2 in (0.5 cm) of the strip below and hides the seam. Neighboring strips differ by one scale, so when they’re centered the scales stagger by half a scale. Strip A hangs 0.25 in (0.6 cm) below the panel to form the tip.
Some strip ends overhang the panel. Tack each one to the back of the strip below with one small stitch.
Cap and loop: Thread both loop ends down through the cap’s magic ring and knot them inside. Stuff the cap lightly with scrap yarn. Sew its rim to the top center of the panel so it stands 0.5 in (1.3 cm) above the panel edge.
Leaves: Sew each stem end under the cap rim. Angle the leaves outward and slightly down, covering the panel’s top shoulders and the top of Row 7.
Border
Work the border right after panel Round 7, before you sew anything on. Use caramel tan.
Border gauge: each border round adds about 0.125 in (0.3 cm) per edge, so the two rounds together add 0.25 in (0.6 cm).
Border Round 1: Ch 1, [sc in next 6, inc] 3 times, sc in next 6, [sc in next 6, inc] 3 times, sc in next 6. Join. (60 sc: 24 per end, 6 per side)
Border Round 2: Ch 1, rev sc in each st around. Join. (60 rev sc: 24 per end, 6 per side) Fasten off and weave in the ends.
Why the math works: each curved end behaves like half of a flat sc circle. A full circle grows by 6 stitches per round, so each half grows by 3, which takes Round 7’s 21 end stitches to 24. Straight sides need no increases, so they stay at 6. Rev sc only rolls the edge and adds nothing, so Border Round 2 stays at 60. The panel now measures 3 in (7.6 cm) × 4.25 in (10.8 cm).
Final Blocking
- Mist the ornament with cool water until it’s damp.
- Lay it face up on the mat.
- Measure the height from the bottom scale tip to the top of the cap: it should be 5 in (12.7 cm).
- Pin Row 5’s outer scales out to a total width of 4.25 in (10.8 cm) across the leaves.
- Curve each scale rim slightly forward with a fingertip.
- Pin the leaf points and press the veins flat.
- Let it dry completely, which takes 6–8 hours.
- Unpin it and check that the loop hangs straight.
Final Quality-Control Checklist
- The border is 60 stitches with even rev sc
- 7 strips, with 1-2-3-4-5-4-3 scales from bottom to top
- Every fan has 7 dc and 10 rim sc
- Scales stagger by half a scale from row to row
- No panel shows between rows
- The bottom scale hangs 0.25 in (0.6 cm) below the panel
- The leaves match and their veins face up
- The cap is centered and the loop is knotted securely
- The ornament measures 4.25 in (10.8 cm) × 5 in (12.7 cm)
Troubleshooting
- Panel cups: you missed increases. Recount at the end markers.
- Panel ruffles: go down a hook size for the panel.
- Scales flip up: sew lower on Row 1 and steam the rims down.
- Gaps between rows: reduce the spacing to 0.5 in (1.3 cm).
- Flat fans: check that you skipped 1 sc on each side of every fan.
- Curling leaves: work the vein loosely and block the leaves pinned flat.
Care
Hand wash in cool water with mild soap, roll in a towel to remove water, and dry flat. Reshape the scale rims while the ornament is damp.
Final Notes
The measurement chain is short. Gauge of 20 sc = 4 in (10.2 cm) makes every 5-stitch scale repeat about 1 in (2.5 cm) wide. The panel measures 2.5 in (6.4 cm) × 3.75 in (9.5 cm) before the border and 3 in (7.6 cm) × 4.25 in (10.8 cm) after it. Seven strips spaced 0.55 in (1.4 cm) apart cover it, and the cap and the 0.25 in (0.6 cm) tip bring the height to 5 in (12.7 cm). Check each link in that chain and the pinecone will come out right.
Happy crocheting!