

The Willow Vein Leaf is a single openwork leaf with a raised cream midrib, nine pairs of side veins, and a sage green rope edge. The two colors keep it soft and natural. It looks good on its own as a coaster, a bookmark-style ornament, a gift-tag topper, or a wall accent.
The look is light and botanical. Cream ribs open out from a braided center vein like the veins of a real leaf. The open gaps between them let the background show through, and the rope edge keeps the outline sharp.
This pattern uses US crochet terms. The finished leaf measures 8.75 in (22.2 cm) long and 4.75 in (12.1 cm) wide after blocking.
Construction is simple. You make one foundation chain for the midrib, then work down one side and up the other, adding a chained rib after every third stitch. Next, you work a cream surface slip-stitch line along the center to raise the vein. Finally, three green rounds join the rib tips and finish the outline.
Finished Size and Construction
- Finished size: 8.75 in (22.2 cm) long × 4.75 in (12.1 cm) wide
- Skill level: Intermediate (working on both sides of a chain, reverse single crochet)
- Terminology: US
- Yarn weight: Worsted (#4), cotton or cotton blend
- Hook: 4.5 mm (US 7)
- Number of pieces: 1 (single motif)
- Layout: One vertical leaf, points at top and bottom
- Piece size before border: 7.5 in (19.1 cm) long × 3.5 in (8.9 cm) wide
- Border depth: 0.625 in (1.6 cm) on every side
Materials
Pick a smooth, mercerized or matte cotton in worsted weight. Cotton shows the ribs and the rope edge clearly and blocks crisply. Acrylic also works, but the leaf will be a little puffier and the points less sharp.
- Cream (Color A): 6 g, about 10 m (11 yd)
- Sage Green (Color B): 7 g, about 12 m (13 yd)
These amounts include roughly a 40% margin for gauge swatching and weaving in ends.
Tools:
- 4.5 mm (US 7) crochet hook
- Tapestry needle
- Stitch markers (2)
- Scissors
- Rust-proof pins and a blocking mat
- Spray bottle with clean water
- Ruler or tape measure
Abbreviations (US Terms)
- ch – chain
- sc – single crochet
- sl st – slip stitch
- rsc – reverse single crochet (crab stitch)
- sp – space
- st(s) – stitch(es)
Special stitches
Rib-n: Ch n + 1. Sc in the 2nd ch from the hook and in each ch back toward the spine (n sc). The rib sticks out from the spine, and its outer tip is the first sc you worked. Example: Rib-4 = ch 5, then sc in the 2nd ch from the hook and in the next 3 ch (4 sc).
Reverse single crochet (rsc): Working from left to right (right-handed), insert the hook into the next st to the right, yarn over, pull up a loop, yarn over, and pull through both loops. This gives the twisted, rope-like edge.
Surface slip stitch: Hold the yarn under the work. Insert the hook from front to back through the fabric, pull up a loop, and draw it through the loop on the hook.
Gauge and Checkpoints
Gauge: 16 sc and 18 rows = 4 in (10.2 cm) in sc, using a 4.5 mm hook. That means 4 sc = 1 in (2.5 cm).
You are only making one leaf, so the leaf is your test piece. Measure at each checkpoint below, and fix the size before you add the green.
- Checkpoint 1 (foundation): The 31 ch, lightly stretched, measure about 7.75 in (19.7 cm).
- Checkpoint 2 (after Side A): The spine edge measures 7.5 in (19.1 cm) from tip to tip. A Rib-6 measures 1.5 in (3.8 cm) from the spine to its tip.
- Checkpoint 3 (cream skeleton done): About 7.5 in (19.1 cm) long and 3.5 in (8.9 cm) wide across the two longest ribs.
- Checkpoint 4 (after Green Rnd 2): About 8.5 in (21.6 cm) × 4.5 in (11.4 cm).
- Checkpoint 5 (finished and blocked): 8.75 in (22.2 cm) × 4.75 in (12.1 cm).
Too big? Go down to a 4 mm hook. Too small? Go up to a 5 mm hook. If only the ribs are off, keep your hook and adjust how tightly you work the rib chains, because loose chains make long, floppy ribs.
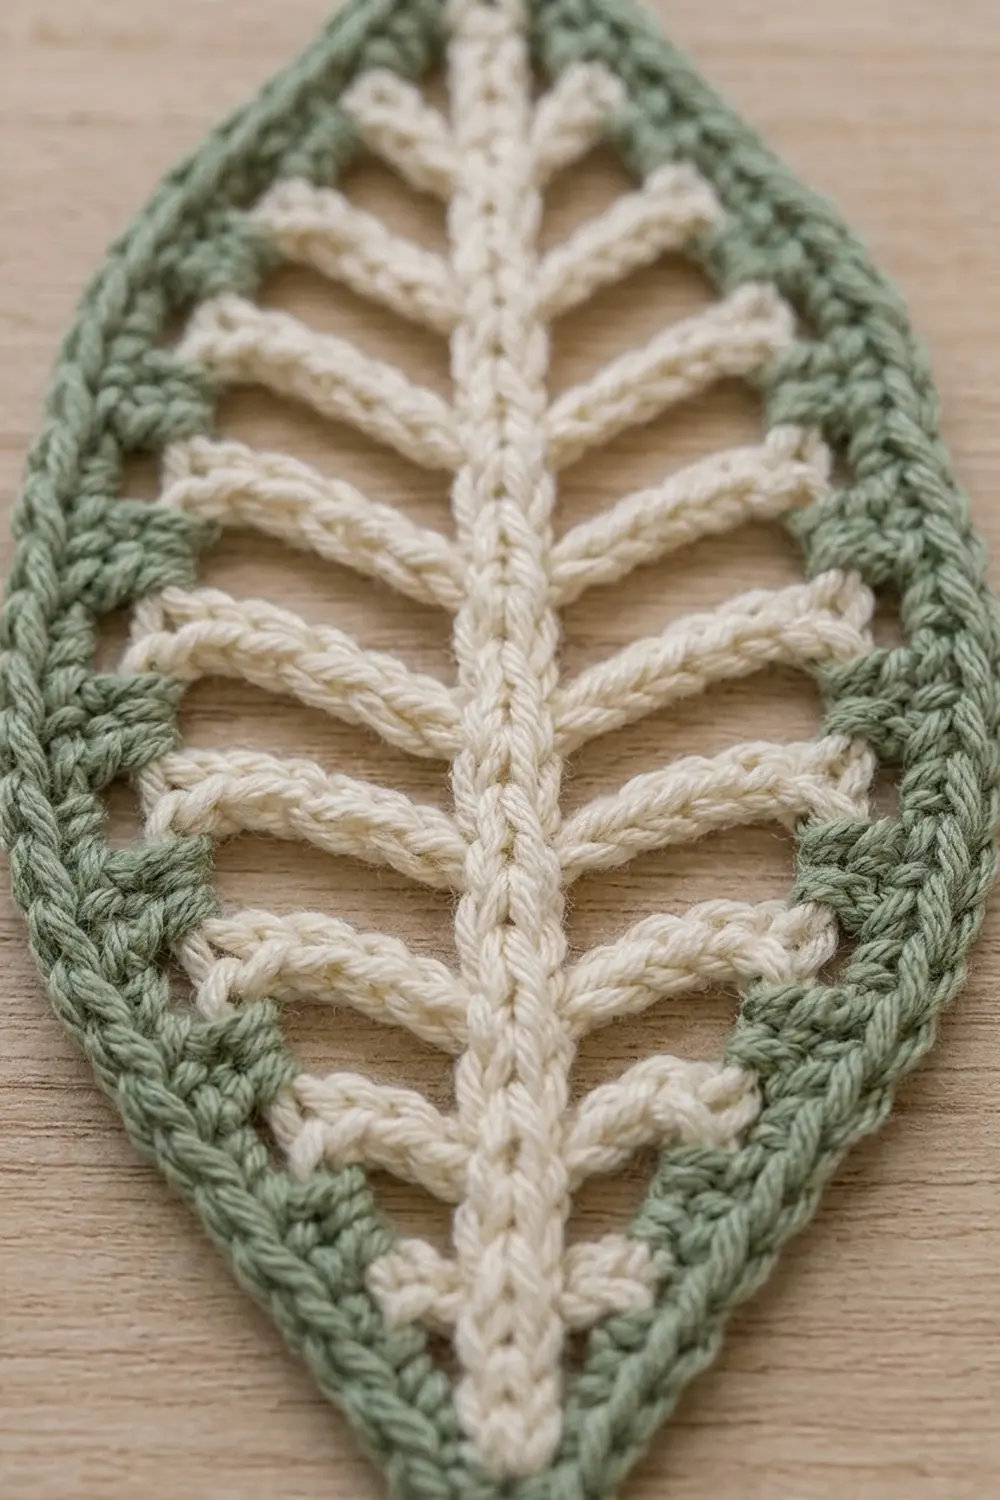
Cream Skeleton (Spine and Ribs)
With Color A, ch 31. Mark the 2nd ch from the hook, because this end becomes the top tip.
Side A (working down the leaf, top to bottom)
Work into the back bumps of the chain.
Sc in the 2nd ch from the hook and in the next 2 ch (3 sc).
Rib-2, sc in the next 3 ch.
Rib-3, sc in the next 3 ch.
Rib-4, sc in the next 3 ch.
Rib-5, sc in the next 3 ch.
Rib-6, sc in the next 3 ch.
Rib-6, sc in the next 3 ch.
Rib-5, sc in the next 3 ch.
Rib-4, sc in the next 3 ch.
Rib-3, sc in the next 2 ch, 3 sc in the last ch (bottom tip).
Count, Side A: 29 spine sc + 3 sc in the bottom tip = 32 spine sc, plus 9 ribs (2 + 3 + 4 + 5 + 6 + 6 + 5 + 4 + 3 = 38 rib sc). You have now used all 30 working chains: 3 + (8 × 3) + 2 + 1 = 30.
Side B (working up the leaf, bottom to top)
Rotate the work and keep going into the free loops on the other side of the foundation chain.
Sc in the next 2 ch.
Rib-3, sc in the next 3 ch.
Rib-4, sc in the next 3 ch.
Rib-5, sc in the next 3 ch.
Rib-6, sc in the next 3 ch.
Rib-6, sc in the next 3 ch.
Rib-5, sc in the next 3 ch.
Rib-4, sc in the next 3 ch.
Rib-3, sc in the next 3 ch.
Rib-2, sc in the next 2 ch, 2 sc in the last ch (the same ch that holds the first sc of Side A). Sl st to the first sc. Do not fasten off yet.
Count, Side B: 2 + (8 × 3) + 2 + 2 = 30 spine sc, plus 9 ribs (38 rib sc). This uses the 29 remaining free loops: 2 + 24 + 2 + 1 = 29.
Total after the skeleton round: 62 spine sc + 76 rib sc = 138 sc, with 18 ribs. Each tip has 3 sc. At the top tip, the center sc is the last sc you made. Put a marker in it. At the bottom tip, the center sc is the 2nd of the 3 sc. Mark that one too.
Each Side B rib sits directly across from its Side A partner, because both sides place ribs between the same pairs of foundation chains.
Raised midrib
Ch 1 and turn the work to the right side. Hold the yarn under the leaf. Work 30 surface slip stitches straight down the center, one into each foundation chain, between the Side A and Side B spine stitches. Stop at the bottom tip, fasten off, and pull the tail to the back.
This adds a raised, braided-looking line over the foundation chain, which is the cream center vein. Keep it loose so the leaf doesn’t cup lengthwise. Weave in the Color A ends.
Lay the skeleton flat and check Checkpoint 3. Gently fan each rib slightly upward toward the top tip.
Green Border
Border gauge: Each ch-3 bridge spans about 0.75 in (1.9 cm) once it’s filled. Three sc at 4 sc per inch also measure 0.75 in (1.9 cm), so filling every bridge with 3 sc keeps the edge flat.
Rnd 1 (connecting round): Using Color B, join with a sl st in the marked top tip sc. Ch 1, then work (sc, ch 2, sc) in the same st. Going down Side A: [ch 3, sc in the tip of the next rib] 9 times, ch 3. Work (sc, ch 2, sc) in the marked center sc of the bottom tip. Going up Side B: [ch 3, sc in the tip of the next rib] 9 times, ch 3. Sl st to the first sc.
Count: 22 sc (9 rib-tip sc per side + 2 sc at each tip), 20 ch-3 sps (10 per side), and 2 ch-2 tip sps.
Lay the leaf flat after this round. Each ch-3 should lie straight between rib tips without pulling the ribs together.
Rnd 2: Ch 1. Sc in the same st. Work (sc, ch 2, sc) in the ch-2 tip sp, then sc in the next sc. [3 sc in the next ch-3 sp, sc in the next rib-tip sc] 9 times, 3 sc in the next ch-3 sp, sc in the next sc. Work (sc, ch 2, sc) in the bottom ch-2 sp, then sc in the next sc. Repeat from * to * once more, ending with 3 sc in the last ch-3 sp. Sl st to the first sc.
Count per side: 1 tip sc + (9 × 4) + 3 + 1 tip sc = 41 sc. Each tip adds 2 sc around a ch-2 sp.
Total: (2 × 41) + (2 × 2) = 86 sc, plus 2 ch-2 tip sps.
Check: The 22 sc of Rnd 1 + (20 × 3) for the bridges + 4 tip sc = 86. ✓
Check Checkpoint 4 now.
Rnd 3 (rope edge): Ch 1. Rsc in each sc around, and work (rsc, ch 1, rsc) in each ch-2 tip sp. Sl st to the first rsc and fasten off.
Count: 86 + 4 = 90 rsc, plus 2 ch-1 tip points.
Why the math works: Every rib tip gets exactly 1 sc in Rnd 1 and 1 sc in Rnd 2. Every bridge gets exactly 3 sc, which matches its length. The tips get (sc, ch 2, sc) twice and then (rsc, ch 1, rsc), so each point stays sharp without flaring. Only the two tips get extra stitches, so the edge doesn’t ruffle along the sides.
Weave in the Color B ends along the back of the green band, not through the cream ribs.
Final Blocking
- Weave in all ends, but don’t trim them yet.
- Spray the leaf evenly until it is damp but not soaked.
- Lay it face up on the blocking mat.
- Pin the top and bottom tips 8.75 in (22.2 cm) apart, in a straight line.
- Pin the widest point, at the middle pair of Rib-6s, to 4.75 in (12.1 cm) across.
- Pin the outline into a smooth pointed oval. Place a pin at each rib-tip stitch, about every 0.75 in (1.9 cm).
- Using your fingers, angle each rib slightly upward toward the top tip. Make sure each pair mirrors across the midrib.
- Pinch the midrib gently so the surface slip stitches stand up.
- Leave it to dry completely, then unpin it and trim the ends.
Final Quality-Control Checklist
- 9 ribs on each side, with lengths 2, 3, 4, 5, 6, 6, 5, 4, 3 sc from the top
- Every rib sits directly across from its partner on the other side
- The raised midrib runs straight from the top tip to the bottom tip
- Green Rnd 1: 22 sc, 20 ch-3 sps, 2 ch-2 sps
- Green Rnd 2: 86 sc, 41 per side
- Green Rnd 3: 90 rsc with sharp ch-1 points
- Finished size is 8.75 in (22.2 cm) × 4.75 in (12.1 cm)
- The leaf lies flat with no cupping or ruffling
- All ends are woven into same-color stitches
Troubleshooting
The ribs curl or twist. Your rib chains are too tight compared with the sc worked back along them. Loosen the chains, or pin the ribs firmly while blocking.
The leaf cups lengthwise. The midrib slip stitches are too tight. Pull them out and redo them more loosely, or go up one hook size for that step.
The edge ruffles. You’ve added extra sc in the bridges. Count exactly 3 sc per ch-3 sp.
The edge pulls in and the ribs bunch together. Your Rnd 1 chains are tight. Work them a bit looser, or make each bridge ch 4 and still work 3 sc into it.
The points are rounded. Make sure you worked (sc, ch 2, sc) in both tip rounds and kept the ch-1 in Rnd 3.
The rsc edge is uneven. Keep every stitch the same height, and don’t skip stitches when working left to right.
The two sides don’t match. Recount your Side B rib order. It should be 3, 4, 5, 6, 6, 5, 4, 3, 2 going up.
Care
Hand wash in cool water with mild soap, gently press out the water, and dry flat. Re-pin the shape if needed.
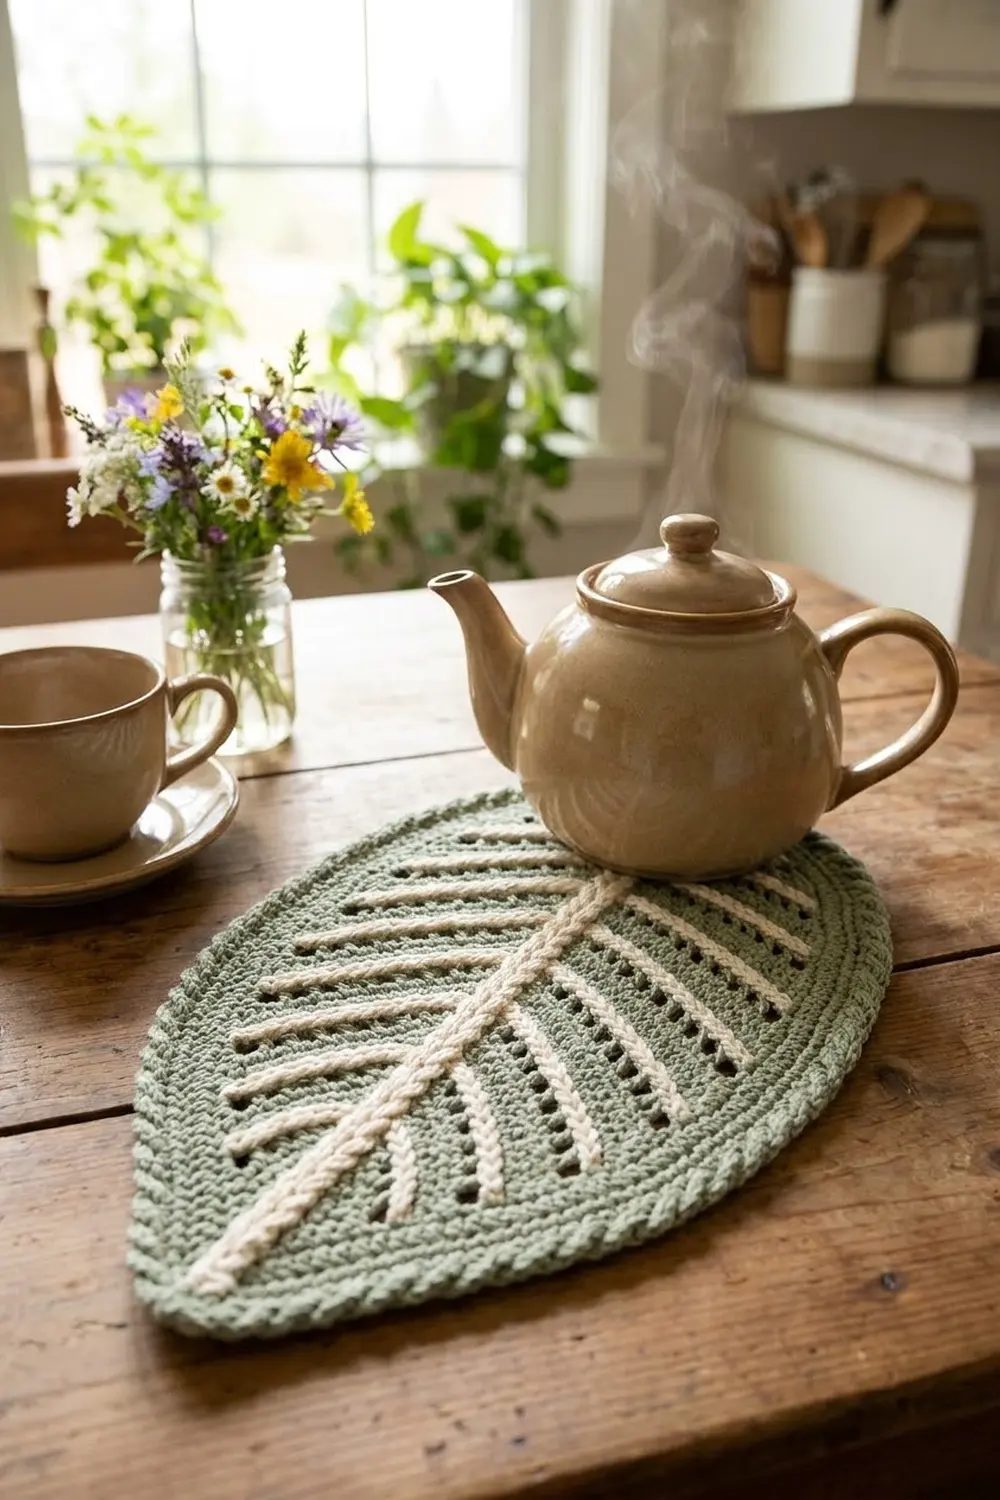
Final Notes
The measurements build on each other. A gauge of 4 sc = 1 in (2.5 cm) makes the 30-stitch spine measure 7.5 in (19.1 cm). Ribs of up to 6 sc make the skeleton 3.5 in (8.9 cm) wide. Three green rounds add 0.625 in (1.6 cm) on every side, which brings the leaf to 8.75 in (22.2 cm) × 4.75 in (12.1 cm). If your gauge and Checkpoints 2 and 3 match, the border will match too.
Happy crocheting!