

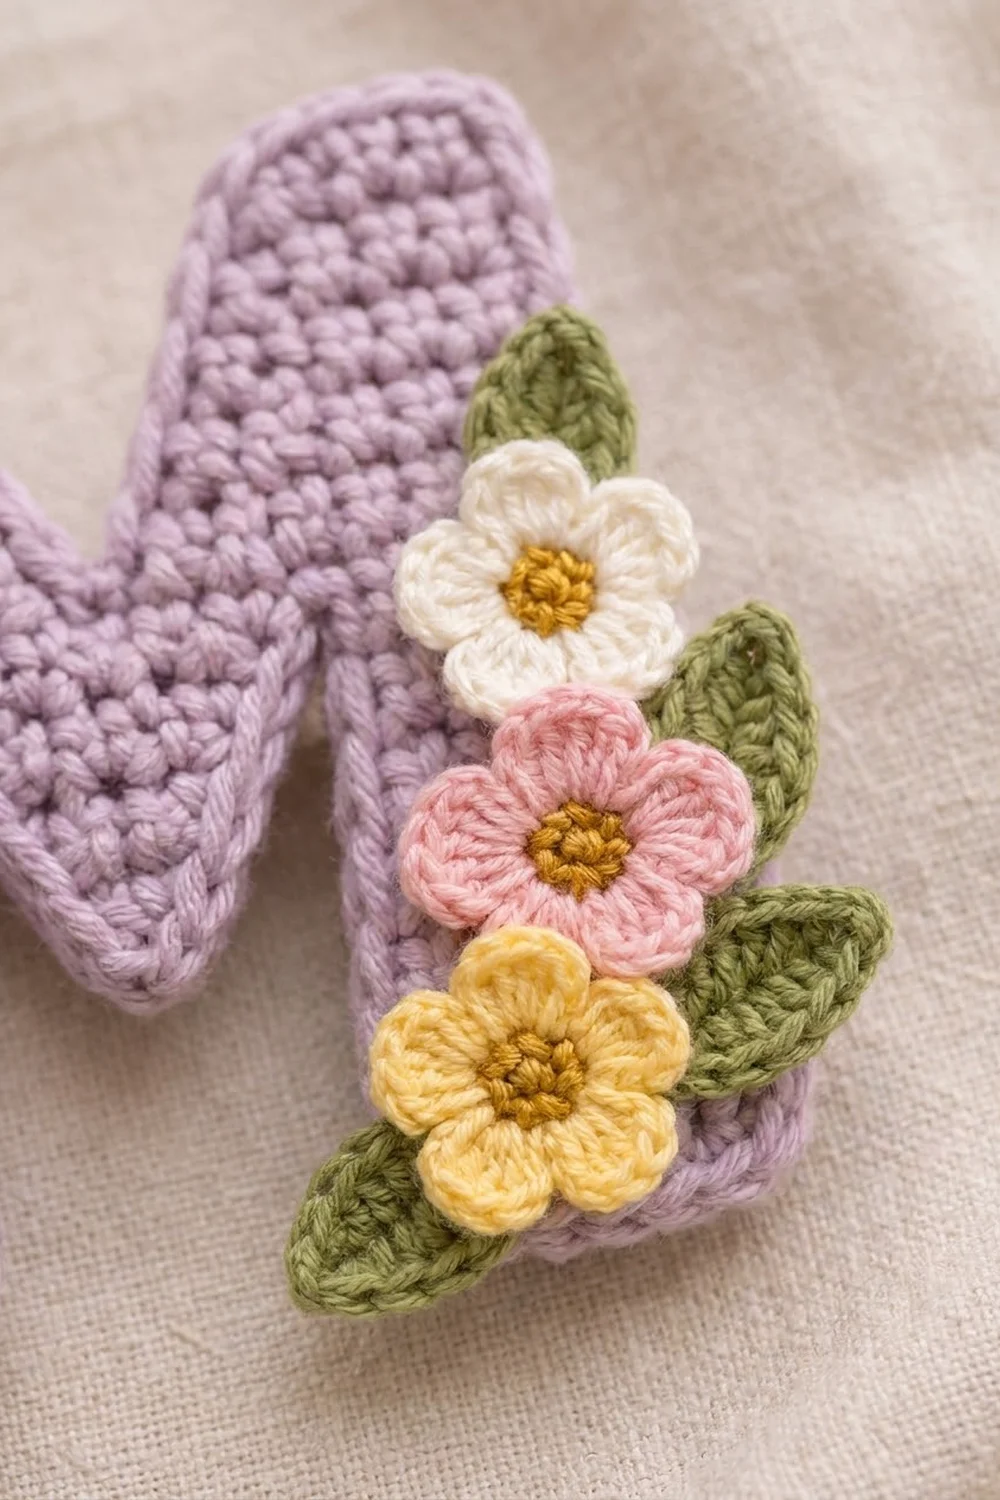
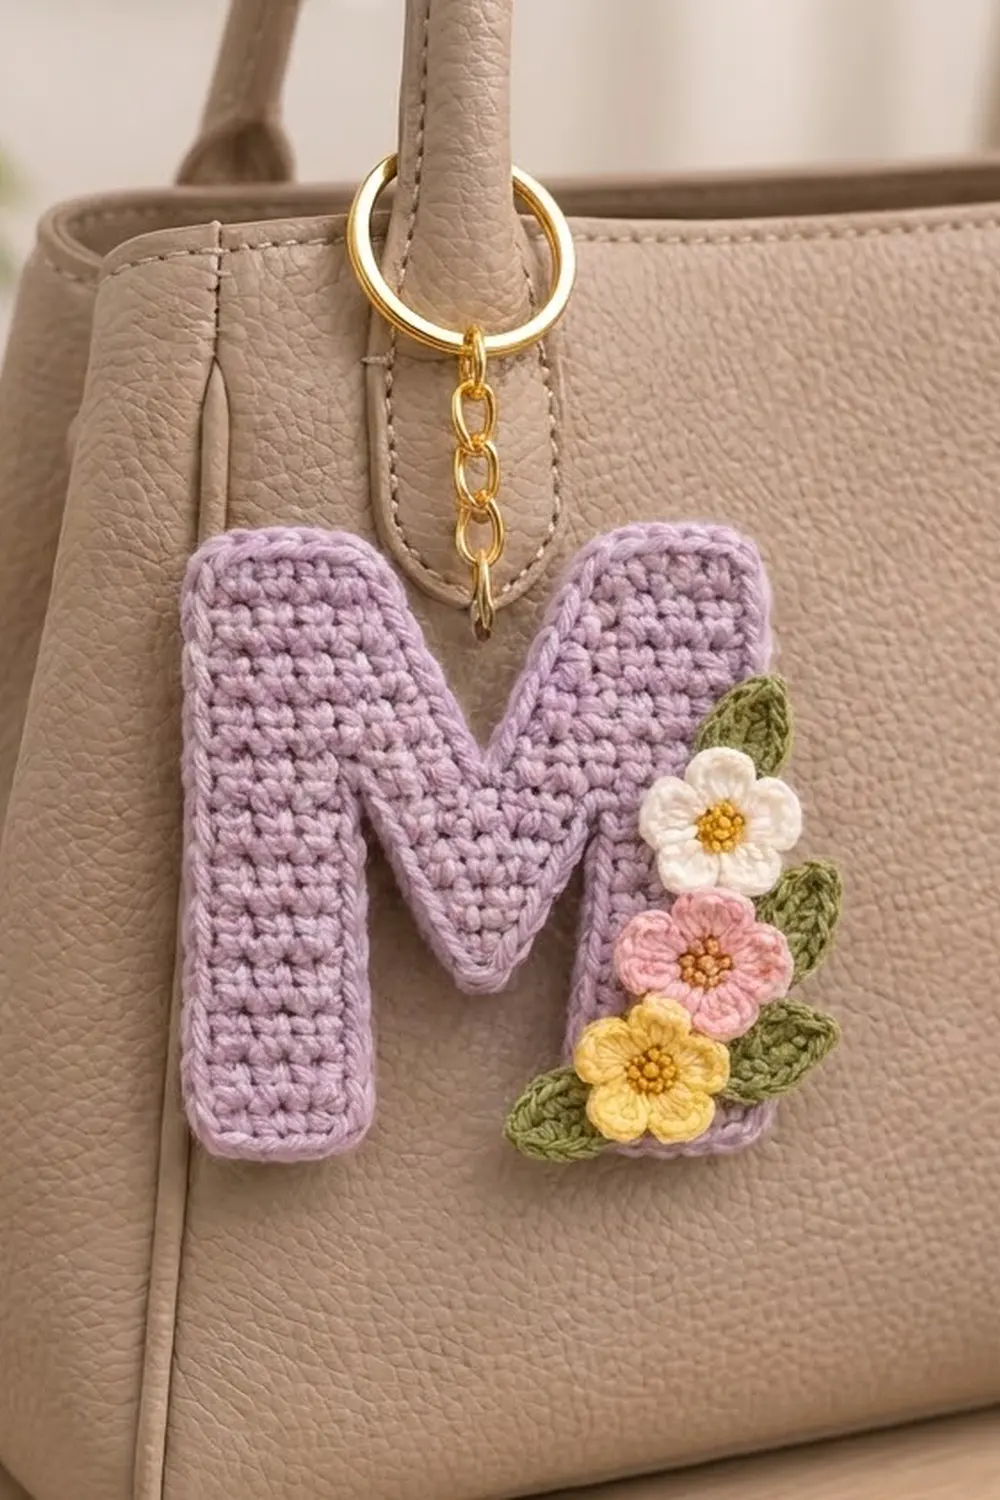
This little letter M is a flat keychain charm in soft lavender cotton. The letter is solid single crochet, and the whole edge has a neat raised rim. A small cluster of flowers sits on the lower right leg: white, pink and butter-yellow blooms with mustard centers, tucked between sage-green leaves.
The style is sweet and tidy, with a bold letter shape. It looks lovely clipped to a handbag handle, a key ring or a backpack zipper, and it makes a quick personalized gift.
The pattern uses US crochet terms. The finished letter measures 3.4 in wide x 3.9 in tall (8.6 cm x 9.9 cm), not counting the keyring hardware.
You crochet the two legs separately in rows and join them with a chain bridge. Then you work a solid center band and split the top into two peaks that slope inward to form the V. One round of single crochet and one round of back-loop slip stitch finish the edge. The flowers and leaves are made separately and sewn on.
Finished Size and Construction
- Finished size: 3.4 in x 3.9 in (8.6 cm x 9.9 cm)
- Skill level: Easy (advanced beginner)
- Terminology: US crochet terms
- Yarn weight: DK (#3) cotton
- Hook: 3.0 mm for the letter, 2.5 mm for flowers and leaves
- Number of pieces: 1 letter, plus 3 flowers and 3 leaves sewn on as appliqués
- Layout: single standalone charm, no joining
- Letter size before border: 3 in x 3.5 in (7.6 cm x 8.9 cm), 15 sts wide x 21 rows tall
- Border depth: about 0.2 in (0.5 cm) per side
Materials
Choose a smooth mercerized or combed DK cotton. It gives crisp stitch definition and holds the flat letter shape well. Avoid fuzzy or stretchy yarns.
- Lavender (letter): 8 g / 20 m
- Mustard (flower centers): 1 g / 2 m
- White (flower 1): 1 g / 2 m
- Pink (flower 2): 1 g / 2 m
- Butter yellow (flower 3): 1 g / 2 m
- Sage green (leaves): 2 g / 5 m
All quantities include a margin for swatching and sewing tails.
Tools:
- 3.0 mm and 2.5 mm crochet hooks
- Tapestry needle
- 1 stitch marker
- Scissors
- Gold split keyring, about 1 in (2.5 cm) across, with a short chain and jump ring
- Small pliers
- Blocking mat, rust-proof pins and a spray bottle
Abbreviations (US Terms)
- ch – chain
- sl st – slip stitch
- sc – single crochet
- hdc – half double crochet
- dc – double crochet
- sc2tog – single crochet 2 together
- BLO – back loop only
- MR – magic ring
- st(s) – stitch(es)
- RS – right side
- rep – repeat
Special stitch – sc2tog: Insert hook in next st, yarn over, pull up a loop. Insert hook in following st, yarn over, pull up a loop (3 loops on hook). Yarn over and pull through all 3 loops. One stitch decreased.
Gauge and Checkpoints
Gauge: 10 sc x 12 rows = 2 in (5.1 cm) square with the 3.0 mm hook. That equals 5 sts and 6 rows per 1 in (2.5 cm).
The letter is a single piece, so make a small swatch as your test piece first. Work firmly, with no visible gaps between stitches.
Checkpoints:
- Each leg after Row 9: 1 in wide x 1.5 in tall (2.5 cm x 3.8 cm)
- After Row 13: 3 in wide (7.6 cm), about 2.2 in tall (5.6 cm)
- After Row 21: 3 in x 3.5 in (7.6 cm x 8.9 cm)
- After the border: 3.4 in x 3.9 in (8.6 cm x 9.9 cm)
Too big: go down to a 2.75 mm hook or tighten your tension. Too small: go up to a 3.5 mm hook. Keep the stitches dense so the edges stay straight.
The Letter M
The letter is worked bottom-up in rows of sc. The turning ch 1 never counts as a stitch.
Leg 1
With lavender and 3.0 mm hook, ch 6.
Row 1: Sc in 2nd ch from hook and in each ch across, turn. (5 sts)
Rows 2–9: Ch 1, sc in each st across, turn. (5 sts)
Fasten off. The leg measures 1 in x 1.5 in (2.5 cm x 3.8 cm).
Leg 2
Work exactly as Leg 1 through Row 9, but do not fasten off. (5 sts)
Joining Row and Center Band
Row 10: Ch 1, turn. Sc in each of the 5 sts of Leg 2, ch 5. Hold Leg 1 beside Leg 2 with the same side facing and the bottom edges level. Sc in each of the 5 sts of Leg 1’s Row 9, starting with the st nearest the chain, turn. (5 sc + 5 ch + 5 sc)
The ch-5 bridge forms the flat top of the opening between the legs.
Row 11: Ch 1, sc in each sc and in each ch across, turn. (15 sts)
Rows 12–13: Ch 1, sc in each st across, turn. (15 sts)
Place a marker in the 8th st of Row 13. This center st stays unworked and becomes the bottom point of the V.
First Peak
This peak uses only the first 7 sts. All decreases go at the inner edge, next to the center st, which creates the sloped inner side of the M.
Row 14: Ch 1, sc in first 7 sts, turn. Leave the remaining 8 sts unworked. (7 sts)
Row 15: Ch 1, sc in each st across, turn. (7 sts)
Row 16: Ch 1, sc in each st to last 2 sts, sc2tog, turn. (6 sts)
Rows 17–18: Ch 1, sc in each st across, turn. (6 sts)
Row 19: Ch 1, sc2tog, sc in each st across, turn. (5 sts)
Rows 20–21: Ch 1, sc in each st across, turn. (5 sts)
Fasten off.
Second Peak
Row 14: Hold the work with the same side facing as for the first peak’s Row 14. Skip the marked center st and join lavender with a sl st in st 9. Ch 1, sc in same st and in each of the remaining 6 sts, turn. (7 sts)
Row 15: Ch 1, sc in each st across, turn. (7 sts)
Row 16: Ch 1, sc2tog, sc in each st across, turn. (6 sts)
Rows 17–18: Ch 1, sc in each st across, turn. (6 sts)
Row 19: Ch 1, sc in each st to last 2 sts, sc2tog, turn. (5 sts)
Rows 20–21: Ch 1, sc in each st across. (5 sts)
Do not fasten off. Each peak top is 5 sts wide, matching the leg below it. The V opening is 5 sts (1 in / 2.5 cm) wide at the top and narrows to the single center st. The letter measures 3 in x 3.5 in (7.6 cm x 8.9 cm).
Border
Border gauge: 1 sc in each stitch along top and bottom edges, and 1 sc in each row end along the sides. This is the standard rate for sc fabric and keeps the edges flat.
The border runs all the way around the M, including the opening between the legs and the V. Edge segments and base counts:
- Outer side of each leg: 21 row ends each
- Bottom of each leg: 5 sts each
- Inner side of each leg (opening between legs): 9 row ends each
- Top of the opening (underside of the ch-5 bridge): 5 sts
- Top of each peak: 5 sts each
- Inner sloped side of each peak: 8 row ends each
- Center V point: 1 st (the marked st)
Base total: 21 + 5 + 9 + 5 + 9 + 5 + 21 + 5 + 8 + 1 + 8 + 5 = 102 sts.
There are 8 outward-pointing corners:
- 2 outer top corners
- 2 inner top corners of the peaks
- 2 outer bottom corners
- 2 inner bottom corners of the legs
Work 3 sc in each of these corner stitches. The corner stitch is already counted in its segment, so each corner adds just 2 sts. The 3 inward corners (the two top corners of the opening and the V point) get no extra sts.
Round 1: With the yarn still on the hook, ch 1. Do not turn. Sc around the whole letter at the rates above. Work 3 sc in each of the 8 outer corner sts and exactly 1 sc in the marked V st. Join with a sl st to the first sc. (102 + 16 = 118 sts)
Round 2: Ch 1, sl st in BLO of each st around. Join with a sl st to the first sl st. (118 sl sts)
Fasten off and weave in ends. The back-loop slip stitches roll the front loops outward into a raised, braided-looking rim that adds almost no width.
Why the math works: The body is 15 sts (3 in / 7.6 cm) wide and 21 rows (3.5 in / 8.9 cm) tall. One sc round adds 0.2 in (0.5 cm) per side, or 0.4 in (1.0 cm) in each direction, giving 3.4 in x 3.9 in (8.6 cm x 9.9 cm). The 2 extra sts at outer corners let the edge turn flat, and skipping extras at inward corners prevents bunching.
Flowers (Make 3)
Make 1 each in white, pink and butter yellow with the 2.5 mm hook.
Round 1: With mustard, make a MR. Ch 1, 5 sc in ring. Pull the ring closed and join with a sl st to the first sc. (5 sts) Fasten off.
Round 2: Join petal color in any sc. *(Sl st, ch 2, 2 dc, ch 2, sl st) in same st, move to next st; rep from * around. Join with a sl st to the base of the first petal. (5 petals, 10 dc total)
Fasten off, leaving a 6 in (15.2 cm) tail. Each flower is about 0.8 in (2.0 cm) across, with a slightly raised, bumpy mustard center.
Leaves (Make 3)
With sage green and 2.5 mm hook, ch 7.
Side 1: Working in back bumps, sl st in 2nd ch from hook, sc in next ch, hdc in next ch, dc in next ch, hdc in next ch, sc in last ch. (6 sts)
Side 2: Ch 1, rotate. Work in the free loops on the other side of the chain. Sc in the same last ch, hdc in next ch, dc in next ch, hdc in next ch, sc in next ch, then sl st in the ch holding the first sl st. (6 sts)
Fasten off, leaving a 6 in (15.2 cm) tail. Each leaf is about 0.9 in (2.3 cm) long, pointed at the tip.
Assembly
Lay the letter RS up. The flowers stack down the lower outer edge of the right leg, overlapping the border slightly.
- Place the white flower level with the top of the opening between the legs.
- Place the pink flower directly below it, touching.
- Place the yellow flower below the pink, near the bottom corner.
- Tuck in the 3 leaves:
- one behind the white flower, pointing up and outward
- one on the outer side between the pink and yellow flowers
- one below the yellow flower, pointing down and left
Sew the leaves first with small stitches along their centers. Then sew each flower through its center and between the petals.
Open the jump ring and pass it through the border at the top outer corner of the left peak. Attach the chain and split ring, then close the jump ring firmly.
Final Blocking
- Mist the letter lightly until damp, not soaked.
- Lay it RS up on the blocking mat.
- Pin the 8 outer corners, easing the letter to 3.4 in x 3.9 in (8.6 cm x 9.9 cm).
- Pin the V point and the top corners of the opening to keep inner lines crisp.
- Smooth the side edges straight.
- Let it dry completely.
- Unpin. For the flattest result, block before sewing on the flowers.
Final Quality-Control Checklist
- The letter measures 3.4 in x 3.9 in (8.6 cm x 9.9 cm).
- Both legs and both peaks are the same width.
- The V point sits exactly in the center.
- Round 1 has 118 sc and Round 2 has 118 sl sts.
- The raised rim is even all the way around.
- Each flower has 5 petals, and all appliqués are secure.
- The jump ring is fully closed and all ends are hidden.
Troubleshooting
Legs are different heights: Each leg needs exactly 9 rows before Row 10.
The ch-5 bridge sags: Chain more tightly, or use the 2.5 mm hook for those 5 chains.
Peaks lean: Every decrease must be at the inner edge, next to the V.
The edge ruffles: Work exactly 1 sc per row end, no extras.
The edge cups: Check that each of the 8 outer corners has 3 sc.
The rim looks flat: Work Round 2 in the back loop only.
Care
Hand wash in cool water with mild soap and lay flat to dry. Wipe the metal ring dry to keep it shiny.
Final Notes
Here is the measurement chain:
- Gauge: 5 sts and 6 rows per 1 in (2.5 cm).
- Each leg: 5 sts x 9 rows, 1 in x 1.5 in (2.5 cm x 3.8 cm).
- Letter body: 15 sts x 21 rows, 3 in x 3.5 in (7.6 cm x 8.9 cm).
- Border: adds 0.2 in (0.5 cm) per side, for a finished 3.4 in x 3.9 in (8.6 cm x 9.9 cm).
If each checkpoint matches, your letter will lie flat and crisp, ready for its flowers and ring.
Happy crocheting!