
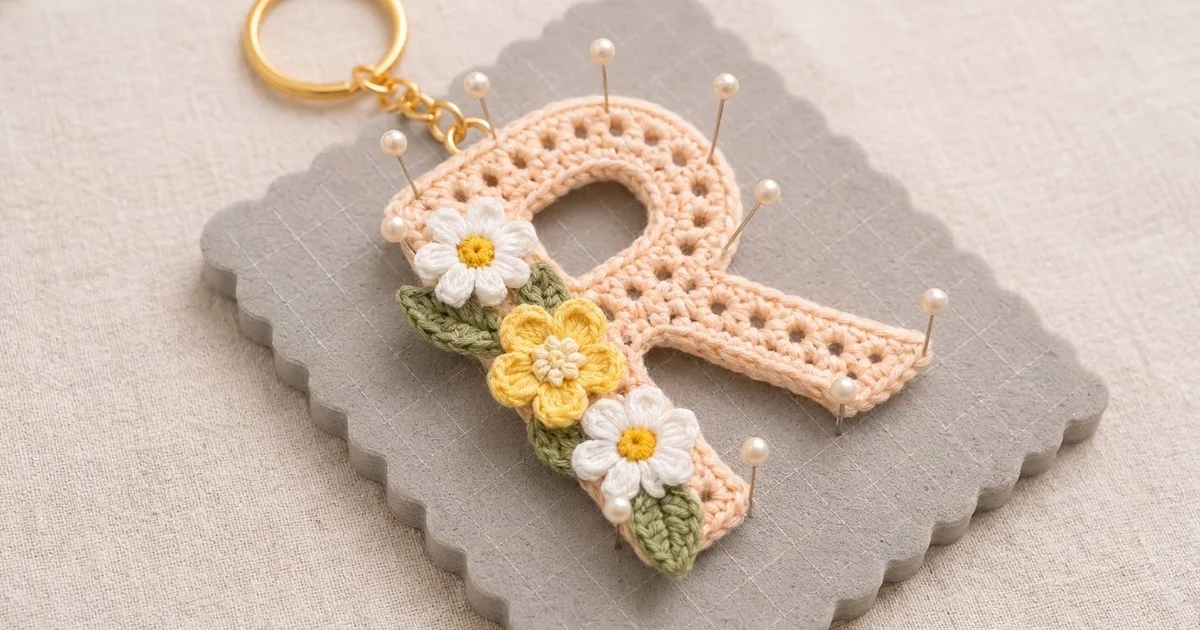
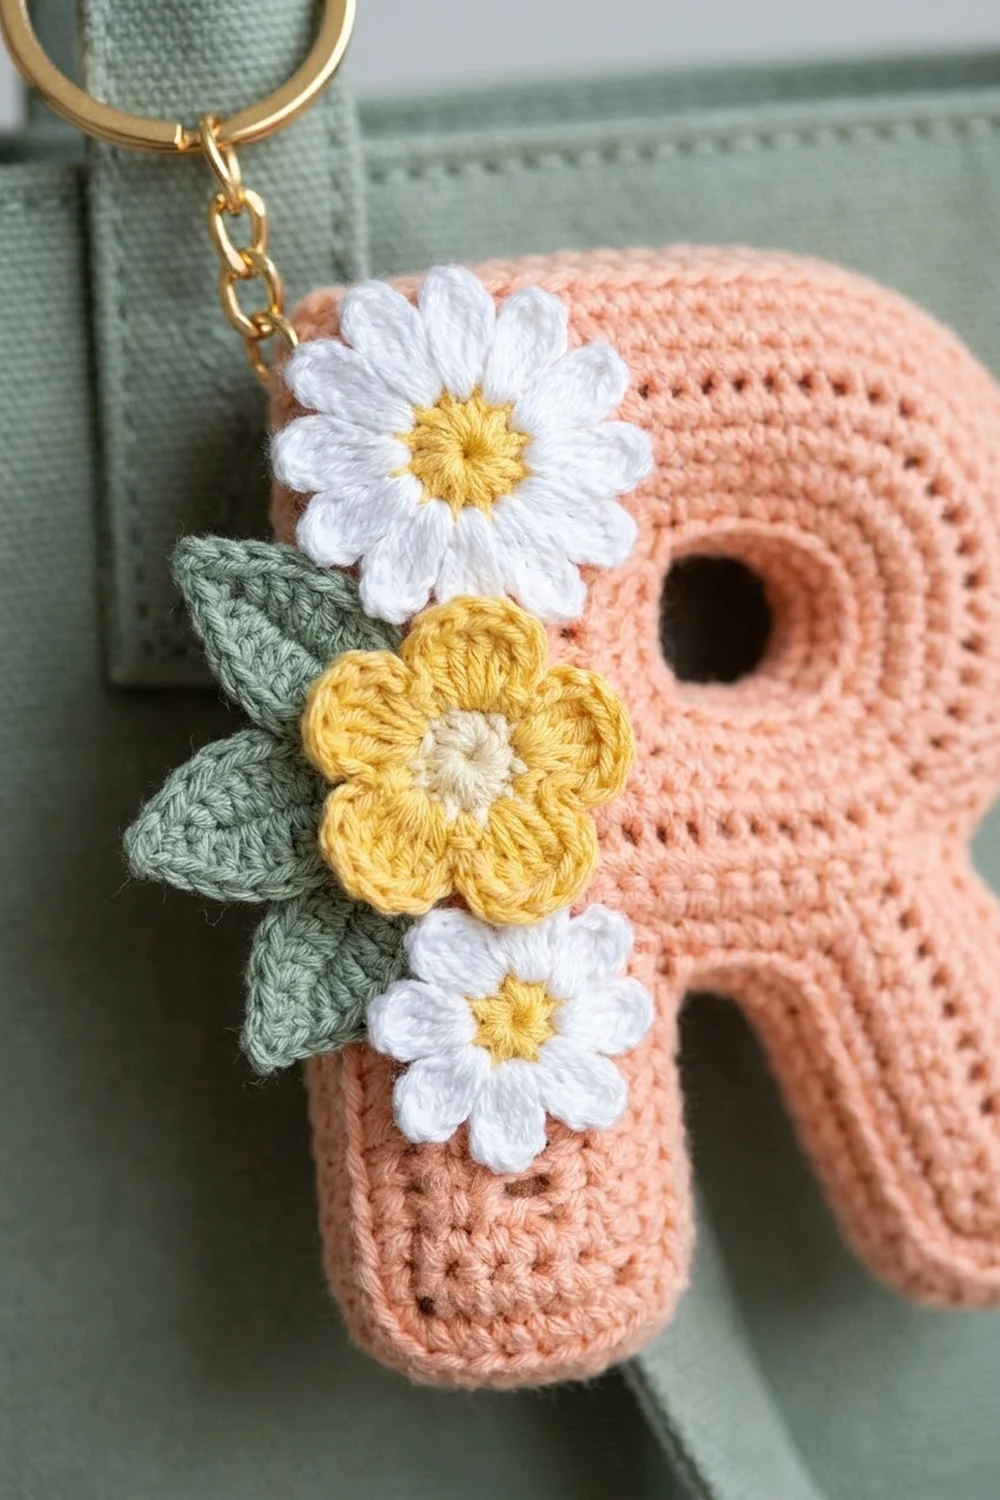
This initial keychain is a flat capital R in soft peach cotton. Neat rows of round eyelets run through a firm single crochet fabric. A raised outline frames every edge, and two white daisies, a yellow flower, and three sage-green leaves trail down the stem.
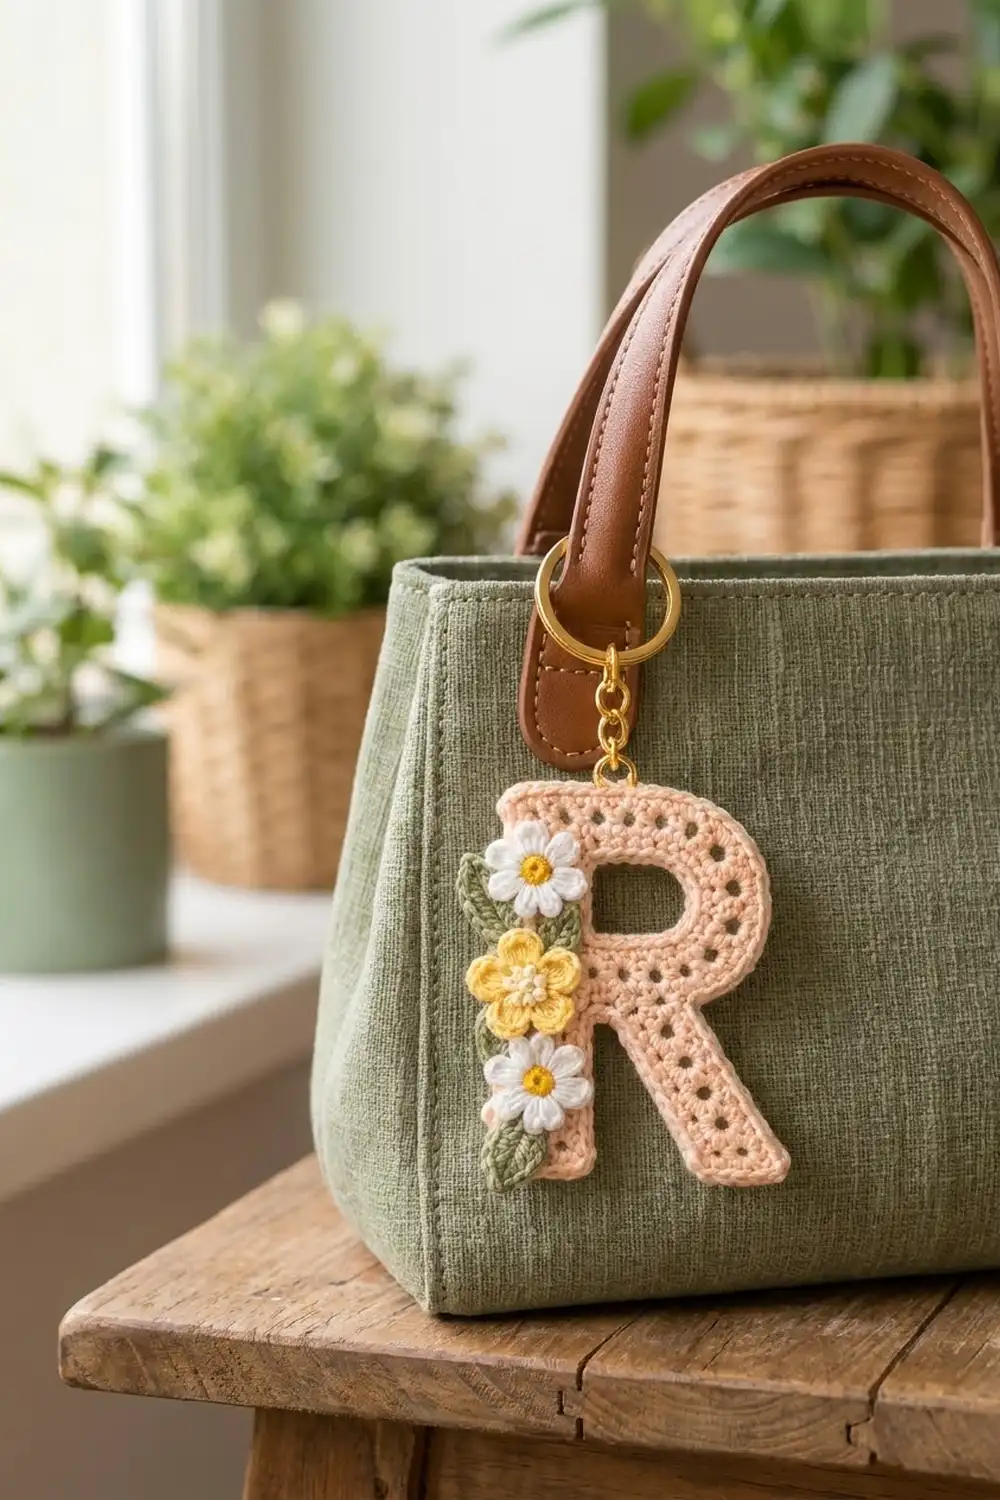
The colors are soft and springlike: peach for the letter, white and buttery yellow for the flowers, cream for one flower center, and sage green for the leaves. With gold hardware, it works on a tote, a backpack zip, or a set of keys.
The pattern uses US crochet terms. The finished letter measures about 2.8 in (7.1 cm) wide by 3.8 in (9.7 cm) tall. With the ring and chain, the total length is about 5.5 in (14.0 cm).
You crochet the letter flat in rows from the bottom up. First you make the stem and the leg as two small strips. Then you join them into one row, split around the counter (the enclosed hole of the R), rejoin above it, and shape the top-right curve. One border round outlines the outside, a short round outlines the counter, and the flowers and leaves are sewn on last.
Finished Size and Construction
- Finished size: about 2.8 in (7.1 cm) x 3.8 in (9.7 cm)
- Skill level: Intermediate (split sections and rejoining)
- Terminology: US crochet terms
- Yarn weight: DK / light (#3) cotton
- Hook: 3.0 mm
- Number of pieces: 1 letter, plus 3 flowers and 3 leaves sewn on
- Layout: single letter, with the flowers and leaves stacked down the left side of the stem
- Size before border: 2.5 in (6.4 cm) x 3.5 in (8.9 cm), which is 15 sts x 21 rows
- Border depth: about 1/6 in (0.4 cm) per side
Materials
Use a smooth mercerized or combed cotton in DK weight. Cotton keeps the eyelets crisp and holds its shape on a keychain that gets handled every day.
- Peach (letter): 8 g / 20 m
- White (daisy petals): 2 g / 6 m
- Yellow (daisy centers and yellow flower): 2 g / 5 m
- Cream (yellow flower center): 1 g / 2 m
- Sage green (leaves): 2 g / 5 m
All quantities include extra for swatching and sewing tails.
Tools:
- 3.0 mm crochet hook
- Tapestry needle
- 2 stitch markers
- Gold split key ring, 1 in (2.5 cm) across
- Gold chain, about 0.75 in (1.9 cm) long, plus 2 small jump rings
- Flat-nose pliers
- Blocking board, rustproof pins, and a spray bottle
- Scissors
Abbreviations (US Terms)
- ch – chain
- sl st – slip stitch
- sc – single crochet
- hdc – half double crochet
- dc – double crochet
- sk – skip
- sp – space
- st(s) – stitch(es)
- RS / WS – right side / wrong side
- sc2tog – single crochet 2 together: (insert hook in next st or sp, yarn over, pull up a loop) twice, yarn over, pull through all 3 loops.
Special stitch – Eyelet row on 5 sts: ch 1, sc in first st, ch 1, sk next st, sc in next st, ch 1, sk next st, sc in last st. (3 sc + 2 ch-1 sps = 5 sts)
Each ch-1 space counts as 1 stitch. On solid rows, work 1 sc into each sc and 1 sc into each ch-1 sp.
Gauge and Checkpoints
Gauge: 6 sts and 6 rows = 1 in (2.5 cm) in pattern, alternating solid and eyelet rows.
Stitches and rows need to match. This square gauge is what lets the border take exactly 1 sc per row end without ruffling or pulling.
Check your gauge on the stem strip (Rows 1–8) before going further. The strip is part of the letter, so nothing is wasted. For a separate swatch, ch 13 and work 12 rows of the pattern on 12 sts. It should measure 2 in (5.1 cm) square.
Checkpoints:
- Stem strip after Row 8: 0.8 in (2.0 cm) wide x 1.3 in (3.3 cm) tall
- After Row 11: 2.5 in (6.4 cm) wide x 1.8 in (4.6 cm) tall
- After Row 18: 3 in (7.6 cm) tall
- After Row 21: 2.5 in (6.4 cm) x 3.5 in (8.9 cm)
- After the border: about 2.8 in (7.1 cm) x 3.8 in (9.7 cm)
Too big? Use a 2.75 mm hook. Too small or stiff? Use a 3.25 mm hook. Change the hook size, not the stitch counts.
Letter: Stem Strip (Rows 1–8)
With peach, ch 6.
Row 1 (RS): sc in 2nd ch from hook and in each ch across, turn. (5 sts)
Row 2 (WS): Eyelet row on 5 sts, turn. (5 sts)
Row 3: ch 1, sc in each st across, turn. (5 sts)
Rows 4–8: Repeat Rows 2–3 twice, then Row 2 once more. (5 sts)
Fasten off. The strip has eyelets in Rows 2, 4, 6, and 8.
Letter: Leg Strip (Rows 1–8)
The leg moves 1 stitch to the left on each shift row, which makes the diagonal.
With peach, ch 6.
Row 1 (RS): sc in 2nd ch from hook and in each ch across, turn. (5 sts)
Row 2 (WS): Eyelet row on 5 sts, turn. (5 sts)
Row 3 (shift row): ch 1, sc2tog over first sc and next ch-1 sp, sc in next sc, sc in next ch-1 sp, 2 sc in last sc, turn. (1 + 1 + 1 + 2 = 5 sts)
Rows 4–7: Repeat Rows 2–3 twice. (5 sts)
Row 8: Eyelet row on 5 sts. (5 sts) Do not fasten off.
The leg has now moved left 3 times, on Rows 3, 5, and 7. Lay both strips RS up, with the stem on the left, the leg on the right, and the bottom edges level.
Letter: Joining Row and Crossbar (Rows 9–11)
Row 9 (RS): With the leg’s working loop, ch 4, turn. sc in 2nd ch from hook and in next 2 ch (3 sts that form the bowl’s lower-right overhang). sc in each of the 5 leg sts, ch 2, then sc in each of the 5 sts of stem Row 8, turn. (3 + 5 + 2 + 5 = 15 sts)
The ch-2 counts as 2 stitches. It bridges the gap between stem and leg and forms the inside corner where they meet.
Row 10 (WS): ch 1, sc in first st, *ch 1, sk next st, sc in next st; rep from * 6 more times, turn. (8 sc + 7 ch-1 sps = 15 sts)
Row 11: ch 1, sc in each sc and ch-1 sp across, turn. (15 sts)
Checkpoint: 2.5 in (6.4 cm) wide x 1.8 in (4.6 cm) tall.
Letter: Counter Split (Rows 12–18)
From here the rows split around the counter. You work 5 stem sts on the left, leave 5 sts unworked for the hole, and work 5 bowl sts on the right.
Stem side:
Row 12 (WS): Eyelet row on the first 5 sts only, turn. Leave the remaining 10 sts unworked. (5 sts)
Row 13: ch 1, sc in each st across, turn. (5 sts)
Rows 14–18: Repeat Rows 12–13 twice, then Row 12 once more. (5 sts) Fasten off.
Bowl side:
With WS facing, skip 5 unworked sts of Row 11 and join peach in the 11th st.
Row 12 (WS): Eyelet row on the last 5 sts, turn. (5 sts)
Rows 13–18: Work as for the stem side. (5 sts) Do not fasten off.
The counter is an opening 5 sts wide x 7 rows tall, about 0.8 in (2.0 cm) x 1.2 in (3.0 cm).
Letter: Top of the Bowl (Rows 19–21)
Row 19 (RS): ch 1, turn. sc in each of the 5 bowl-side sts, ch 5, then sc in each of the 5 stem-side sts, turn. (5 + 5 + 5 = 15 sts)
Row 20 (WS): ch 1, sc in first st, *ch 1, sk next st, sc in next st; rep from * 5 more times, sc2tog over last 2 sts, turn. (7 sc + 6 ch-1 sps + 1 sc2tog = 14 sts)
Row 21: ch 1, sc2tog over first 2 sts, sc in each st across. (1 + 12 = 13 sts)
These two decreases step in the top-right corner, so the bowl looks rounded once the border is on. Checkpoint: 2.5 in (6.4 cm) x 3.5 in (8.9 cm). Do not fasten off.
Border
Border gauge: 1 sc in each stitch along the top and bottom edges, 1 sc in each row end along the sides, and 3 sc in each outside corner.
Border Round 1 (outer outline): With RS still facing, ch 1 and work around the outside edge in this order:
- Top edge (Row 21): sc in each of 13 sts, with 3 sc in the last st (top-left corner).
- Left side of stem: 21 sc, 1 per row end.
- Bottom of stem: 5 sc, with 3 sc in the first and last ch.
- Right side of stem, going up: 8 sc.
- Underside of the ch-2 bridge: 2 sc.
- Left side of leg, going down: 8 sc.
- Bottom of leg: 5 sc, with 3 sc in the first and last ch.
- Right side of leg, going up: 8 sc.
- Underside of the overhang: 3 sc, with 3 sc in the last ch (lower-right corner of the bowl).
- Right side of the bowl, Rows 9–21: 13 sc.
Join with sl st to first sc. (86 base sts + 6 corners x 2 extra = 98 sts) Fasten off.
Why the math works: In each corner, the 3 sc replace the 1 sc already counted for that stitch, so each of the 6 outside corners adds exactly 2. The two inside corners get a plain 1 sc so they stay sharp. These are where the stem meets the leg and where the overhang meets the leg. The top-right corner needs no extra stitches because Rows 20–21 already rounded it. Since rows and stitches both measure 6 per inch, 1 sc per row end matches the stitch spacing.
Border Round 2 (counter outline): With RS facing, join peach in the bottom-right corner of the counter. sc in each of the 5 unworked sts of Row 11, 7 sc up the row ends, 5 sc in the ch-5 of Row 19, then 7 sc down the row ends. Join with sl st. (5 + 7 + 5 + 7 = 24 sts) The counter is an inside edge, so it gets no corner increases. Fasten off and weave in all peach tails.
Flowers and Leaves
White Daisy (make 2): With yellow, make a magic ring.
- Rnd 1: 8 sc in ring, sl st to first sc, pull ring closed. Fasten off. (8 sts)
- Rnd 2: Join white in any st. *(sl st, ch 2, dc, ch 2, sl st) in next st; rep from * around. (8 petals)
Fasten off, leaving a 10 in (25.4 cm) tail. Each daisy is about 0.9 in (2.3 cm) across.
Yellow Flower (make 1): With cream, make a magic ring.
- Rnd 1: 10 sc in ring, sl st to first sc. Fasten off. (10 sts)
- Rnd 2: Join yellow in any st. *sl st in next st, (hdc, 3 dc, hdc) in next st; rep from * 4 more times, join. (5 petals)
Fasten off, leaving a 10 in (25.4 cm) tail. The flower is about 1 in (2.5 cm) across.
Leaf (make 3): With sage green, ch 7.
- sl st in 2nd ch from hook, sc in next ch, hdc in next ch, dc in next ch, hdc in next ch, sc in last ch, ch 1. Turn the piece and work along the other side of the chain: sc, hdc, dc, hdc, sc, sl st in last ch. (12 sts plus the ch-1 tip)
Fasten off, leaving a tail. Each leaf is about 0.9 in (2.3 cm) long.
Assembly: Lay the letter RS up. Place the top daisy on the stem over Rows 16–19, the yellow flower over Rows 10–14, and the second daisy over Rows 5–9. Let each one stick out past the left border by about 1/4 in (0.6 cm). Tuck one leaf behind the top daisy pointing up and left, one behind the yellow flower pointing left, and one below the lower daisy pointing down. Sew on the leaves first, then the flowers, using small stitches on the back so nothing shows on the front.
Hardware: Put a jump ring through the border at the top-left corner and close it around one end of the chain. Join the other end of the chain to the split ring with the second jump ring.
Final Blocking
- Before attaching the hardware, mist the letter until it is just damp.
- Pin it RS up to 2.8 in (7.1 cm) x 3.8 in (9.7 cm).
- Pin each corner, then the inside corner between stem and leg and the tip of the leg. Keep the leg’s diagonal straight.
- Shape the top-right corner into a smooth curve with two pins.
- Pin the counter open to 0.8 in (2.0 cm) x 1.2 in (3.0 cm).
- Let it dry completely, at least 4 hours.
- Flatten the flower petals with your fingers before sewing.
Final Quality-Control Checklist
- Row 9 has 15 sts, and the bridge is exactly 2 chains.
- The leg moved left 3 times, and its diagonal looks even.
- The counter is 5 sts x 7 rows and fully outlined.
- Border Round 1 has 98 sts and lies flat.
- The letter measures about 2.8 in (7.1 cm) x 3.8 in (9.7 cm).
- The flowers stay put and don’t flop forward when the keychain hangs.
- Both jump rings are fully closed.
- All tails are woven in.
Troubleshooting
- Border ruffles: Your rows are shorter than your stitches are wide. Skip 1 row end in every 6 along the long sides.
- Border pulls or cups: Loosen your tension, or add 1 sc on the long left side.
- Leg curls: The shift rows are too tight. Keep the 2-sc increases relaxed and block firmly.
- Eyelets close up: Make the ch-1s a little looser.
- Flowers tilt forward: Add an anchoring stitch near the outer edge of each flower.
Care
Hand wash in cool water with mild soap, roll in a towel to remove water, and dry flat. Keep the gold hardware dry when you can.
Final Notes
Every measurement follows from the gauge of 6 sts and 6 rows per inch. At that gauge, the 5-stitch strips are 0.8 in (2.0 cm) wide, the 15-stitch letter is 2.5 in (6.4 cm) wide, and 21 rows are 3.5 in (8.9 cm) tall. The border adds about 1/6 in (0.4 cm) per side, for a finished letter of 2.8 in (7.1 cm) x 3.8 in (9.7 cm). The hardware brings the total length to about 5.5 in (14.0 cm). Check your gauge on the stem strip, then count Row 9, Row 19, and the border.
Happy crocheting!